One Lamp, Two Lamp, Old Lamp, New Lamp!

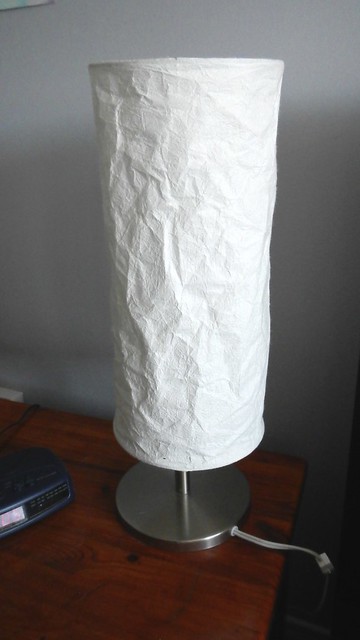
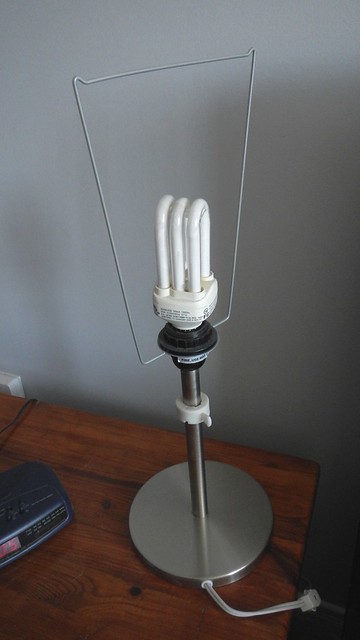
My final quarantine project was one I’d been meaning to get done since we moved into the house over a year ago. When we moved in together we bought a matching set of IKEA lamps: two table lamps and a larger floor lamp with crumpled paper shades. They were literally the WORST shades as the things that held the shades up so they looked crumpled fell out and were lost so you just had this wrinkly, torn, dusty, discoloured piece of paper sitting here and we really started to hate them. But they were cheap and they worked so we moved them across the country and back.

New Lampshades 1

BUT NO MORE.

New Lampshades 2

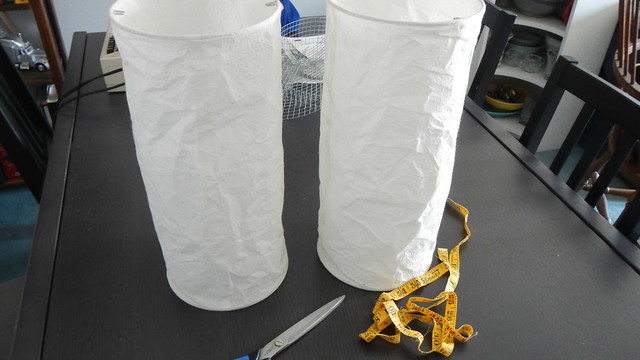
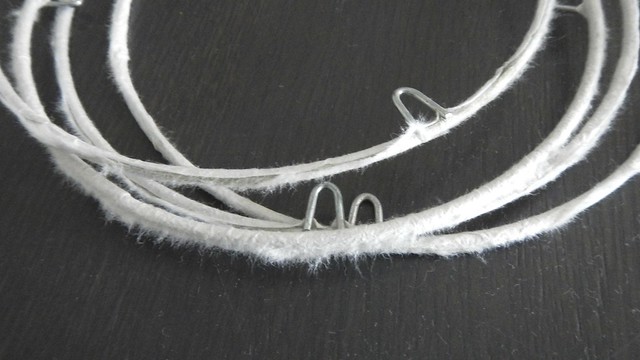
My plan was to use the wire frame of the shades to create a new surface for a slightly more durable fabric shade. So I carefully measured the dimensions of the existing lamps.

New Lampshades 3

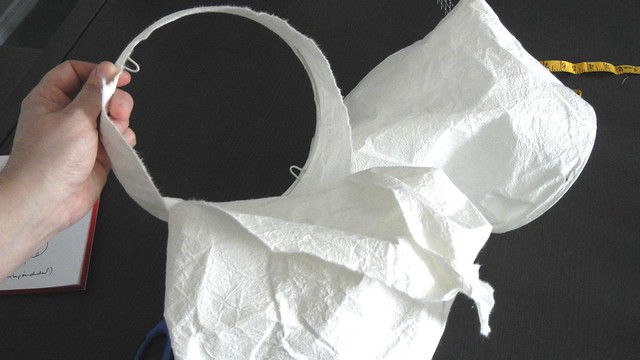
Then I took enormous pleasure in ripping the paper off.

New Lampshades 4

I soaked the wires in warm soapy water for a bit to get the excess glue and paper off.

New Lampshades 5

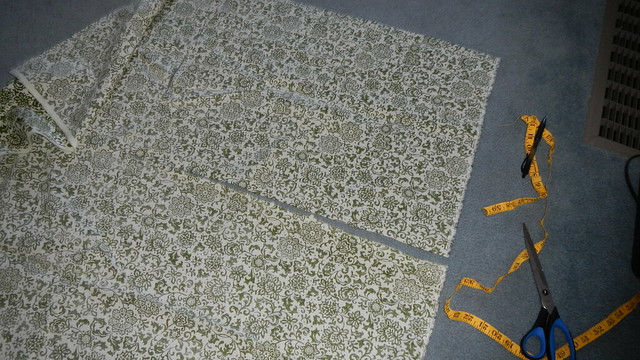
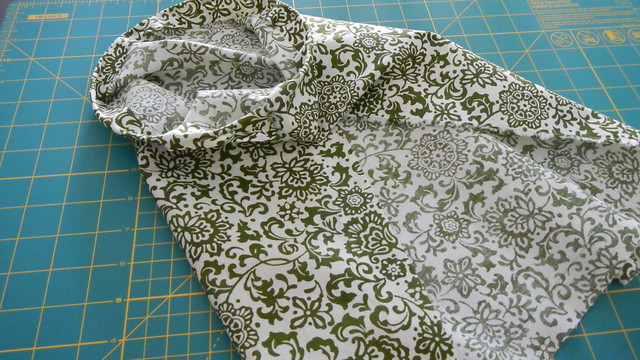
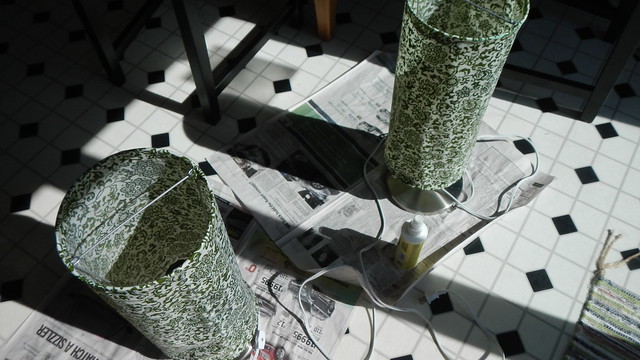
Then I measured and cut the fabric Cait and I had bought from Joann like forever ago.

New Lampshades 6

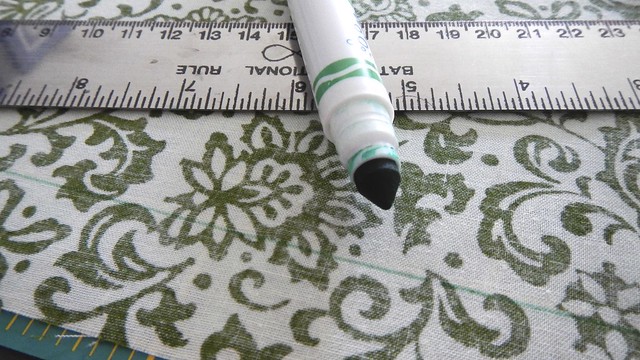
I don’t own any fabric markers so I use washable Crayolas instead. I measured an inch of overlap from the edges to wrap around the frames.

New Lampshades 7

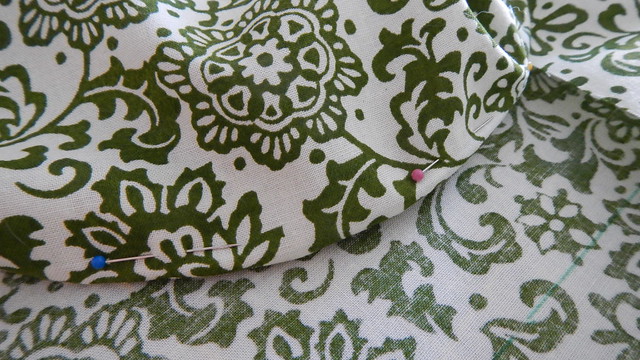
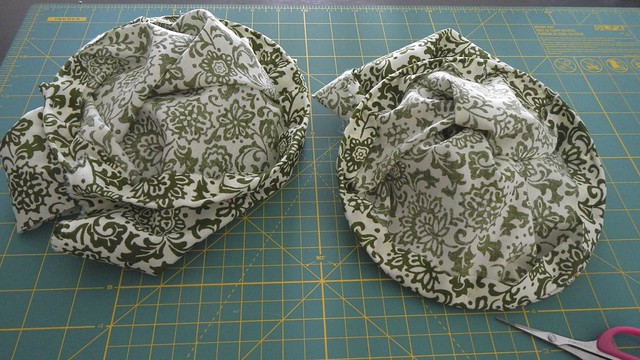
Then I used pins to fix everything into place.

New Lampshades 9

One side done.

New Lampshades 10

Both sides done.

New Lampshades 11

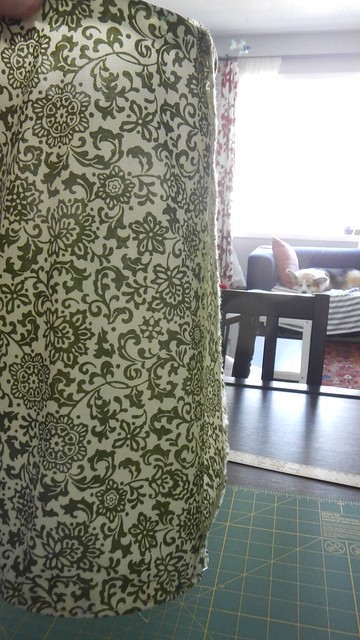
I left the side seams open for now just because it was easier to manipulate them with it open.

New Lampshades 12

The best way to get this permanently affixed was to set it up so it hung properly, and the best way to do THAT was to put it back on the lamp.

New Lampshades 13

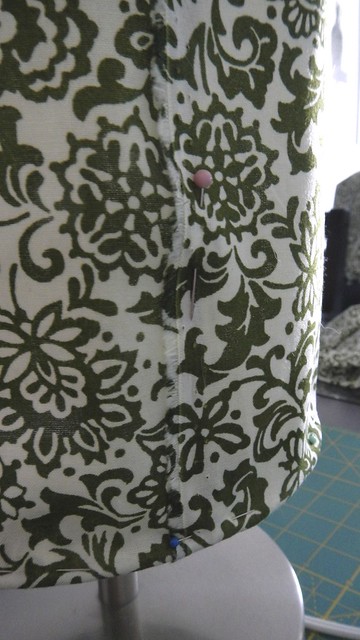
Now I pinned the side seams.

New Lampshades 14

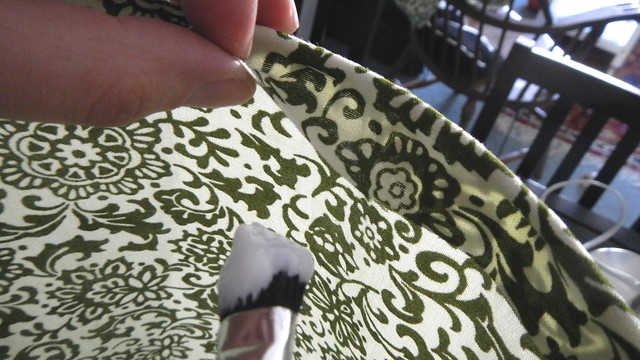
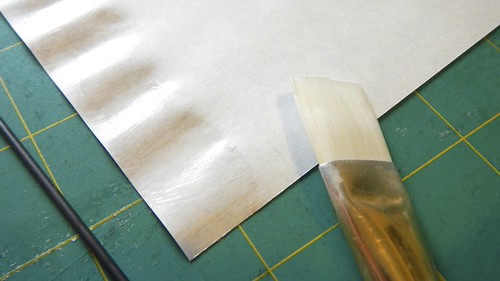
Then I used Mod Podge for fabric and just glued all my flaps closed.

New Lampshades 15

It didn’t take long. I made sure to take the pins out while the glue was still wet.

New Lampshades 16

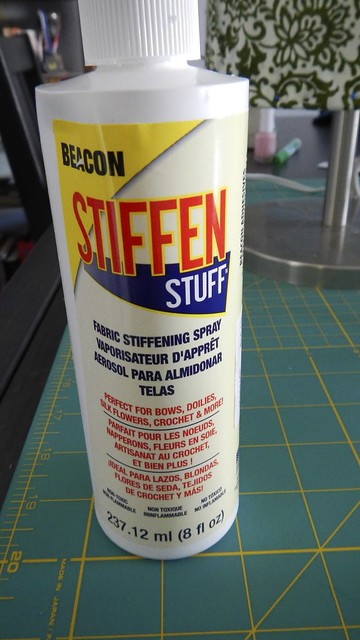
Once it was dry I sprayed the whole thing with Stiffen Stuff, which is sort of a spray starch for making things like bows and ornaments rigid. Another option would have been to wash the fabric with liquid starch and iron them flat before pinning. It might have had a more uniform look to the finished product but it would have been more difficult to manipulate.

New Lampshades 17

I let the starch dry in the sun.

New Lampshades 18

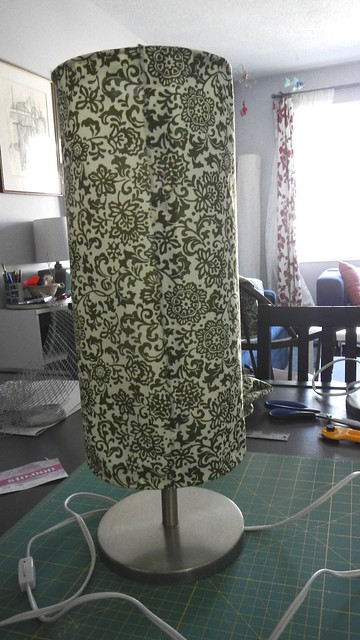
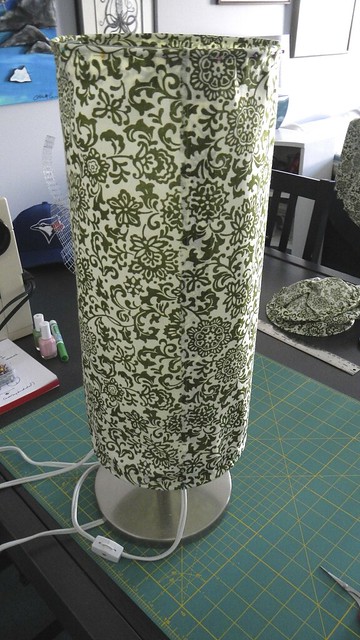
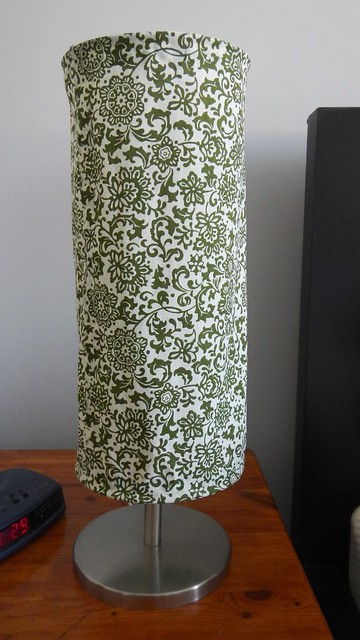
The finished product, off.

New Lampshades 19

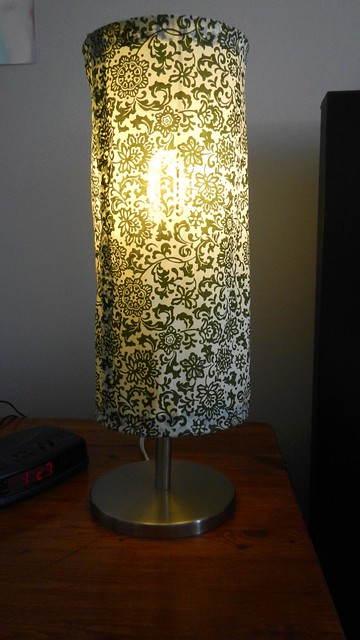
And on.

New Lampshades 20

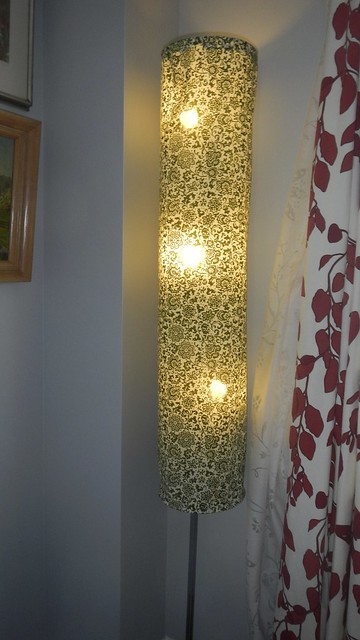
I did the big one too. I’m quite pleased!

New Lampshades 22

A Magic Christmas Eve

Happy Christmas Eve everyone! I wish you all the best and the happiest of the holiday season.

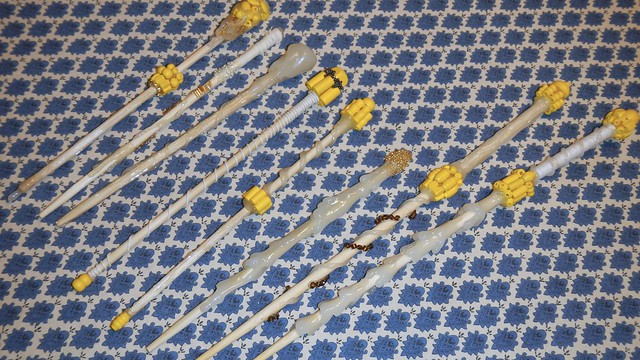
Wands 17

Everybody knows one. There’s at least one in every family. Sometimes there are several.

Wands 19

I’m talking about Harry Potter fans. Yes, those people.

Wands 23

I found this amazing tutorial on DeviantArt to make Harry Potter-inspired wands a couple years ago and I’ve been saving it for that special someone in my family.

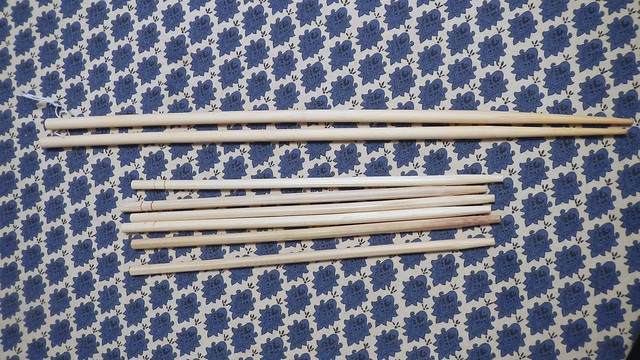
Items you will most def need: chopsticks. I have six of the normal kind you get in fast food restaurants, and then a set of cooking chopsticks, because some wands are longer than others, after all.

Wands 2

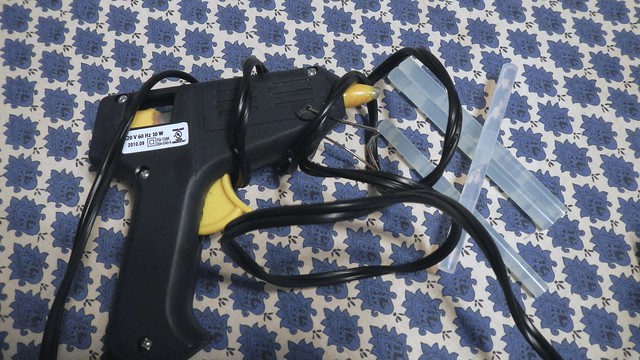
You will also need a hot glue gun and appropriate hot glue sticks. Kind of key. You’re going to use a lot of glue for these so be prepared!

Wands 4

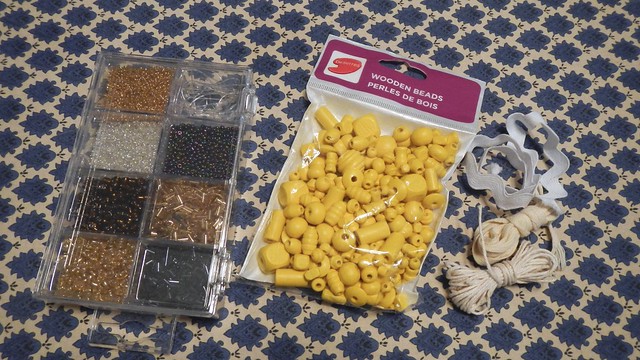
Optional are beads. Plastic, wooden, whatever. Doesn’t matter what colour. I also added some string. Because I like string.

Wands 3

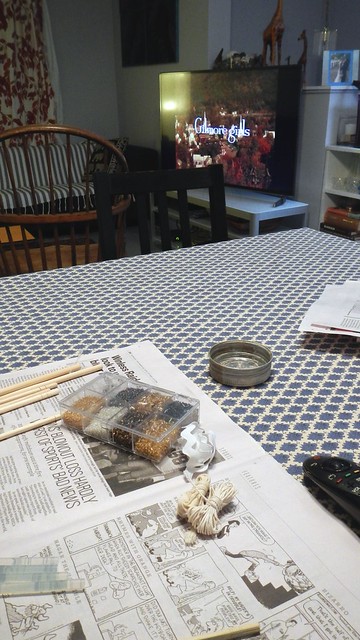
Then I sat myself down with one of her favourite television shows to inspire me and I got to work (I probably should have watched Harry Potter but I’m on season two on Netflix and things are really starting to get good!).

Wands 5

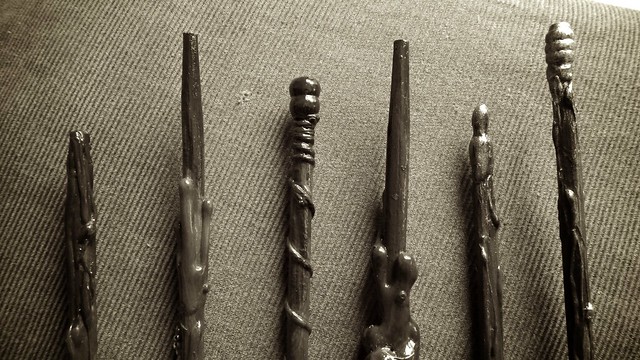
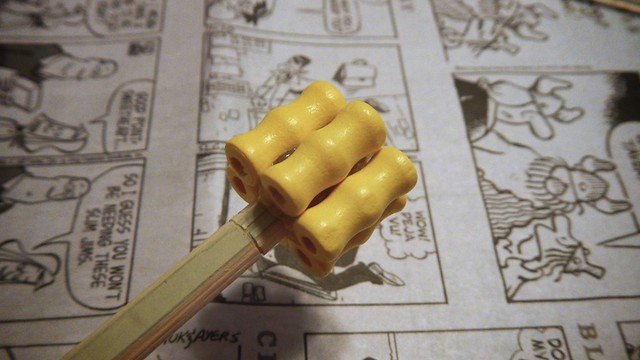
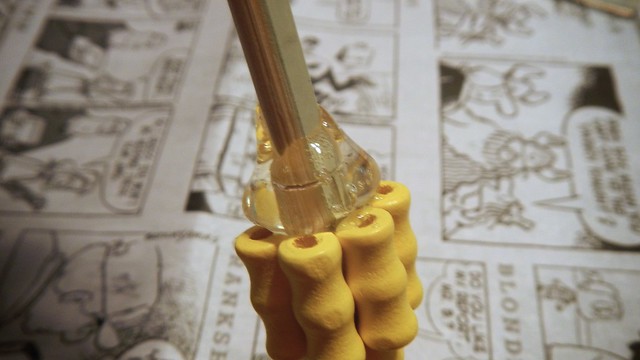
From here what you do is pretty much up to you. I glued on some of the larger beads at the butt end of the wand as kind of a backstop.

Wands 6

And one on the tip as sort of an extender.

Wands 7

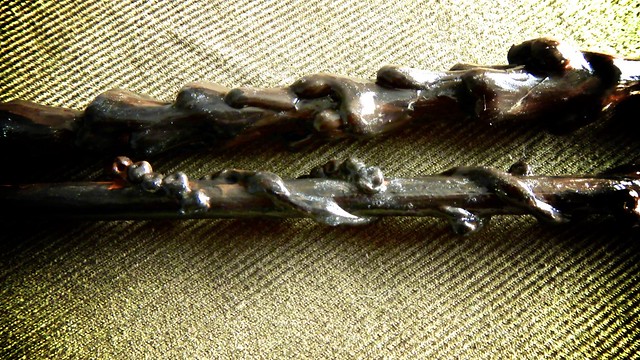
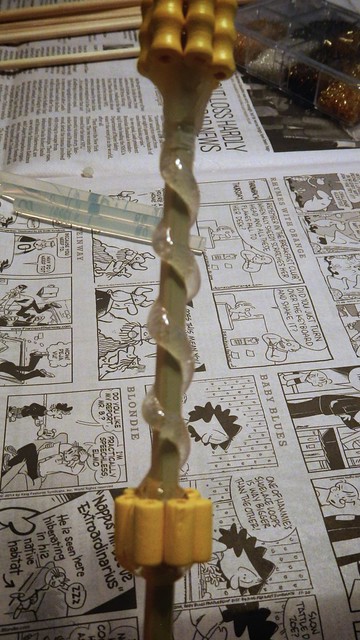
Then I added some texture and filler with glue.

Wands 8

Twirly whirly.

Wands 9

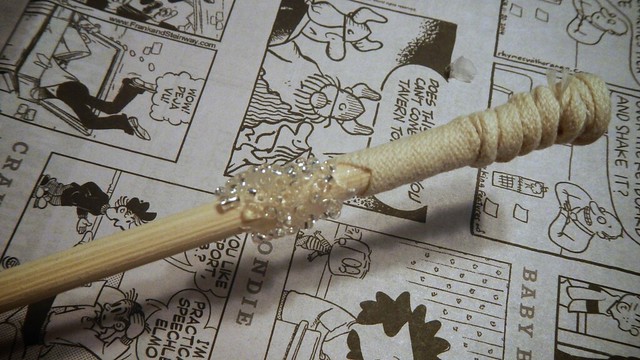
On this one I went with some string and some small beads.

Wands 10

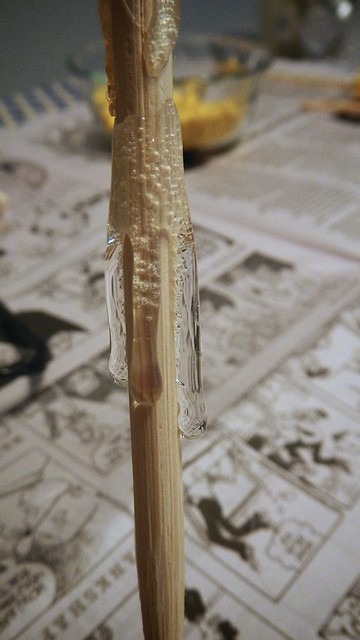
Here I let the glue and gravity do their thing. If you use the high setting on your glue gun the glue will stay liquid for longer.

Wands 11

You can roll almost-cold glue between your hands to shape it but I tend to burn myself so I didn’t do that. I just let the glue cool unadulterated.

Wands 12

Wands 13

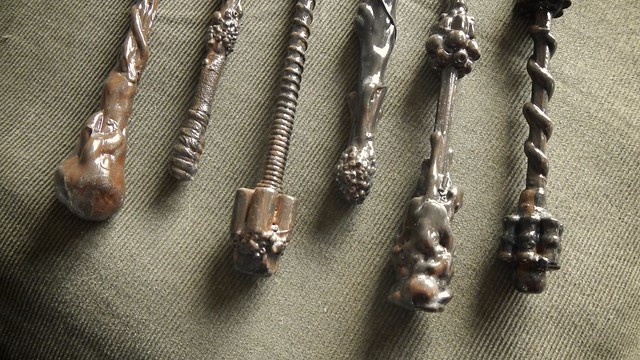
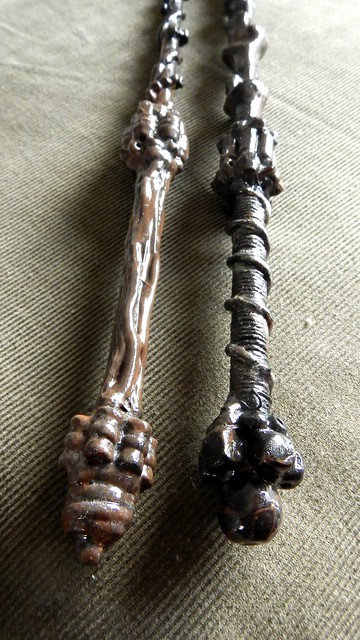
Now you can paint! I used craft paint, in a few different shades of brown. I painted the tips of the wands a darker brown, almost black, because I figure if they’re shooting sparks all the time they might get a little singed, right? I also added bits of silver here and there.

Wands 14

After the paint dried I coated each with a liberal layer of gloss Mod Podge and let that dry overnight. Any other form of sealant would work well – but you should definitely seal them with something because craft paint will just scratch right off hot glue.

Wands 16

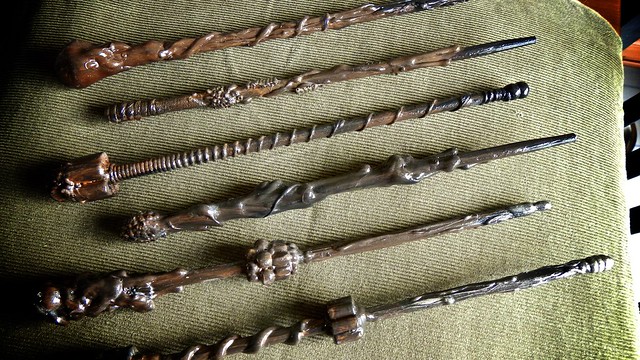
Pretty fancy, no?

Wands 18

I’m not sure what she’s going to do with EIGHT MAGIC WANDS but that’s really not the point of this whole exercise, is it?

Wands 21

Best of Friends.

Okay, so the thing I made for the Pie’s birthday, remember that? Well if it wasn’t quite your style, maybe this one, using the same technique, will be more to your liking.

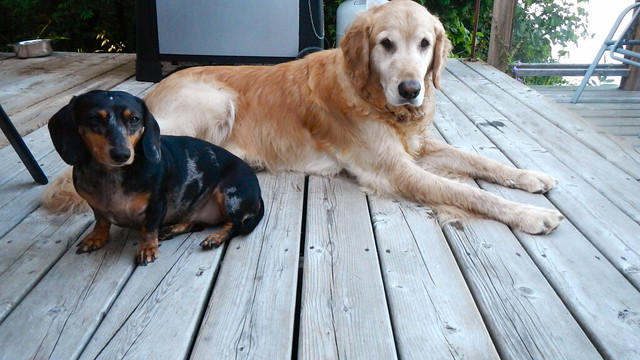
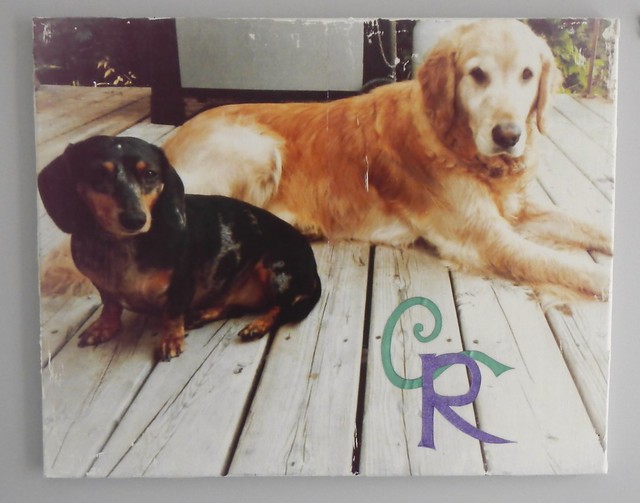
Cait’s dog, Ruby, is very sweet, but, being a dachshund, she doesn’t really get along with most other dogs.  When Cait became  mom to an anxious golden retriever named Cooper, we all held our breath to see what would happen.  It turns out we needn’t have worried.  Ruby enjoys having a big brother to boss around and take care of, and Cooper’s anxiety is so much less with a constant companion. I took this super cute photo of the two of them at a cottage last summer (for the microsecond they actually sat still).  They are the best of friends.

Cottage Life

Now, Cait’s birthday is only four days after the Pie’s, so, working on the success of the Pie’s gel transfer painting, I decided to do something along the same lines.  I messed this up before I got it right, so I’ll show you what I did.

First, I had to alter the photo to make it fit on the 16″ x 20″ canvas, and change the colours a bit in the photo to make sure both dogs stood out.  It’s hard when you have a dog with a black face and another  with an almost white face to make sure they both show up.  So I put a vintage filter on the photo, put a light vignette at the edges, and boosted the contrast a little.  These things tend to work better with high-contrast pictures.  Then I flipped it horizontally so it would come out facing the right way.

*RoobyCooper - FINAL

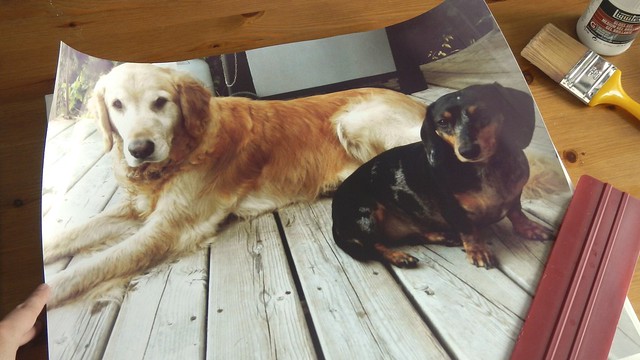
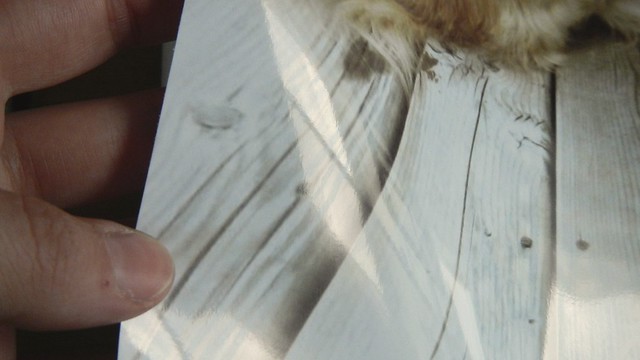
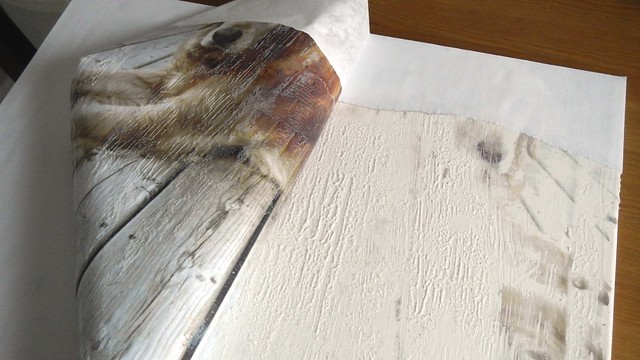
I had the picture printed out at Staples, and because it was so big it came out on their high gloss poster paper. My first mistake.

Best Friends 2

Best Friends 3

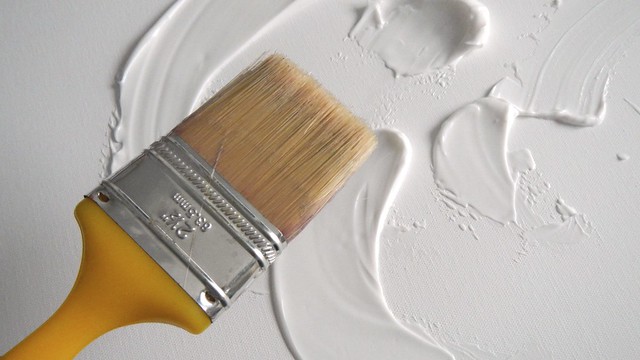
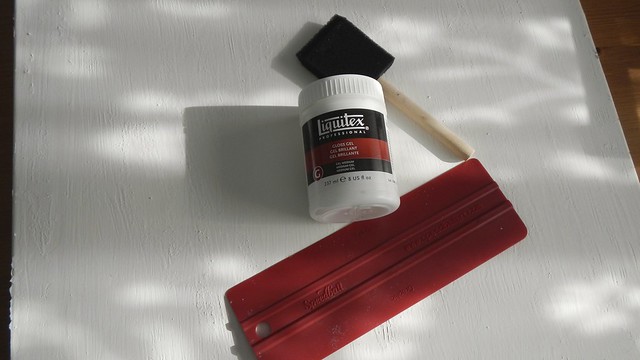
I couldn’t find my sponge brush, so I just used a regular plastic bristle paint brush to smear on the gloss gel medium.  My second mistake.

Best Friends 4

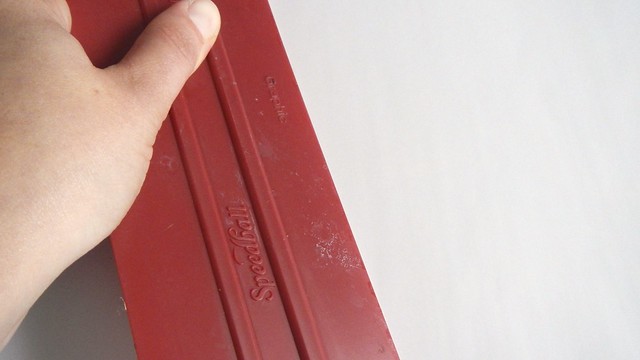
Then I used my squeegee to smooth the photo face-down onto the gel medium-ed canvas.  The centre of the canvas was pretty flexible, so I should have put something underneath to support it as I pushed around on top.  My third mistake.

Best Friends 6

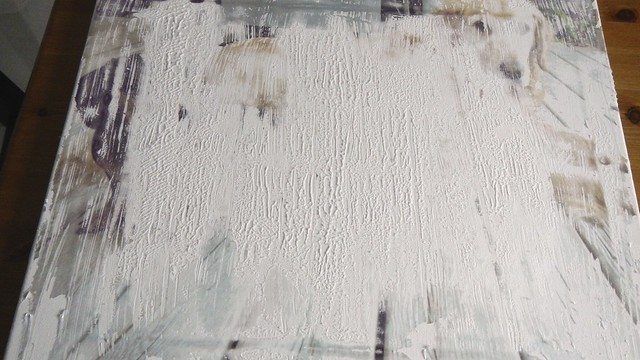
You’re supposed to leave it to dry overnight, but after an hour I could see that the thing wasn’t working.  The poster paper was too thick to conform to the huge grooves in the gel medium left by my paintbrush, and there were giant streaks everywhere.  Because there was no support in the centre of the picture when I pushed down with the squeegee, there were whole spaces where the medium hadn’t adhered at all to the photo.

Best Friends 8

Part of Ruby’s face was completely missing.

Best Friends 9

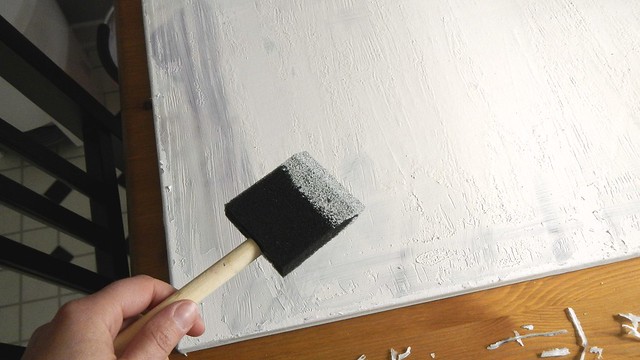
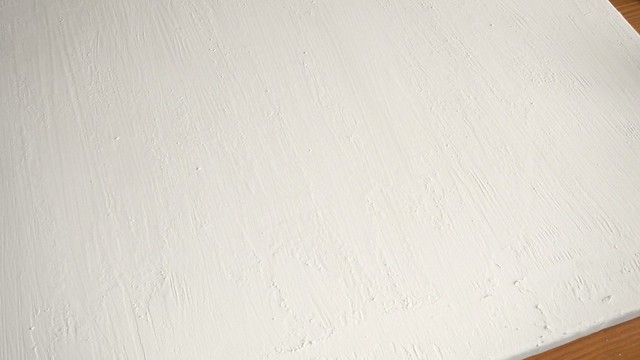
No worries.  I can fix this.  I scraped off the parts of the gel medium that were still wet and left the thing to dry completely.  Then I covered the thing completely in a few coats of antique white craft paint.

Best Friends 13

It left a bit of a texture, but nothing that couldn’t be smoothed over with a new batch of medium and some careful application.

Best Friends 14

To get the picture printed on thinner paper (the regular 25lb stuff that comes out of photocopiers), I had to split the photo in half, so each part measured 10″ x 16″ and would fit nicely on a tabloid (11″ x 17″) piece of paper. You need a photocopier or laser printer for this job, as the ink in an inkjet goes through too many layers of the paper and will not work.

Best Friends 16

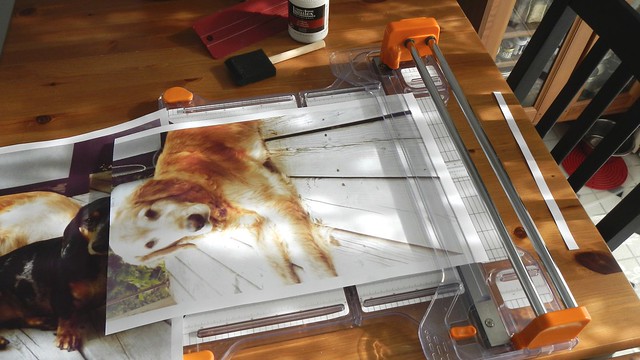
Here I am trimming the white edges off the paper.  My paper cutter is really nice, but it isn’t big enough to do the long edge of the 17″ sheet.  I managed, but it was dicey.

Best Friends 17

This time I put some books under the centre of the canvas to hold it up.

Best Friends 18

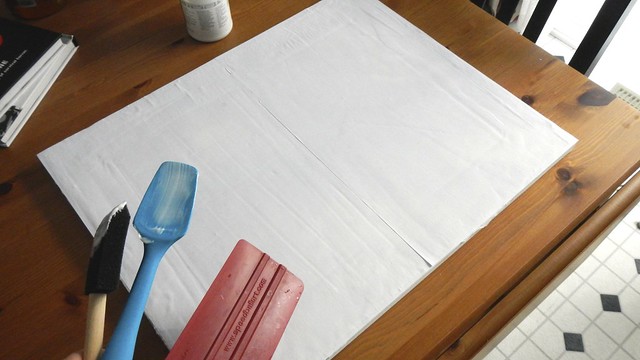
I used a sponge brush AND the squeegee to get the medium evenly across the whole thing.

Best Friends 19

I did my best to line up the photos as closely as I could, though it wasn’t perfect.  I was very careful with the squeegee when pressing it down not to press too hard in any one area.  I examined it minutely for bubbles and pushed out any that I found.  Then I left it the hell alone overnight.

Best Friends 22

The next day I had roofers come to fix our leak so I hid out in the kitchen while chaos reigned.

Best Friends 23

I used my handy spray bottle full of water to wet the paper.

Best Friends 25

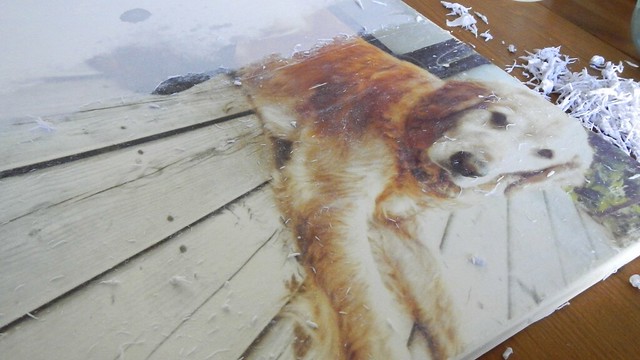
Then I began to rub off the wet layers of paper.  I used just my fingers, because I didn’t want to rub too hard on the dogs’ faces and accidentally remove the colour.

Best Friends 26

I ended up wetting it and rubbing it at least three times before I was happy with how much white paper I took off.

Best Friends 27

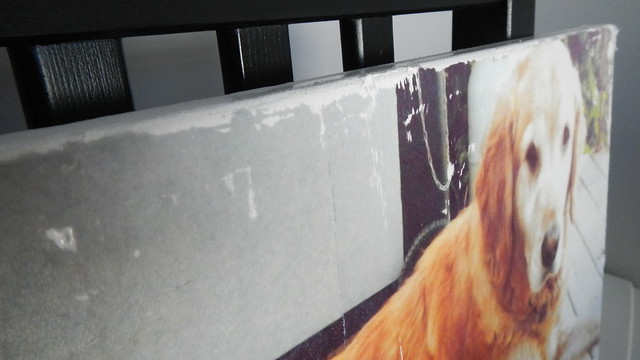
It’s a little rough around the edges, but it’s supposed to be, so it looks good with the vintage cast of the photo.

Best Friends 29

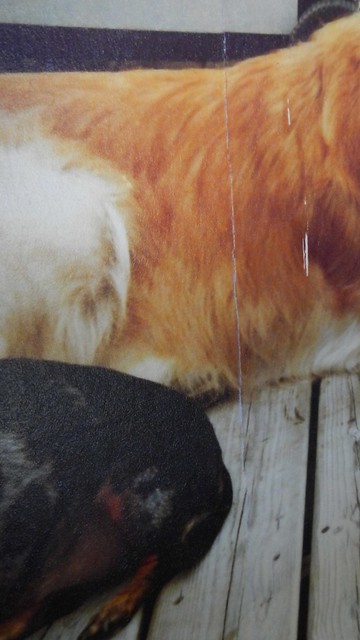
Even the dividing line turned out mostly okay.

Best Friends 30

Because there is a big chunk of empty deck space in the centre of the photo, I wanted to put in Ruby and Cooper’s initials, to make it extra cute.

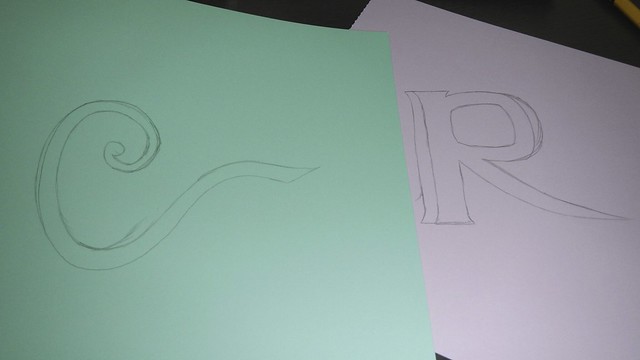
I freehanded the letters onto some card stock.

Best Friends 32

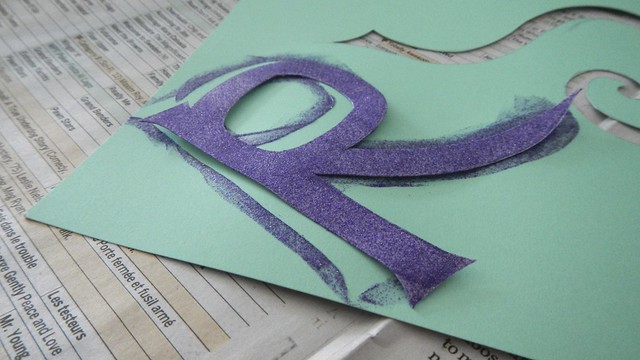
I then painted the card stock.  With glitter craft paint.  Just to be ridiculous.

Best Friends 34

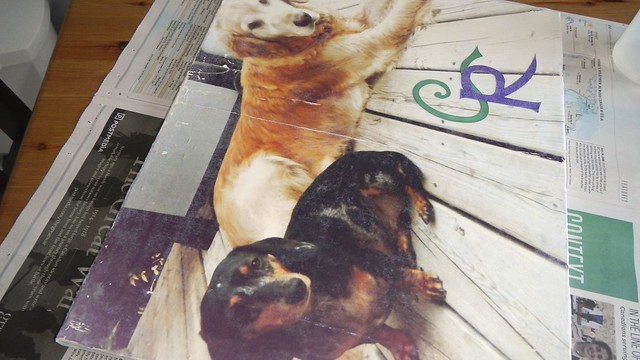
When those were dry I glued them to the canvas with Mod Podge and left that overnight.

Best Friends 35

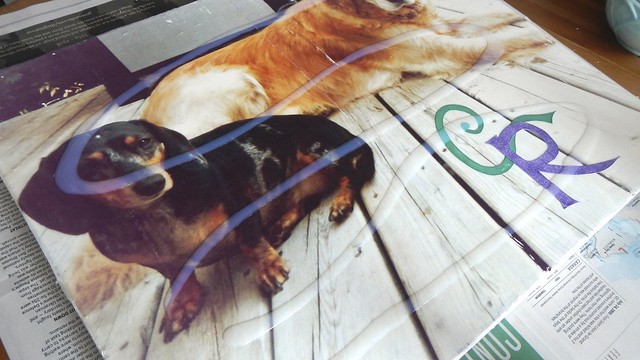
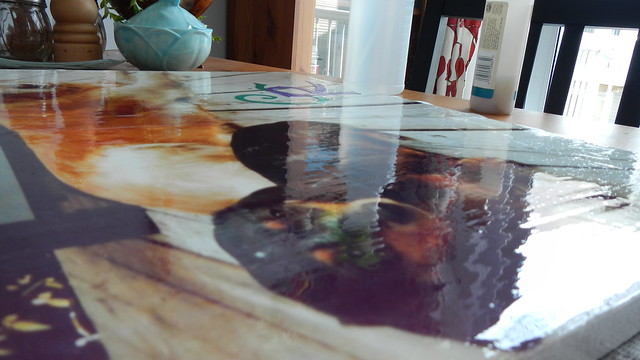
I then painted it with two coats of gloss polyurethane to seal it.

Best Friends 36

And added picture hanging hardware, same way I did for the Pie’s present. So shiny …

Best Friends 37

And there it is!

Best Friends 38

Shoe Face Lift

Shoe Face Lift 5

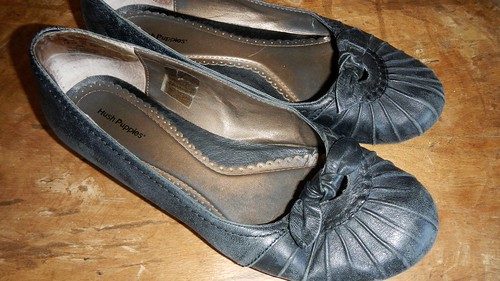
I bought these flats at a strange and yet totally awesome shoe store called Urban Shoe in Gander, Newfoundland, on a completely bizarre road trip with my parents in October of 2008.  I then proceeded to wear them to death for the next five years.  While the shoes themselves are still structurally sound, and will likely survive the next nuclear apocalypse because they’re quite well made, the leather is scuffed and scruffy, and I have since had to replace them with another pair of go-to leather flats I can wear to work.  But I’ve been loath to throw them out, so they’ve languished in my closet.

Shoe Face Lift 1

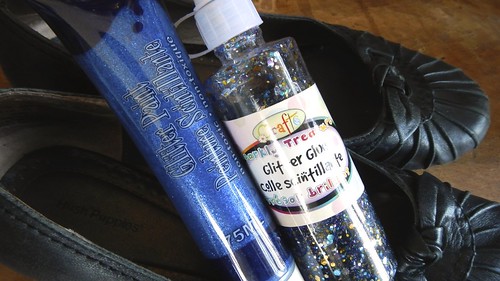
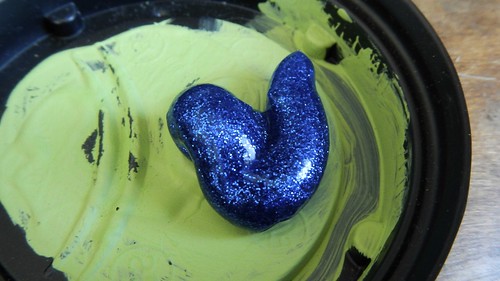
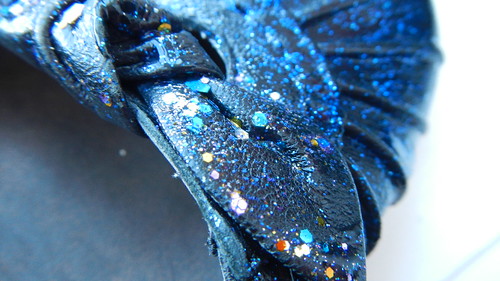
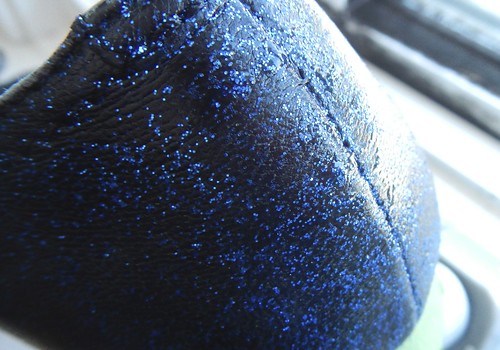
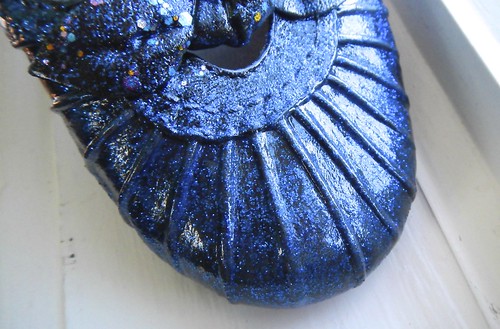
Then I found this glitter paint at Dollarama and I figured, hey, why not?  It’s not like I have anything to lose, right?  I also had some glitter glue left over from Cait’s and my failed experiment with bouncy balls.

Shoe Face Lift 2

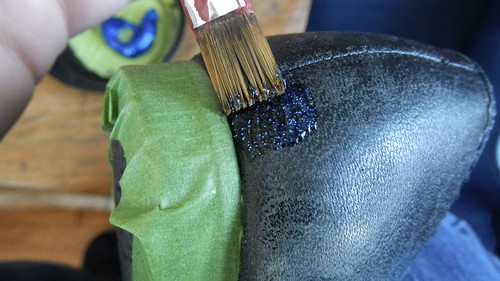
I put a bit of painter’s tape over the heel and got to work with a paintbrush.

Shoe Face Lift 3

I knew that paint would get all over the place, but I figured most of it would come off again after a while.  The heel was just a larger part where I wanted to limit the paint’s access.

Shoe Face Lift 4

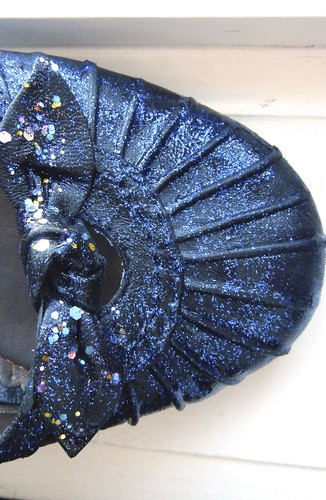
I dabbed the sparkle glue on the bow, for variety.

Shoe Face Lift 6

Shoe Face Lift 7

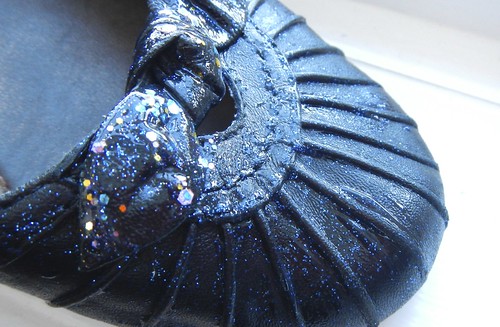
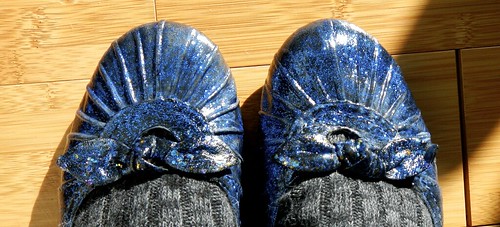
This is four coats of glitter paint in.  I think I’m happy with it.

Shoe Face Lift 8

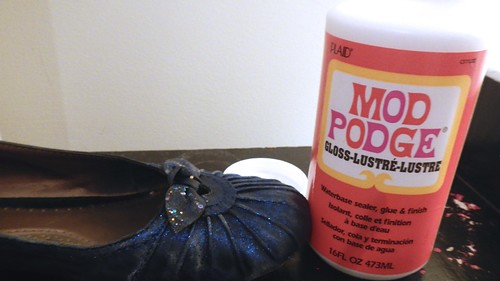
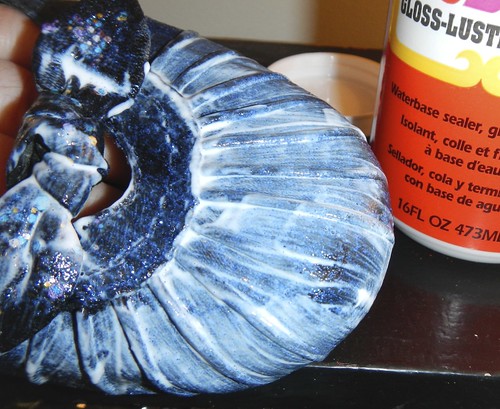
I used Mod Podge gloss finish as a shiny top coat and sealer.  I’m not sure how long they’ll hold up to regular wear (I pretty much only wear them in the office and maybe two and from the car), but I like the facelift, even if it’s only temporary.

Shoe Face Lift 9

Shoe Face Lift 10

Shoe Face Lift 11

They did crack a bit along some pre-existing creases on the side but it’s not that noticeable.

Shoe Face Lift 13

Yarn Eggs

Yarn Eggs 33

These puppies are all over the internet, so I can’t give you any one particular website that gave me the inspiration to try this little Easter craft.  Despite it being warm(ish), we just got another 20cm of snow this week (in one night) and I have had it with winter in the worst way.  So I’m doing Easter things.

Yarn Eggs 16

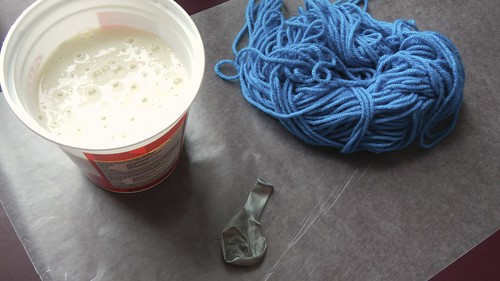
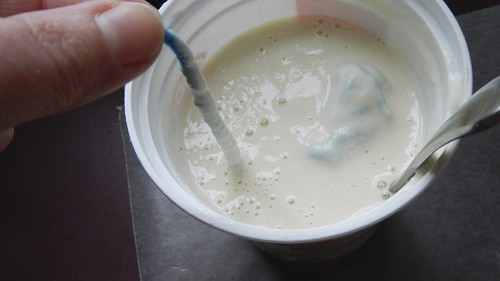
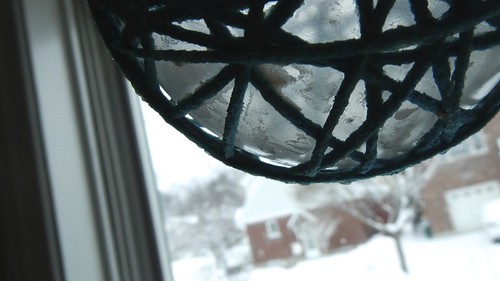
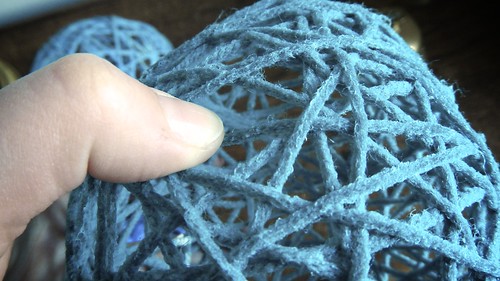
Today we’re making yarn eggs.   What you need for this is a work surface that you can easily clean off (this is a messy project), some brightly coloured yarn, a balloon, and some glue.  In this set of photographs I’m using a 5″ balloon for a medium-sized egg.  You can use a full-sized 10″-12″ balloon but you’ll use more yarn and glue and then you’ll have to find a place for your giant egg.  Water balloons, which are typically around 3″-4″, are probably best for this, though you will have to squish them around to make them a bit more egg-shaped.  I’m also using a papier mâché paste with a flour:water ratio of 2:3 as my glue.

Yarn Eggs 2

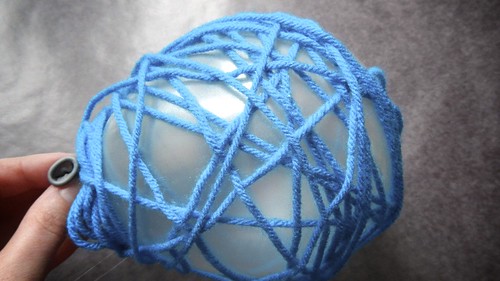
Start by inflating your balloon.  Tie it off and then loosely wrap it in the yarn of your choice, just to get an idea of how much you are going to need.

Yarn Eggs 3

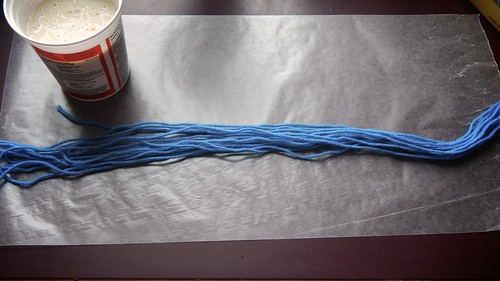
When you have it wrapped to your satisfaction, you can cut the yarn.  I ended up with between 6 and 7 metres of yarn for a 5″ balloon (before you object too loudly, remember that I’m Canadian and we jump back and forth between metric and Imperial measurements with impunity — it’s a cultural thing).

Yarn Eggs 4

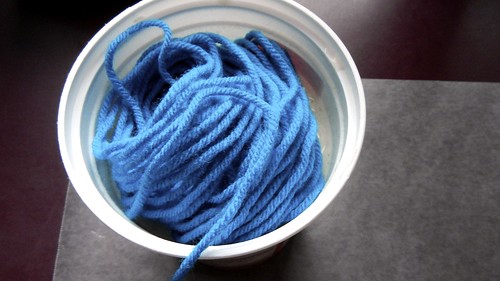
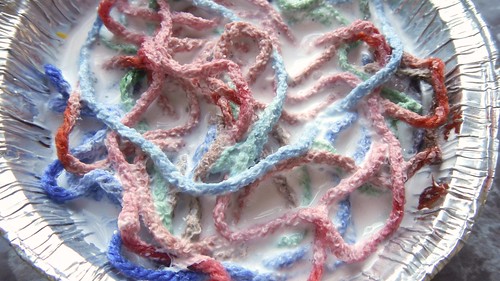
Loosely wind up your yarn so it won’t get too tangled as you pull on it and dunk it gently into your glue mixture.

Yarn Eggs 5

Keep hold of the end so you can find it again.

Yarn Eggs 6

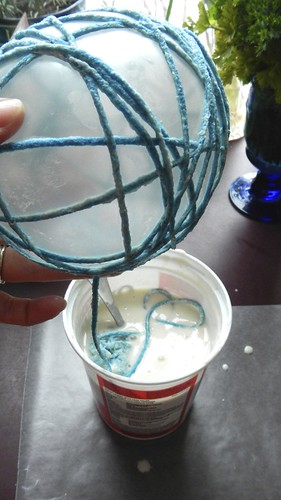
Run the gluey yarn through your fingers to squeeze off the excess and start wrapping it snugly around your balloon.  Some people have sprayed the balloon with cooking spray to prevent sticking, but I didn’t find that this was a problem for me. Make sure to leave the tied off neck of the balloon hanging out so you have something to hold on to.

Yarn Eggs 7

When you are at the end of your yarn, tuck the edge in so it won’t unravel as it dries.

Yarn Eggs 8

It’s best to hang up the balloon overnight so it will be able to dry completely on all sides.

Yarn Eggs 10

While I was making breakfast the next day, the balloon decided to contract and it took me a good five minutes to figure out that the crackling sound in my kitchen was the balloon separating from the pasty yarn.

Yarn Eggs 11

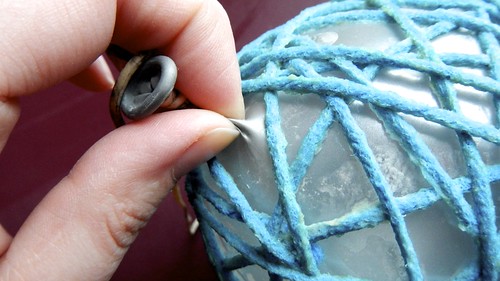
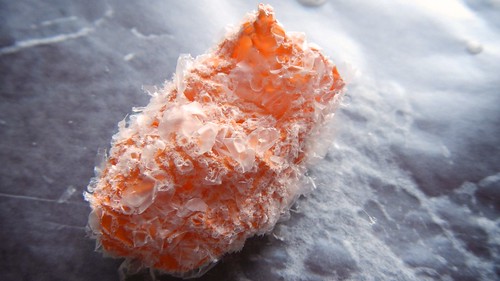
Then you simply pinch the balloon near the neck and cut a snip in it to deflate the balloon quickly without popping it.

Yarn Eggs 12

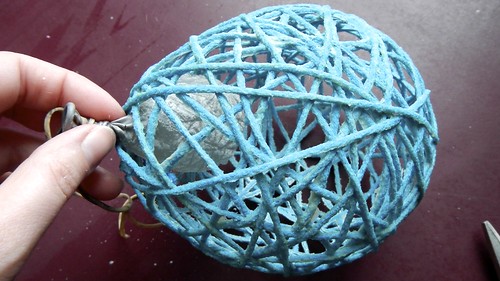
Pull the deflated balloon out through the hole where the neck was.

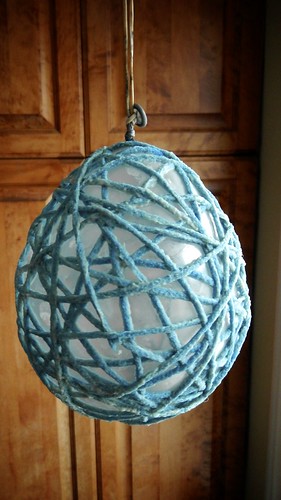
Yarn Eggs 13

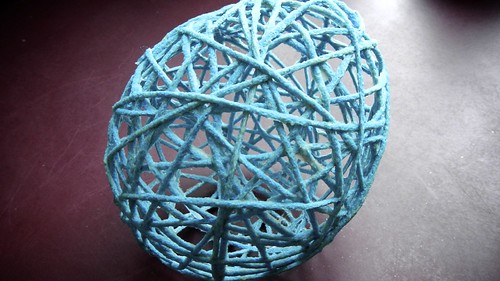
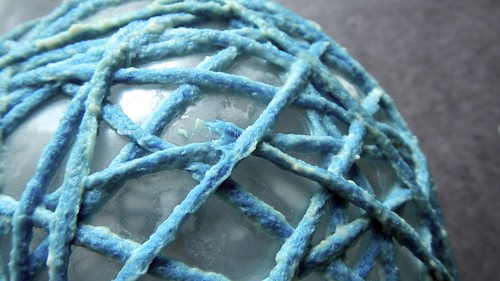
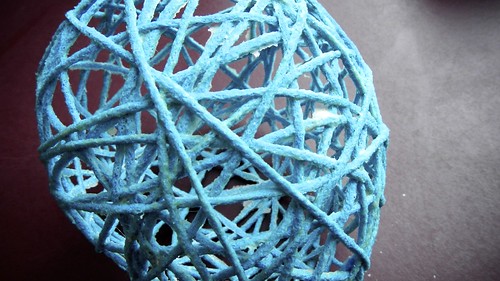
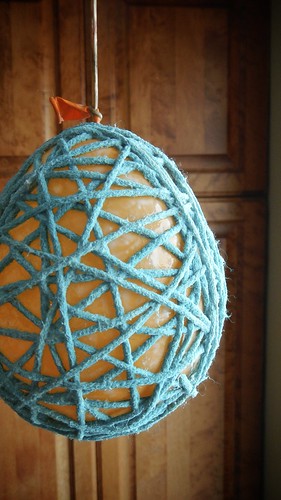
There you have it.   I’m not entirely happy with the way that the papier mâché paste has discoloured the yarn, but this method would probably work best on pale yellow yarn or off-white, to disguise the discolouration.

Yarn Eggs 14

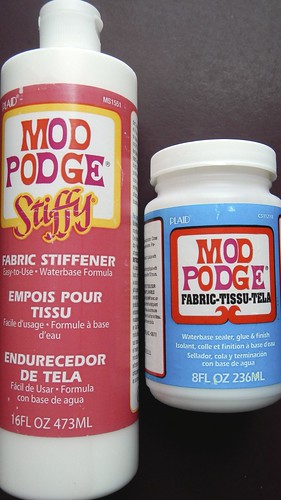
For the next one (this was a test run after all), I decided to use Mod Podge “Stiffy” Fabric stiffener, mixed with a wee bit of Mod Podge Fabric Glue.

Yarn Eggs 17

This was a lot more slippery to work with, for some reason.  The papier mâché seemed to adhere better to the balloon when wet (though it might have also had something to do with me using a metallic balloon first, and then a regular opaque one next — I find that the metallic ones have a different feel to them).  The fabric stiffener slid all over the place, so I had to hold it with my fingers.  So glue was everywhere.

Yarn Eggs 18

Yarn Eggs 19

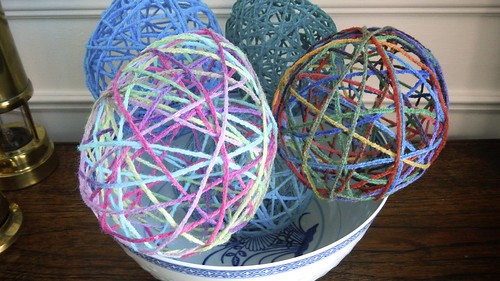
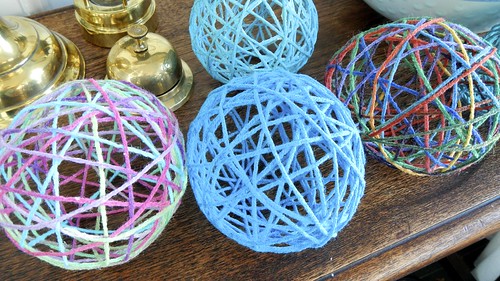
The final three eggs I used straight Stiffy, no glue.  You can see that there’s a difference between the paste one, which is more rigid but has bits of goo all over it, and the Stiffy ones, which are slightly more flexible but also less gross looking.

Yarn Eggs 27

Yarn Eggs 25

The finished eggs can be strung up as a garland, or displayed in a bowl, or used as place markers at the dinner table (if you made wee ones with water balloons).  You can also use rounder balloons to make actual spheres for non-Easter related decorating.  I’ve also seen them stuffed with LEDs as indoor/outdoor luminaries (though if you’re going to put them outdoors I would spray them with a waterproofing sealant first). I’ve even seen people use giant weather balloons to make huge pendant lampshades. It’s a very versatile and easy technique.

Yarn Eggs 32

So Long Sucker! Creepy Hallowe’en Sucker Stand

Sucker Stand 34

I actually made this project LAST year, but because I never get my holiday stuff organized in time to publish it any time before the holiday it’s for, I decided to set this up so I would look timely and well-prepared this year.

MUGS Mixer 6

Anyway, last year, back when the Pie and I were still in St. John’s (weird that we’re not there anymore), Fussellette organized a mixer for the geographical society at MUN and she decided on having a candy bar for everyone to snack on while they got jiggy (do people even say that in the far-off future of 2013?  Better question: do people even say that NOW?).  I volunteered to make a stand for the suckers Fussellette insisted on having, along with our FORTY POUNDS of other candy that we bought.

Sucker Stand 2

You might like to make something like this for your own Hallowe’en party.

Sucker Stand 32

At first I thought I would just do something plain, like a store display, but maybe with some sparkly skulls we’d picked up from Dollarama.  But then, I was looking at a shoe box and I was struck dumb with inspiration (not true: I immediately texted Fussellette about my genius and then told the Pie all about it, despite him not wanting to know).  So here’s what I came up with.

Sucker Stand 5

I’m going to make a grave yard — well, part of one.  It will have a freshly covered grave with headstone and some nice grass all about, and little holes for holding all the suckers.  That will be the top of the box.  Then the extra suckers (there were 100 in the bag) can be stored inside the box itself.

So first, on the shoe box I drew where I wanted the grave to go.

Sucker Stand 6

Then I used a punch to make some evenly spaced holes where the suckers would eventually fit.

Sucker Stand 7

In order to make it so the suckers didn’t just slide all the way through the holes until they were stopped by their candy tops, I had to construct a little hanging platform on the underside of the box lid that would prevent their sliding around and also not interfere with the opening and closing of the box itself.  I just taped a few pieces of spare cardboard in strategic places and there we go.

Sucker Stand 8

Sucker Stand 10

Now I got to do the fun stuff.

Sucker Stand 4

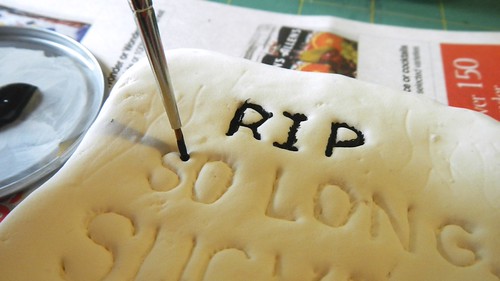
I had a package of Model Magic lying around that I didn’t yet have a project connected to, so I figured its lightweight nature would be perfect to make a gravestone.  A bit of shaping (not too much, as I wanted the stone to look old and cracked) and some choice words (stamped in with the same punch I used for the holes) and I set that aside for the requisite 72 hours to dry.  I’m going to paint it later.

Sucker Stand 13

To ensure that the surface of my gravesite didn’t end up accidentally filling in the holes I punched, I marked their places with wooden skewers.

Sucker Stand 11

Then I went outside.  This moss I hauled up from the path next door and the dirt is from my garden. This explains why I can’t grow anything.  I keep taking all the dirt.

Sucker Stand 3

Spread some Mod Podge.  Attach some moss (I snipped off only the tops of the moss, and replanted it when I was done).  Repeat.

Sucker Stand 14

For the grave dirt, I mixed my garden dirt with some Mod Podge to make mud of sorts, and spooned it onto the area.  I added a few rocks for visual interest, and then sprinkled some un-glued dirt on top to get the colour right.  Then I left THAT for 48 hours to dry.  You can still see the box through some of the moss but honestly, I don’t think anyone else would look this closely at a candy dispenser.  Mostly they are probably just thinking “Free candy!  Gimme!”

Sucker Stand 16

Sucker Stand 17

Sucker Stand 18

Once you’ve got all the stuff glued and set, you can take away the skewers.

Sucker Stand 19

While it was drying I tacked on some black construction paper with tape as a sort of border to the whole thing, and to cover the shoe box-ness of the shoe box.  Then I used craft paint to freehand a picket fence all around (you can see it in the finished shots).

Then, much later, I painted the headstone, filling in the text with black craft paint and adding a bit of texture here and there.

Sucker Stand 24

Sucker Stand 25

Sucker Stand 28

Hot glue that sucker (ha) onto the dried Mod Podge mud and we’re good to go.

Sucker Stand 29

Sucker Stand 30

Insert suckers. You can store extras underneath, inside the box.

Sucker Stand 31

EAT SUCKERS. MWAHAHAHAHAHA.

Sucker Stand 35

Rustic Pencil Holder and Homemade Pencils

Rustic Pencil Holder

I saw this about a year ago, and I remember thinking at the time that it was such a simple yet elegantly nifty project I would have to make it sometime.  What better time than the present?

Pencil-Holder 27

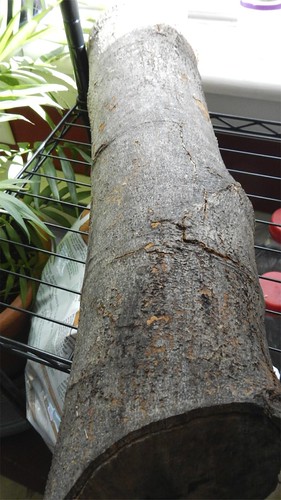
I wrangled a log out of the mildewed pile in our dilapidated excuse for a shed and got to work.  You can of course use any form of windfall or anything you find lying around.  I’d love to try this with driftwood, if I still had my beach handy.  As it was a pretty long chunk of wood, I figured I’d make three pencil holders, just to spread the love amongst my Christmas gift recipients.

Pencil-Holder 1

I also thought I might make them slightly angled, so that all the pencils or pens could be viewed from one side, instead of them all being on the same level. So I sawed them accordingly, in varying thicknesses.  Actually, the Pie did most of this because I took too long.  But we didn’t really try too hard to get things level or straight — the crooked adds to the charm, and I swear we did this on purpose.

Pencil-Holder 22

And then the bark, which had been sitting and drying out over our kitchen heater for two months, just peeled right off so easily.

Pencil-Holder 23

Pencil-Holder 24

I used a butter knife to get the thinner inner bark off.

Pencil-Holder 25

Now you drill your holes.  I used 3/8″ and 1/2″ drill bits, to accommodate skinny and fat pens and pencils. You know, like the fat ones you pick up from the bank or that you get in swag bags at conferences and stuff.

Pencil-Holder 30

You can space them out evenly or put them in randomly, whichever floats your boat.

Pencil-Holder 31

To make sure that all your holes are uniform in depth, use a bit of tape around your drill bit to mark how deep you want it to go.  When the line of the tape touches the wood, you’ve gone far enough.

Rustic Pencil Holder

In addition, if you are pursuing an angled approach, make sure that your drill is going in perpendicular to the surface upon which the wood is sitting, not perpendicular to the surface of the top of the disk.  Although I suppose you could do that, too, if you wanted your pencils to stick out at an angle.

Rustic Pencil Holder

Then I sanded, to smooth out the edges and to make the top nice and even.  You don’t want splinters in something you’re going to be touching all the time.

Rustic Pencil Holder

I stained one of them as well, again for kicks.

Pencil-Holder 32

Pencil-Holder 33

Pencil-Holder 34

To go with the pencil holders, I thought I would include some pencils I made myself.

Pencil-Holder 35

Pencil-Holder 36

I got the idea from here, but modified it so it was easier for me (because I found this actually quite difficult).  You need some 2mm pencil leads, the kind that go into architectural drafting pencils (also known as clutch pencils).  They tend to come in small plastic boxes of 10, and you can find them at art supply stores or on the internet.

Pencil-Holder 2

Then you need some thin paper.  I used a combination of newspaper flyers and origami paper for this, with the cheap newspaper on the inside and the nice origami pattern on the outside.  Cut the paper into squares that are the same length as the leads, which is usually about 5″.

Pencil-Holder 8

Take a paint brush and some glue and paint some onto the edge of one of the pieces of paper.

Pencil-Holder 9

Lay your lead onto the glued surface, just a little bit from the edge.  Fold that extra part over the lead and tuck it in.

Pencil-Holder 10

Now start rolling, carefully, putting even pressure on both ends of the lead.  You want the paper to be tight around the lead but you don’t want to put too much pressure on it that the lead breaks.  I definitely broke a few.  And go slowly, so you can make sure that the lead rolls straight in the paper.  Many of my pencils came out crooked and had to be trimmed later.

Pencil-Holder 11

When you reach the end of the paper, add some more glue and fasten the edge securely on your roll.  Repeat with more paper until you get to the thickness you like, with some nice patterned stuff on the outside.

Pencil-Holder 12

Put some glue on the outside, just to seal it all in.

Pencil-Holder 14

Allow your pencil to dry, then trim the pointy end of the pencil with a knife or a pencil sharpener, and you’re all set.

Pencil-Holder 21

Rustic Pencil Holder

Rustic Pencil Holder

Uncharted 3 Upcycled Jewelry Cabinet

Last year for Christmas, Rusty gave the Pie the collector’s edition of Uncharted 3: Drake’s Deception.  That’s a videogame, for those of you who don’t know.

DSCN3486

Anyway, the collector’s edition came in this huge sort of armoire/chest thing, and contained, in addition to the game itself, a 12″ figurine of Drake, the main character, together with a reproduction of his necklace, a thong wrapped around a ring supposedly belonging to the explorer Francis Drake.  It was pretty cool.  And once I saw the chest, I knew that we couldn’t throw it away, because it was so well made it would HAVE to be useful for something.  I lugged it home from Ottawa, as carry-on on the plane.  It made me grumpy at the time.  I like my leg room.

DSCN3488

So I’ve been staring at it for the better part of the last year, trying to figure out what to do with it.  With its magnetically-sealing door and its little flocked drawers, it pretty much cries out to be a case for some form of treasure, possibly a jewelry box.  In the end, that’s what I decided to do with it.

I’m going to make a sweeping assumption about my readership here and say that you probably don’t have a collector’s edition of Uncharted 3 lying around your house, so that you can easily reproduce what I’m about to show you.  If you do, then by all means, go for it.  But if you don’t, let this give you some inspiration to upcycle or recycle some other, pretty box, into something both functional and stylish.  For example, in my closet at my parents’ house I have stashed a wooden packing crate that held the wine my cousin Lindz brought us as a wedding present.  Some day I’m going to turn it into something epic.

But back to matters at hand.  For all its structural integrity, this box is still essentially made out of cardboard, so I have to be very careful in my assemblage and dis-assemblage of it not to mess it up.  And in order to decorate it properly (enough so it looks better than my usual half-assed attempts and I can give it to someone at Christmas), I am going to have to use every ounce of my limited artistic skills and patience.

First I’m going to outline my plan for you and then we can see how well I managed to carry it out.

At first I considered removing the decorative feet and top of the box and flipping it onto its back.  It would make the box easier to store, but it would negate the usefulness of those wee drawers.  So upright it was going to be.

DSCN3490

Then I was going to remove the feet and top anyway, just for cleaner lines, but then it occurred to me that I could use the top to hide evidence of my construction, so I should leave it on.  And if I was going to leave the top on, I should probably leave the feet on.  So the structural appearance of this cabinet would remain the same as it was.

DSCN3489

Now, my plan was to screw some small hooks into the “ceiling” of the cabinet, from which one could hang necklaces.  I would put a dab of hot glue on the screw end when it came out the top, and then hide the evidence by putting the top of the cabinet back on.

For earrings, I would remove this mesh piece of cardboard from the door and replace it with a larger piece of metal wire mesh, carefully glued in place.  I would have to make sure that there was room for the door to close with it in place.

And of course I would paint the whole thing.  I’m thinking a sage green, with lighter green and ivory elements, and perhaps a touch of black (because the flocking inside the drawers is black).  So that’s the plan, as it stands.

And, like my idol Hannibal from the A-Team is wont to say, “I love it when a plan comes together.”

First, the disassembly.  Using a box knife, I carefully cut off the top of the chest.

DSCN3493

And I did my best to peel off the filigreed game pouch from the inside of the door.  It was a rough job but I wasn’t too concerned, as that would be covered over later with the earring holder.

DSCN3492

I pulled out the drawers as well.

DSCN3495

Now for the messing-about. Part of my plan included putting little hooks inside both drawers to hang bracelets and other smaller things, just to keep them from getting in the way.

DSCN3500

I wasn’t planning on using the adhesive that they came with. I was going to use hot glue. I also cut off the little end bits of plastic left over from when I broke them off their holder.

DSCN3502

Then I painted them. I made them black so they would hide against the flocking inside the drawers.  It took a couple coats of acrylic to fully hide the white.

DSCN3503

I cut down the front of each drawer so that you could see inside more easily.

DSCN3510

Then I started to paint everything. I was working with acrylic on a smooth surface so it took a few coats to make sure everything stuck. I had considered lightly sanding the cardboard before I began but I didn’t want to risk damaging it. So I just used a lot of paint.

DSCN3512

I used Mod Podge to glue a piece of paper over the rough bit on the door. I wasn’t too concerned about the wrinkles. The whole thing would be covered soon anyway.

DSCN3514

Screwing in the hooks for hanging necklaces turned out to be a snap. I just eyeballed where I thought they would go, and that ended up working out just fine.

DSCN3520

Some hefty daubs of hot glue ensured that they wouldn’t come sliding out again.

DSCN3525

This is how they look from the useful side.

DSCN3522

Then I cut a hole in the base of the top of the box, to accommodate the glued parts of the hooks. Then I just glued it in place and there we were.

DSCN3529

Now here’s where I hit my first (and really, my only) real snag. I had thought there would be enough room in the drawers for them to slide in and out even after painting. That, however, was not true. You can see here the damage done to the paint after I shoved a drawer back in and then had to wrestle it out again. Not good.

DSCN3515

But an easy fix, really. First, I glued the hooks in place inside the drawers.

DSCN3518

Then I cut down the front of the drawers even further.

DSCN3526

DSCN3531

Then I simply glued them in place inside their spaces, so you couldn’t pull them out anymore, but you could still access everything inside them.

DSCN3533

I had originally wanted some sort of wire mesh for the earring holder on the door, but I couldn’t find any that suited my purposes. I still had plenty of those wooden sticks leftover from my coffee stirrer wall art, however, and they would do just fine.

DSCN3551

I used hot glue to make a little lattice arrangement out of them, which I then painted silver. That nut you see there, which I also painted silver, is going to serve as the handle to open the cabinet.

DSCN3553

With the main structure of the cabinet completed and the initial painting done, it was time to consider the embellishments.

DSCN3554

I wanted to make a nice little border around the door to echo the shape of the box itself, but I wasn’t sure how the acrylic would take to having masking tape stuck to it. So I tested it on the back first, and left it there for a day.

DSCN3560

It seemed to be okay so I went ahead and masked out the front.

DSCN3572

Then I painted in two parallel lines, one in ivory, one in silver.

DSCN3583

I pulled the tape off before the lines were dry, to make sure that I wouldn’t pull off more paint than I wanted. I went a bit too fast at the end and lost a corner — the hazards of painting on a smooth surface, but nothing a touch-up wouldn’t fix.

DSCN3585

While waiting for the touch-ups to dry, I glued on the door knob.

DSCN3586

Then I stuck in the lattice.

DSCN3591

And also some felt squares to go on the feet.

DSCN3589

When it was all dry, I sprayed it with a couple coats of spray varnish. The stuff I used is designed to go on artists’ canvas, so it was ideal to go over the acrylic and dried really fast.

DSCN3609

And that’s it, it’s done.

DSCN3625

DSCN3627

I put some of my own jewelry in it so you can see how it will work. I don’t own any earrings so I hung the lattice with brooches instead.

DSCN3636

DSCN3639

DSCN3640

Those hooks hold up well.

DSCN3642

Plenty of room in the former drawers.

DSCN3644

And the doorknob holds strong.

DSCN3646

If I didn’t have too much jewelry to fit the thing I’d keep it for myself. I am so pleased with how well it worked out.

DSCN3645

And you can still see the copyright information on the bottom of the box, just so you remember its roots.

DSCN3648

And yes, it has occurred to me that now I have to lug it all the way back to Ottawa, carry-on on the plane and everything.  The price we pay to make our families happy …

For a dramatic juxtaposition of the before and after shots, look no further:

DSCN3486

DSCN3626

DSCN3488

DSCN3645

Button Mosaic

Button Mosaic 8

If you’re looking for a last-minute gift idea for the person who has everything, the person who appreciates all things quirky and vintage, or the person who has a strong addiction to sewing notions (trust me, there are more of them out there than you think), then look no further than right.  Here.

Button Mosaic 11

I have a large collection of vintage sewing buttons, but my favourites are the ones with the pearlescent sheen — so I have extra of those.

Button Mosaic 1

I picked up this mini wood frame at Michaels back when I was doing the coffee stirrer wall art.

Button Mosaic 2

At the time I figured I would make another, smaller version of the same, but it was not to be.  Instead, I painted it purple and started sticking buttons on with Mod Podge (though any white glue — or non-white glue — would work here).

Button Mosaic 3

I kind of went with an ombre sort of pattern from purple to red to white.

Button Mosaic 4

These buttons attach with that little sticky-outie thing and won’t lie flat, so I glued them into small spaces between other buttons, where the other buttons would hold them up.

Button Mosaic 12

Button Mosaic 13

Don’t forget to stick some hanging hardware on the back.

Button Mosaic 7

The finished product.  Easy peasy blamo kablam.

Button Mosaic 6