Banana Chocolate Breakfast Cookies

Banana Oat Cookies 11

These popped up on my Facebook feed a few weeks ago and they looked so easy I figured there was no harm in trying them. And they’re fantastic! Switch out the oats for gluten-free oats and you can please those with dicky digestive systems. Replace the chocolate chips with dried fruit or nothing and it’s a great treat for wee folks who are learning how to eat solid foods with their hands. Shove some peanut butter in there and you have a handy dog treat. It’s really a versatile little cookie full of natural sweetness and texture.

Banana Oat Cookies 12

Plus it’s basically only got three ingredients, so it was an instant hit with Cait of chicken-salsa-cheese fame. I used slightly more than three ingredients because I was out of chocolate chips so I made do …

Banana Oat Cookies 1

I doubled this recipe because in a house with a large male and a very pregnant female these bite-sized morsels were simply not big enough. Start by preheating your oven to 350°F and lining a large baking sheet with parchment or spraying it with cooking spray.

Grab yourself at least 2 large ripe bananas (this is also a good recipe for when the bananas are just starting to go, and you don’t want to chuck them in the freezer for YET ANOTHER banana bread batch).

Banana Oat Cookies 2

Mash the crap out of those suckers. Not just a little bit of mashing, like you’d have for banana bread, where you want the chunks.

Banana Oat Cookies 5

I’m talking full-on banana soup. Yes. There is no picture. It was too gross.

Add in 1/4 cup chocolate chips (or whatever else you have that you want to use: this is a few spoonfuls each of dark chocolate bar, broken up, Skor bits, and peanut butter chips).

Banana Oat Cookies 6

Now tip in 1 cup oats (a little bit of shredded coconut and some ground flax would be nice here too, I think).

Banana Oat Cookies 8

Stir-stir-stir! Plop flattened gobs of those things on your baking sheet and shove it in the oven for about 15 minutes.

Banana Oat Cookies 9

These bigger ones took about 18), then let sit on the cookie sheet for about five minutes before eating.

Banana Oat Cookies 10

Definitely eat them warm – and all at once!

Banana Oat Cookies 14

Raspberry Mousse Pie

Raspberry Mousse Pie 27

This is another Martha Stewart recipe that I adapted to be gluten-free and made up for the second of our Mother’s Day celebrations (same day, different mom). This recipe is also great because it actually involves zero baking whatsoever, so if it’s hot where you are and you can’t handle the thought of turning on the oven – don’t worry about it.

Raspberry Mousse Pie 25

Start by lightly spraying a 9″ square metal baking dish with cooking spray. Or a 7″ x 10″ glass baking dish, which is what I did. Line it with parchment so that there’s some overhang, because you’re gonna need handles.

Raspberry Mousse Pie 6

Grab 7 or 8 graham crackers. These gluten-free ones are really tiny and kind of thick. We used the whole package. The original recipe involves laying them out in the pan whole but that always ends poorly for me so I plopped them in the food processor, together with about 1/3 cup unsweetened shredded coconut and about 3 tablespoons butter and gave them a good whaz. Then I took that clumpy mixture and pressed it hard into the bottom of the pan. That way I could cut the pieces anyway I wanted without worrying about the shape of my graham crackers.

Raspberry Mousse Pie 2

Raspberry Mousse Pie 5

Raspberry Mousse Pie 6

Tip 3 tablespoons lemon juice into a wee bowl and sprinkle 1 envelope powdered gelatin (∼ 2 1/4 teaspoons) over top. Leave that for 5 minutes. Wash and drain about 2 cups fresh raspberries and plop them in your food processor. Purée the crap out of them.

Raspberry Mousse Pie 7

Pour the raspberry goo into a measuring cup via a fine mesh sieve. Scrape and scrape and shove the goo around until all the juice is through and what you have left is just seeds. Compost the seeds – you should have about 1 cup of raspberry juicy stuff.

Raspberry Mousse Pie 10

In a small saucepan, combine the raspberry stuff with 1/2 cup sugar and stir over medium until bubbles start to form at the edges.

Raspberry Mousse Pie 11

Tip in the gelatin mixture and stir constantly until the stuff is completely dissolved, about 1 minute.

Raspberry Mousse Pie 12

Raspberry Mousse Pie 13

Pour that into a bowl and let it cool to room temperature.

Raspberry Mousse Pie 14

While you’re waiting, whip up 2 cups heavy cream with 2 tablespoons sugar until stiff and lovely.

Raspberry Mousse Pie 15

Fold your cooled raspberry goo gently into the cream and keep folding until the colour is uniform and it looks amazeballs.

Raspberry Mousse Pie 16

Raspberry Mousse Pie 18

Pour the mousse goo over the graham crumbs and smooth if necessary with an offset spatula.

Raspberry Mousse Pie 19

Wash and drain another 2 cups fresh raspberries and use them to decorate the top.

Raspberry Mousse Pie 20

Raspberry Mousse Pie 22

Refrigerate the mousse pie for about 2 hours or up to overnight. When you’re ready to serve, use the parchment handles to gently remove it from the pan before cutting it into squares. Enjoy!

Raspberry Mousse Pie 28

Ginger Molasses Cookie

So there’s a certain giant mega-corporation coffee chain near our office. I’m sure you know the one – it has a fishy logo. Because it’s the only place near our office, we go there ALL THE TIME. And I’m kind of in love with their giant ginger molasses cookies. But they’re a million dollars and I just KNOW that the reason they’re so chewy and amazing is because they’re filled with all sorts of ick. And there’s probably some form of addictive substance in them (other than sugar, I mean), because I don’t even LIKE cookies and I can’t resist these. And I just found out TWO DAYS AGO that the place near work has discontinued the darned things.

Ginger Molasses Cookies 12

So it’s been a quest of mine to re-create the recipe on my own. Turns out I’m not the only one who has tried. Most of the recipes I found seem to be taken from the same source and have mostly the same ingredients, so I picked this one from Food.com. Forgive my crappy photos – it’s a weeknight in the winter in Canada so it’s dark. Start by preheating your oven to 375°F and line two large baking sheets with parchment paper. Then grab your ingredients.

Ginger Molasses Cookies 1

Whisk together 2 1/4 cups flour, 2 teaspoons baking soda, 1 teaspoon ground cinnamon, 1 teaspoon ground ginger, 1/2 teaspoon ground allspice, and 1/2 teaspoon ground cloves. Set that aside for a few minutes.

Ginger Molasses Cookies 2

Next, in the bowl of an electric mixer, cream together 3/4 cup butter and 1 cup dark brown sugar. I didn’t have dark brown so I went with regular brown. But the darker your sugar, the darker your cookie.

Ginger Molasses Cookies 3

Scrape down the mixing paddle and the sides of the bowl and crack in 1 large egg. Pour in as well 1/4 cup regular unsulphured molasses. I used fancy grade molasses, because that seems to be what you can get in Canada. Not sure what the difference is.

Ginger Molasses Cookies 4

Give that a good beating until it’s smooth.

Ginger Molasses Cookies 5

Now, slowly add in your flour mixture while beating on low speed. Keep mixing until the dough forms a cohesive mass – it’ll be super thick and you’ll have to scrape things down occasionally to ensure good mixage.

Ginger Molasses Cookies 6

Now grab your cookie dough, and your baking sheets, and a shallow dish or plate. Tip about 1/3 cup granulated sugar onto the plate and spread it around. Scoop out 1/4 cup of the dough (I’m not kidding, these things are huge), roll it into a ball, and roll it in the granulated sugar before placing it on the baking sheet.

Ginger Molasses Cookies 7

Do that five more times for the first sheet, spacing them far apart (they spread). Do the other six on the other baking sheet (yeah, this recipe only makes 12. If you’re not insane and you’d like a smaller cookie go ahead and do that).

Ginger Molasses Cookies 8

Next, wet your fingers and press down on each cookie ball to flatten it slightly and dampen the sugar coating. Shove one baking sheet in the fridge and the other in the oven.

Ginger Molasses Cookies 9

Bake each sheet, one at a time, for 12 minutes, rotating halfway through, or until the cookie is an even brown and is mostly solid in the middle. Let those giant suckers cool on the baking sheet.

Ginger Molasses Cookies 10

I’m not sure if they’re *quite* the recipe I was looking for – I might add more ginger and more molasses (or maybe my ginger is just a little old). But they’re really good nonetheless!

Ginger Molasses Cookies 15

Yarn Eggs

Yarn Eggs 33

These puppies are all over the internet, so I can’t give you any one particular website that gave me the inspiration to try this little Easter craft.  Despite it being warm(ish), we just got another 20cm of snow this week (in one night) and I have had it with winter in the worst way.  So I’m doing Easter things.

Yarn Eggs 16

Today we’re making yarn eggs.   What you need for this is a work surface that you can easily clean off (this is a messy project), some brightly coloured yarn, a balloon, and some glue.  In this set of photographs I’m using a 5″ balloon for a medium-sized egg.  You can use a full-sized 10″-12″ balloon but you’ll use more yarn and glue and then you’ll have to find a place for your giant egg.  Water balloons, which are typically around 3″-4″, are probably best for this, though you will have to squish them around to make them a bit more egg-shaped.  I’m also using a papier mâché paste with a flour:water ratio of 2:3 as my glue.

Yarn Eggs 2

Start by inflating your balloon.  Tie it off and then loosely wrap it in the yarn of your choice, just to get an idea of how much you are going to need.

Yarn Eggs 3

When you have it wrapped to your satisfaction, you can cut the yarn.  I ended up with between 6 and 7 metres of yarn for a 5″ balloon (before you object too loudly, remember that I’m Canadian and we jump back and forth between metric and Imperial measurements with impunity — it’s a cultural thing).

Yarn Eggs 4

Loosely wind up your yarn so it won’t get too tangled as you pull on it and dunk it gently into your glue mixture.

Yarn Eggs 5

Keep hold of the end so you can find it again.

Yarn Eggs 6

Run the gluey yarn through your fingers to squeeze off the excess and start wrapping it snugly around your balloon.  Some people have sprayed the balloon with cooking spray to prevent sticking, but I didn’t find that this was a problem for me. Make sure to leave the tied off neck of the balloon hanging out so you have something to hold on to.

Yarn Eggs 7

When you are at the end of your yarn, tuck the edge in so it won’t unravel as it dries.

Yarn Eggs 8

It’s best to hang up the balloon overnight so it will be able to dry completely on all sides.

Yarn Eggs 10

While I was making breakfast the next day, the balloon decided to contract and it took me a good five minutes to figure out that the crackling sound in my kitchen was the balloon separating from the pasty yarn.

Yarn Eggs 11

Then you simply pinch the balloon near the neck and cut a snip in it to deflate the balloon quickly without popping it.

Yarn Eggs 12

Pull the deflated balloon out through the hole where the neck was.

Yarn Eggs 13

There you have it.   I’m not entirely happy with the way that the papier mâché paste has discoloured the yarn, but this method would probably work best on pale yellow yarn or off-white, to disguise the discolouration.

Yarn Eggs 14

For the next one (this was a test run after all), I decided to use Mod Podge “Stiffy” Fabric stiffener, mixed with a wee bit of Mod Podge Fabric Glue.

Yarn Eggs 17

This was a lot more slippery to work with, for some reason.  The papier mâché seemed to adhere better to the balloon when wet (though it might have also had something to do with me using a metallic balloon first, and then a regular opaque one next — I find that the metallic ones have a different feel to them).  The fabric stiffener slid all over the place, so I had to hold it with my fingers.  So glue was everywhere.

Yarn Eggs 18

Yarn Eggs 19

The final three eggs I used straight Stiffy, no glue.  You can see that there’s a difference between the paste one, which is more rigid but has bits of goo all over it, and the Stiffy ones, which are slightly more flexible but also less gross looking.

Yarn Eggs 27

Yarn Eggs 25

The finished eggs can be strung up as a garland, or displayed in a bowl, or used as place markers at the dinner table (if you made wee ones with water balloons).  You can also use rounder balloons to make actual spheres for non-Easter related decorating.  I’ve also seen them stuffed with LEDs as indoor/outdoor luminaries (though if you’re going to put them outdoors I would spray them with a waterproofing sealant first). I’ve even seen people use giant weather balloons to make huge pendant lampshades. It’s a very versatile and easy technique.

Yarn Eggs 32

Chewy Molasses Squares

Molasses Squares 12

These were a consolation prize the Pie found after the disastrous experiment with s’mores cookies last week.  And they turned out to be an excellent way of depleting our more esoteric baking supplies.

Molasses Squares 14

Preheat your oven to 350°F and butter an 8″ baking dish.  I went with the extra precaution of lining it with parchment and buttering that, too.  Now I doubled my recipe and plopped it in a 9″ x 13″ baking dish because the recipe got its math wrong and there is no way that an 8″ square pan leaves you with forty 1 1/2″ squares.  It just ain’t so.  I only ended up with twenty-four, and that’s in the bigger pan.

Molasses Squares 2

Anyway.  Don’t fret about the math for now, and whisk together 1 3/4 cups all purpose flour, 1/4 teaspoon baking soda, and 1/4 teaspoon salt and set that aside for now.

In the bowl of an electric mixer, beat together 1/3 cup unsalted butter (room temperature) and 3/4 cup granulated sugar until they’re pale and fluffy, a couple minutes.  I used half white and half brown sugar here because I ran out of molasses so  I needed to boost the flavour a bit.

Molasses Squares 4

Separate out 4 egg whites and use the yolks for something else.  I’m sure you could get away with tossing them into this mix, but it would make for a much denser cake.  I might try it next time.  Huck those into the mixer and beat to combine.

Molasses Squares 1

Grab yourself 1 cup molasses.  I ran out of molasses halfway through and discovered that my Golden Syrup had corroded the tin it was in, so my only recourse was lily white corn syrup, which made my squares quite a bit more pale than they were supposed to be.  Your squares will be much darker.

Molasses Squares 3

Anyway, pour that in as well and give it a stir until it’s all combined.

Molasses Squares 5

At this point, the Pie remarked that this was one of the grosser-looking things I had ever made, with maybe the exception of banana bread.  He has no appreciation for the science of things.  Then of course I added in the flour mixture and whipped that around and he was all like, “ooooh, it’s so pretty and smooth!”  Figures.

Molasses Squares 6

Anyway, smooth that lovely pretty substance into your prepared pan and chuck it in the oven for 40 minutes, or until a toothpick inserted in the centre of it comes out clean.  For the doubled recipe, this took about an hour.

Molasses Squares 7

Allow the cake to cool completely in the pan on a wire rack, then tip it out and cut it into as many squares as you like.

Molasses Squares 9

Grab a bowl and dump in about 1/2 cup icing sugar, and roll each square in that just before serving (if you do it in advance then the icing sugar will be absorbed into the square and it won’t look as pretty).

Molasses Squares 10

Then you eat them!

Molasses Squares 11

Pulled Pork Mac and Cheese

Pulled Pork Mac & Cheese 32

Ando made this for Thidz’ birthday last week and it went down so well that he suggested I put it on the blog.  So here it is, adapted to his standards.  While the whole thing takes a little while to prepare, it’s all easy stuff that you can do in stages.  I ended up having most of it ready in the morning and then just chucked it together at the end and baked it.  But we’ll work from the bottom up on this layered casserole.  Also, the recipe says it serves 8, but really it serves 4 because you are going to want seconds.

BOTTOM:

Preheat your oven to 425°F and spray a 9″ springform pan with cooking spray.  My pan was a little wider, but that’s fine.

Pulled Pork Mac & Cheese 6

In a teeny bowl, mix together 1 teaspoon smoked paprika, 1 teaspoon ground cumin, 1/2 teaspoon chili powder, and some salt and ground black pepper to taste.

Pulled Pork Mac & Cheese 9

Peel 2 medium sweet potatoes.  I only had large ones, so I opted to just do one, but I could have used both and it would have been fine.

Pulled Pork Mac & Cheese 5

Use a mandoline to shave off super thin slices.

Pulled Pork Mac & Cheese 10

Chuck those pieces in a bowl, drizzle with a few tablespoons vegetable oil, and add in your spice mix.  Toss with your hands until the oil and spices evenly coat all the potato pieces.

Pulled Pork Mac & Cheese 11

Layer the sweet potato slices evenly in the bottom of the pan.

Pulled Pork Mac & Cheese 12

Bake for 15-20 minutes until they are softened and starting to brown.  Ando wanted to bake them longer to make them more crisp, so I tried that, but I found that once you piled the rest of the ingredients on top they went soft again anyway, so don’t worry too much about that.  The Pie hoped for a thicker layer of sweet potatoes (because I only used the one potato and my pan was wider), so next time I would go for two.

Pulled Pork Mac & Cheese 23

MIDDLE:

Grab yourself some pork tenderloin.  I had a boneless pork loin rib here that was on stupid sale so I used that.

Pulled Pork Mac & Cheese 2

You’ll need 2lbs pork, cut into 2″ chunks.  If I did this again, I would cut the chunks larger, just so your pulled pork strings end up being decently long.

Pulled Pork Mac & Cheese 3

Bring a large saucepan of water to a boil and add in the meat.  It goes gray almost immediately, which is kind of gross.  Reduce to a simmer and leave that on the go for about an hour.

Pulled Pork Mac & Cheese 4

Drain the pork and use 2 forks to shred it into little pieces.

Pulled Pork Mac & Cheese 14

Then you’re going to need some barbecue sauce.  Ando expressed concern that the sauce tended to overpower the more delicate flavours of the macaroni and cheese on top, so we picked out a milder apple butter sauce and it worked out fantastically.  The sweetness of the apple really worked well with the pork.

Pulled Pork Mac & Cheese 13

So you pour 14oz barbecue sauce all over your pork and mix it in.

Pulled Pork Mac & Cheese 15

Then you add in 2 tablespoons apple cider vinegar and stir that in as well, then set the whole thing aside.

Pulled Pork Mac & Cheese 17

TOP:

Bring another saucepan of water to a boil and add a pinch or two of salt.  When it’s boiling, add in 8oz elbow pasta (MACARONI) and cook according to your package instructions.  When it’s ready, drain the water, saving about 1/4 cup of it.  Add the water back to the pasta in the pot.

Pulled Pork Mac & Cheese 19

Add to the pasta 1/2 cup grated cheddar cheese (I think the sharper the better), 1/2 cup grated Gruyere (we used Jarlsberg), and 1/4 cup creme fraiche (which is next to impossible to find in Newfoundland, so we used sour cream instead).  Because Ando suggested boosting the flavour of the mac, I added a few crumbles of blue cheese (Rochefort) as well.

Pulled Pork Mac & Cheese 18

Stir that up until it’s all melted, then add a few drops of hot sauce (we used Tabasco) to taste.

Pulled Pork Mac & Cheese 21

Season it with salt and pepper and set it aside.

Pulled Pork Mac & Cheese 22

CRUST:

Melt 1/4 cup butter and stir it up with 1/2 cup parmesan cheese and 1 cup panko breadcrumbs.

Pulled Pork Mac & Cheese 20

ASSEMBLY:

Smooth the pulled pork over the sweet potatoes.

Pulled Pork Mac & Cheese 24

Dollop the macaroni on top of that and flatten it down a bit.

Pulled Pork Mac & Cheese 25

Sprinkle the bread crumb mixture on top of that to completely cover the macaroni.

Pulled Pork Mac & Cheese 26

Bake for 15 minutes, until the casserole is hot through and the bread crumbs are browned.

Pulled Pork Mac & Cheese 28

DISASSEMBLY:

Ideally you should be able to pop open the springform pan and cut this puppy like a cake.  My pork ended up being supremely saucy and thus too slithery to be architecturally sound in terms of casserole structure.  Meaning I tried to pop off the frame and then the whole thing went sideways — literally and figuratively.  So we just scooped it out with spoons, hence the lack of presentation.  Didn’t matter.  Ate it anyway.  And it was awesome.  Thanks Ando!

Pulled Pork Mac & Cheese 29

Lemon Cloud with Strawberries and Mint

Lemon Cloud 25

Fussellette asked me to make “something light” for dessert following our Easter meal of a traditional Jiggs dinner.  What is lighter than a cloud?  Not much.  This sharp lemon foam is a great palette-cleanser and went smashingly with some post-prandial tea.  And, as most things gluten-free tend to be (with the exception of doughy things of course), it was easy and quick to make.  I made it the day before to allow the flavours to really concentrate themselves.

Lemon Cloud 3

Start with some fresh strawberries, 2 cups.  Wash them, cut the tops off, and slice them into quarters.  Drop them in a bowl.

Lemon Cloud 2

Sprinkle 2 tablespoons sugar over top.

Lemon Cloud 4

Grab yourself some fresh mint, 2 tablespoons.  Chop that up and drop it on top of the strawberries.

Lemon Cloud 5

Give that a stir, then chuck it in the fridge to chill.

Lemon Cloud 6

Preheat your oven to 350°F.  Spray a 1 1/2 quart soufflé dish (I didn’t have one, so I used this steep-sided oval bowl) with cooking spray and dust with 2 tablespoons sugar.  The recipe said to shake out the excess but I left mine in the bottom in the hopes it would get all crusty and lovely, and I was right.  Set the dish on top of a baking sheet.

Lemon Cloud 7

Separate 4 eggs and bring the whites to room temperature.  You’ll only need two of the yolks.  I had three whites left over from eggs Benny so in actual fact this recipe used 5 whites.

Lemon Cloud 8

Grate the zest of 2 lemons and squeeze out their juice as well.  You want to end up with 2 tablespoons lemon zest and 6 tablespoons lemon juice.

Lemon Cloud 10

In a small saucepan, whisk together 1/2 cup sugar and 1 tablespoon corn starch.

Lemon Cloud 9

Add in the lemon juice, zest, and the 2 egg yolks and stir until smooth.

Lemon Cloud 11

Heat on medium, stirring constantly, until thick enough to coat the back of a wooden spoon.  Transfer to a large glass bowl and allow to cool to room temperature.

Lemon Cloud 12

Take your 4 egg whites and plop them in a bowl with a pinch of salt.  Whisk until foamy.

Lemon Cloud 14

Gradually add, a little bit at a time, 1/4 cup sugar, and continue to beat until stiff peaks form.

Lemon Cloud 15

Take about 1/4 of the egg whites and fold it into the lemon curd in the glass bowl.

Lemon Cloud 16

When that is fully incorporated you can fold in the rest of the whites.

Lemon Cloud 17

Transfer the mixture to the soufflé dish and smooth the top.

Lemon Cloud 18

Bung that in the oven for 25 minutes, or until the eggy mess is puffy and slightly browned on top.  Haul it out and put it on a wire rack to cool.

Lemon Cloud 19

Now watch it fall.  Don’t fret — it’s supposed to fall.

Lemon Cloud 21

Lemon Cloud 23

When it’s cool cover it with plastic wrap and chuck that in the fridge as well to get chilly. When you’re ready to eat, take it out. Or you could sit in your fridge and eat it. Whatever works for you. Scoop some out, top with your strawberry compote, and you’re golden.

Lemon Cloud 26

Slutty Brownies for My Birthday

Slutty Brownies 34

It’s my birthday.  Hooray!  Happy birthday to ME!

Slutty Brownies 25

As such, it means I can do whatever the eff I want to do today.  And I choose to be totally lazy and completely unhealthy and make these brownies*.  I’ve been hearing amazing things about this thing called a “slutty brownie,” and after looking them up on the interwebz I decided to go to the source, which, apparently, is a lady known as The Londoner.  Seems legit.  I could definitely get behind this sort of recipe.

Slutty Brownies 22

Normally I’m not one to make stuff out of pre-packaged food.  It’s just not my style.  For the most part, if you make something from scratch it tastes way better and is far more satisfying to make.  In this particular case, however, I think I can make an exception.

Slutty Brownies 1

It IS my birthday, you know.  But I have to say that the word “chocolatey” versus “chocolate” is always worrisome, though these did include real chocolate after all.

Slutty Brownies 2

Slutty Brownies 3

Preheat your oven to 350°F and line a baking dish with parchment.  I figured that seeing as some of the contents of my dish would fit normally into a square pan, and because I had extra ingredients on top of that, I should use a bigger pan.

Slutty Brownies 21

So you take a some chocolate chip cookie dough. In the British version, cookie dough comes in a box like cake and brownie mix, but here, unless you want it in bulk, it generally comes pre-made in refrigerated rolls.  The Londoner recommends using a teaspoon extra oil and water than recommended for the dry mix, because the cookie dough will be baking longer than usual and might dry out.  And you want this baby to be moister than moist.  So mix that up according to directions and add a bit more liquid. Smoosh the cookie dough into the bottom of the pan.  Use your fingers to make it all even and stuff. I decided I needed an extra roll of cookie dough.

Slutty Brownies 6

Take a package of Oreo cookies (double-stuffed is better, apparently), and line them up in the tray.  She says not to use the broken ones, but how else would one fill the gaps?  It’s thrifty.  However, I didn’t have any broken ones.  Way to go, modern packaging.

Slutty Brownies 7

And I didn’t have enough Oreos, actually.  So I moved everything to a smaller pan, which just involved some re-smooshing, and was very easy.

Slutty Brownies 9

Still didn’t have enough Oreos, though, and I couldn’t justify going out for another package when I was only a few short.

Slutty Brownies 10

So I just moved them over a bit.

THEN.  Then.  You take a box of brownie mix.  And you mix that up according to its directions. Mine had chocolate chunks in it!

Slutty Brownies 11

No need to add anything extra.  Just do it.  Giv’er.

Slutty Brownies 12

Pour that loveliness over top of the Oreos.  I’m serious.  Do it.  If you used a bigger pan like me you will need to spread it carefully so everything is covered.

Slutty Brownies 13

Bake that sucker for 40-50 whole minutes, then remove from the oven and put on a wire rack to cool.  Mine was big, so it actually took an hour.  A smaller pan would probably take you about 30 minutes. Look at that lovely shiny/crackly top!

Slutty Brownies 17

When it’s still a little warm, use the parchment as handles to remove the gloriousness from the confines of the pan, set it on a cutting board, and cut it up.  I recommend smallish cubes, as larger cubes of the stuff might result in DEATH.  And nobody likes death.

Slutty Brownies 19

Serve it up with a dollop of ice cream on top, or whipped cream, or caramel sauce, or fudge sauce, or all four in combination.  With a cherry on top.  And sprinkles.  Okay maybe I’m getting ahead of myself.

Slutty Brownies 27

And I’m not going to give you storage instructions because if you have any sense, there won’t be any left to store.

Slutty Brownies 31

* This is actually a lie.  I don’t do ANYTHING on my birthday.  It’s a rule.  I made these a week BEFORE my birthday (because despite what you may believe I don’t get up at the crack of dawn and bake in time for a 7AM NST post).  The Pie is creating a magical birthday cake for me as we speak.  There may be a post on it.  Who knows.

Slutty Brownies 35

Caramel Corn

Caramel Corn 28

Caramel Corn 33

I’ve been experimenting quite a bit recently with caramel (not “carmel”, like Newfoundlanders and many Americans call it, that drives me bonkers) corn — something to which I am entirely addicted, but usually too lazy to make.  I think I’ve finally come up with a recipe I like, however, so now you can have it.  This version is plain jane, but feel free to jazz it up with chopped salted nuts for extra pizzazz.

Caramel Corn 1

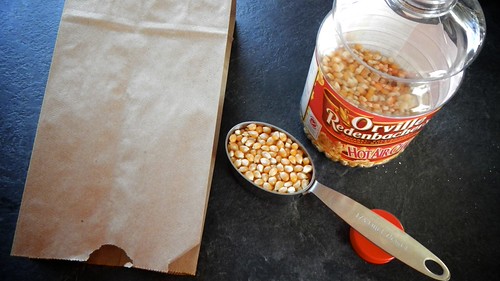
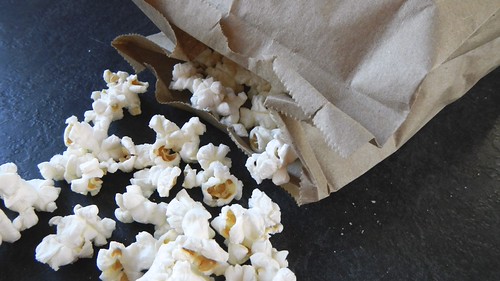
First, start with 10 cups popped popcorn.  This is generally about 1 cup of the unpopped stuff.  We don’t have an air popper here, and I’m afraid of the chemicals in microwave packets, so I’ll let you in on how I make my own popcorn (when I’m not doing it this way).  Take about 1/3 cup of popcorn and plop it in the bottom of a brown paper lunch bag.

Caramel Corn 3

Fold the top edge down once and then again, over itself.

Caramel Corn 4

Put that on its side in your microwave and cook away.  Every microwave is different when it comes to popcorn, but I’ve found that on mine, cooking it for 2 minutes and 35 seconds on power level 9 (out of 10) pops nearly every kernel, every time, without burning anything.  Make sure to save people’s teeth by sifting out all the unpopped kernels before you use this stuff.

Caramel Corn 6

Now, preheat your oven to 250°F and spray a large roasting pan.  I used the one I save for turkey time.  You could also use a large metal bowl if that’s all you have. Plop your popcorn in the roasting pan for now.

Caramel Corn 5

Scrounge around and find yourself a wooden spoon (always preferable to metal in candy making), a spatula, a whisk, and a candy thermometer.  Keep those all handy.

Caramel Corn 2

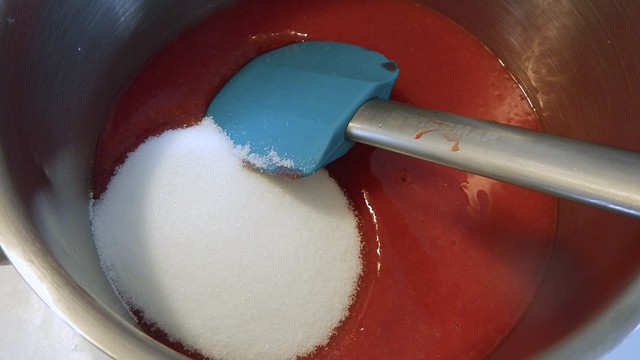
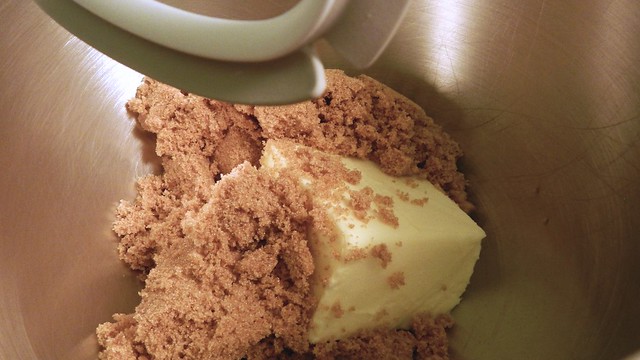
Find a large pot, too, and plop in 1 cup butter, 2 cups brown sugar, 1/2 cup corn syrup (any colour, doesn’t matter), and 1/2 teaspoon salt.

Caramel Corn 8

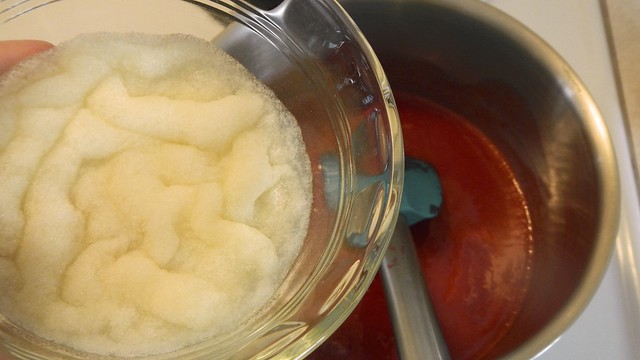
On the side, have two small dishes ready with 1/2 teaspoon baking soda and 2 teaspoons vanilla.

Caramel Corn 7

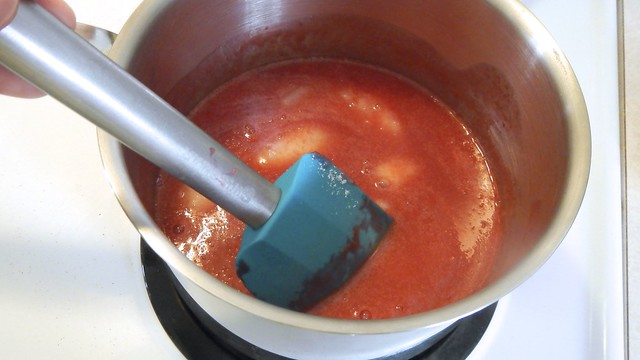
Bring the contents of the pot to a boil, stirring often, and clip the candy thermometer to the side. The reason you use the wooden spoon here is because sugar crystallizes more quickly on metal than wood, and crystallization is not what you want at this particular juncture.

Caramel Corn 9

Once the mixture starts boiling, stir it constantly for 1 minute.

Caramel Corn 10

Then take the spoon out and let it boil on its own for 5 minutes.  It’s going to boil up pretty high, so make sure you use a large pot for this. At this point, your candy thermometer should be reading 250°F, which is the magic number for the hard ball stage — exactly what we want.

Caramel Corn 12

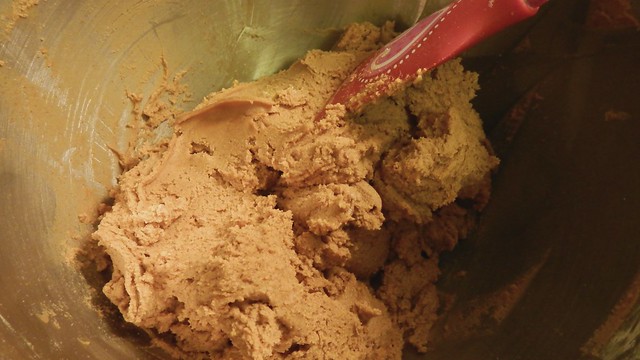
Turn off the heat and stir your mixture for about a minute.  Then remove it entirely from the heat.

Caramel Corn 13

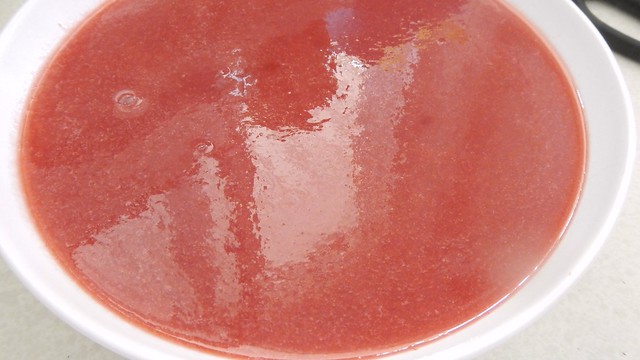
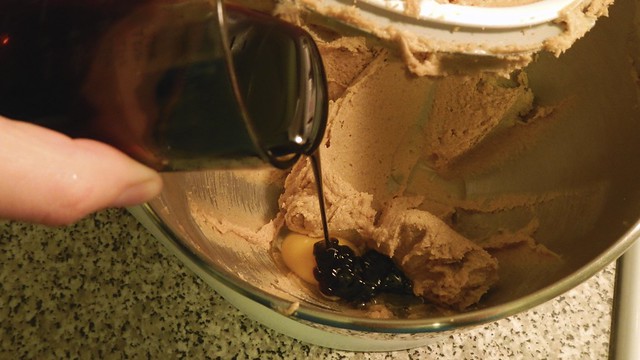
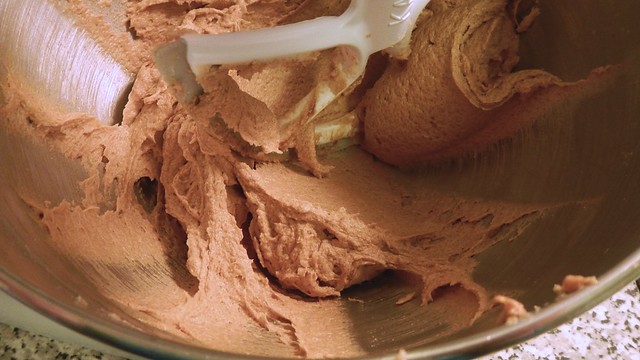
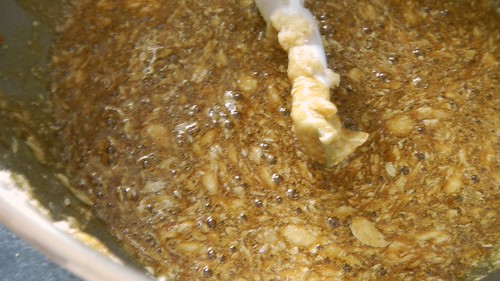
Whisk in your vanilla and baking soda.  It will fizz up, so be careful.  See how the texture and colour has changed?  Well, you can’t in that photo because it’s a terrible photo, but it will become smooth and a light opaque brown almost immediately. Keep whisking until it more or less stops fizzing.

Caramel Corn 14

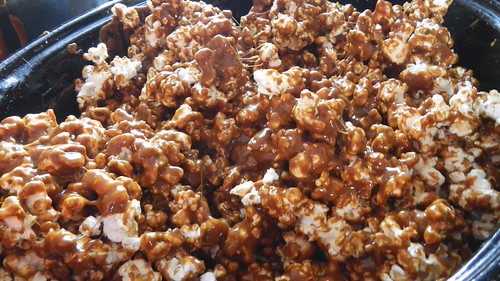
Slowly and in a controlled stream, pour your caramel over your waiting popcorn, mixing with a spatula.  Don’t worry if you don’t get it entirely incorporated.

Caramel Corn 15

Caramel Corn 16

I suggest leaving all your caramel tools soaking in hot water for a few minutes.  It makes cleanup so much easier.

Caramel Corn 20

Pop the roasting pan filled with popcorn in the oven and bake it for an hour, stirring it all over every 15 minutes.  While the caramel had started to harden on you before you stuck it in there, baking it at this low heat enables it to ooze all over the place and cover everything evenly.

So when you’re stirring, make sure to scrape the bottom of the pan, because you will always find a nice puddle of caramel down there.

Caramel Corn 22

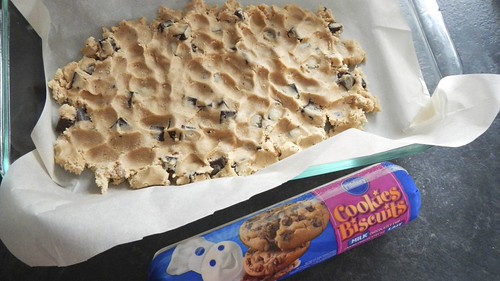
Spread a counter with waxed paper and spray it, too.  Once the hour is up, take the pan from the oven and spread the popcorn in a thin layer on the waxed paper to cool. Squish it down with your spatula to spread it out. Doing that now will make it both cool faster and be easier to separate after it’s cooled.

Caramel Corn 24

Once it has fully cooled, break it up into pieces and store it in a sealed container for up to a few days.

Caramel Corn 25

Or package it in wee bags for a bake sale, which is what I did.

Caramel Corn 31

I found the “Hello” stickers lying around in my office supply cupboard.  I figured what the heck, eh?

Caramel Corn 34

MUGS Bake Sale 1

Carrot Zucchini Bran Muffins

Carrot Zucchini Muffins

I’ve been craving baked goods recently but with the food-heavy holidays coming up I don’t want to overdo it this early in the season.  The answer to my delicious dilemma?  These hearty food-filled muffins from Sweet Mama.

Preheat your oven to 400°F and spray a muffin tin with cooking spray.

Carrot Zucchini Muffins

Grate up 1 small zucchini and 1 medium carrot — you’re trying for 1 cup of each.

Mash up 2 small bananas with a fork — again, you’re looking for 1 cup banana.

Carrot Zucchini Muffins

In a medium-sized bowl, beat together 2 eggs, 1/2 cup brown sugar, 1/2 cup canola oil and 1 teaspoon vanilla.

Carrot Zucchini Muffins

Add in the mashed banana and the grated carrot and zucchini.  Add in as well 1 cup unsweetened shredded coconut.  Mix it up well.

Carrot Zucchini Muffins

In another bowl, mix together 3/4 cup all-purpose flour, 1/4 cup bran, 1 teaspoon baking powder, 1/2 teaspoon baking soda, and 1/2 teaspoons each ground cinnamon and ground nutmeg.

Carrot Zucchini Muffins

Add the dry ingredients to the wet mixture and stir until just combined.

Carrot Zucchini Muffins

Spoon into the muffin tins.  I sprinkled mine with a wee bit of cinnamon sugar that I had on hand.

Carrot Zucchini Muffins

Bake for 20-25 minutes, until the muffins are brown and a toothpick inserted in the centre of the centre muffin comes out clean.

Carrot Zucchini Muffins

Leave in the pan for a few minutes and then transfer to a wire rack to cool completely.

Or eat still hot with butter.  MMMMMMMM!

Carrot Zucchini Muffins