Grapefruit Poppyseed Soap

Grapefruit Poppyseed Soap 24

After my disastrous start with melt-and-pour soap, I’ve been leery of trying it again. It was way more of an accomplishment for me to learn how to make soap entirely from scratch, though nobody will let me near the chemicals these days. And with melt-and-pour soaps, you already know the chemical reaction is going to work, so newbies like me have much more freedom to experiment with the add-in ingredients. And this mixture from A Beautiful Mess has been haunting me for ages with its deliciousness. I had to do it.

Grapefruit Poppyseed Soap 23

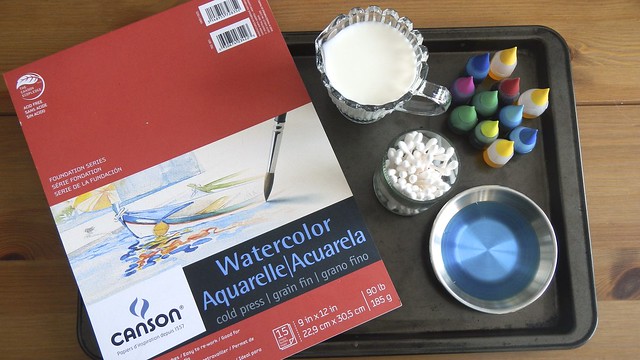
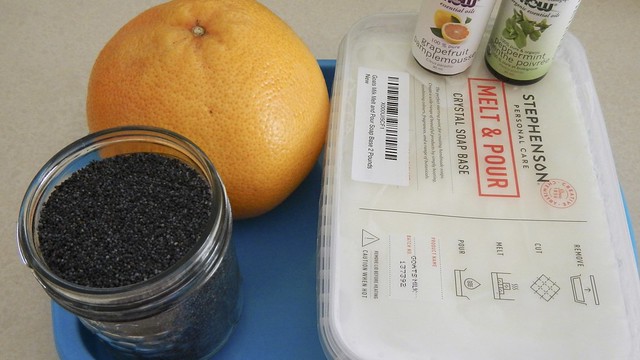
The simplicity of the ingredients is a definite bonus, and the fact that it’s so quick and easy to put together and then you can ignore it for a while is also a plus. I made this while painting two sets of lawn furniture so obviously my attention was divided. All you need is 1 grapefruit, 3 tablespoons poppy seeds, peppermint essential oil, grapefruit essential oil, and 2lb goat’s milk melt-and-pour soap base (which you can buy in craft stores and from Amazon). You also need something to pour your soap into to harden – I used the silicone trays I bought for making my jelly fish mobile.

Grapefruit Poppyseed Soap 1

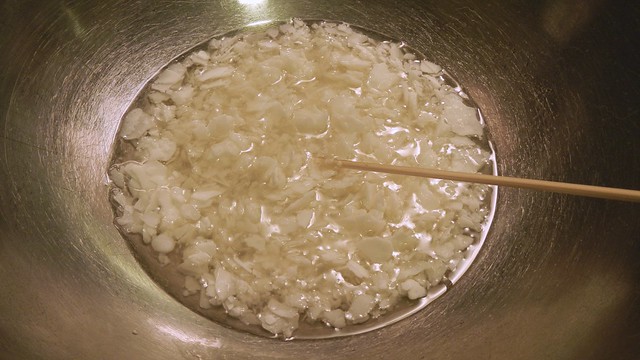
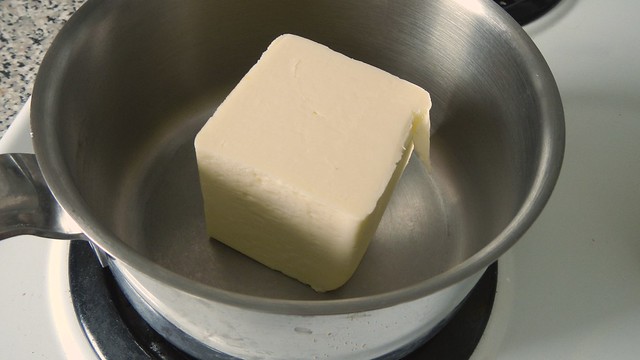
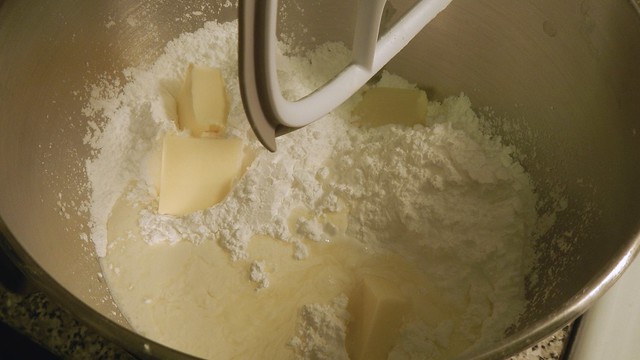
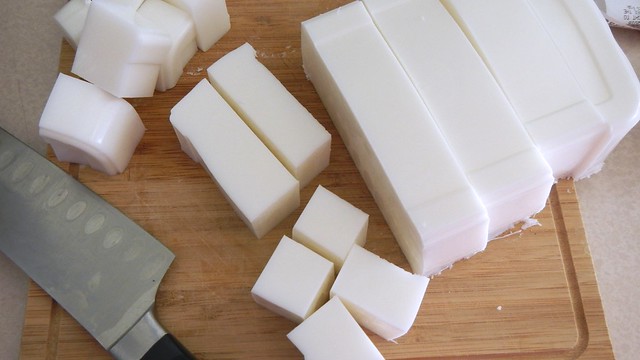
Grab your soap base. Apparently you can melt it in the container provided in your microwave but I decided that was unwise.
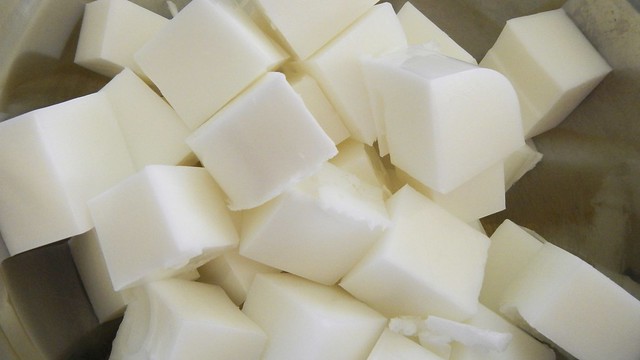
Grapefruit Poppyseed Soap 2

Chop it into cubes.

Grapefruit Poppyseed Soap 3

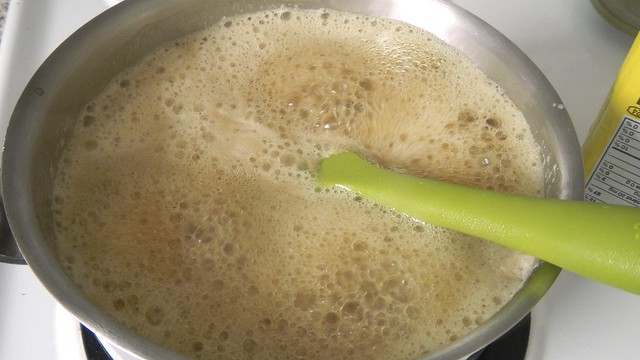
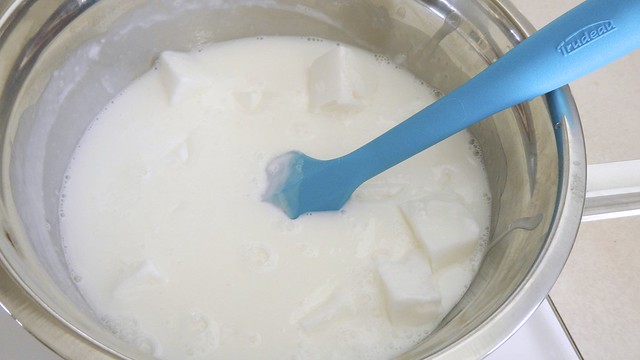
Plop those cubes in the top of a double-boiler and let that sucker melt for a while.

Grapefruit Poppyseed Soap 4

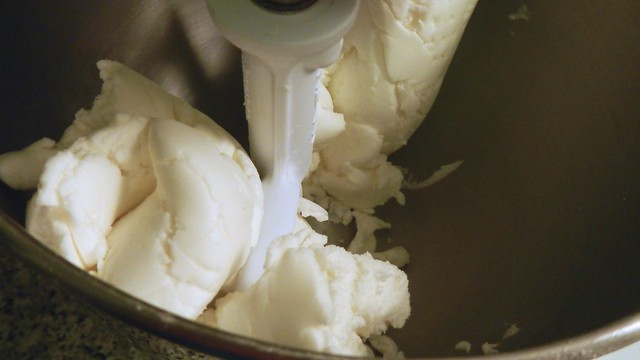
You’ll find a skin develops as it melts. Just stir that back in.

Grapefruit Poppyseed Soap 7

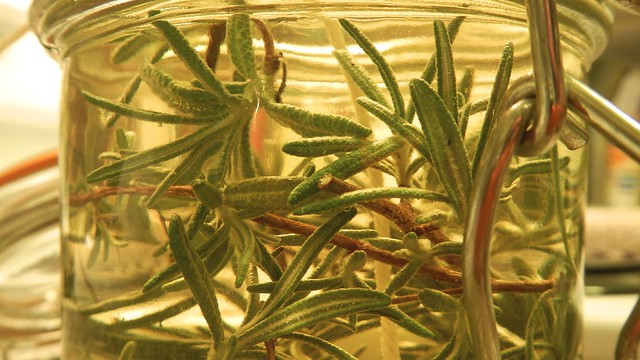
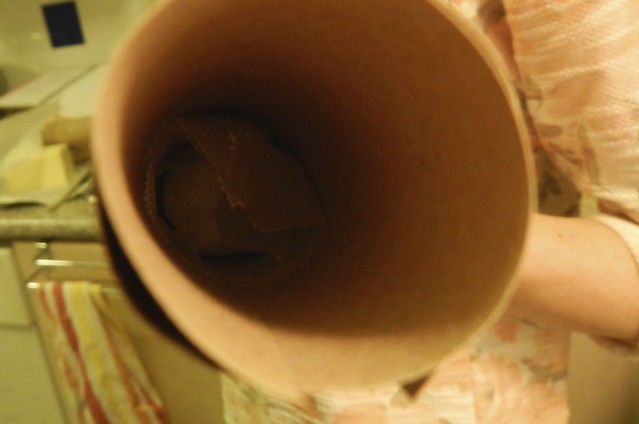
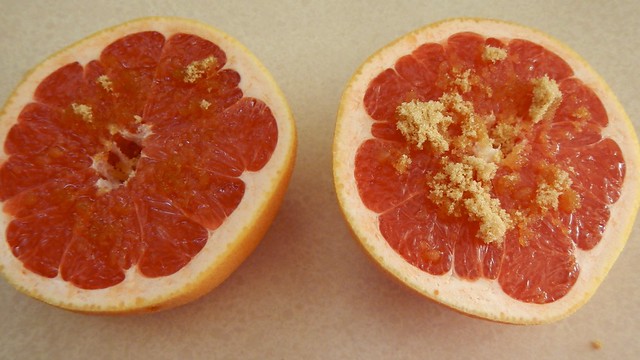
While that’s a-meltin’, go ahead and zest the entire grapefruit. Mmm, lovely.

Grapefruit Poppyseed Soap 9

Then eat your grapefruit. It’s good for you.

Grapefruit Poppyseed Soap 6

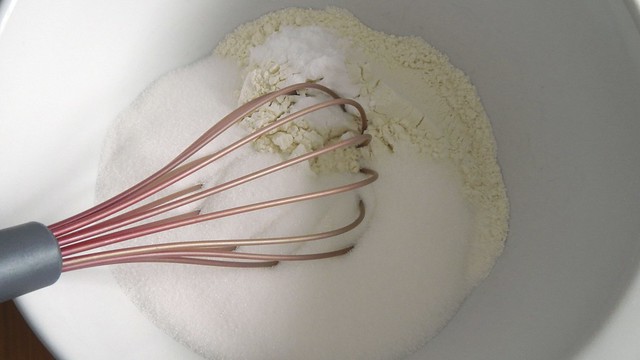
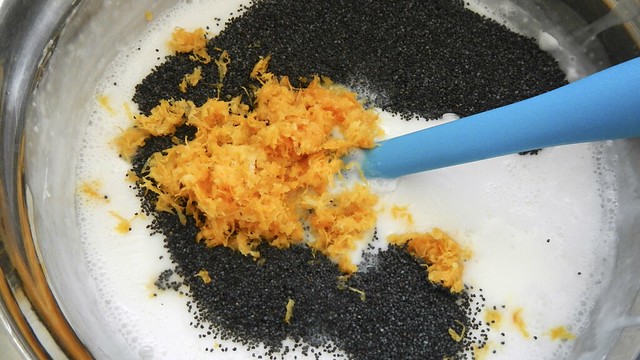
Gather your poppy seeds as well, about 3 tablespoons.

Grapefruit Poppyseed Soap 11

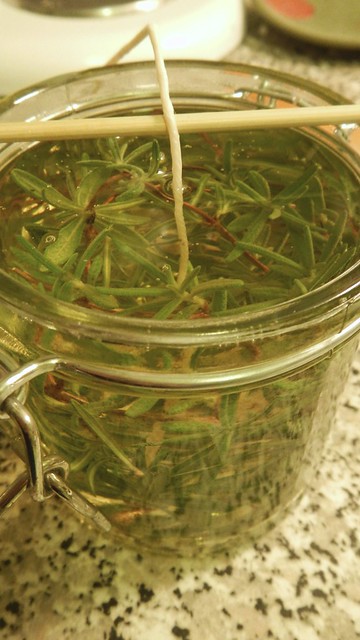
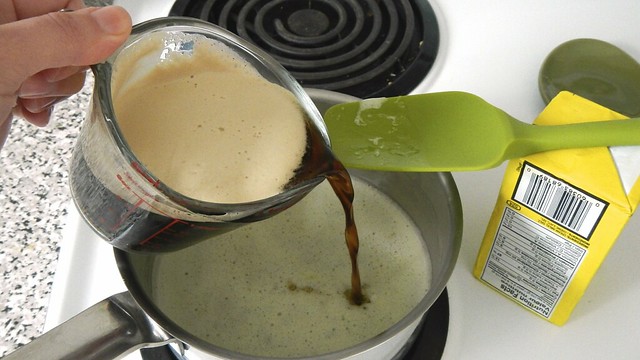
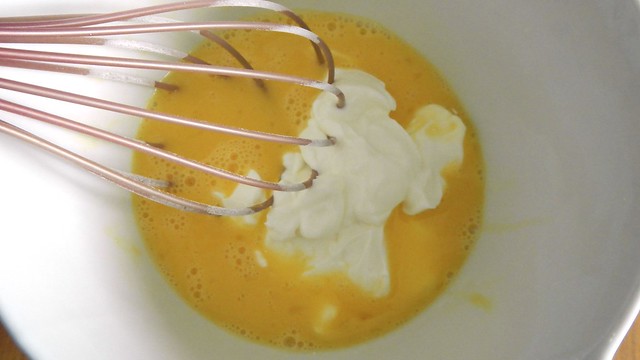
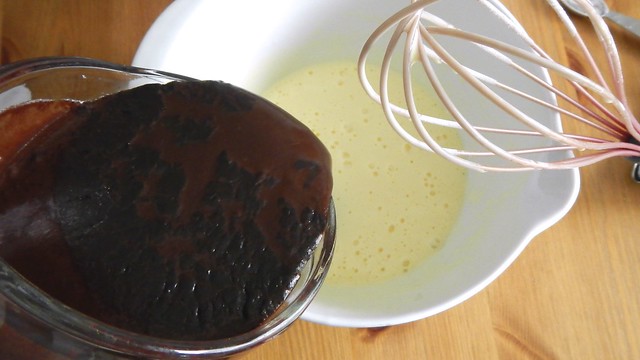
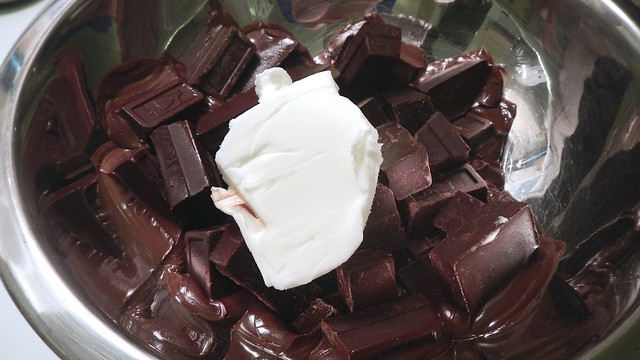
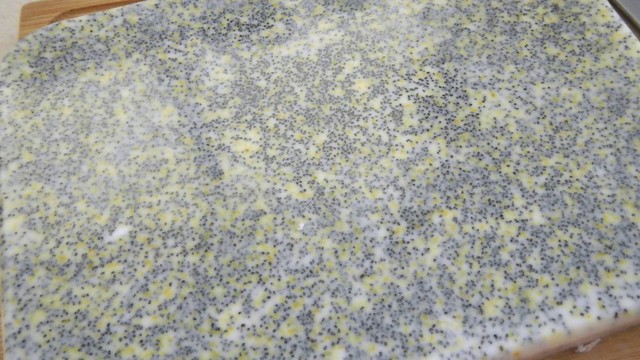
Once the soap has fully melted, remove it from the heat and tip in your grapefruit zest and poppy seeds. Shake in about 12 drops peppermint essential oil, and about 30 drops grapefruit essential oil, and stir that in quite well.

Grapefruit Poppyseed Soap 14

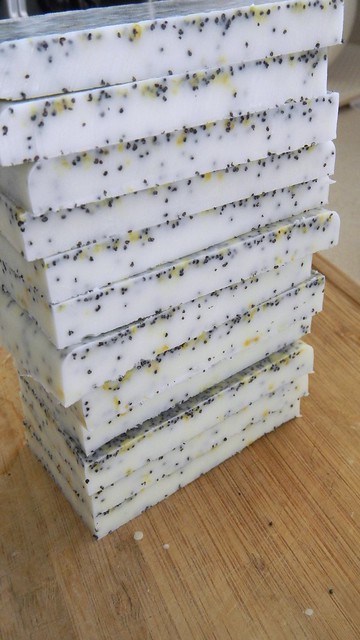
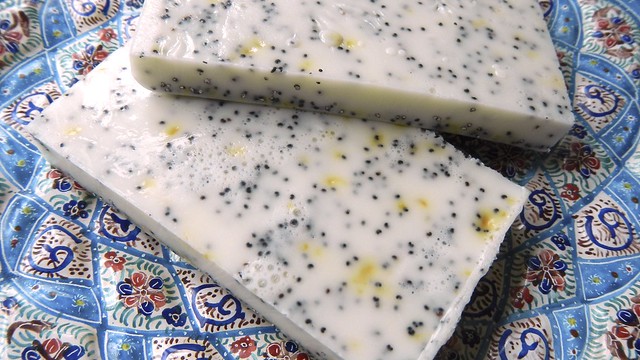
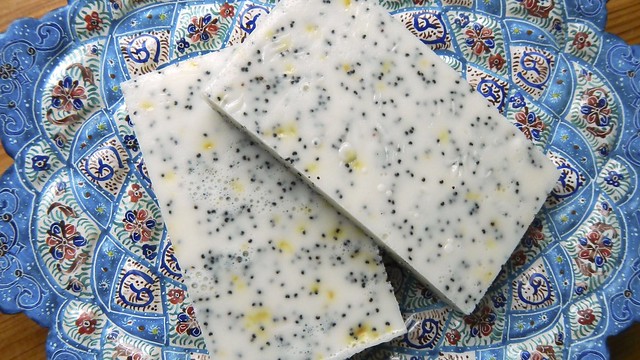
Pour the melted soap into your moulds to harden. You can use individual moulds if you like but mine was a big block rectangle – the soap is soft enough to cut afterwards so you can chop the soap bars down to size when they’re ready.

Grapefruit Poppyseed Soap 16

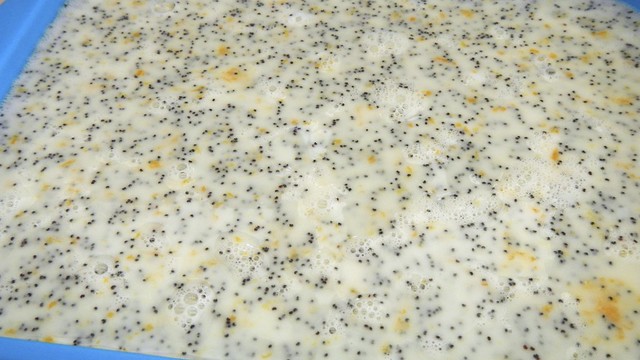
The soap will harden in a couple of hours, but if it’s hot or humid where you are I would recommend leaving it for a few more hours just to be on the safe side. When I tipped out my soap I did find I had quite a bit of settling with the poppy seeds, but that’s okay. It means my soap will have an exfoliating side to it. I suppose I could have stirred it a bit while it was cooling, but I was painting furniture, so …

Grapefruit Poppyseed Soap 17

I chopped it up into regular rectangles.

Grapefruit Poppyseed Soap 18

The rounded corner bits I re-melted and poured into the same mould but with the corners blocked off so they had sharper edges.

Grapefruit Poppyseed Soap 19

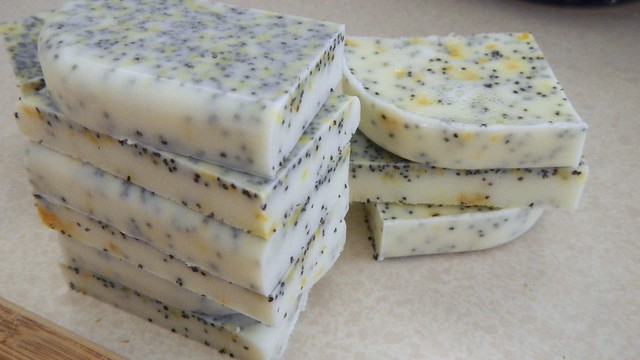
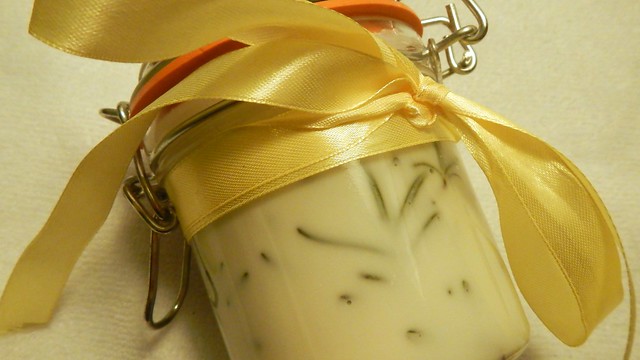
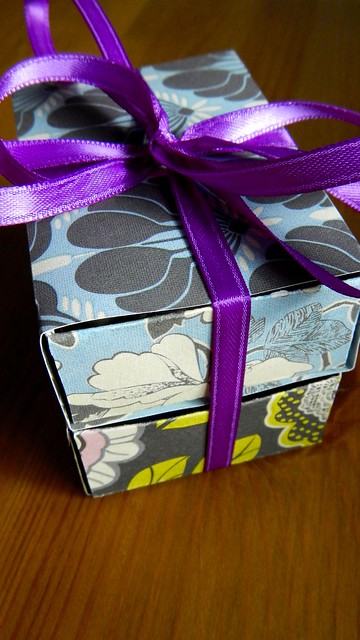
These make great gifts!

Grapefruit Poppyseed Soap 20

Quick Hostess Gift: Rosemary Candle

Happy birthday Dad!

Rosemary Lemon Candle 6

I just spent the weekend hanging around in Chel’s living room, eating her food and lolling about on her couch. So before I did that, I whipped up a cute little beauty of a wee giftie for her and I’m quite pleased with how it turned out.

Rosemary Lemon Candle 1

Start with a clean (and cute) jar. Glue a nice long candle wick to the bottom of it and stuff fresh woody herbs like rosemary around the sides.

Rosemary Lemon Candle 2

Grab a decent amount of soy wax, enough to fit your jar, and melt that sucker up.

Rosemary Lemon Candle 3

Add some essential oils. I added lemon along with the rosemary oil because it works well with rosemary and I love it.

Rosemary Lemon Candle 4

Pour your wax into your jar and poke the herbs down so they don’t float.

Rosemary Lemon Candle 5

Let solidify and garnish with a pretty ribbon. Gift away!

002

Jelly(fish) Mobile

Jelly Jelly Mobile 71

You guys. Guys. Seriously. This might be the best thing I’ve ever done. And I have to give it away. Fortunately I’m giving it to someone very, very special, so all the effort that went into it is definitely worth it. I can see that this sort of project could be used in all sorts of different situations: you could have it simply as a delightful window decoration; a baby’s mobile; as the modified shade on some LED chandeliers (like this one from IKEA); a room separator … anything. really. This one in particular is … a rainbow jellyfish.

Jelly Jelly Mobile 4

And you can make one too. All you need for a basic version are some gelatin plastic shapes (you may remember we made them earlier), some fishing line or monofilament line (I picked very fine line that will be nearly invisible) and a wire rack of some kind to hang stuff from (mine is round).

Jelly Jelly Mobile 1

Add-ons to this were some snap swivels I picked up from our local hunting and fishing store and that lovely beaded string I picked up for my miniature chandeliers that I made earlier this summer. I had some flexible wire that I saved from my wire baskets, and I found a set of bent needlenose pliers (and a pair of scissors) to be very helpful.

Jelly Jelly Mobile 2

I’ll show you what I did and then hopefully you can take this idea and improve on it and make it your own. Let’s begin, shall we?

First I took the flexible wire and I cut it into three equal pieces. I hooked each piece around the three little feet on my wire cooling rack and wound them up tight. Forgive the photos as my camera hates taking pictures of wire apparently. I looped each wire between two feet so I had three arcs coming up from the rack.

Jelly Jelly Mobile 7

Jelly Jelly Mobile 8

Jelly Jelly Mobile 9

Then I grabbed all three arcs and squished them together, twisting the wire so that all was left was a nice big hoop at the top, tapering to a straight line in the middle and then it spread out to the three little feet at the bottom, like a tripod.

Jelly Jelly Mobile 10

Then I took my beaded string and I wrapped it around all of those things, to look like bubbles in the sea.

Jelly Jelly Mobile 11

Jelly Jelly Mobile 13

Then I hung it from my ceiling fan, because I figured it was pretty firmly attached to my ceiling.

Jelly Jelly Mobile 14

I added some more beaded string, because I knew that once I started hanging the discs it would be harder to do. I put some loops at the top to distract from all the hardware that was going to be visible up there when I was done.

Jelly Jelly Mobile 20

Jelly Jelly Mobile 22

Jelly Jelly Mobile 23

Next I sorted all my discs into rainbow order.

Jelly Jelly Mobile 18

Then I grabbed my humble snap swivel. And some pliers.

Jelly Jelly Mobile 25

And started attaching them to the discs.

Jelly Jelly Mobile 26

And I did that a million times.

Jelly Jelly Mobile 27

Then I started tying the discs onto my fishing line. I had originally planned to just use one disc per line, so that the snap swivel would provide the weight needed to keep the line straight and the swivel would allow for spin but before I put it together I reconsidered this and decided to tie multiple discs to the same line. This will prevent clutter on the wire rack and make things easier to install. It will also leave more space around each disc for spinning. If you do this, make sure to tie the discs on at irregular intervals, because you want the colours to overlap in places and if you do it all regularly it will look like a very pretty geometric thing but not like a jellyfish. So I guess it depends on what you’re going for.

Jelly Jelly Mobile 29

My inner lines were quite long, and each time I moved out a few circles in the rack I made the lines shorter.

Jelly Jelly Mobile 35

This took several hours, and was quite fiddly because I also used snap swivels to attach the lines to the racks for durability, which necessitated a lot of reaching over my head to fasten a tiny piece of metal to another tiny piece of metal. It is quite a strain on the shoulders after a while. This is where I got to before I threw in the towel for the night.

Jelly Jelly Mobile 39

The next day I got up early in the hopes that I could catch the early morning sun filtering through the discs but alas it was overcast. I kept going, though.

Jelly Jelly Mobile 46

Almost there …

Jelly Jelly Mobile 56

And here is my beautiful magnum opus. The recipients are already in love with it and I still haven’t figured out how to transport it in my car yet. It makes a highly satisfying sound when the pieces click together, like a sink full of popping dish foam.

Jelly Jelly Mobile 60

Jam Session: Saskatoon Berries

Saskatoon Berry Jam 27You may remember that last year I surreptitiously liberated several service or Saskatoon berries from city property. This year it rained on Canada Day, our national holiday, and between thunderstorms I went out and hauled in about 4 litres of them. Everyone who passed through the kitchen during our Canada Day get-together asked where I’d gotten so many cranberries. I got a little testy explaining that they were service berries each time. I guess they DO kind of look like cranberries, but whatever. Saskatoon Berry Jam 2

I decided to make jam out of all my berries (and I actually ended up with so many berries that I had some leftover even after two batches of jam). I bought two dozen of the wee 175mL Bernardin canning jars and popped them into my canner to sterilize. I turned on the stove and brought those to a low boil.

Saskatoon Berry Jam 4I put the rings aside and put the discs in a heatproof bowl. Saskatoon Berry Jam 3

I heated a kettle and poured almost boiling water over the discs to let the rubber soften.

Saskatoon Berry Jam 9I gathered my other canning tools and had them handy. Always use non-metallic implements when making jam. Saskatoon Berry Jam 12

I get very irritated when I make jam because I always end up either burning myself on boiling sugar or burning myself with steam or hot water and everything ends up sticky and it’s already hot making jam in the summer so I decided to double my batch so I wouldn’t have to repeat the process in the same day. When you do this you have to make sure that your proportions are exact so you don’t mess up your ratios of acid to sugar to pectin.

Saskatoon Berry Jam 23The recipe I used is from the Bernardin website and advocates the use of the crystallized pectin, but the liquid stuff had been on sale so I used that instead. The process is a little different using liquid pectin in terms of when you add the sugar and stuff so the process below reflects that. Saskatoon Berry Jam 7

It’s a good idea to pre-cut the packages and sit them upright in a cup so they’re handy when you need them.

Saskatoon Berry Jam 15

Now that all your canning stuff is ready to go, you can get onto the actual jam component. Grab your berries, about 9 cups service berries (for a single batch, though in these photos that’s doubled), and plop them in a pan. I like to use my Lee Valley maslin pan because it’s kind of designed for jam and candy making and I love it. Plus it has a great handle that is very useful. Mush up your berries with a potato masher so they don’t explode on you later and so all the berry goodness gets out there early on. Saskatoon Berry Jam 6

Tip in as well 4 tablespoons lemon juice and 1/2 teaspoon butter or margarine (apparently this helps prevent it from foaming too much but I don’t think it helped in my case).

Saskatoon Berry Jam 8Start heating the berries on medium-high and give them a good stirring. Measure out 6 cups granulated sugar and add that in as well. Saskatoon Berry Jam 10

You’ll find the berries very quickly become way more liquidy.

Saskatoon Berry Jam 14You want the berries to be at a decent boil that doesn’t go away when you stir (watch out for flying berry juice that can burn you). Saskatoon Berry Jam 16

When you get to that state, grab your pectin and quickly add it to the jam and give it a quick but thorough stirring.

Saskatoon Berry Jam 17Let it come back to a rolling boil again and leave that for 1 minute before removing the jam from the heat. Don’t burn yourself! Saskatoon Berry Jam 18

Skim off any foam with a non-metallic utensil. The jam foam was always a huge treat for us as kids to eat with a spoon. I offered it to the Pie and he refused it. I was miffed about that.

Saskatoon Berry Jam 19Grab your jars from the canner and drain them. Saskatoon Berry Jam 20

Fill them with your jam, leaving about 1/4″ of headspace between the jam and where the lid will go. Use a wet towel to wipe off any jam on the edge of the jar where the disc will need to be tightly sealed.

Saskatoon Berry Jam 22Plop the disks onto the jam jars and add the rings and tighten to fingertip tightness. Return the sealed jars to your canner and bring the water back to a boil and leave it for the time required by your canner and the number of jars you have in there. Saskatoon Berry Jam 21

I set my jars on a cookie rack to cool completely. These are the first batch of my DIY holiday gifts this year.

Saskatoon Berry Jam 26And I bought some overflow jars for myself, knowing I didn’t have enough jars for the jam I made. And I quickly filled the overflow jars, and then a bunch of plastic containers I had lying around. SO MUCH JAM. Saskatoon Berry Jam 25

Strawberry Shortcake

20150614_184641

As you may have figured out by now, my birthday gifts to my friends and family members usually end up being the birthday cake of their choice – no cake too elaborate, no tower of layers too high. We have had a few memorable ones over the years, but this one sticks out because when I asked Atlas which cake she’d like for her birthday a couple weeks ago, she said she wanted a strawberry shortcake. And I realized that I had never actually ever made this classical and simple dessert delight. So I decided to go right back to the cake’s roots and make it as classic as possible, following this recipe from Fine Cooking.

Strawberry shortcake, in its traditional form, is not really a cake at all. It’s more of a sweet sandwich in a biscuit (“short” cake indicating that the cake isn’t really made with any leavening agents and ends up pretty dense and flat). This recipe also doesn’t really lend itself well to making ahead, as it must be assembled immediately before cooking, but it’s simple enough that this is not a huge deal.

Strawberry Shortcake 13

Let’s start with our dough, shall we? I did make the dough ahead of time, and kept it in the fridge, wrapped in plastic, until I was ready to bake it.  Grab 2 cups unbleached all-purpose flour, 1/3 cup plus 1 tablespoon granulated sugar, 2 1/2 teaspoons  baking powder,  and 1/4 teaspoon baking soda (leavening agents, I know, but give me a break). Whisk those around in a bowl until they’re nice and mixed.

Strawberry Shortcake 3

Now grab yourself 1/2 cup cold butter and cut it into little cubes. Tip the butter into the flour and use a pastry cutter to blend it all up until you have a mess of coarse-looking flour with pea-sized bits of butter throughout.

Strawberry Shortcake 4

In another bowl, mix together 1/4 cup whipping cream, 1/4 cup buttermilk (why oh why don’t they sell buttermilk in smaller cartons?), and 1 large egg.

Strawberry Shortcake 1

Make a well in the centre of your flour/butter mixture and pour in the wet ingredients.

Strawberry Shortcake 5

Stir that around with a fork until you get a shaggy dough.

Strawberry Shortcake 6

Then knead it a little bit with your hand until it all comes together.

Strawberry Shortcake 7

At this point I wrapped it tight in plastic wrap and shoved it in the fridge overnight, but if you want to bake it right away you totally can.

Strawberry Shortcake 8

Ideally the biscuits are made so that they’re still slightly warm when you assemble them with the strawberries, but you can make them up to four hours ahead of when you need them. Just make sure to col them completely and then shove them in an airtight container until they’re needed. So when you’re ready to bake,  preheat your oven to 425°F, line a baking sheet with parchment paper, and lightly flour a nice surface to work on. Grab your rolling pin as well.

Strawberry Shortcake 9

Roll the dough out into a rough rectangle about 3/4″ thick. The original recipe calls for making six biscuits from this dough but those seemed absolutely ginormous so I cut the rectangle into eight biscuits instead and even then they were pretty big.

Strawberry Shortcake 10

Lay the cut biscuits on your baking sheet and brush with a tablespoon of whipping cream and sprinkle with a bit more sugar.

Strawberry Shortcake 11

Bake those for 10-15 minutes, until golden brown.

Strawberry Shortcake 12

While they’re baking and cooling slightly, you can do your strawberries. You can prepare the strawberries a couple hours ahead of time as well, because they need to macerate (i.e. sit cut up in sugar) for at least 30 minutes. The recipe calls for 1lb fresh strawberries, but I probably used about 1 1/2lbs, and we all agreed later that I could have used the whole 2lbs that I bought. You can never have too many strawberries in strawberry shortcake.

Strawberry Shortcake 14

Anyway, wash and hull the berries, and then take about one third of them and use a potato masher or pastry cutter to mush them up in the bottom of a bowl.

Strawberry Shortcake 15

Strawberry Shortcake 16

Slice the rest of the berries and plop them in the bowl with the strawberry mush.

Strawberry Shortcake 17

Tip in 2 tablespoons granulated sugar and give that a stir. Leave that to sit at room temperature for at least 30 minutes. At this time you might as well also chuck a bowl for whipping cream into the freezer, along with whatever beater you are going to use. Cold utensils make for a better whipped cream.

Strawberry Shortcake 18

Now you’ve finished your lunch or dinner and it’s time to assemble the cakes. Grab your bowl and beaters out of the freezer and pour in 1 1/2 cups whipping cream. Add vanilla and sugar to taste. I don’t have any photos of this because the Pie did it while I was doing other things.

20150614_183555

Use a serrated knife to cut all the biscuits in half horizontally and set the bottoms of the biscuits on your serving plates.

20150614_184051

Spoon on a generous amount of strawberry goo. It’s okay if it spills off the edges – it looks all artistic that way.

20150614_184321

Add a generous dollop of whipped cream to the mix.

20150614_184425

Then plop the biscuit top on.

20150614_184503

Add another scoop of strawberry goo, followed by more whipped cream.

20150614_184644

Admire your handiwork.

20150614_184653

Then serve immediately! Yum!

Guinness Chocolate Cake

Guinness Chocolate Cake 44

It was Krystopf’s birthday last weekend, and, as I do for the fam-dambly, I take on the cake-making duties as a present – the birthday person gets to pick whatever one they want and I do my best. Krystopf picked a Guinness Chocolate Cake, which is a very grown-up sort of cake (he did turn 38 after all, so I *suppose* he’s a grown-up).

Guinness Chocolate Cake 6

For the cake:

Guinness Chocolate Cake 8

In a saucepan over medium heat, melt 1 cup butter.

Guinness Chocolate Cake 1

Then grab some Guinness.

Guinness Chocolate Cake 2

Pour 1 cup Guinness (or other stout if you prefer). Keep the rest for yourself. It’s never too early for drinking Guinness, especially if you’re baking.

Guinness Chocolate Cake 3

Pour the Guinness into the butter and stir it up.

Guinness Chocolate Cake 5

Allow that to come to a foamy simmer before removing it from the heat.

Guinness Chocolate Cake 7

Whisk in 3/4 cup unsweetened cocoa powder.

Guinness Chocolate Cake 9

Let that cool for a little bit.

Guinness Chocolate Cake 10

In the meantime, preheat your oven to 350°F and butter and flour a 9″ cake pan. This one is springform because I find with fancy cakes it just makes everything easier.

Guinness Chocolate Cake 4

Now, in a large bowl, whisk together 2 cups flour, 1 1/2 teaspoons baking soda, and 1 cup sugar.

Guinness Chocolate Cake 11

In a smaller bowl, beat up 2 large eggs and tip in 2/3 cup sour cream.

Guinness Chocolate Cake 13

Pour your no-longer-hot chocolate Guinness butter mix into the egg and sour cream mix and stir it up.

Guinness Chocolate Cake 14

Isn’t that pretty?

Guinness Chocolate Cake 15

My whisk has a much heavier handle than the whisk part and I always have to remember to take it out of the bowl when I let go of it. This ONE TIME, I forgot. That is chocolate all over my floor.

Guinness Chocolate Cake 16

Time for a new whisk.

Guinness Chocolate Cake 17

Now pour your chocolate goo into your flour and whisk until fully combined and smooth.

Guinness Chocolate Cake 18

Pour that in your cake pan and shove it in the oven. The recipe Atlas gave me said it would take 35-40 minutes, but I found it took closer to 60 minutes to cook all the way through.

Guinness Chocolate Cake 20

For the filling:

Guinness Chocolate Cake 22

While that’s on the go, you can make your filling. Slam 8oz bittersweet chocolate chips into a heatproof bowl and top with 2/3 cup heavy (whipping) cream and 2 tablespoons butter.

Guinness Chocolate Cake 23

Plop that over a pot of simmering water and melt, melt, melt!

Guinness Chocolate Cake 24

Set the finished ganâche aside to cool until it’s the consistency of pudding.

Guinness Chocolate Cake 25

For the frosting:

Now you can work on the frosting. In the bowl of an electric mixer, dump 1/2 cup room temperature butter and whip that until it’s pale and creamy.

Guinness Chocolate Cake 27

Slowly beat in 3-4 cups icing sugar.

Guinness Chocolate Cake 28

If it gets too stiff, add in 3-4 tablespoons Bailey’s or other Irish cream liqueur.

Guinness Chocolate Cake 29

I also found a little dribble of whipping cream got it to that perfectly creamy, spreadable consistency.

Guinness Chocolate Cake 31

Cake assembly:

By this time hopefully your cake is gorgeously baked and entirely cool. If not, then you’ll just have to wait a bit longer.

Guinness Chocolate Cake 26

When it’s ready, slice the cake in half horizontally.

Guinness Chocolate Cake 32

Take a small spoon to the bottom half and scrape away a bit of the inside.

Guinness Chocolate Cake 33

Use your fingers to press down, creating a shallow bowl.

Guinness Chocolate Cake 34

By now your ganâche should look like this.

Guinness Chocolate Cake 35

Pour that gorgeousness into the little bowl in your cake. I didn’t use all the ganâche here because otherwise I was afraid it would run over the sides when I put the top on. And it did that anyway, so in future I would use all the ganâche and purposely make it run down the sides.

Guinness Chocolate Cake 37

Put the top on the cake. You can see that the ganâche is already peeking out.

Guinness Chocolate Cake 39

Spread your icing thickly on top. It’s already pushing the ganâche out the sides so I decided to forego icing the sides altogether and just do the top.

Guinness Chocolate Cake 40

Then it kind of looks like a poured Guinness with a nice frothy head.

Guinness Chocolate Cake 41

The final touch was shaving a bit of bittersweet chocolate on top. Serve to your brother or your friends and family. They’ll all enjoy it!

Guinness Chocolate Cake 42

Don’t Fence Me In – Make Baskets Instead

Wire Baskets 12

This is another wee project I picked up to keep me from going stir crazy when I was sick last weekend. I’m behind the trend on this again (surprise, surprise), but I’ve wanted to make these custom wire baskets for ever. The Pie as a rule is against wire baskets because he always feels like he’s going to jam his fingers in the holes and hurt himself, but then again when it comes to me getting up to shenanigans when he’s out of town, I’m not really considering anyone’s happiness but my own. For these baskets all you need is some welded hardware mesh, usually used for fencing off gardens and things like that (this one has 1/2″ square holes), a wire cutter, and a pair of pliers. Or, if you’re lucky, you can get a two-in-one that’s both cutters and pliers. And you’ll need some patience and strong wrists. This is going to take a while.

Wire Baskets 1

I was warned that when I opened the package it might spring open and seriously harm me.

Wire Baskets 2

The only thing between me and certain death was this little bitty wire.

Wire Baskets 4

When I undid the wire, the whole roll spontaneously sprang open — about three inches. I was expecting a large-scale disruption as it fully unraveled and let me tell you, I was disappointed.

Wire Baskets 5

But I kept the wire. Because I always keep wire. And ribbons. And small pieces of string. Man am I a hoarder or what.

Wire Baskets 6

Then it was easy to clip out the basket frame in the size I wanted – the best part about this project is being able to make them exactly the size you need. Make sure to leave those nice sharp open prongs. You’ll need at least one set of those on each seam.

Wire Baskets 7

Folding it up was a little harder than I expected.

Wire Baskets 8

But all the edges matched which was good.

Wire Baskets 9

Folding the prongs down over the other side of the basket took some time. And I made a bunch of baskets on this day. So that took a lot of time.

Wire Baskets 10

I also folded down the tops for a smoother edge.

Wire Baskets 11

It’s just a wee basket.

Wire Baskets 13

But it can hold things like coasters.

Wire Baskets 14

Or my orchid.

Wire Baskets 16

Wire Baskets 17

I even made a round one, out of scraps. It was not as hard as I thought it would be.

Wire Baskets 18

I made a bunch more and even painted them for another project I started that weekend, so stay tuned for the results shortly!

Matchbox Gifts

Matchbox Gifts 14

My mother is absolutely obsessed with match boxes and the things you can put in them, so I kind of had a lightbulb moment when trying to figure out a present for her birthday last week (normally I handle the cake but this year my dad insisted that he had it under control). If you have a mother with a similar fetish, maybe this will work out for you for a nice Mother’s Day present.

Matchbox Gifts 8

For my mother’s wee giftie, it was just a silly little thing: I decided to give her MAGIC BEANS. But instead of magic beans it was actual bean seeds that she could plant shortly in the garden. And then we could eat the beans. I also gave her some rosemary seeds because I killed her rosemary tree while she was in Florida.

Matchbox Gifts 1

I love these little tiny glass jars you can get at the dollar store.

Matchbox Gifts 2

Matchbox Gifts 4

Matchbox Gifts 5

Don’t worry, I DID label all the little jars.

Matchbox Gifts 6

I decided to make a matchbox from scratch so I could ensure it was the right size to fit my beans. In order to do that I downloaded a template from the internet. I cut it out and used scrapbook paper (it’s a decently stiff cardstock) for my boxes.

Matchbox Gifts 7

I used a craft knife to get things exact, but it’s a pretty easy template to cut out.

Matchbox Gifts 9

Then a little bit of strategic adhesion with craft glue.

Matchbox Gifts 10

And the beans, they fit! They’re a little loose though.

Matchbox Gifts 11

So I padded the bottoms of the boxes with a bit of felt.

Matchbox Gifts 12
I broke this photo. It’s okay, though, because it wasn’t a very good one anyway.


Then tied up both boxes with pretty ribbon to give to my favourite mother!

Matchbox Gifts 13

Match boxes (even custom-made ones) are a great creative way to package up smaller gifts of jewelry or what-have-you. Keep that in mind the next time you’re doing some complex wrapping and you don’t have a perfect box to hand.

Have You Tried Milk Art?

Milk Art 13

This is a super popular project for folks with kids, because you can teach them all about surface tension and the properties of soap and fat and all that good science-y stuff in a nice controlled environment, with very pretty results.

Milk Art 15

The supplies are simple: a large shallow tray (a rimmed baking sheet will do), watercolour paper (sized to fit in your tray), cotton swabs, liquid food colouring, a few drops liquid dish soap, and some milk. You can use almond milk or rice milk or homogenized milk or cream or whatever — you just need some milk with a decent fat content. The results will apparently differ depending on the milk you use (almond milk is supposedly the best), but I only had regular old 2% on hand so I can’t really speak to that.

Milk Art 1

On a level surface, pour milk into your tray so that the whole bottom is just covered.

Milk Art 5

Now start dotting the surface of the milk with food colouring. Go with whatever floats your boat.

Milk Art 7

Take a cotton swab and dip it in your dish soap.

Milk Art 8

Gently touch the swab to your milk surface. POW! Watch that science happen.

Milk Art 9

This is that same spot a few seconds later.

Milk Art 11

Touch the swab all over to make the  colours mix or drag it across the surface to make a trail.

Milk Art 12

Now lay your paper down flat on the surface of the milk, then slide it off.

Milk Art 14

Let it drip a bit and lay it or hang it somewhere to dry.

Milk Art 16

I liked how the colours kept changing as I put in more paper, so I didn’t replace my milk, but you can if you like.

Milk Art 20

After a while I had nine full sheets and I was quite pleased with the results.

Milk Art 22

You can do whatever you want with these sheets: cut them into shapes and frame them, use them as stationery or greeting cards … whatever you want.

Milk Art 23

In my case, I ironed them flat using the high steam setting on my iron.

Milk Art 27

You can tell that I let this one dry on a sheet of newspaper can’t you?

Milk Art 28

Then I played around with the order of them a bit.

Milk Art 29

And used Blu-Tack to put them up on the wall in our bedroom.

Milk Art 31

The colours I used complement the other quick wall art I made a few weeks ago so I am very happy with how they turned out – though I would like to try it with almond milk sometime.

Milk Art 36

Peppermint Patties

Peppermint Patties 14

This was yet another “baking” episode Cait and I got up to – except it involved no baking whatsoever. If you’re not a fan of peppermint patties, then you won’t like this. If you ARE a fan, well, then, maybe you’ll like these, which we made from a mish-mash of these two recipes. Just a warning: if you make these puppies around Christmas time, you may have to search a bit to find peppermint extract in the grocery store. Cait and the Pie and I went to three separate stores before we nabbed the very last one hidden at the back of a shelf. If you’re making these for your Valentine tomorrow you may have some better luck!

Peppermint Patties 11

Now, you’re basically making a peppermint-flavoured fondant as the centre of these babies, so let’s start with that.

Peppermint Patties 3

In the bowl of your electric mixer, dump in 2 1/4 cup icing sugar, 2 tablespoons softened butter, 2 teaspoons peppermint extract, and 2 tablespoons cream.

Peppermint Patties 1

Start beating it on low speed until incorporated (so you don’t get a face full of icing sugar), then increase the speed and beat until you have a solid, smooth mass.

Peppermint Patties 2

Now take your fondant and roll it into a long snake between 1″ and 1 1/2″ in diameter (any bigger and the patties will fall apart as you manipulate them).

Peppermint Patties 4

Wrap the snake in waxed paper and chill it for about 45 minutes or so. If you shove the snake into an old cardboard tube from a paper towel then it won’t deform while in the fridge.

Peppermint Patties 5

In the meantime, plop 12oz chocolate (dark is probably best, but it’s your choice) into a double boiler with 6 teaspoons shortening and let that melt. The shortening is what will give the chocolate a shiny, harder exterior once it hardens again. The magic ratio for shortening to chocolate, if you’d like to use it in other recipes, is 1/2 teaspoon shortening for every 1oz chocolate. And as it happens with every chocolate-dipping recipe, depending on the size of your patties and how quickly you get this done, you may need to melt more chocolate.

Peppermint Patties 8

Anyway, let the chocolate cool to almost room temperature (because otherwise you’ll melt the patties when you dip them and that would be bad). Take your snake out of the fridge and slice it into little disks about 1/4″ thick. To avoid the patties warming up and getting floopy, I put half of them back in the fridge.

Peppermint Patties 9

Using chopsticks or a fork, dip the cold patty into the cool chocolate and flip to coat. Lift it out of the chocolate and let it drip for a few seconds. Set the patty on a sheet of waxed paper to harden completely.

Peppermint Patties 10

The demented ones are the ones that Cait did. I take no responsibility for them.

Peppermint Patties 12

Store in an airtight container for up to two weeks. Enjoy!

Peppermint Patties 13