Snap Happy!

Didja miss me? A whole twelve days without something new from Ali Does It? Shenanigans! We are starting to find ourselves in a routine with now month-old LongJohn (for the most part) so hopefully I’ll be able to get back to some kind of regular posting schedule in the near(ish) future.

Anyway, here’s something for you now. I recently found myself looking for a birthday gift for a mom friend of mine, who takes a good number of pictures of her kid on her phone. As a new parent too, I find myself doing the same thing – my phone is usually to hand when my actual camera is not (if you check out my instagram you can see what I mean …).

20160704_090258

So on my searches on the internet I found a company called Photojojo, and their specialty is photography. And they had these nifty kits with camera lenses you could attach to your phone! So I got one for her, and one for myself. Naturally.

Snap Happy 3

Each lens comes with several little adhesive rings so you can attach them to your phone, your partner’s phone, your tablet … whatever. The ring clips easily to a magnet set into the lens itself. No fuss, no muss.

Snap Happy 4

Simply stick the ring to your phone (that blue plastic comes off) and let it sit for half an hour.

Snap Happy 6

I got all the bells and whistles in my kit.

Snap Happy 7

Including this wee pouch that holds all the lenses!

Snap Happy 8

Here’s the ultra fisheye lens securely sitting on my phone …

Snap Happy 10

And its effect.

Snap Happy 11

You have to zoom in a bit so that the lens itself doesn’t show up in the shot:

Snap Happy 12

I’m especially interested in the wee macro lens that also came with the kit. Most of the stuff I do here on Ali Does It is in macro so I think I can have some serious fun with it. Stay tuned!

Snap Happy 1

Grapefruit Poppyseed Soap

Grapefruit Poppyseed Soap 24

After my disastrous start with melt-and-pour soap, I’ve been leery of trying it again. It was way more of an accomplishment for me to learn how to make soap entirely from scratch, though nobody will let me near the chemicals these days. And with melt-and-pour soaps, you already know the chemical reaction is going to work, so newbies like me have much more freedom to experiment with the add-in ingredients. And this mixture from A Beautiful Mess has been haunting me for ages with its deliciousness. I had to do it.

Grapefruit Poppyseed Soap 23

The simplicity of the ingredients is a definite bonus, and the fact that it’s so quick and easy to put together and then you can ignore it for a while is also a plus. I made this while painting two sets of lawn furniture so obviously my attention was divided. All you need is 1 grapefruit, 3 tablespoons poppy seeds, peppermint essential oil, grapefruit essential oil, and 2lb goat’s milk melt-and-pour soap base (which you can buy in craft stores and from Amazon). You also need something to pour your soap into to harden – I used the silicone trays I bought for making my jelly fish mobile.

Grapefruit Poppyseed Soap 1

Grab your soap base. Apparently you can melt it in the container provided in your microwave but I decided that was unwise.

Grapefruit Poppyseed Soap 2

Chop it into cubes.

Grapefruit Poppyseed Soap 3

Plop those cubes in the top of a double-boiler and let that sucker melt for a while.

Grapefruit Poppyseed Soap 4

You’ll find a skin develops as it melts. Just stir that back in.

Grapefruit Poppyseed Soap 7

While that’s a-meltin’, go ahead and zest the entire grapefruit. Mmm, lovely.

Grapefruit Poppyseed Soap 9

Then eat your grapefruit. It’s good for you.

Grapefruit Poppyseed Soap 6

Gather your poppy seeds as well, about 3 tablespoons.

Grapefruit Poppyseed Soap 11

Once the soap has fully melted, remove it from the heat and tip in your grapefruit zest and poppy seeds. Shake in about 12 drops peppermint essential oil, and about 30 drops grapefruit essential oil, and stir that in quite well.

Grapefruit Poppyseed Soap 14

Pour the melted soap into your moulds to harden. You can use individual moulds if you like but mine was a big block rectangle – the soap is soft enough to cut afterwards so you can chop the soap bars down to size when they’re ready.

Grapefruit Poppyseed Soap 16

The soap will harden in a couple of hours, but if it’s hot or humid where you are I would recommend leaving it for a few more hours just to be on the safe side. When I tipped out my soap I did find I had quite a bit of settling with the poppy seeds, but that’s okay. It means my soap will have an exfoliating side to it. I suppose I could have stirred it a bit while it was cooling, but I was painting furniture, so …

Grapefruit Poppyseed Soap 17

I chopped it up into regular rectangles.

Grapefruit Poppyseed Soap 18

The rounded corner bits I re-melted and poured into the same mould but with the corners blocked off so they had sharper edges.

Grapefruit Poppyseed Soap 19

These make great gifts!

Grapefruit Poppyseed Soap 20

Mocha Latte Fudge

Mocha Latte Fudge 19

This recipe from Real Simple is not your typical fudge, but it’s relatively easy to concoct and would make a nice gift to your favourite coffeephile. You don’t even need a candy thermometer to make it, which is handy for those of you who aren’t familiar with making candy.

Mocha Latte Fudge 21

Do keep a close eye on it, however, as I burnt the bottom of one of my pots quite badly the first time I made it.

Mocha Latte Fudge 10

Start by lining an 8″ square pan with parchment paper and spraying it with cooking spray. I had neither a square pan nor cooking spray at the time so I used this 6″ x 10″ pan and I buttered it instead. You do you.

Mocha Latte Fudge 1

Set that aside for a spell and grab a large pot. Dump in 1/2-lb butter, 2 cups brown sugar, and 1 14-oz can sweetened condensed milk.

Mocha Latte Fudge 2

Stir that frequently over medium-low heat until it’s all melted and starts to boil.

Mocha Latte Fudge 4

Then tip in 1/2 cup chocolate chips and 1 tablespoon espresso powder. Once that’s mixed in, stop stirring and leave the whole thing to boil (but not burn!) for 8 minutes.

Mocha Latte Fudge 6

Remove the pan from the heat and stir in 1 tablespoon vanilla. Remember, it’s gonna fizz.

Mocha Latte Fudge 9

Let the mixture cool for 10 minutes; then grab an electric mixer and beat the crap out of it for about 5 minutes, until it looks and feels like almost-melted peanut butter.

Mocha Latte Fudge 14

Spill that into the prepared pan and smooth it down. Shove it in the fridge for 4 hours, until it’s all firm. Run a knife around the outside edge and use the parchment to pull the whole thing out of the pan. Cut it into cubes.

Mocha Latte Fudge 18

EAT. (Store leftovers sealed in the fridge. PAH. Like there will be leftovers.)

Mocha Latte Fudge 22

Mags and her Merry Maids

Happy Thanksgiving!

Mags and the Dutchman are getting married in a little over a MONTH and I couldn’t be happier. Yesterday her bridesmaids held a small shower for her and this is what I gave her (and them) as a giftie. I put one of these together for my own wedding and for every wedding I’ve ever been a bridesmaid in, and I have used everything in it in lifesaving, wedding-emergency kinds of situations.

Mags and her Merry Maids 8

We start with a large tote, which can be coordinated to match the bridesmaids’ dresses. This one is reversible. I have a similar one that Cait bought me a few years ago and I love it so I know it will come in handy later. The tote is big enough to hold sweaters or scarves, cameras, phones, makeup, flip flops … all the stuff you need to bring from place to place but you don’t want the bride to have to deal with. Everything the bridal party needs is in one bag so nothing gets left behind when they move from place to place.

Mags and her Merry Maids 1

Then we put stuff in it that we know will come in handy on the big day. There’s always first aid to consider, so we’ve got bandaids, blister relief (because everyone wears dumb shoes to weddings – except me), Tums for an upset stomach, Gravol for a queasy stomach, and Advil for a sore noggin.

Mags and her Merry Maids 4

Last minute hair repair: elastics, bobby pins, and hair spray. And you can use those for all sorts of things. Elastics can replace broken bustle strings and hold together boutonnieres. Bobby pins can hold hems and ties in place. And hair spray can keep that run in your stocking from getting any bigger.

Mags and her Merry Maids 2

Same with clothing repair: lint roller, safety pins, Tide To Go, and hockey tape, the world’s greatest adhesive. At Atlas’s wedding, when her petticoat turned out to be way too long, I rolled it up from the waistband and taped it in place and it stayed all night. Not shown as well is a little tiny set of sewing needles with thread matching the colour of all the dresses. Hockey tape is definitely the go-to, though. I’ve even used it in place of double-sided tape to keep certain parts of dresses in their proper place.

Mags and her Merry Maids 3

For other touchups we have a compact mirror, gum, lotion, lip balm, Purel, tissues, and makeup wipes (for smudges). The gum and the lip balm are handy for those stolen kisses behind the scenes, and the tissues and wipes for those tender moments when you end up with mascara all down your face. And the Purel is great for after those cute pictures with the family’s younger set, when you need to de-stickify yourself, STAT.

Mags and her Merry Maids 5

And of course some chocolate!

Mags and her Merry Maids 6

Some of the smaller stuff went into a smaller bag, and the Purel handily attached to the handle of the tote.

Mags and her Merry Maids 7

What other items have you found super handy in these sorts of Big Day situations?

Jelly(fish) Mobile

Jelly Jelly Mobile 71

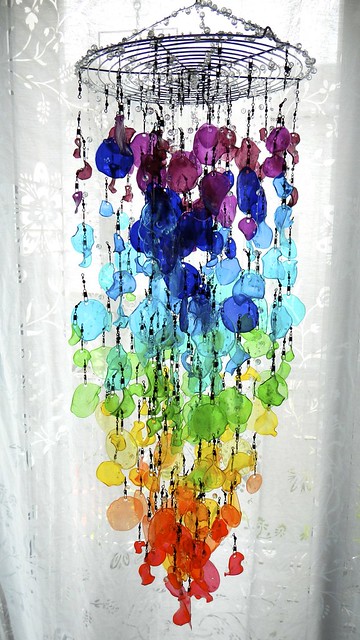
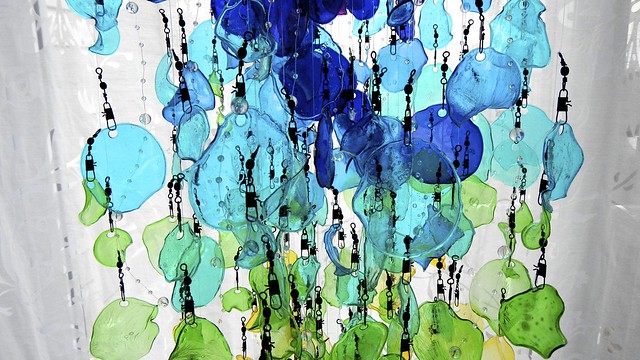
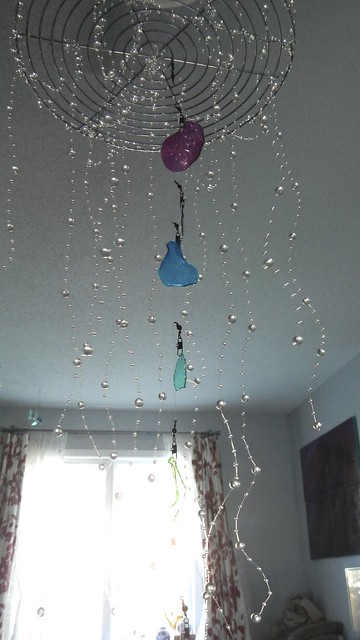
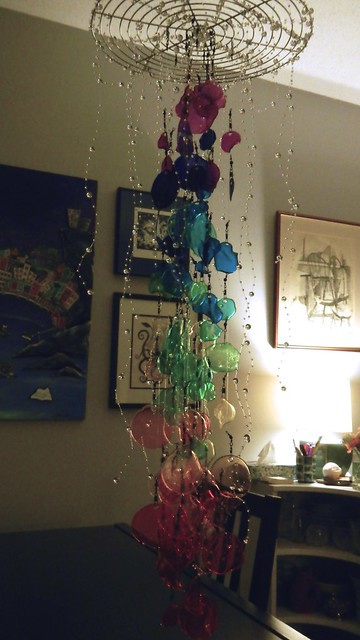
You guys. Guys. Seriously. This might be the best thing I’ve ever done. And I have to give it away. Fortunately I’m giving it to someone very, very special, so all the effort that went into it is definitely worth it. I can see that this sort of project could be used in all sorts of different situations: you could have it simply as a delightful window decoration; a baby’s mobile; as the modified shade on some LED chandeliers (like this one from IKEA); a room separator … anything. really. This one in particular is … a rainbow jellyfish.

Jelly Jelly Mobile 4

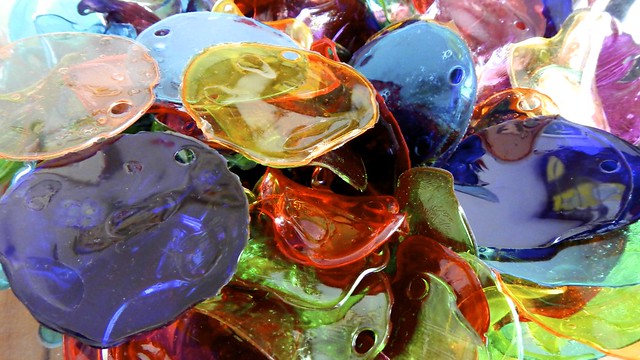
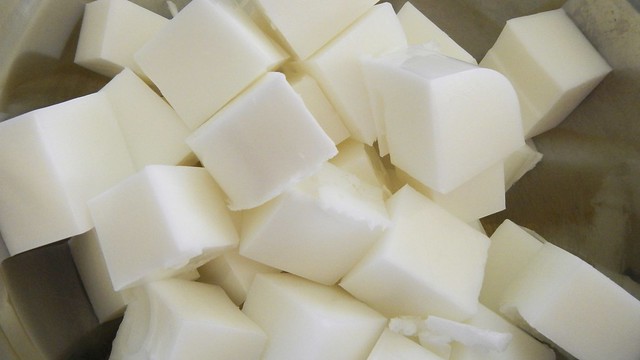
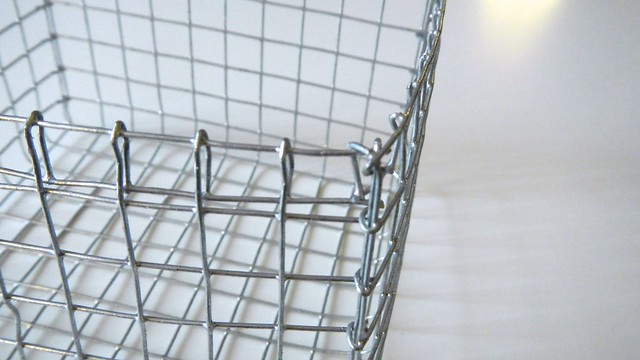
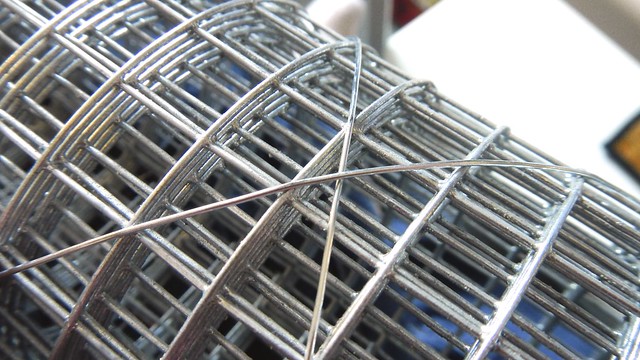
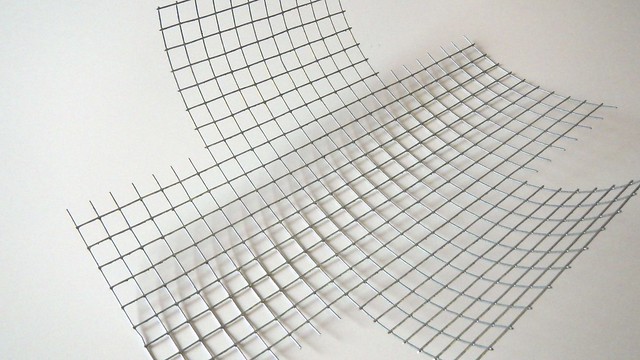
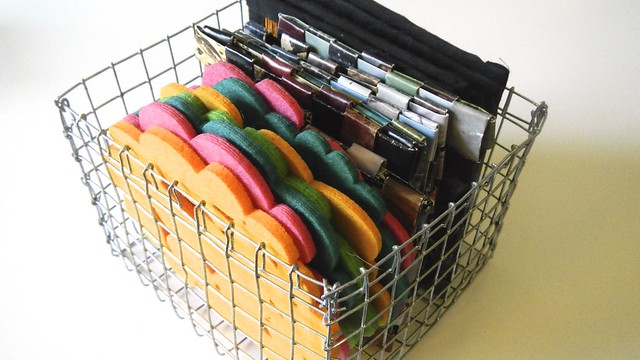
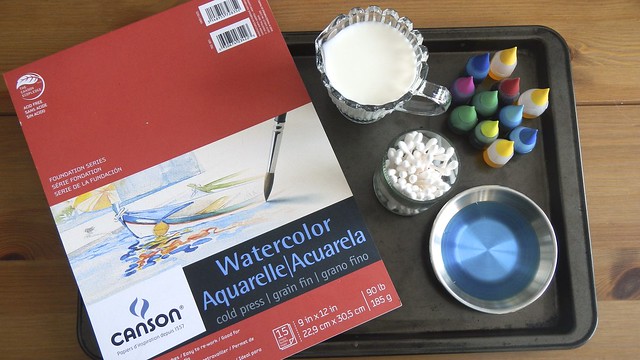
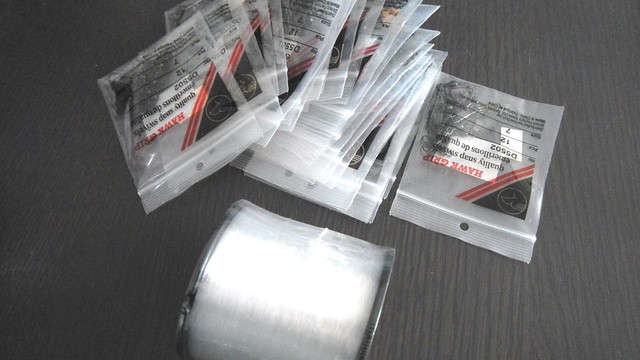
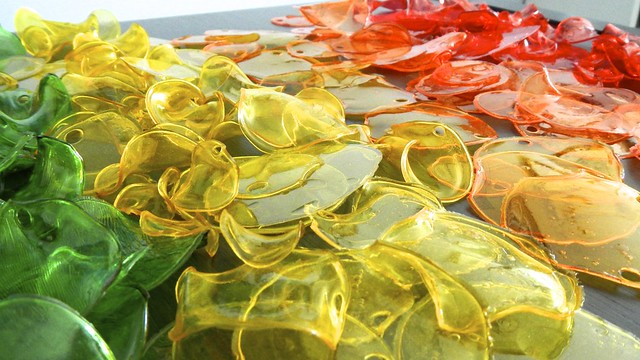
And you can make one too. All you need for a basic version are some gelatin plastic shapes (you may remember we made them earlier), some fishing line or monofilament line (I picked very fine line that will be nearly invisible) and a wire rack of some kind to hang stuff from (mine is round).

Jelly Jelly Mobile 1

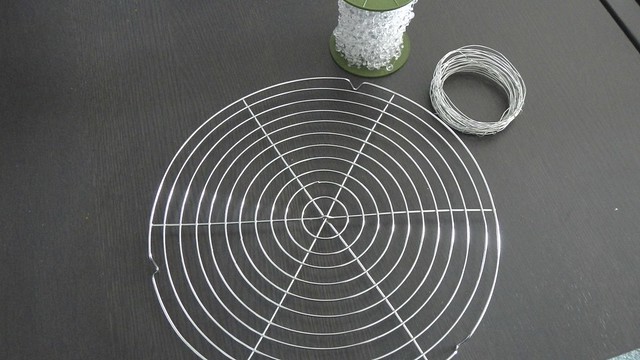
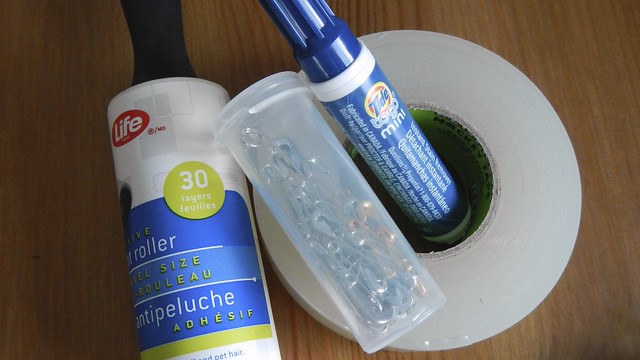
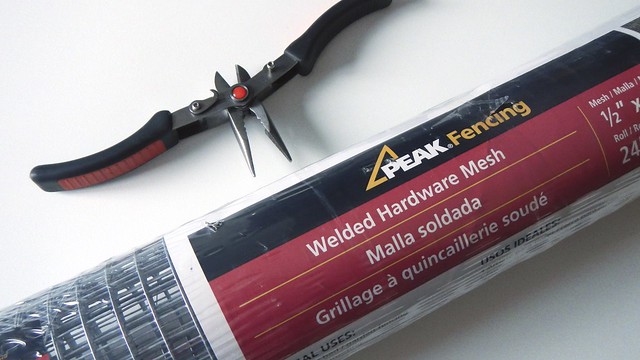
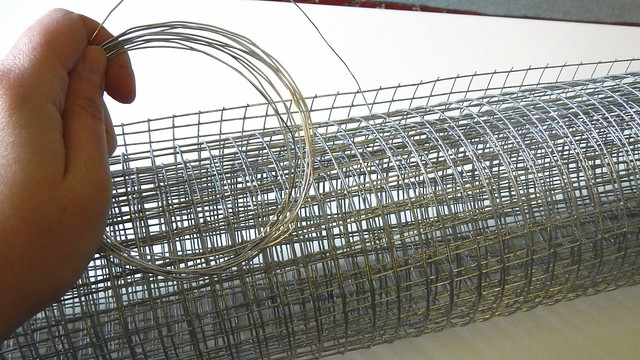
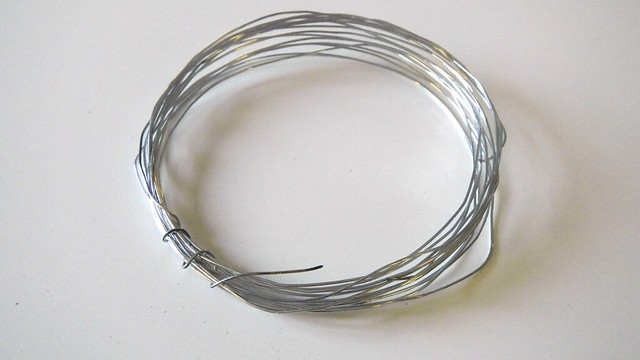
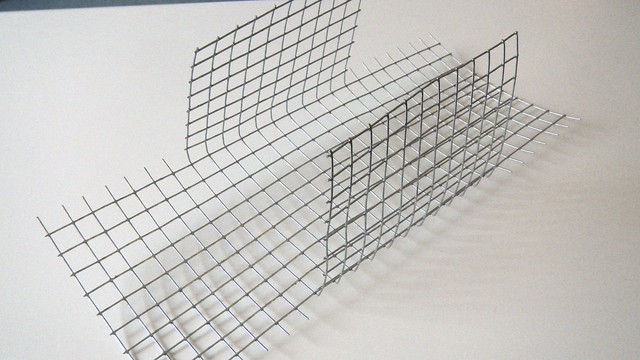
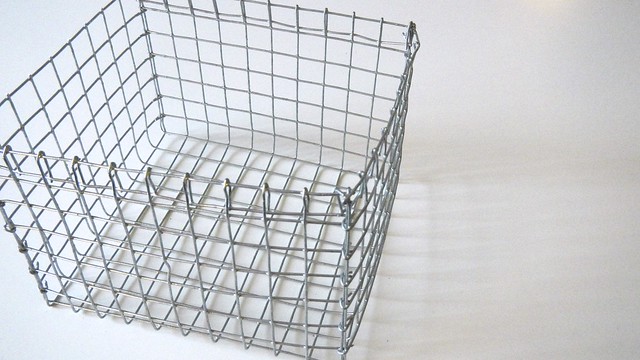
Add-ons to this were some snap swivels I picked up from our local hunting and fishing store and that lovely beaded string I picked up for my miniature chandeliers that I made earlier this summer. I had some flexible wire that I saved from my wire baskets, and I found a set of bent needlenose pliers (and a pair of scissors) to be very helpful.

Jelly Jelly Mobile 2

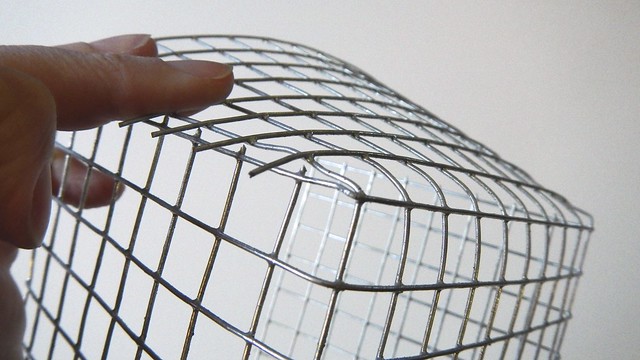
I’ll show you what I did and then hopefully you can take this idea and improve on it and make it your own. Let’s begin, shall we?

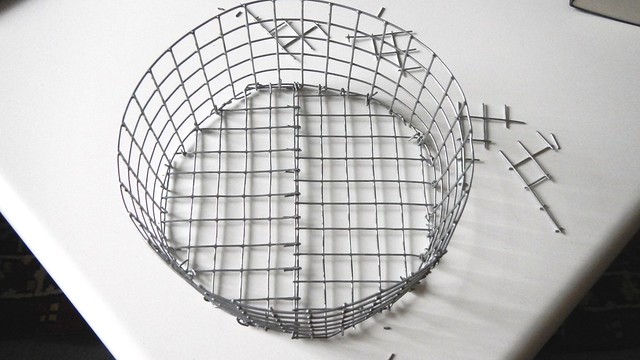
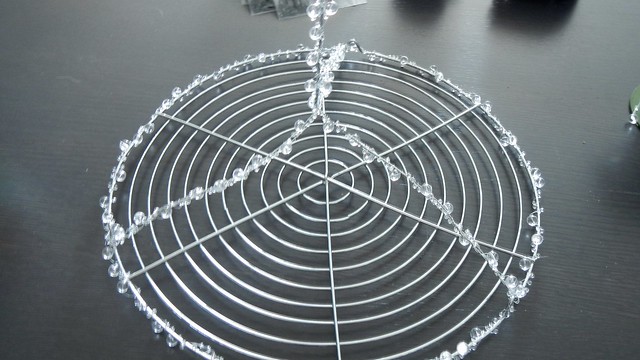
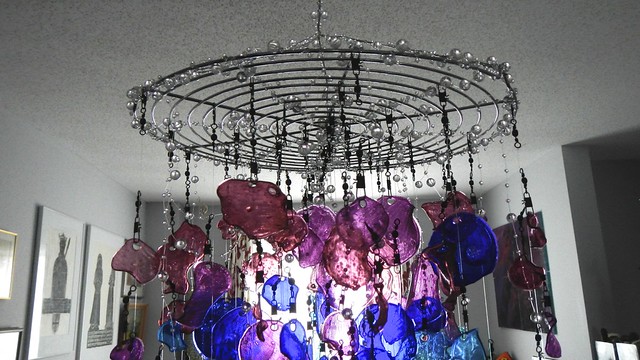
First I took the flexible wire and I cut it into three equal pieces. I hooked each piece around the three little feet on my wire cooling rack and wound them up tight. Forgive the photos as my camera hates taking pictures of wire apparently. I looped each wire between two feet so I had three arcs coming up from the rack.

Jelly Jelly Mobile 7

Jelly Jelly Mobile 8

Jelly Jelly Mobile 9

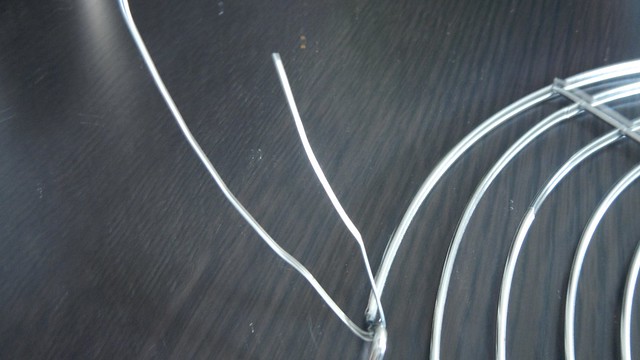
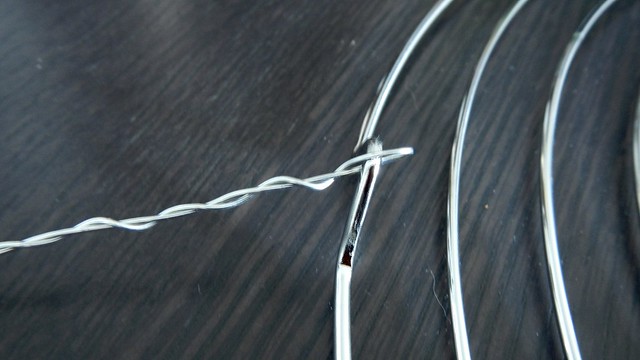
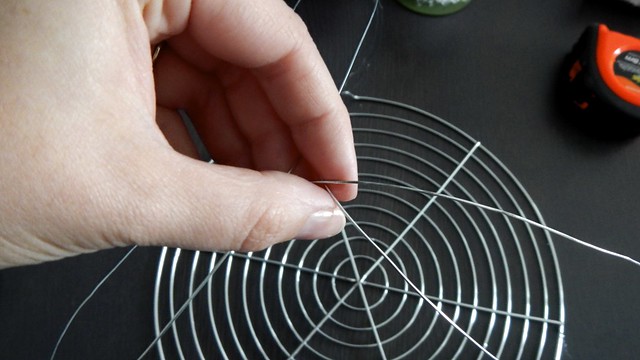
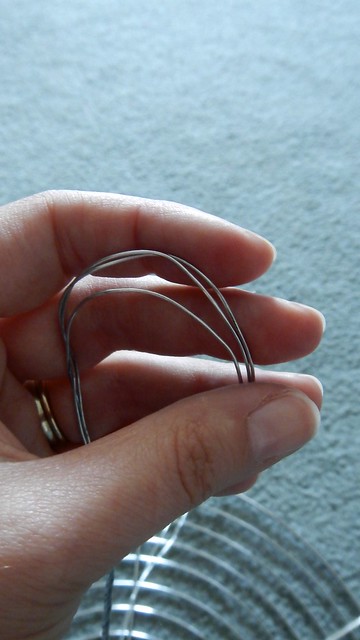
Then I grabbed all three arcs and squished them together, twisting the wire so that all was left was a nice big hoop at the top, tapering to a straight line in the middle and then it spread out to the three little feet at the bottom, like a tripod.

Jelly Jelly Mobile 10

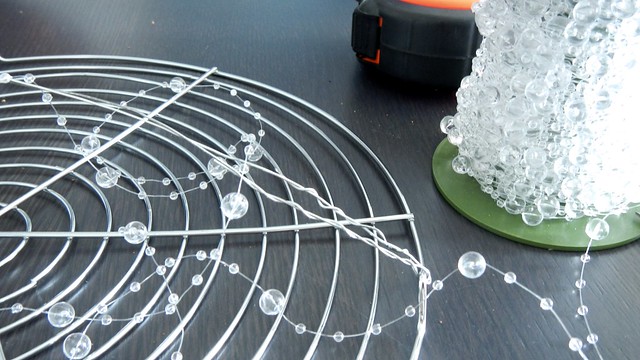
Then I took my beaded string and I wrapped it around all of those things, to look like bubbles in the sea.

Jelly Jelly Mobile 11

Jelly Jelly Mobile 13

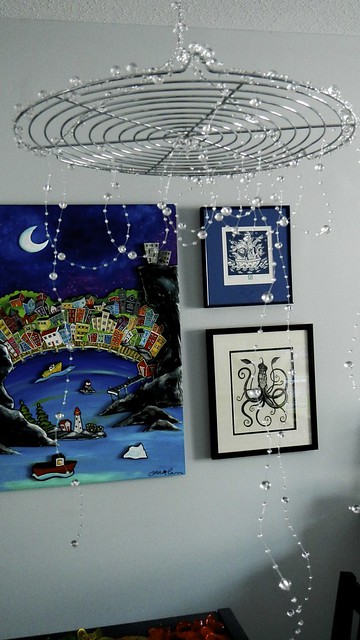
Then I hung it from my ceiling fan, because I figured it was pretty firmly attached to my ceiling.

Jelly Jelly Mobile 14

I added some more beaded string, because I knew that once I started hanging the discs it would be harder to do. I put some loops at the top to distract from all the hardware that was going to be visible up there when I was done.

Jelly Jelly Mobile 20

Jelly Jelly Mobile 22

Jelly Jelly Mobile 23

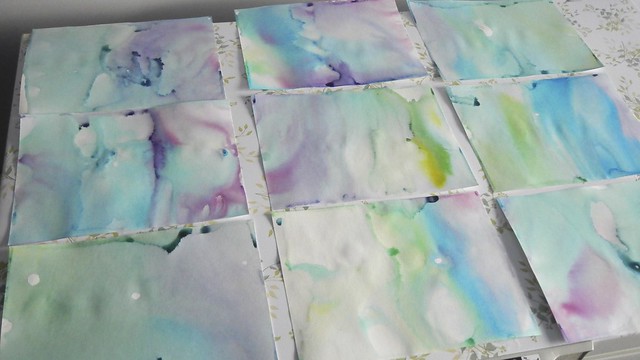
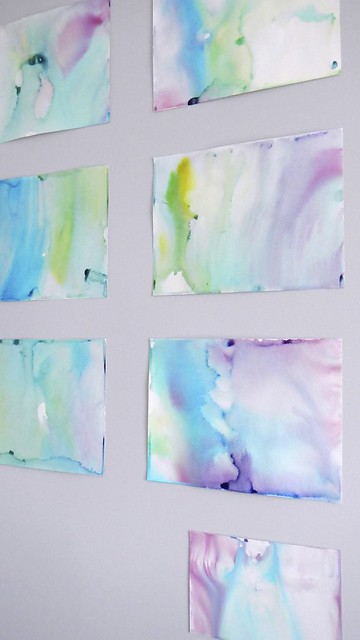
Next I sorted all my discs into rainbow order.

Jelly Jelly Mobile 18

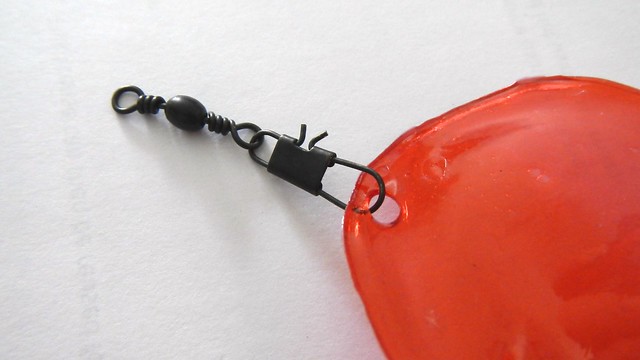
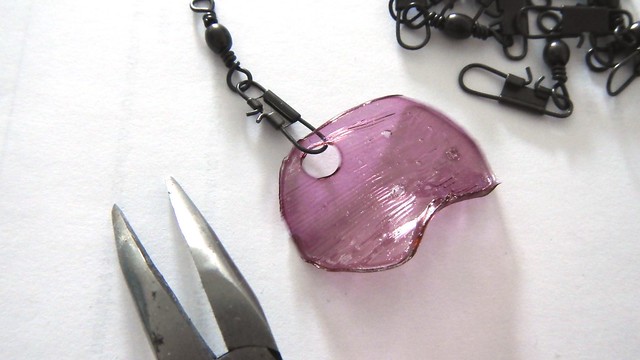
Then I grabbed my humble snap swivel. And some pliers.

Jelly Jelly Mobile 25

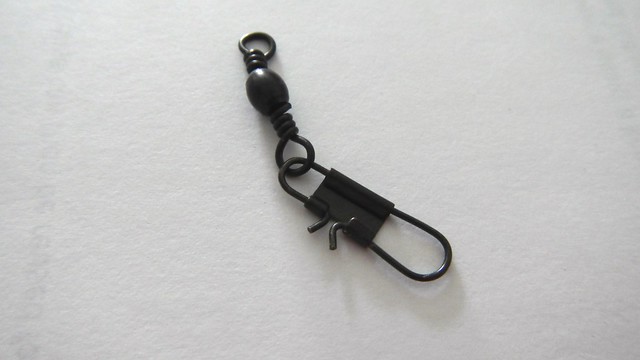
And started attaching them to the discs.

Jelly Jelly Mobile 26

And I did that a million times.

Jelly Jelly Mobile 27

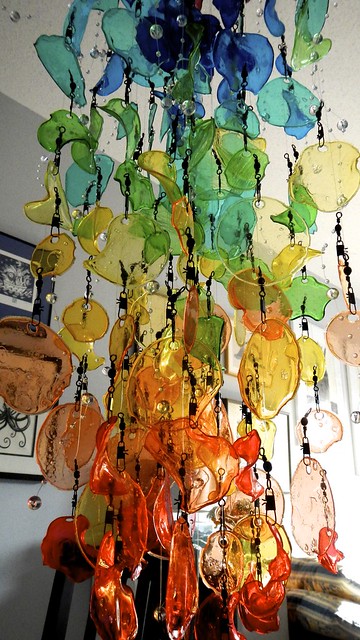
Then I started tying the discs onto my fishing line. I had originally planned to just use one disc per line, so that the snap swivel would provide the weight needed to keep the line straight and the swivel would allow for spin but before I put it together I reconsidered this and decided to tie multiple discs to the same line. This will prevent clutter on the wire rack and make things easier to install. It will also leave more space around each disc for spinning. If you do this, make sure to tie the discs on at irregular intervals, because you want the colours to overlap in places and if you do it all regularly it will look like a very pretty geometric thing but not like a jellyfish. So I guess it depends on what you’re going for.

Jelly Jelly Mobile 29

My inner lines were quite long, and each time I moved out a few circles in the rack I made the lines shorter.

Jelly Jelly Mobile 35

This took several hours, and was quite fiddly because I also used snap swivels to attach the lines to the racks for durability, which necessitated a lot of reaching over my head to fasten a tiny piece of metal to another tiny piece of metal. It is quite a strain on the shoulders after a while. This is where I got to before I threw in the towel for the night.

Jelly Jelly Mobile 39

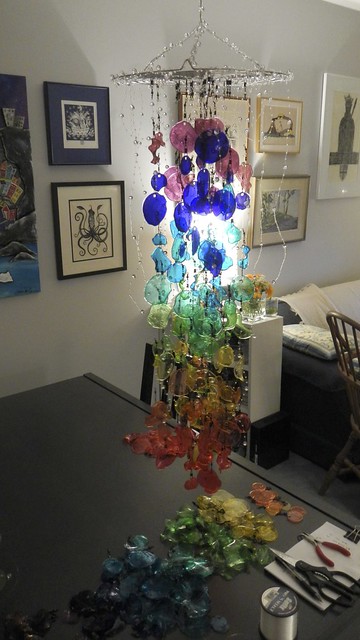
The next day I got up early in the hopes that I could catch the early morning sun filtering through the discs but alas it was overcast. I kept going, though.

Jelly Jelly Mobile 46

Almost there …

Jelly Jelly Mobile 56

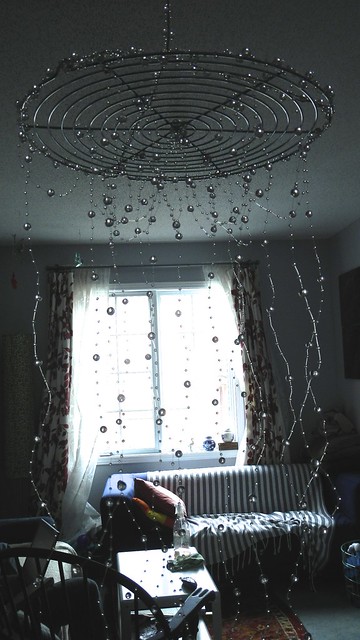
And here is my beautiful magnum opus. The recipients are already in love with it and I still haven’t figured out how to transport it in my car yet. It makes a highly satisfying sound when the pieces click together, like a sink full of popping dish foam.

Jelly Jelly Mobile 60

Don’t Fence Me In – Make Baskets Instead

Wire Baskets 12

This is another wee project I picked up to keep me from going stir crazy when I was sick last weekend. I’m behind the trend on this again (surprise, surprise), but I’ve wanted to make these custom wire baskets for ever. The Pie as a rule is against wire baskets because he always feels like he’s going to jam his fingers in the holes and hurt himself, but then again when it comes to me getting up to shenanigans when he’s out of town, I’m not really considering anyone’s happiness but my own. For these baskets all you need is some welded hardware mesh, usually used for fencing off gardens and things like that (this one has 1/2″ square holes), a wire cutter, and a pair of pliers. Or, if you’re lucky, you can get a two-in-one that’s both cutters and pliers. And you’ll need some patience and strong wrists. This is going to take a while.

Wire Baskets 1

I was warned that when I opened the package it might spring open and seriously harm me.

Wire Baskets 2

The only thing between me and certain death was this little bitty wire.

Wire Baskets 4

When I undid the wire, the whole roll spontaneously sprang open — about three inches. I was expecting a large-scale disruption as it fully unraveled and let me tell you, I was disappointed.

Wire Baskets 5

But I kept the wire. Because I always keep wire. And ribbons. And small pieces of string. Man am I a hoarder or what.

Wire Baskets 6

Then it was easy to clip out the basket frame in the size I wanted – the best part about this project is being able to make them exactly the size you need. Make sure to leave those nice sharp open prongs. You’ll need at least one set of those on each seam.

Wire Baskets 7

Folding it up was a little harder than I expected.

Wire Baskets 8

But all the edges matched which was good.

Wire Baskets 9

Folding the prongs down over the other side of the basket took some time. And I made a bunch of baskets on this day. So that took a lot of time.

Wire Baskets 10

I also folded down the tops for a smoother edge.

Wire Baskets 11

It’s just a wee basket.

Wire Baskets 13

But it can hold things like coasters.

Wire Baskets 14

Or my orchid.

Wire Baskets 16

Wire Baskets 17

I even made a round one, out of scraps. It was not as hard as I thought it would be.

Wire Baskets 18

I made a bunch more and even painted them for another project I started that weekend, so stay tuned for the results shortly!

Matchbox Gifts

Matchbox Gifts 14

My mother is absolutely obsessed with match boxes and the things you can put in them, so I kind of had a lightbulb moment when trying to figure out a present for her birthday last week (normally I handle the cake but this year my dad insisted that he had it under control). If you have a mother with a similar fetish, maybe this will work out for you for a nice Mother’s Day present.

Matchbox Gifts 8

For my mother’s wee giftie, it was just a silly little thing: I decided to give her MAGIC BEANS. But instead of magic beans it was actual bean seeds that she could plant shortly in the garden. And then we could eat the beans. I also gave her some rosemary seeds because I killed her rosemary tree while she was in Florida.

Matchbox Gifts 1

I love these little tiny glass jars you can get at the dollar store.

Matchbox Gifts 2

Matchbox Gifts 4

Matchbox Gifts 5

Don’t worry, I DID label all the little jars.

Matchbox Gifts 6

I decided to make a matchbox from scratch so I could ensure it was the right size to fit my beans. In order to do that I downloaded a template from the internet. I cut it out and used scrapbook paper (it’s a decently stiff cardstock) for my boxes.

Matchbox Gifts 7

I used a craft knife to get things exact, but it’s a pretty easy template to cut out.

Matchbox Gifts 9

Then a little bit of strategic adhesion with craft glue.

Matchbox Gifts 10

And the beans, they fit! They’re a little loose though.

Matchbox Gifts 11

So I padded the bottoms of the boxes with a bit of felt.

Matchbox Gifts 12
I broke this photo. It’s okay, though, because it wasn’t a very good one anyway.


Then tied up both boxes with pretty ribbon to give to my favourite mother!

Matchbox Gifts 13

Match boxes (even custom-made ones) are a great creative way to package up smaller gifts of jewelry or what-have-you. Keep that in mind the next time you’re doing some complex wrapping and you don’t have a perfect box to hand.

Have You Tried Milk Art?

Milk Art 13

This is a super popular project for folks with kids, because you can teach them all about surface tension and the properties of soap and fat and all that good science-y stuff in a nice controlled environment, with very pretty results.

Milk Art 15

The supplies are simple: a large shallow tray (a rimmed baking sheet will do), watercolour paper (sized to fit in your tray), cotton swabs, liquid food colouring, a few drops liquid dish soap, and some milk. You can use almond milk or rice milk or homogenized milk or cream or whatever — you just need some milk with a decent fat content. The results will apparently differ depending on the milk you use (almond milk is supposedly the best), but I only had regular old 2% on hand so I can’t really speak to that.

Milk Art 1

On a level surface, pour milk into your tray so that the whole bottom is just covered.

Milk Art 5

Now start dotting the surface of the milk with food colouring. Go with whatever floats your boat.

Milk Art 7

Take a cotton swab and dip it in your dish soap.

Milk Art 8

Gently touch the swab to your milk surface. POW! Watch that science happen.

Milk Art 9

This is that same spot a few seconds later.

Milk Art 11

Touch the swab all over to make the  colours mix or drag it across the surface to make a trail.

Milk Art 12

Now lay your paper down flat on the surface of the milk, then slide it off.

Milk Art 14

Let it drip a bit and lay it or hang it somewhere to dry.

Milk Art 16

I liked how the colours kept changing as I put in more paper, so I didn’t replace my milk, but you can if you like.

Milk Art 20

After a while I had nine full sheets and I was quite pleased with the results.

Milk Art 22

You can do whatever you want with these sheets: cut them into shapes and frame them, use them as stationery or greeting cards … whatever you want.

Milk Art 23

In my case, I ironed them flat using the high steam setting on my iron.

Milk Art 27

You can tell that I let this one dry on a sheet of newspaper can’t you?

Milk Art 28

Then I played around with the order of them a bit.

Milk Art 29

And used Blu-Tack to put them up on the wall in our bedroom.

Milk Art 31

The colours I used complement the other quick wall art I made a few weeks ago so I am very happy with how they turned out – though I would like to try it with almond milk sometime.

Milk Art 36

Peppermint Patties

Peppermint Patties 14

This was yet another “baking” episode Cait and I got up to – except it involved no baking whatsoever. If you’re not a fan of peppermint patties, then you won’t like this. If you ARE a fan, well, then, maybe you’ll like these, which we made from a mish-mash of these two recipes. Just a warning: if you make these puppies around Christmas time, you may have to search a bit to find peppermint extract in the grocery store. Cait and the Pie and I went to three separate stores before we nabbed the very last one hidden at the back of a shelf. If you’re making these for your Valentine tomorrow you may have some better luck!

Peppermint Patties 11

Now, you’re basically making a peppermint-flavoured fondant as the centre of these babies, so let’s start with that.

Peppermint Patties 3

In the bowl of your electric mixer, dump in 2 1/4 cup icing sugar, 2 tablespoons softened butter, 2 teaspoons peppermint extract, and 2 tablespoons cream.

Peppermint Patties 1

Start beating it on low speed until incorporated (so you don’t get a face full of icing sugar), then increase the speed and beat until you have a solid, smooth mass.

Peppermint Patties 2

Now take your fondant and roll it into a long snake between 1″ and 1 1/2″ in diameter (any bigger and the patties will fall apart as you manipulate them).

Peppermint Patties 4

Wrap the snake in waxed paper and chill it for about 45 minutes or so. If you shove the snake into an old cardboard tube from a paper towel then it won’t deform while in the fridge.

Peppermint Patties 5

In the meantime, plop 12oz chocolate (dark is probably best, but it’s your choice) into a double boiler with 6 teaspoons shortening and let that melt. The shortening is what will give the chocolate a shiny, harder exterior once it hardens again. The magic ratio for shortening to chocolate, if you’d like to use it in other recipes, is 1/2 teaspoon shortening for every 1oz chocolate. And as it happens with every chocolate-dipping recipe, depending on the size of your patties and how quickly you get this done, you may need to melt more chocolate.

Peppermint Patties 8

Anyway, let the chocolate cool to almost room temperature (because otherwise you’ll melt the patties when you dip them and that would be bad). Take your snake out of the fridge and slice it into little disks about 1/4″ thick. To avoid the patties warming up and getting floopy, I put half of them back in the fridge.

Peppermint Patties 9

Using chopsticks or a fork, dip the cold patty into the cool chocolate and flip to coat. Lift it out of the chocolate and let it drip for a few seconds. Set the patty on a sheet of waxed paper to harden completely.

Peppermint Patties 10

The demented ones are the ones that Cait did. I take no responsibility for them.

Peppermint Patties 12

Store in an airtight container for up to two weeks. Enjoy!

Peppermint Patties 13

Chocolate Caramel Pretzel Bites

Pretzel Bites 7

Cait and I made these on one of our baking evenings where we wanted to put in as little effort as possible. While it’s inspired by this recipe, I had trouble locating large amounts of the ingredients it required so I ended up changing things around. My process shots for this are also terrible and blurry, and for that I apologize, but you can probably figure out how to make these for yourself without them. They are a quick and easy contribution to a potluck, picnic, or gift, and are simple enough that you can do this with small children if they want to make their own gifts.

Pretzel Bites 8

Start with a bunch of pretzels. Lay them on a baking sheet lined with parchment paper and preheat your oven to 250°F.

Pretzel Bites 1

On top of each pretzel, place one chocolate-covered caramel. The original recipe called for Rolo candies, but I could only find the miniature ones at Bulk Barn so I opted for these salted chocolate caramels instead and while they were wildly expensive, they were totally worth it.

Pretzel Bites 2

Grab a number of pecan halves equal to the number of pretzels and caramels and set them aside. Pop the tray with the caramel-topped pretzels into the oven and leave it there for 5 minutes or so, until the chocolate is melty and the caramel is squishy. The time it will be in the oven is dependent on the size and type of your caramel.

Pretzel Bites 3

Pull the pan out of the oven and press a pecan half into each caramel. Cait was concerned about the structural integrity of the underlying pretzel so she was unwilling to squish the pecan and caramel down with any force. As a result, when the ones she made were cooled, the pretzel came off the bottom and chaos ensued. So make sure to press the pecan down firmly into the caramel and in doing so, push the caramel into the pretzel to hold everything in place.

Pretzel Bites 4

Set those aside to cool and harden, then store in airtight containers until you eat them all.

Pretzel Bites 5

You can see that we have our festive Christmas tins ready to go here. I know it’s February, but tins are tins are tins, right?

Pretzel Bites 6