One Lamp, Two Lamp, Old Lamp, New Lamp!

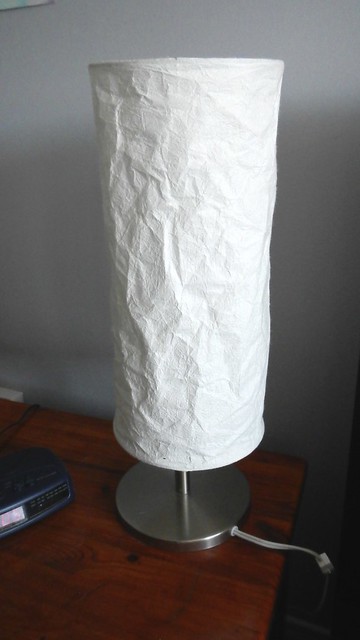
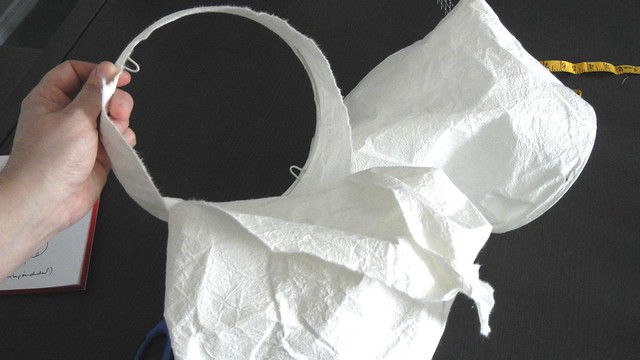
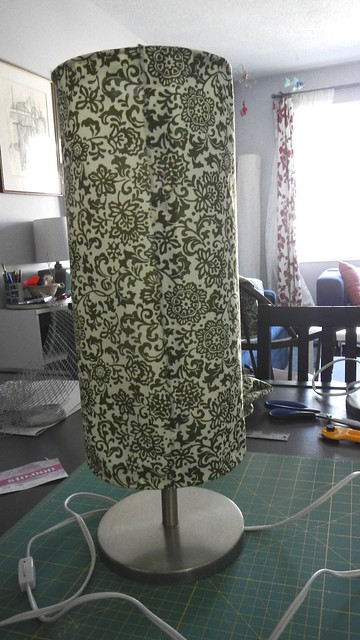
My final quarantine project was one I’d been meaning to get done since we moved into the house over a year ago. When we moved in together we bought a matching set of IKEA lamps: two table lamps and a larger floor lamp with crumpled paper shades. They were literally the WORST shades as the things that held the shades up so they looked crumpled fell out and were lost so you just had this wrinkly, torn, dusty, discoloured piece of paper sitting here and we really started to hate them. But they were cheap and they worked so we moved them across the country and back.

New Lampshades 1

BUT NO MORE.

New Lampshades 2

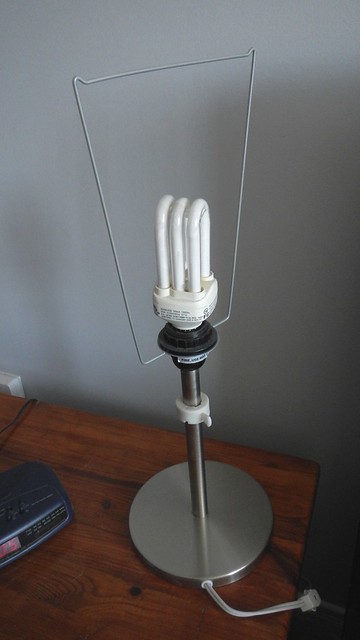
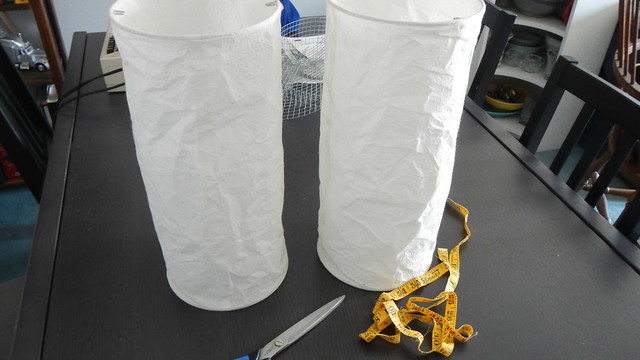
My plan was to use the wire frame of the shades to create a new surface for a slightly more durable fabric shade. So I carefully measured the dimensions of the existing lamps.

New Lampshades 3

Then I took enormous pleasure in ripping the paper off.

New Lampshades 4

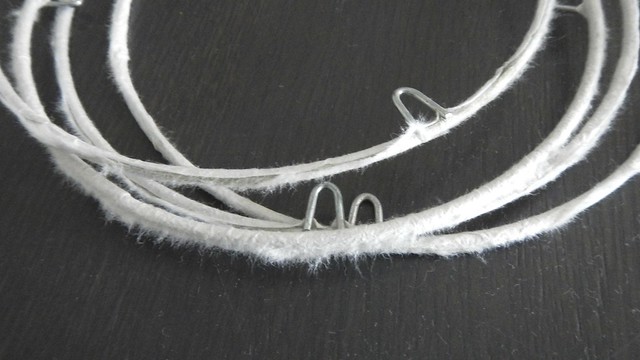
I soaked the wires in warm soapy water for a bit to get the excess glue and paper off.

New Lampshades 5

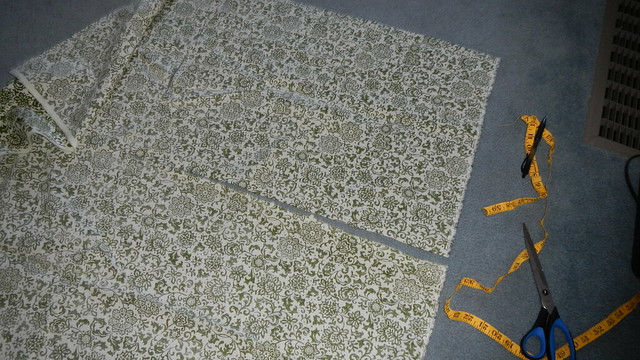
Then I measured and cut the fabric Cait and I had bought from Joann like forever ago.

New Lampshades 6

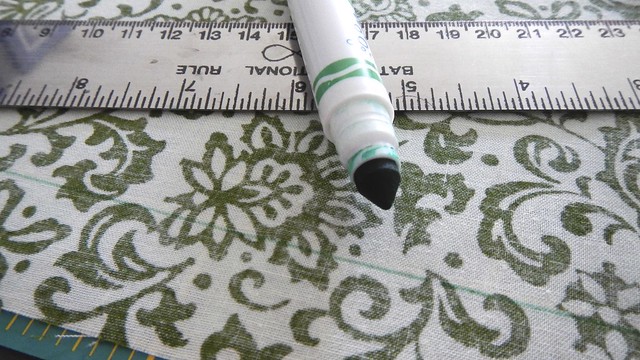
I don’t own any fabric markers so I use washable Crayolas instead. I measured an inch of overlap from the edges to wrap around the frames.

New Lampshades 7

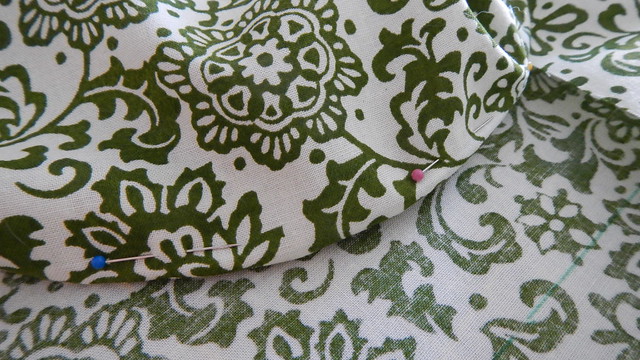
Then I used pins to fix everything into place.

New Lampshades 9

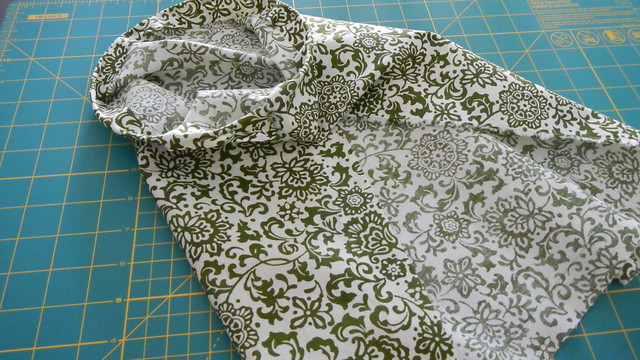
One side done.

New Lampshades 10

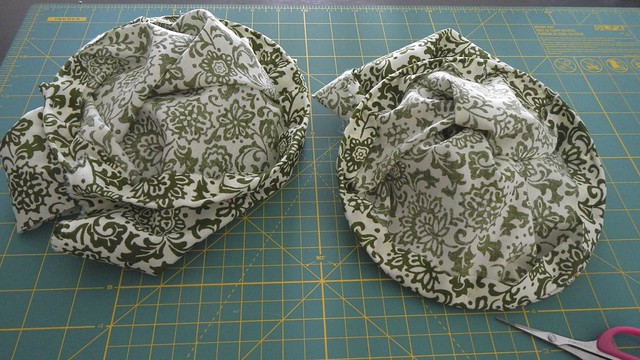
Both sides done.

New Lampshades 11

I left the side seams open for now just because it was easier to manipulate them with it open.

New Lampshades 12

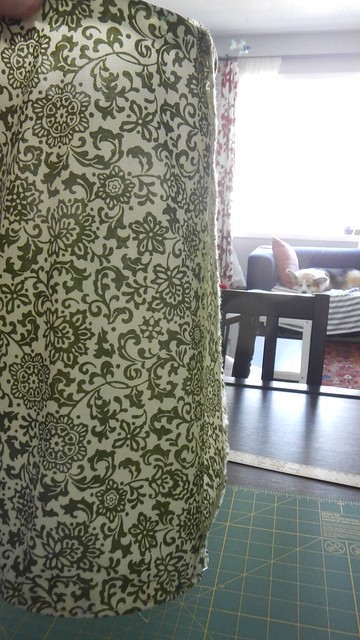
The best way to get this permanently affixed was to set it up so it hung properly, and the best way to do THAT was to put it back on the lamp.

New Lampshades 13

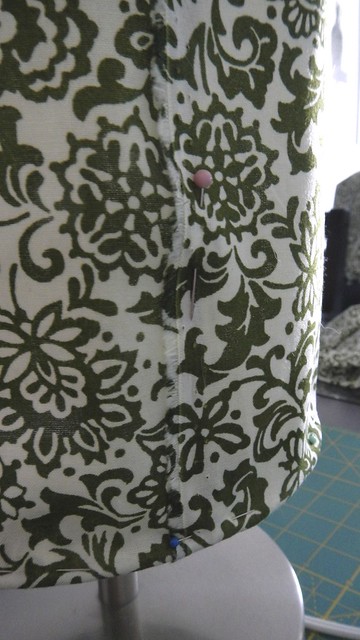
Now I pinned the side seams.

New Lampshades 14

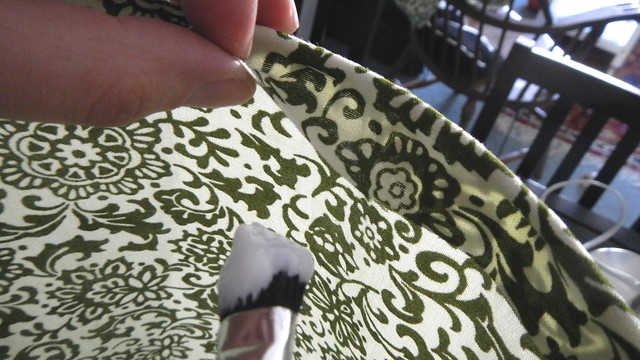
Then I used Mod Podge for fabric and just glued all my flaps closed.

New Lampshades 15

It didn’t take long. I made sure to take the pins out while the glue was still wet.

New Lampshades 16

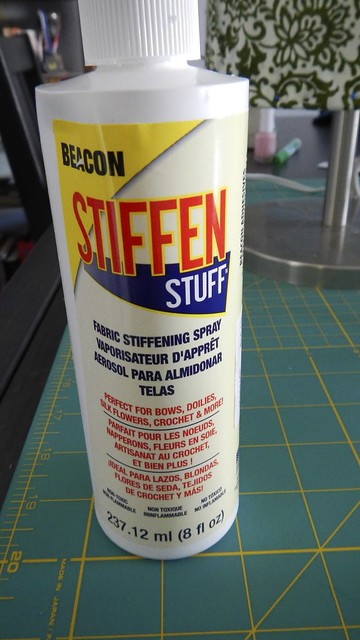
Once it was dry I sprayed the whole thing with Stiffen Stuff, which is sort of a spray starch for making things like bows and ornaments rigid. Another option would have been to wash the fabric with liquid starch and iron them flat before pinning. It might have had a more uniform look to the finished product but it would have been more difficult to manipulate.

New Lampshades 17

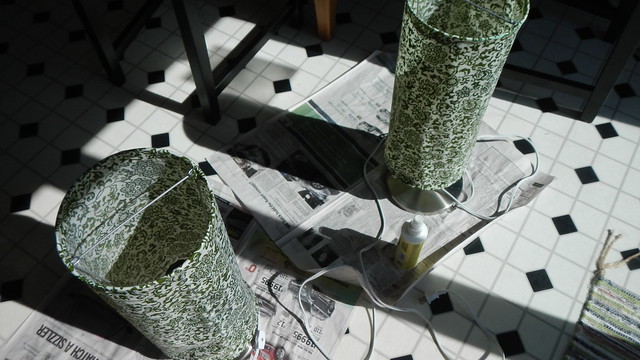
I let the starch dry in the sun.

New Lampshades 18

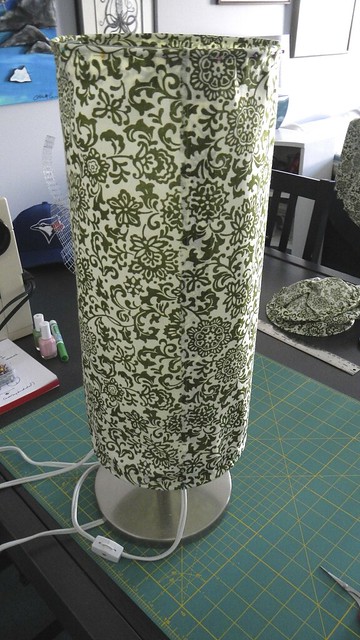
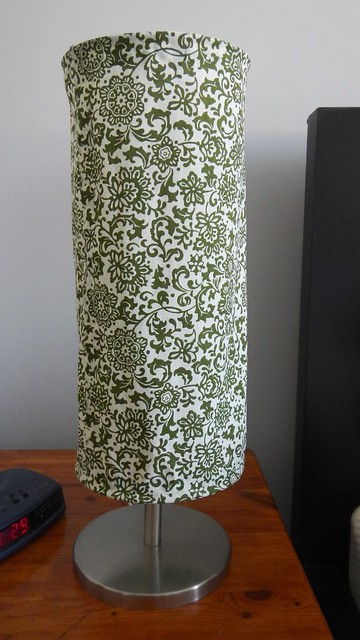
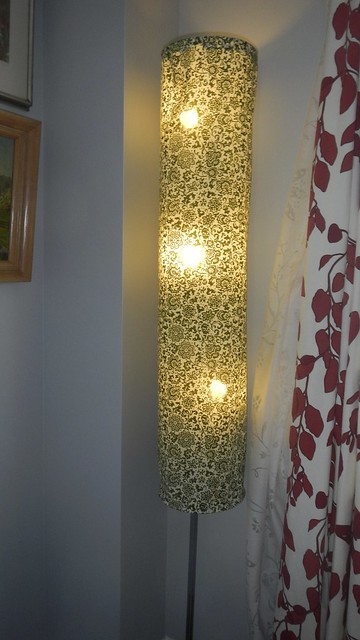
The finished product, off.

New Lampshades 19

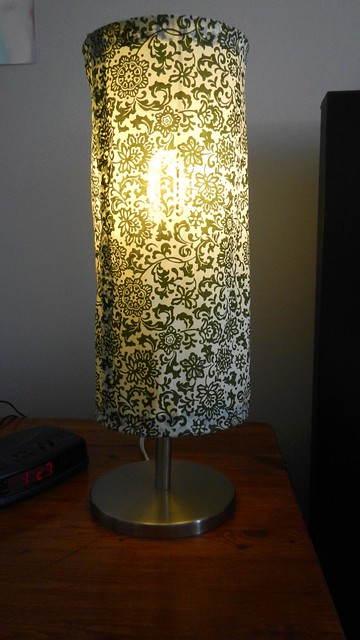
And on.

New Lampshades 20

I did the big one too. I’m quite pleased!

New Lampshades 22

Bench Cover Thingy with Cait

Bench with Cait 13

Cait and I share a calendar, because when you live on totally opposite sides of the city it makes it easier to stalk each other. So when we planned for this particular DIY event (because we are that nerdy), this is the title Cait gave it in the calendar. So that’s the title you’re getting.

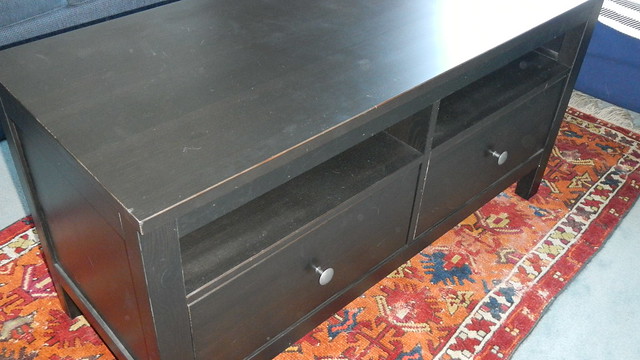
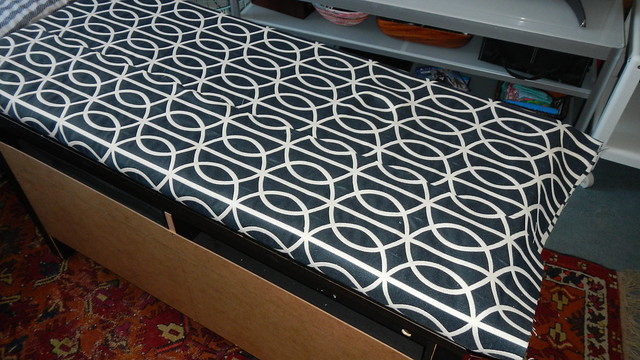
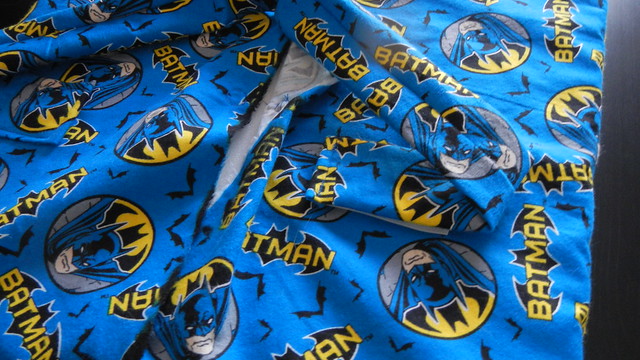
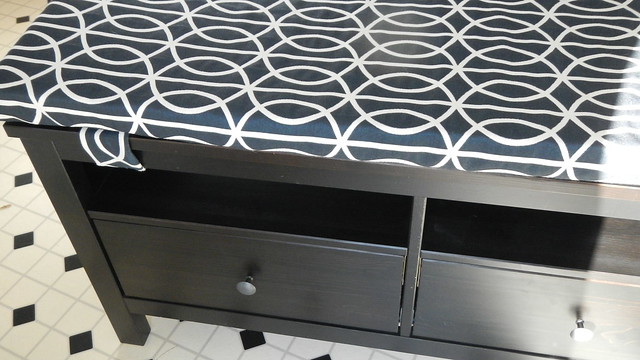
Cait commandeered a large amount of shelving and other furniture from her aunt’s house and wanted to incorporate it into hers, but with a twist. So this little bench thingy? It’s a little underwhelming as-is, and because all the furniture Cait got was black, the colour is a bit much.

Bench with Cait 1

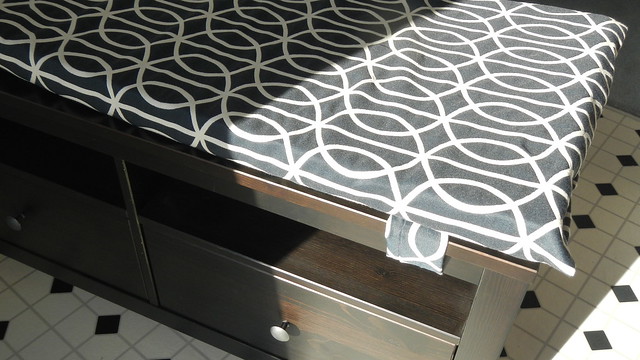
We’re gonna jazz it up a little and soften it up a little as well by adding a cute cushion to the top of it. Maybe two different cushions, for variety’s sake. We didn’t take any measurements, and who knows if your furniture is the same size, so this is just a series of photos for you to take inspiration from.

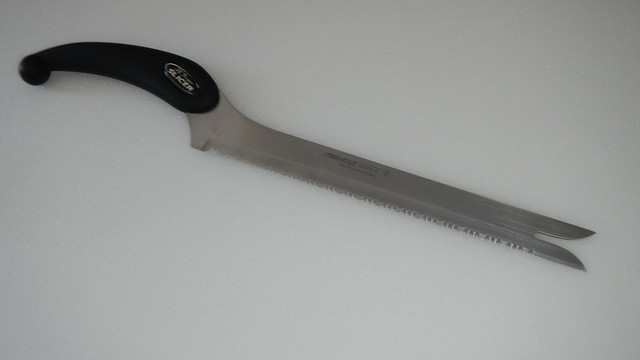
I did get to cut through some 2″ foam padding with a bread knife which was satisfying. Holy moley though foam padding is expensive!

Bench with Cait 2

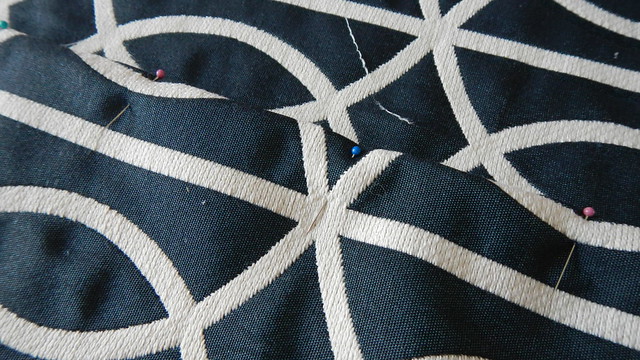
Pinning it in place and making sure there was enough overlap on the seams.

Bench with Cait 3

Bench with Cait 4

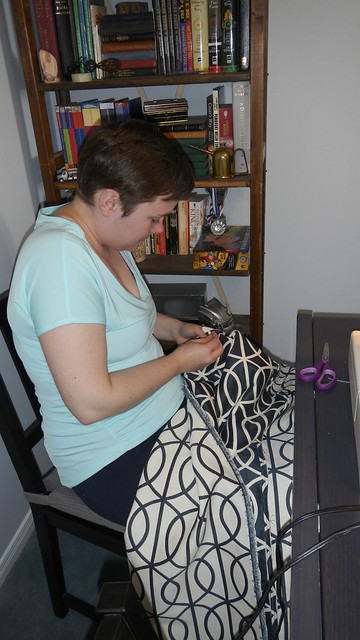
You can’t tell in this photo but I’m actually in mid-pin-stab and am about to yell some bad words. I hate sewing.

Bench with Cait 5

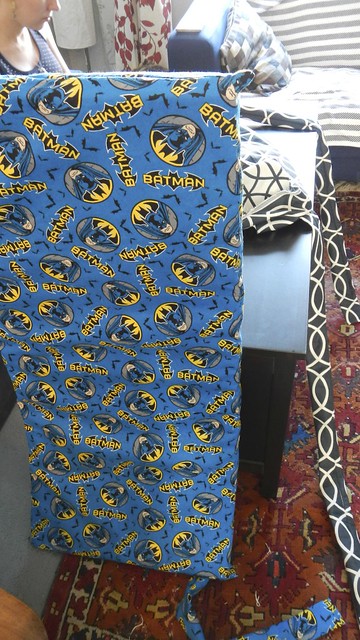
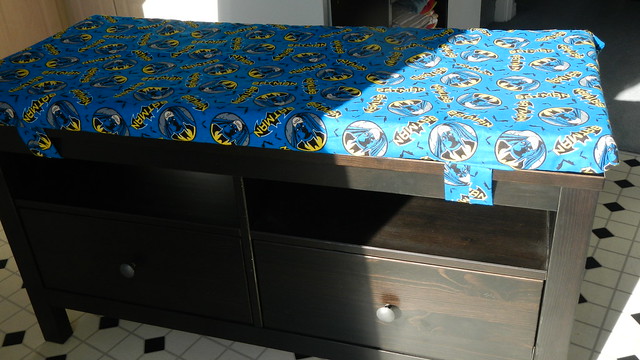
Okay so in addition to the grownup one we made a Batman one too. You can see Cait in the background, sewing snaps on the other cushion. She also hates sewing.

Bench with Cait 6

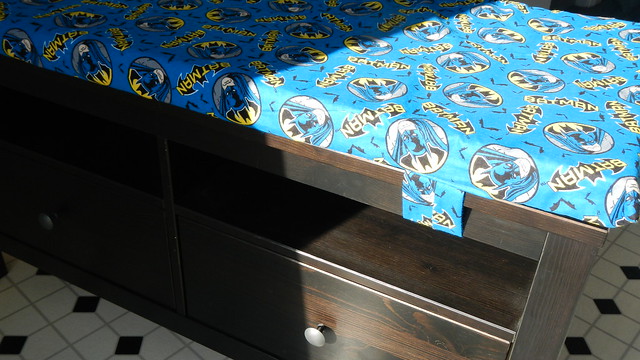
We used velcro and sewed straps to hold the cushion onto the bench. Luckily the bench is actually some kind of entertainment console so we could thread the straps through the holes easily.

Bench with Cait 7

Adhesive velcro rocks for getting things where you want them exactly. You do need to sew it afterwards, which is a total pain, but it is a useful thing.

Bench with Cait 8

Straps in action.

Bench with Cait 9

Batman suits it.

Bench with Cait 10

The grown-up one is nice, too. The fabric is reversible so I’m also making Cait some small square cushion covers to accent the whole thing.

Bench with Cait 14

Custom Carrying Caddy

Custom Caddy 39

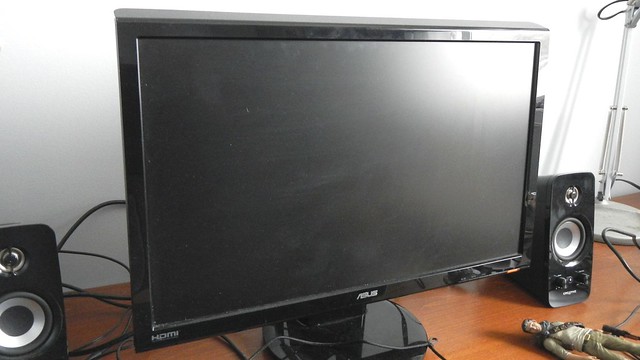
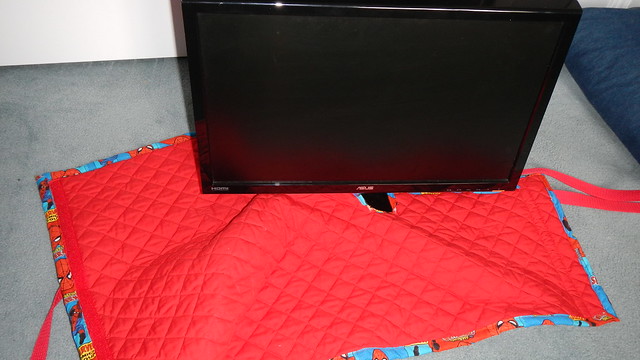
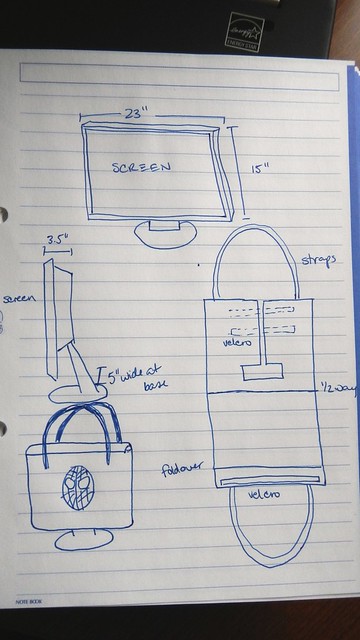
This was another birthday present for the Pie.  When he goes off to play Street Fighter, he brings what is known as a “setup,” which includes an XBox, the game, his fightstick and a display monitor.  He can put pretty much everything in one backpack, but carrying the monitor to and fro is more difficult, especially when negotiating doors and long hallways and preventing it from getting damaged while sliding around in the trunk of the car.  So he has often wished aloud that he had some kind of specialized carrier that would make humping the monitor to and fro less of a pain in the patoot.

Custom Caddy 1

The idea percolated in my head for a few months, and then, about a week before his birthday, I figured it out.  I managed to make this, from concept art to completion, in about three hours, on a horribly humid and rainy Sunday afternoon.  I’m not sure if this particular DIY is practical for you, but maybe you have something awkward you need to carry around on occasion and if so I hope this inspires you to make something that is perfect for the purpose!

Custom Caddy 4

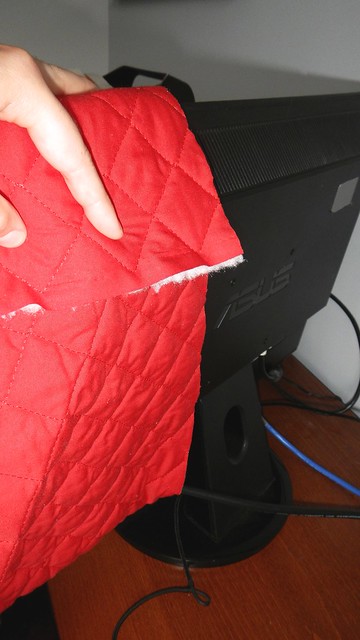
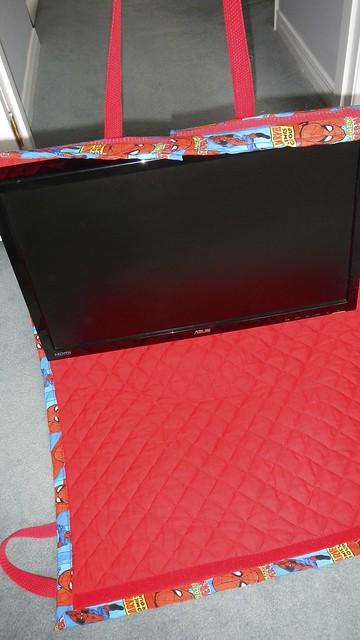
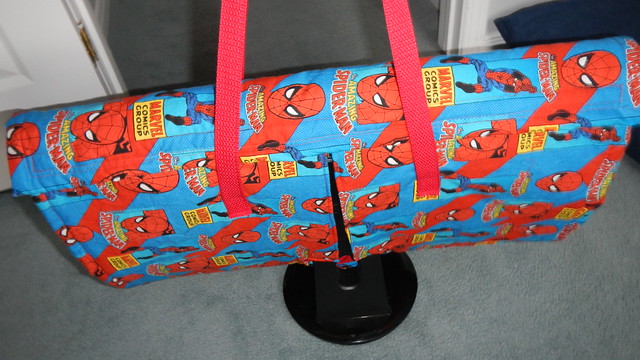
First, obviously, I measured the crap out of everything.  I studied the front and back of the monitor, figuring out where the base stuck out of the back and how wide it was when it did so.  To make this custom caddy stable, it made more sense for the caddy itself to enclose only the screen, and have the base stick out the bottom.  This means that you can put the whole thing down on a surface without it overbalancing and tipping over.

Custom Caddy 3

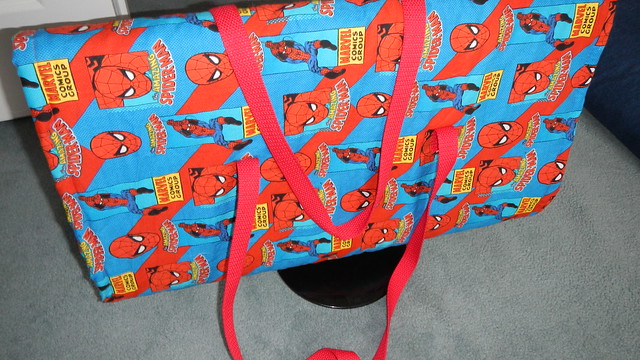
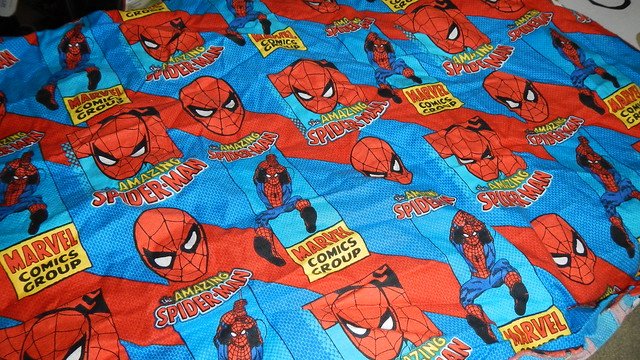
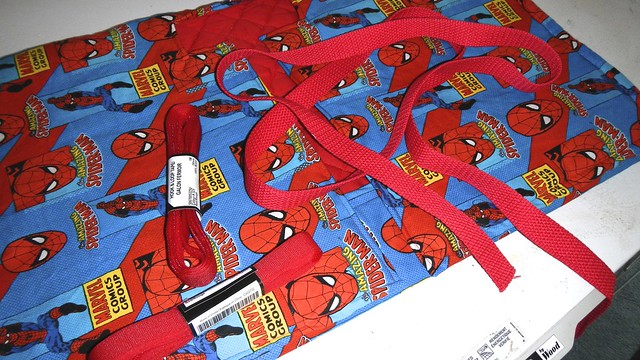
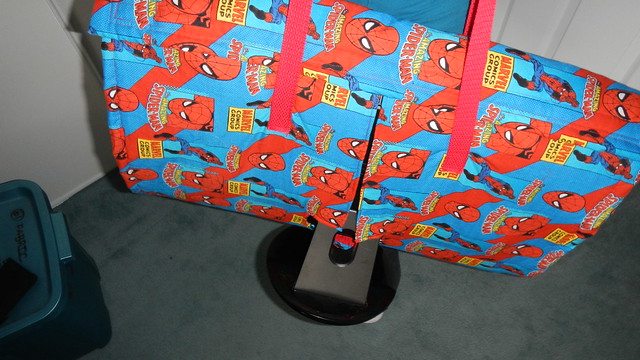
I picked up this absolutely awesome Spider-Man fabric at Wal-Mart.  I couldn’t resist.

Custom Caddy 5

And if I turned it sideways, it was the perfect size for a custom caddy.

Custom Caddy 6

This quilted stuff I grabbed at Fabricland, as well as some red velcro and some red strapping.

Custom Caddy 7

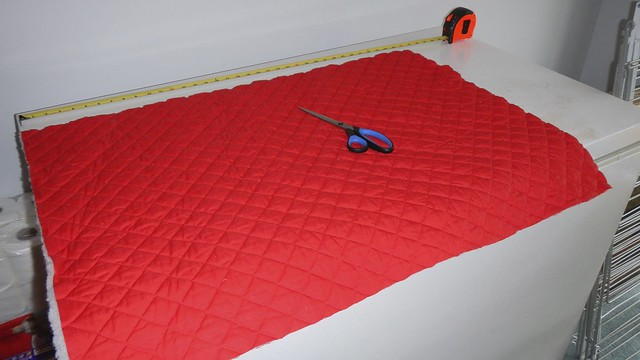
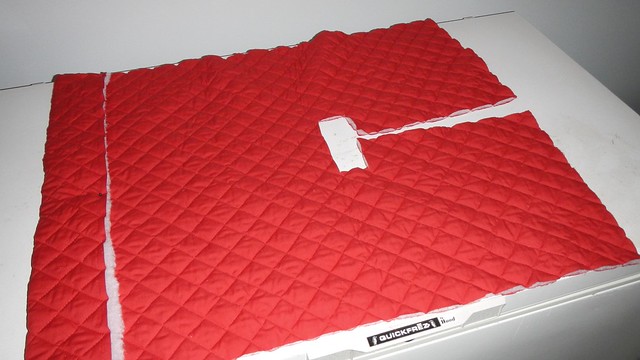
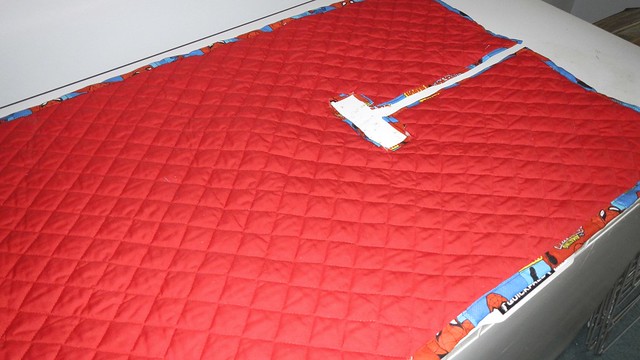
In order to ensure the continuing accuracy of my measurements, I had to cut the stuff in the basement where the sewing machine was, and then carry it upstairs two storeys and hold it against the monitor in question. I would have brought the monitor down but it would have been harder to explain if the Pie had come home early.  This shot shows the fold-over flap at the top.

Custom Caddy 8

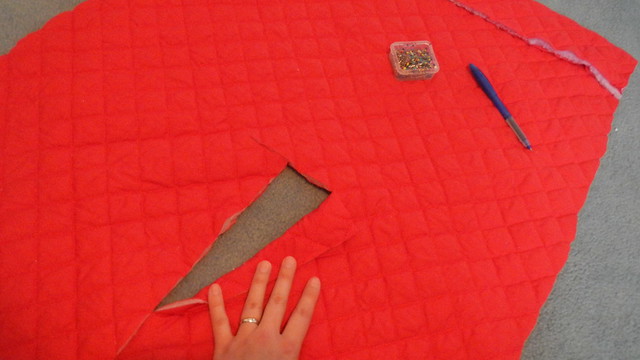
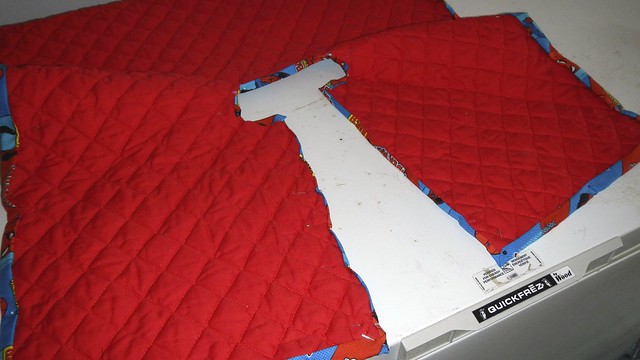
Now I needed to figure out the hole for the base and stem.

Custom Caddy 9

Measure, check, measure, check again, and then finally cut.  Fortunately I bought enough of the quilted stuff to have a do-over if I messed it up, but I didn’t want to waste it.

Custom Caddy 10

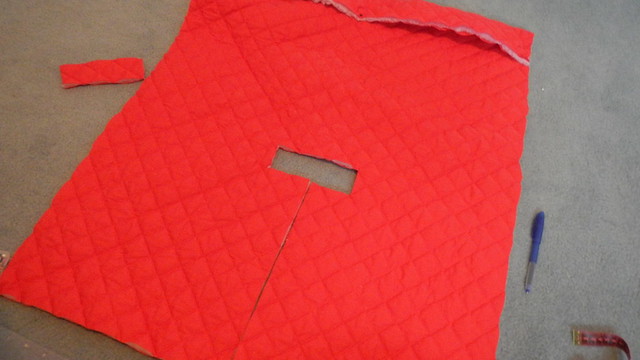
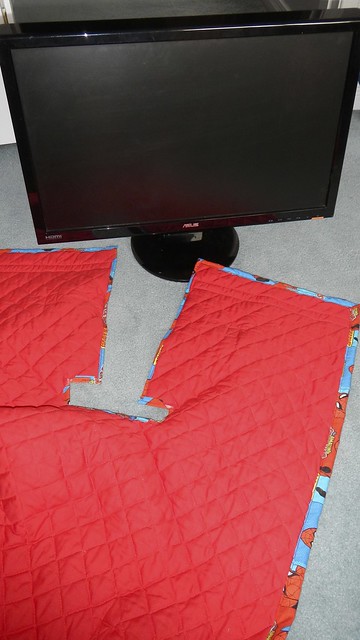
The slit in the back of the caddy with the hole for the base.

Custom Caddy 11

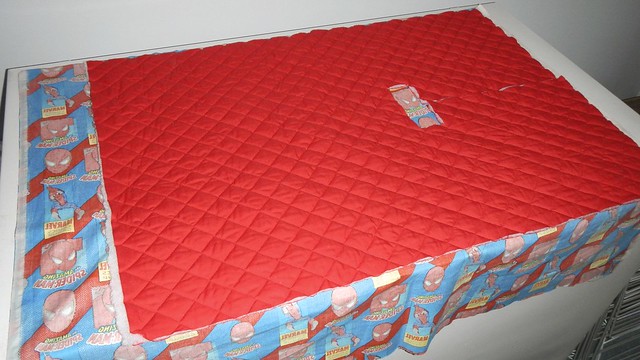
Here it is with the foldover flap pinned down for measuring purposes.

Custom Caddy 12

Now to attach it to the outside fabric.

Custom Caddy 13

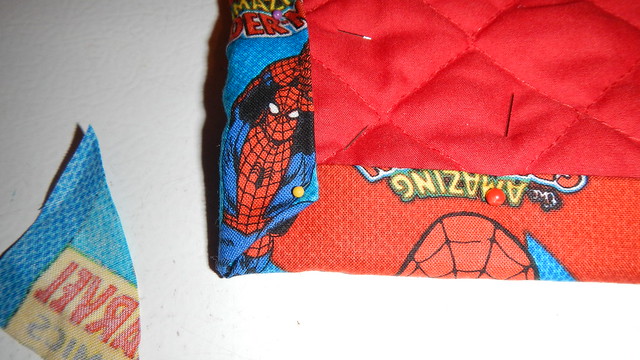
I pinned it in place as straight as I could, and mitred the corners to avoid fraying.

Custom Caddy 14

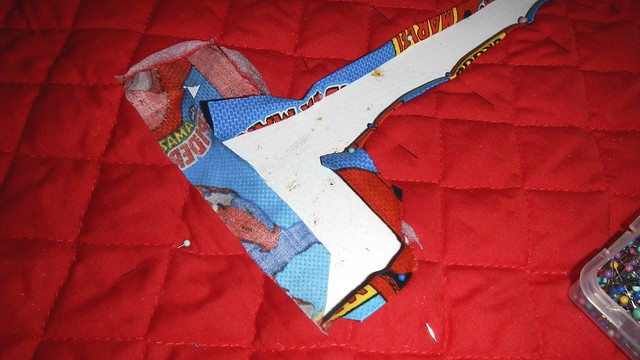
In order to have the Spider-Man fabric wrap properly around the quilting along the slit, I widened it slightly to give me a little wiggle room.

Custom Caddy 15

Not much wiggle room, but some.

Custom Caddy 16

The pinned slit.

Custom Caddy 17

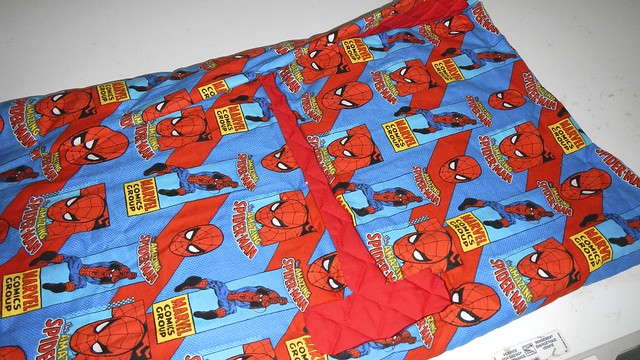
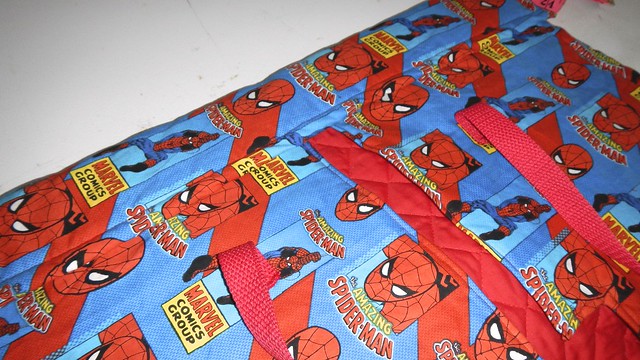
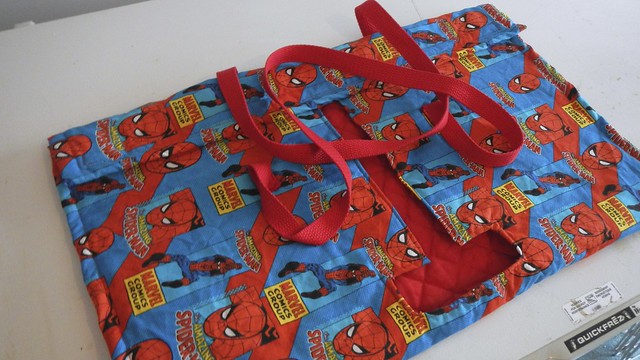
This gives you an idea of how it’s going to look from the back, with the top flap folded down.

Custom Caddy 18

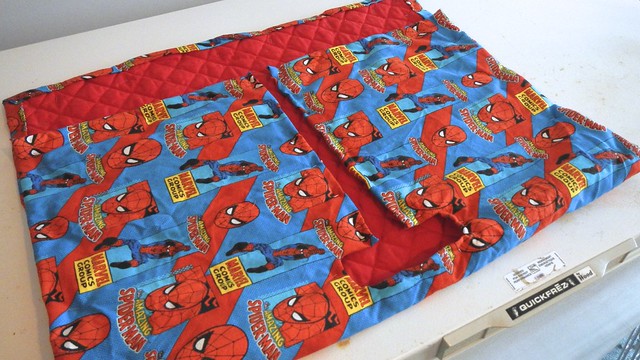
And the flap open.

Custom Caddy 19

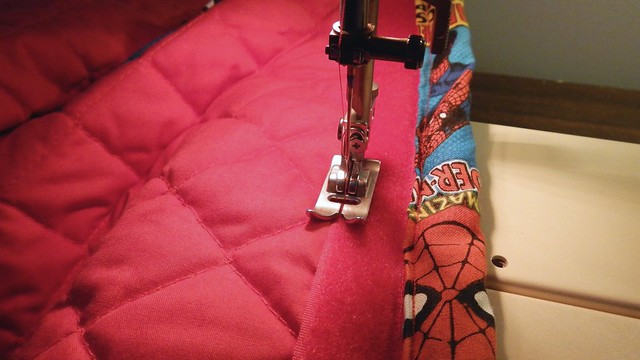
Then I sewed it all down.

Custom Caddy 20

It’s not perfect in the hole but it’s the best I could do at the time.

Custom Caddy 21

Now for all the bits to hold it together.

Custom Caddy 22

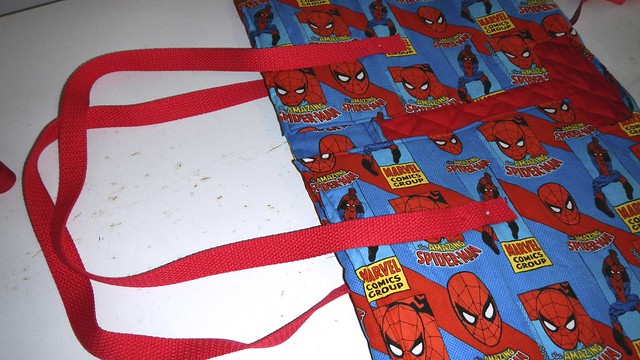
Each strap is a metre long, and I pinned them far enough down on the caddy so they would support the weight of the monitor while not putting too much strain on the fabric.  They’re also at a comfortable spot for the straps to go over your shoulder, with the monitor balanced against your hip.

Custom Caddy 23

Sewn in place with reinforced stitches.  You can see here how the foldover flap keeps the two sides split by the slit together.

Custom Caddy 24

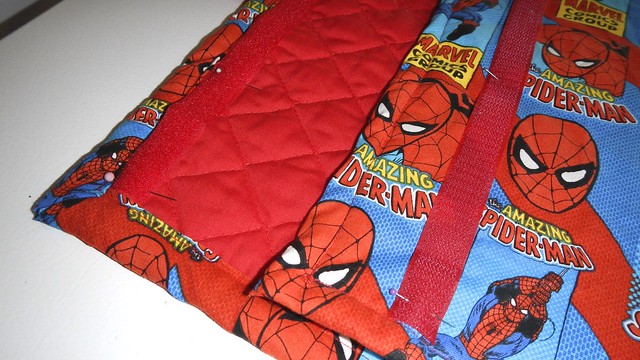
In order to keep the foldover flap in place I needed the velcro.  One fuzzy strip across the flap and a hook strip on either side of the slit.

Custom Caddy 26

Sewing velcro on a machine is not easy.

Custom Caddy 27

It was hot work, in fact, but the humidity outside didn’t make anything easier.

Custom Caddy 28

But I did it!

Custom Caddy 29

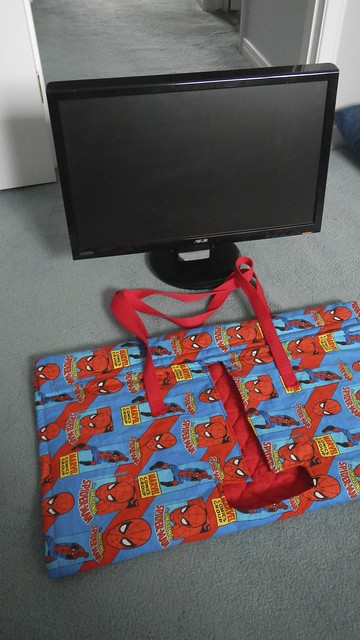
So basically here’s how it works.Custom Caddy 31

You open it up and align the slit with the base of the monitor, tucking the strap over the monitor (not shown in this shot, sorry).

Custom Caddy 33

Slide the slit along the base of the monitor (sideways works best).

Custom Caddy 34

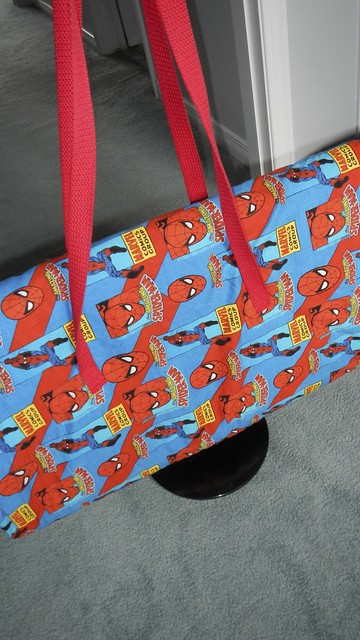
Twist the carrier so the solid side is in front, covering the screen.

Custom Caddy 35

Lift the caddy by the straps …

Custom Caddy 37

… and fold the flap over to hold the two back ends together.

Custom Caddy 38

So you can easily carry it and just as easily set it down.

Custom Caddy 40

Here’s me trying to take a selfie while holding the thing on my shoulder.

Custom Caddy 42

Bulletin Board Beautification

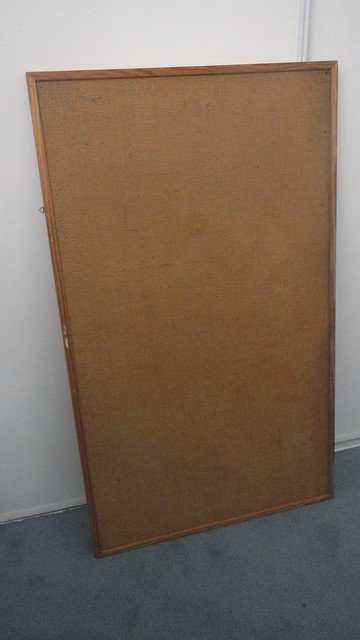
I think I’ve had this bulletin board for twenty-five years, and someone else had it before me.  It’s held up pretty well, I think, but its age is starting to show.

Bulletin Board Beautification 1

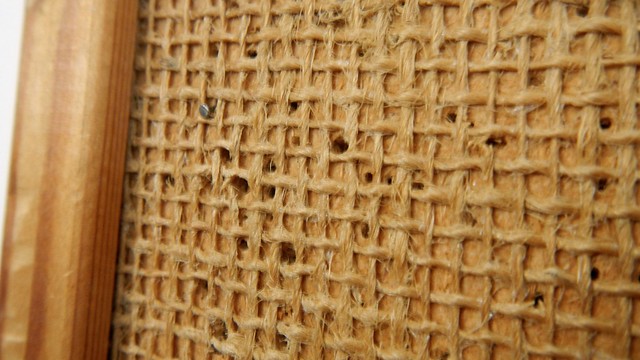
There are certainly a large number of holes in it.

Bulletin Board Beautification 2

It’s not even made of cork: it’s like burlap and some sponge-y/fibre-y stuff.

Bulletin Board Beautification 4

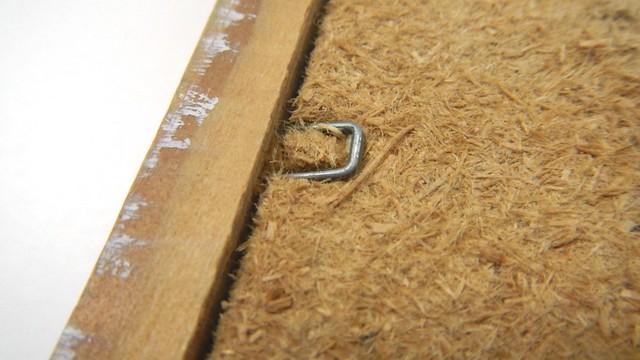
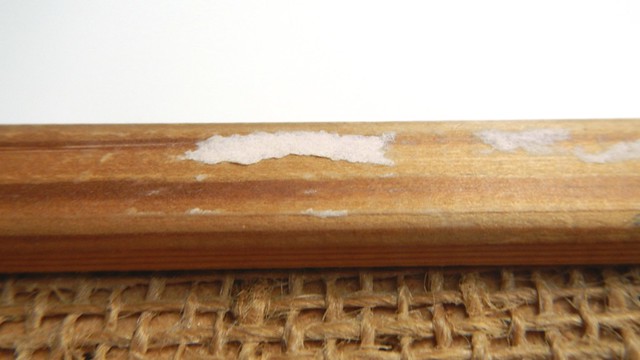
And there are weird scraps of whatnot on the frame.

Bulletin Board Beautification 3

But why buy a new one when I can make this one new again?

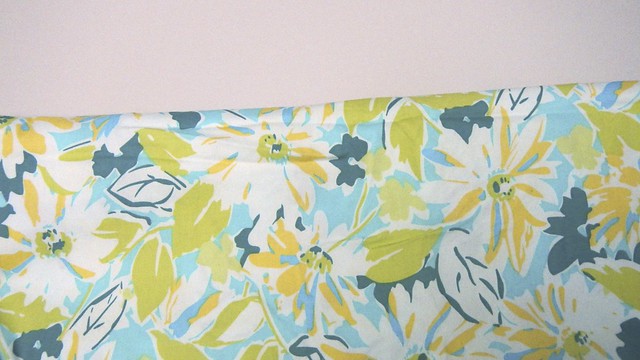
I had this pretty fabric stuffed in my crafty closet.  It’s actually a stretch cotton, which will help me to get it very tightly attached to the bulletin board.

Bulletin Board Beautification 5

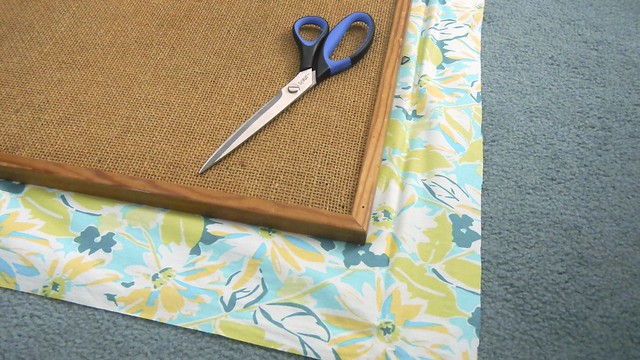
I cut it to vaguely fit the size of the board.

Bulletin Board Beautification 6

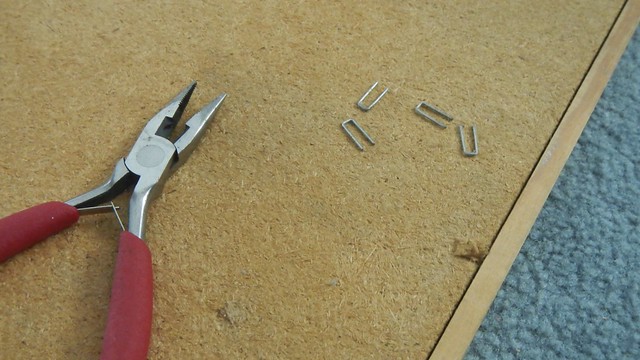
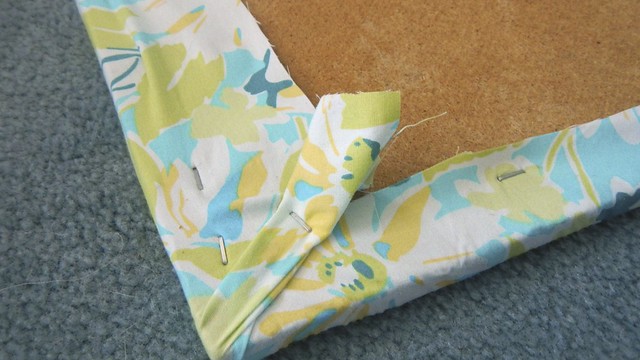
Then I pulled out these metal staples with a pair of needle-nosed pliers.  So I’m left with the frame and the board.

Bulletin Board Beautification 7

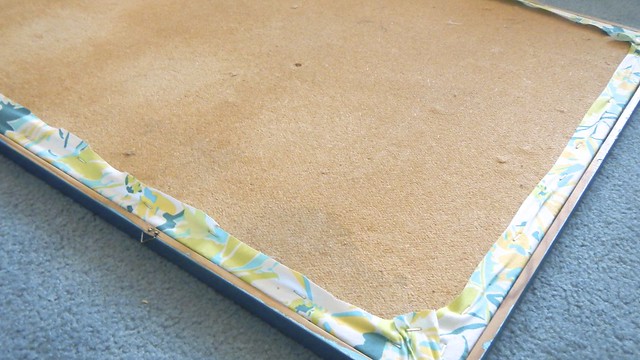
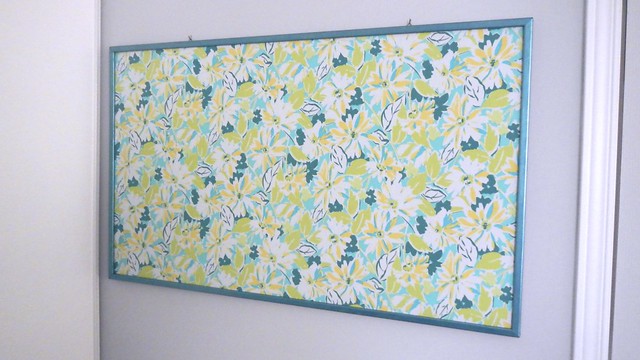
I stretched the fabric across the board and used a staple gun to fasten the fabric into place.  You could probably use a hot glue gun as well.

Bulletin Board Beautification 8

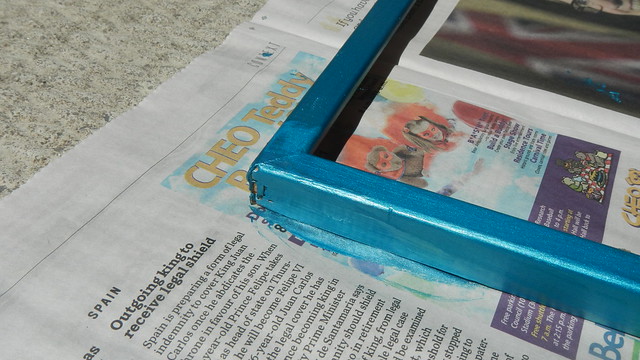
Then I quickly sanded down the frame with fine sandpaper and removed the hanging hardware temporarily. I painted it with this cute metallic teal craft paint.

Bulletin Board Beautification 9

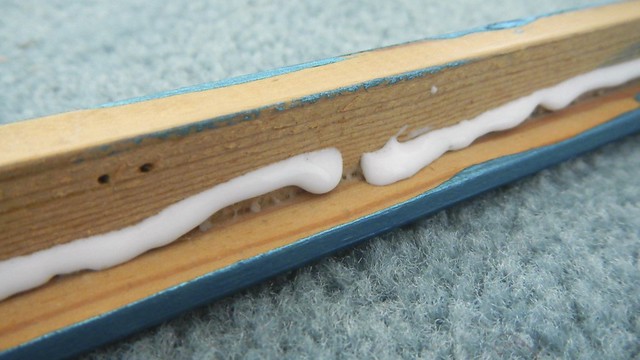
I reattached the hanging hardware to the top of the frame, and then fit the board back into place with glue.  It’s a tighter squeeze with the fabric covering it.

Bulletin Board Beautification 11

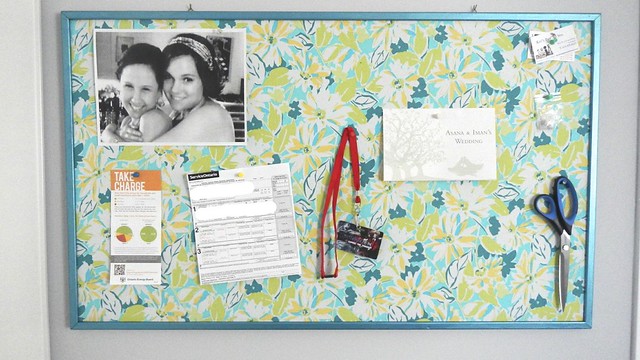
Tada!  I’m glad I didn’t have to replace something that was still functional, and that I could add a personal touch to my office organization!

Bulletin Board Beautification 12

Bulletin Board Beautification 13

It’s hard for me to be artistic in arranging a bulletin board to appeal to the tastes of the internet, and really there’s only so much you can do with license plate renewals, energy cost charts, and a pair of scissors.  Though I did dress it up with a super cute pic of me and Cait that I found while I was looking for something else.  So that’s something.

Bulletin Board Beautification 14

Izod’s Bookcase

Izod's Bookshelf 7

I had a totally different plan for this, but when it turned out that it was completely unfeasible, this one worked out really well instead.  When I first found out that Atlas was pregnant, I decided that the baby would get as a first Christmas gift from me a collection of my favourite children’s books.  I’ve been picking them up second-hand at various thrift shops, and I aim to continue to do so whenever I find one that is right.  But so far, I have a pretty good collection of Roald Dahl, some Doctor Doolittle, the Narnia series, and a few of the classics.

I bought the bookshelf at IKEA.  I wanted to re-vamp a thrifted one but I couldn’t find an appropriate one and this one was inexpensive and the exact size I wanted.

Izod's Bookshelf 1

I took off the back panel of the bookshelf and set it up against some nice blue fabric, which I cut to size.

Izod's Bookshelf 2

Then I glued it onto the back with hot glue.

Izod's Bookshelf 3

Because the fabric made the panel thicker, I used a craft knife to widen the slots on the back of the bookshelf.

Izod's Bookshelf 4

So now it fit, and it’s all in place.

Izod's Bookshelf 5

I’d originally planned a nice stencil here, with contact paper and spray paint, but I discovered that if you use spray paint on contact paper it peels back from the design and doesn’t work.  So I ended up free-handing Izod’s name here with craft paint and it worked out really well.

Izod's Bookshelf 6

And it’s all finished.  I hope he has many adventures with some of my favourite stories!

Izod's Bookshelf 8

Beeswax Food Wrap

Beeswax Food Wrap 7

Christmas may be over for you, but I’m still going strong with my backlog of gift ideas, so stick with me.  And this one might come in handy for you as you are dealing with festive leftovers.

Start with some scraps of fabric, cut into various shapes, that you can wrap around bowls or sandwiches or whatever.  I finished the edges with pinking shears, so that they wouldn’t fray so fast (once they’re waxy, they won’t fray at all).

Beeswax Food Wrap 2

Then grate a whole bunch of beeswax.  I did 3oz beeswax, which gave me just enough to finish 11 pieces of fabric.

Beeswax Food Wrap 1

Turn your oven on to about 180°F, or as low as it will go, and line a baking sheet with aluminum foil.  Lay a piece of fabric on the baking sheet and sprinkle it evenly with beeswax.  You want enough that when it’s melted it will saturate the cloth.

Beeswax Food Wrap 3

Shove the fabric in the oven for a few minutes.  Keep an eye on it and watch for how long it will take the beeswax to melt — between five and ten minutes.

Beeswax Food Wrap 4

When the beeswax is entirely melted, haul out your baking sheet and immediately remove the cloth from the foil — if you don’t it will stick and get gross.  I waved mine in the air a few times before the wax set and I could set them down.

Beeswax Food Wrap 5

Keep going until all your sheets are finished and thoroughly saturated with beeswax.  If you miss a spot, you can always top it up and shove it back in the oven for a few minutes.

Beeswax Food Wrap 6

Beeswax Food Wrap 8

Use these wraps like you would plastic wrap.  They will mould into shapes with the heat of your hands and stick to themselves, so you can even cover bowls with them.

Beeswax Food Wrap 9

I was going to show you the wrap on a sandwich but I was out of bread so you get deli meat instead in a wrap.  Beeswax is naturally antibacterial, and the wax itself blocks out air, so it makes a really good seal for keeping your food fresh.

Beeswax Food Wrap 10

Wash gently in warm (not hot!) water to remove food goo and to ease the wax back into shape.  TADA!

Beeswax Food Wrap 11

Grape Crate Pet Beds

Grape Crate Cat Beds Final 12

We currently live in an Italian neighbourhood and in the fall a good many of our neighbours squished their own grapes to make wine.  The result was that there were plenty of these nice wooden crates at the curb when they were done.  I knew I HAD to have them, to make SOMETHING, but I didn’t know what, exactly, I was going to do with them.  Then my brother-in-law got a cat.  Then my brother got a cat.  Then my sister-in-law mentioned that she was going to get a cat.  And cats like boxes.  And these boxes are cat-sized.  So there you go.

Grape Crate Cat Beds 1

First I had to clean them off and scrape off the labels and sand them a bit.

Grape Crate Cat Beds 3

Grape Crate Cat Beds 5

The sides of the crates were made from particle board, so I didn’t sand too much, naturally.

Grape Crate Cat Beds 4

I did wonder how the porosity of the particle board would affect my ability to stain it.  I guess the only way to find out is to do it!

Grape Crate Cat Beds 6

I used a variety of stains for this, the dregs that were in the bottoms of cans from previous projects.  One was a gel stain, which I had never used before.

Grape Crate Cat Beds 7

You can see how dark it goes on.

Grape Crate Cat Beds 8

It almost covered up the ink on the sides of the crate, but came back through once I wiped off the excess.

Grape Crate Cat Beds 9

Here you can see the other two stains, which were more translucent.

Grape Crate Cat Beds 10

Wiping off the excess with a rag after painting it on.

Grape Crate Cat Beds 13

It came out darker depending on the roughness of the wood.

Grape Crate Cat Beds 12

And I forgot about the whole STAINING part of stain, and forgot to wear gloves.  Oops.

Grape Crate Cat Beds 11

Once they’d dried, I painted on a quick layer of varathane.

Grape Crate Cat Beds 15

Again, because I didn’t sand them too much, we weren’t looking at baby’s bottom smoothness here.

Grape Crate Cat Beds Final 1

The completed boxes.

Grape Crate Cat Beds Final 2

I bought three pillows, each 13″ x 20″, which nearly fit the inside of the boxes.

Grape Crate Cat Beds Final 4

Fortunately my mother has what amounts to a fabric store in her basement, so I had plenty of patterns to choose from for cushion covers.

Grape Crate Cat Beds Final 5

I made the cushion covers in the same fashion as I make all my other cushion covers: with the simple overlap in the back that eliminates the need for buttons or zippers, which are beyond my skill level.  I double-sewed all the seams because I wanted them to last through being removed for washing.  I got the whole thing done super quickly, too, because I was using my grandmother’s sewing machine, which has two settings: terrifyingly fast, and supersonic.  And I didn’t sew my thumb to anything, either, so I count that as a win.

Grape Crate Cat Beds Final 6

The cushions, stuffed inside the covers.

Grape Crate Cat Beds Final 7

And inside the box.  There’s a little gap on the sides, but once the pillows get squished down by the cats they’ll fill the whole space.

Grape Crate Cat Beds Final 9

Grape Crate Cat Beds Final 13
I decided they were too tricky to wrap (and a waste of paper), so it’s more of a token wrapping job.

Grape Crate Cat Beds Final 14

The things we do for love: Learning to Silk Screen at Home

Screen Printing 72

Beware: this is a very long post!

Because I love my husband and because I support his weird video game addiction (I did make him a cake after all), I agreed to make up some t-shirts for an upcoming tournament in my hometown of Dartmouth, Nova Scotia, in May.

Screen Printing 92

Screen printing in a studio is awesome and you can do all sorts of fun stuff.  And fortunately nowadays (unlike when my mother was an arts student), the materials you use won’t kill you.  Which means you can do this stuff at home, too!

DESIGN

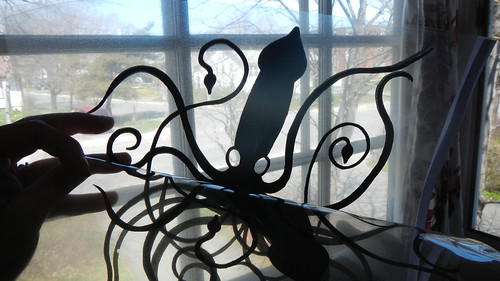
First you need a design.  For our first attempts, we decided to work with something simple: a giant squid for myself.  Because I love giant squid.

Screen Printing 8

Screen Printing 9

After several attempts, I had something I liked.  I didn’t notice, however, that I’d put an extra tentacle on the thing.

Screen Printing 22

But after photoshopping it looked pretty good.  Pick something simple with high contrast.

Screen Printing 38

Then copy it onto a transparency — this way you won’t have to cut it out.  If you have a strongly black and white design you could just print it out in black on white paper and cut it out.

Screen Printing 41

Now, the first time we tried this it didn’t work (I will show you that later), because the transparency printings weren’t as opaque as they should have been.

Having learned from that, we printed our images in triplicate, and lined them up.  You can see in the photos below how the opacity increases with each layer.

Screen Printing 52

Screen Printing 53

Screen Printing 54

After carefully lining them up, tape them together with a bit of clear tape.

Screen Printing 55

PREPARING YOUR SCREENS

And now for your screen.  We ended up buying a kit from Urchin downtown to get us started, but we also made a few of our own screens.

Screen Printing 1

This is the Speedball screen that came with the kit.  This is the squeegee side, where you will burn your image and spread your ink.

Screen Printing 16

Here is the print side, which will be going flush against your fabric.

Screen Printing 17

To make your own screen, you need frames and screening.  Here I have some sheer polyester that I picked up from Value Village.  It’s denser than, say, pantyhose, which means that the details will come out much more finely, but it’s also hole-y enough that you can squeegee paint through it, which is kind of key.

Screen Printing 3

And I have these picture frames, also from Value Village.  Take out the glass and the picture and everything and you can staple your fabric onto your frame using a staple gun.

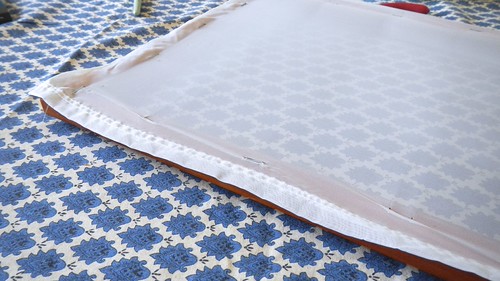
Screen Printing 6

Pull it relatively tight — not so much that it buckles or tears around the staples, but tight enough that there are no wrinkles and you could run a squeegee up and down it with no worries.

Screen Printing 11

Screen Printing 12

Screen Printing 13

Give your finished screen a scrub with warm water and a bit of dish soap and leave it to dry.

Screen Printing 20

Use tape to line around the outside of the frame on the screen so paint won’t go all over everything and make a mess.  I used hockey tape because it’s pretty waterproof and sticks well to fabric, but I’m sure there’s some specific tape you should really be using.

Screen Printing 14

Do it again on the inside of the frame as well.

Screen Printing 15

Oh yeah, and you need a squeegee.  If you don’t have one, you can get away with using a piece of stiff cardboard.  Who came up with the word SQUEEGEE anyway?  It’s fantastic.

Screen Printing 24

Okay so we’re almost set here.  Do you have photoemulsion?  You should get some — it’s kind of key.  It’s a weird greenish stuff that will turn hard and waterproof under UV light.  I got the Speedball stuff that comes with the kit.  Make sure you follow the instructions on the back, as they’re all different.  Normally it comes in two parts: the dark green Diazo sensitizer, which comes in a wee bottle and you add water to it:

Screen Printing 26

And the blue photo emulsion base, to which you add the Diazo sensitizer.  Once this is mixed, you can keep it in your fridge for several months.  So you see here that it is green, indicating its mixedness.

Screen Printing 28

Screen Printing 29

Screen Printing 30

Spread the emulsion carefully and in a thin, even layer all over your screen, on the FRONT side, and the back side.  Use the squeegee to get a nice thin layer all over.  The first time we did it we spread it on too thick and as it dried it dripped.  Gross.

Screen Printing 31

Screen Printing 32

Screen Printing 33

Quickly place the emulsified frame in a completely dark room.  Lay it horizontally to dry for a few hours.  Don’t let any light touch it.  A nice big closet or a well-sealed box is a good place.  Ideally you should set the screen bottom side down while you dry (not what is shown in this picture, because we did it wrong the first time), so you will need to prop the screen up so the wet side doesn’t touch your closet.

Screen Printing 37

EXPOSING YOUR IMAGE

When you’re ready to burn the image onto your screen, you have to work quickly.  Some people like to expose their images inside, under high-wattage light bulbs, but we did ours on the cheap and exposed them outside on a sunny day.  Worked like a charm.

You’ll need your image (cut out from opaque paper or printed on transparency) and a sheet of glass that will fit inside the confines of your screen.  And a dark towel or thick piece of dark fabric for wrapping your frame in while in transport.

In the dark (we shut the curtains to our bedroom and I stood almost IN the closet while the Pie held the door mostly shut), lay your image on the inside of your frame (on the squeegee side, and orient it the way you want it to look when it’s printed (as in, you don’t need to mirror this).  Lay the sheet of glass on top so the image is fully covered and flattened down.

Now wrap the frame up in your dark towel so that the print side of the screen is resting on the towel, face down, and the rest is wrapped up around it.  Take it out in the sun and lay it in a flat, sunny spot.  Unwrap the towel so that the frame is resting completely on the dark surface (you want it flush so that there’s no chance of any reflection hitting the photo emulsion on the bottom and exposing it by accident).  You can see that the dried photo emulsion starts out green.

Screen Printing 56

And then in a few minutes turns a nice bluish.  We left ours out for about ten minutes.  Then you need to wrap it back up in the towel like a burrito and take it back inside.

Screen Printing 58

Now you need a source of high pressure warm water, like a sink sprayer or a shower head, and a nylon scrubbing brush (like a dish brush).

Working quickly, remove the wrapping, glass, and image from your frame and put it under the spray.  Use the scrub brush on the parts where your image is to get the unexposed photo emulsion off.  Scrub both sides vigorously until it comes clean.

Screen Printing 46

If you exposed it correctly, the contrast between the blue exposed photo emulsion and the stuff you hid under your image will be quite good and the unexposed stuff will come right off. If you didn’t have an opaque enough image, then the contrast will not be good and the photo emulsion will not come off, and will in fact continue to expose as you work.

Screen Printing 47

You can see this failed attempt only had a few spots that were truly opaque and so that was all that came off.

Screen Printing 48

But this one worked pretty well, save for a bit around one tentacle that didn’t expose properly.  But I can live with that.

Screen Printing 59

Screen Printing 60

After you’ve gotten all the unexposed photo emulsion off, let the screen dry in the sun for a bit (this will also cure the remaining photo emulsion).

Screen Printing 61

And here’s one that the Pie did for his video games.  He is using drawing fluid to fill in some pinholes in his exposed screen.

Screen Printing 71

PRINTING

Make sure that you’ve washed and dried any fabric you are planning to print on first, to get rid of sizing and make sure that it has shrunk all it’s going to shrink.  I picked up this handful of t-shirts at Old Navy and Michaels for cheap.

Screen Printing 4

Protect your work surface and wear an apron — fabric ink is permanent, after all.  If you’re printing clothing, put a piece of cardboard inside the t-shirt so that if ink comes through the fabric it won’t stain the other side.

Screen Printing 74

Lay out your shirt flat and place the screen where you want it to go.  For our initial test we used a piece of scrap cotton.  Pour a line of ink on one side of the screen, on top of the emulsion.

Screen Printing 65

Hold your squeegee at a 45° angle and using even pressure, pull the ink across the surface of your screen.  It helps if you have another pair of hands holding down the screen frame while you do this.  Do a second pass in the other direction.  Experiment with the pressure you put on and the number of passes you do until you are satisfied with how the ink looks on your fabric.

Screen Printing 66

Ease the frame off the fabric on an angle (so that one side is still touching the surface if you need to put it back down) and set the fabric to dry.

Screen Printing 67

On our second pass I tried a blend of two different colours.

Screen Printing 68

I tried to repaint the missing tentacle. It didn’t go well.

Screen Printing 69

My two shirts, one in greenish-gray and the other in silver.

Screen Printing 84

The silver wasn’t as opaque as I’d like it, but it’s still nice.

Screen Printing 77

And the Pie’s two shirts.

Screen Printing 85

When we did the yellow one we forgot to re-fill the pinholes and you can see they came out onto the fabric.

Screen Printing 81

When the paint is fully dry (give it an hour or two), place your shirt on an ironing board and, with a sheet of paper between your design and the iron (no steam!), run the iron on hot over the design for a few minutes.  This will “fix” the image and protect it from frequent washings.

Screen Printing 83

Modeling.  Sorry for the selfies.

Screen Printing 91

Screen Printing 86Screen Printing 90

Screen Printing 87

Screen Printing 89


Silver on blue …


Gray on orange …


Tada!

SCREEN CLEANUP

Unless you want to use those screens again, you’ll need to get the photo emulsion off as soon as possible.  I used the ScreenClean stuff that came with my kit, but you can also use 1 cup of washing soda dissolved in a gallon of warm water.

Use a paint brush to apply the cleaner to both sides of the screen and scrub briskly with a nylon brush.

Screen Printing 49

Apply the cleaner again with the paintbrush to both sides and leave it to sit for about 5 minutes.

Screen Printing 50

Run under a forceful stream of hot water and scrub again until all the emulsion and cleaner has washed away.

Wow, that was a lot to take in.  I hope it was easy enough to follow.  If not, please let me know!

PEOPLE WHO DID IT DIFFERENTLY:

Here are some of the links to the other sites I checked out to learn how do this stuff:

How to Screen Print! Silkscreening at home – The Art of Doing Stuff

Screen Printing: Cheap, Dirty, and at Home Instructables

Top Ten Worst Screen Printing Mistakes Adventures in DIY Screen Printing

DIY Screen Printing – I Love to Create

Cheap screenprinting tutorial – Craftgrrl

How to Silk Screen Posters and Shirts – No Media Kings

Sewing so easy even I can do it: Nursing Shawl

Nursing Shawl 18

Okay so it’s official: I’m going to be an aunt (again).  This time, though, unlike my lovely instant nieces Tego and HG I get to meet this niece or nephew at birth!  Krystopf and Atlas, the expectant parents, are coming to visit at the end of May.  It’s my big brother’s first time in Newfoundland, though Atlas was here back around the time of Doodle’s Newfoundland Express.  And neither Atlas nor I will let Krystopf forget the fact that SHE bravely came to visit us (by herself!) when she was a just brand new girlfriend, and HE (my own eldest brother) can’t organize himself enough to book a flight.  But for reals now they are coming and I couldn’t be more excited!  It’s a very brief trip but we’ll be sure to cram it with all sorts of fun stuff.

Nursing Shawl 15

While I fully plan to have their wedding present (from last July) finished before they get here,  I thought I would also get cracking on some baby-related things they might find useful in the near future (the baby is due in October).  Now we know that if you put me in front of a sewing machine I am likely to break it.  Like for real.  But this one I think I can handle, because it involves sewing precisely one line.  Even I can do that.  I hope.  Anyway, this post also kicks off my new Kidlet category here at Ali Does It.  Who says you can’t do it yourself when there’s children involved?
Nursing Shawl 14

What we’re going to make today is a nursing shawl, and it’s so simple it’s almost stupid.  But the great thing about this shawl (I think) is that it’s an easy (and fashionable) alternative to nursing bibs and trying to gather blankets around your shoulders and whatever.  And it covers your back, too, like a stylish poncho.  And it’s small enough you can just jam it anywhere in your bag.  And it doesn’t wrinkle.

Start off with some fabric, a nice jersey knit.  I found two that I liked, this pink cotton and then a silky gray polyester blend.  They were $2.99 a metre, which struck me as a good deal.

Nursing Shawl 1

After washing and drying the fabric (to remove sizing and get any shrinkage out of the way), fold the fabric right-side-in along its width (which should be about 60 inches (or about a metre and a half).  This will leave you with something about 30 inches wide.

Nursing Shawl 2

Because fabric stores cut this stuff very quickly, the edges are not exact.  I lined mine up as best I could and then used some sharp sewing scissors to cut along the outer edge to make it more square.

Nursing Shawl 6

Next, use a measuring tape to measure 25″ from the outer edge and pin several times to mark your place. This will run perpendicular to the folded edge.

Nursing Shawl 4

Cut along your markings so you are left with a rectangle that is about 25″ x 30″ (or 25″ x 60″ if you unfolded it).

Now you’ve got one folded edge and three open edges, right?  From one corner of your folded edge, measure 13″ along an open edge and pin to mark it.  This will be the head hole for your shawl.  Pin along the rest of the fabric to hold it in place.

Nursing Shawl 7

Nursing Shawl 5

Now all you have to do is sew along that line, from the edge of the head-hole to the end of the fabric.  It’s only 17″ of sewing.  Of course, my sewing machine and I don’t get along.  And so rather than throw it across the room I just did these by hand with a needle and matching thread and it took no time at all.

Nursing Shawl 8

Then you just flip them right side out and they’re done.  Jersey knit doesn’t fray so you don’t have to worry about hemming the other sides (though you can if you want to, or embellish them with ribbons or whatever you would like).

Nursing Shawl 9

It’s a nice comfortable, breezy fit!

Nursing Shawl 19
At this point, Fussellette laughed and said, “I’m not fit yet for motherhood.”

Nursing Shawl 22

Thanks to Fussellette and Teddy Two for being my models!

Nursing Shawl 16

Quick Mouse Pad Re-Fit

Mousepad Refit 1

I’ve had this mousepad since I got my first MacBook about eight years ago.  With an optical mouse, of course, I don’t actually NEED a mouse pad, but I don’t like rolling my hand over the relatively rough surface of my desk.  It makes me feel icky.  This mousepad, of course, has seen better days, and the cloth on top of the foam is peeling off.

Well, I have fabric, and I have fabric glue.  How hard can a re-fit be?

So first I peeled off the old fabric, which was some form of stretchy something.

Mousepad Refit 2

I gave the neoprene base a bit of a rinse and scrub to get rid of the now powderized ancient adhesive and let it dry.  Then I set out my equipment: paint brush, fabric glue, scissors, and a piece of fabric.  Go with a fabric that feels okay against your wrist, because you will constantly be rubbing your wrist against it. This was a scrap leftover from a previous experiment making bow ties, and it was just the right width.

Mousepad Refit 3

I used my paintbrush to slather fabric paint across the entire surface of the mousepad. Make sure to get it right to the edges, and don’t spread it on too thick. I may have gotten mine a little thick in some places and it showed through the fabric later. Not a huge deal, but if you’re a perfectionist, use caution.

Mousepad Refit 4

Then I simply flipped it over and trimmed around the edges with scissors. Easy peasy.

Mousepad Refit 5

All trimmed up and sitting to dry.

Mousepad Refit 7

And that’s it. A new look in five minutes or less.

Mousepad Refit 9

Mousepad Refit 10