Winter Sun

DSCN8853

There have been a slew of babies born into our circle in the past few months, with more to come in the new year, and it’s all very exciting. I didn’t have a whole lot of time to hand-make presents for everyone this year, but for the babies I spared an hour or so. This project, inspired by Made by Joel, is super easy and makes use of those little scraps of fabric you have on hand. If you don’t have a sewing machine you can do this by hand but it certainly saves a bit of time when you’re making them in bulk.

DSCN8855

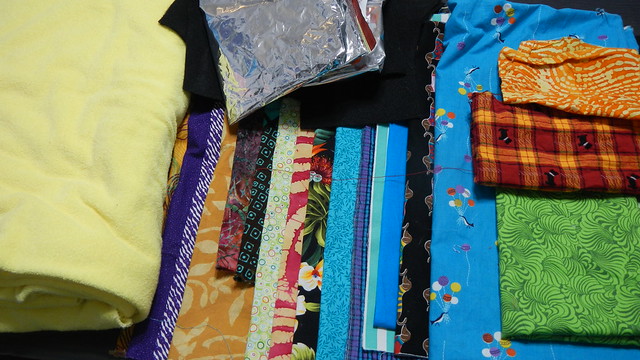
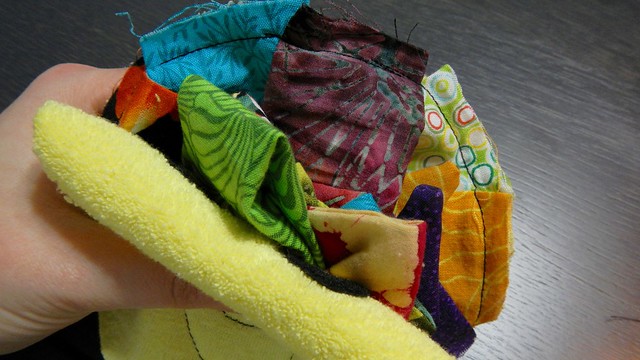
So I have here some fabric scraps, a huge hunk of soft yellow terry cloth, and some empty plastic bags that previously held potato chips (but that are now clean, because you probably don’t want your baby to smell like potato chips).

DSCN8821

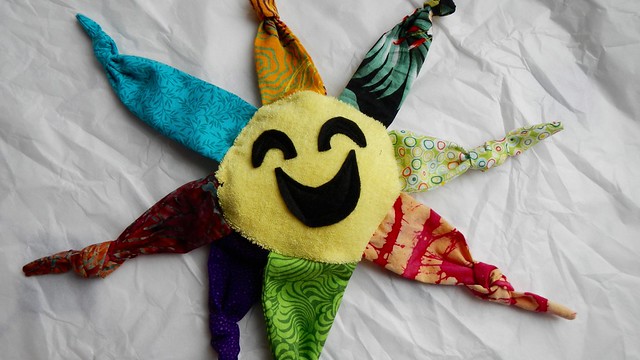
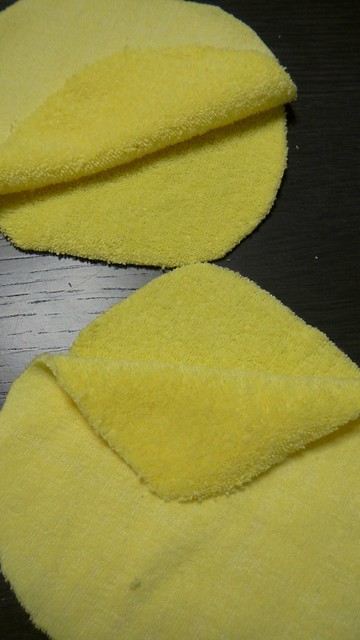
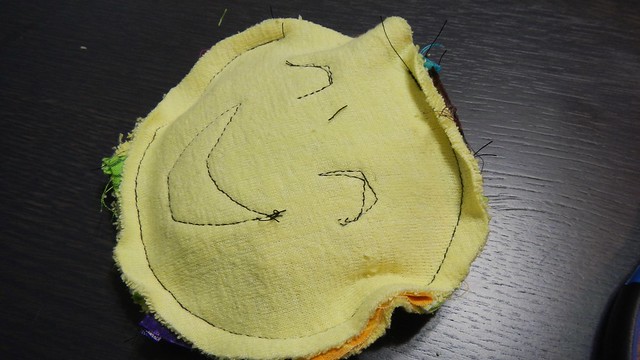
Grab your terry cloth (or whatever fabric you choose) as the centre of your winter sun and cut from it two circles of the same size (you don’t have to measure but think of how big a baby’s hands are and act accordingly).

DSCN8823

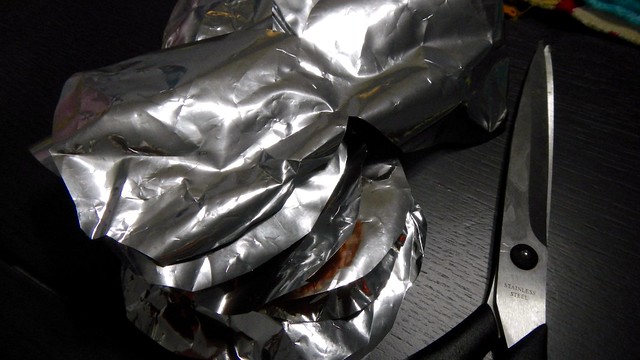
Cut out some circles as well in your chip bags. These things will be layered and stuffed inside your little creation to give it a delightful crinkle.

DSCN8824

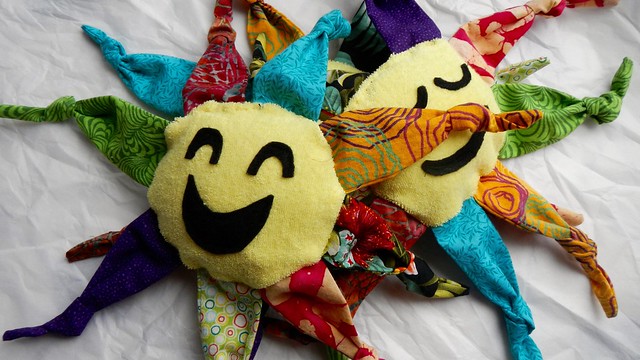
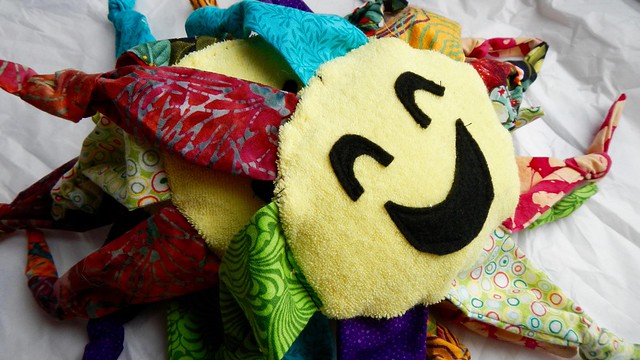
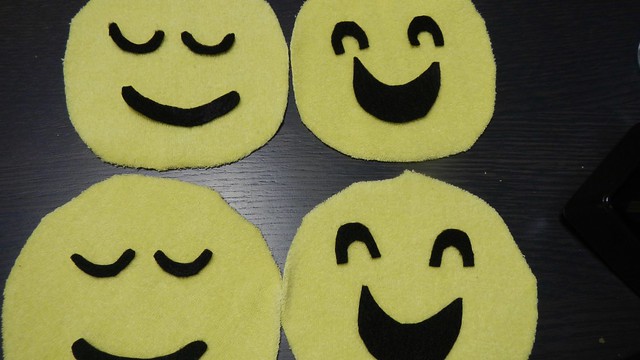
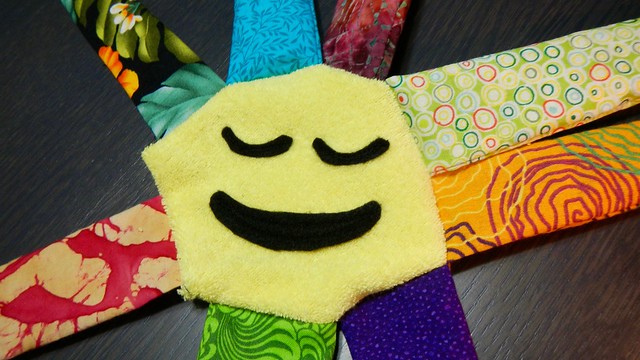
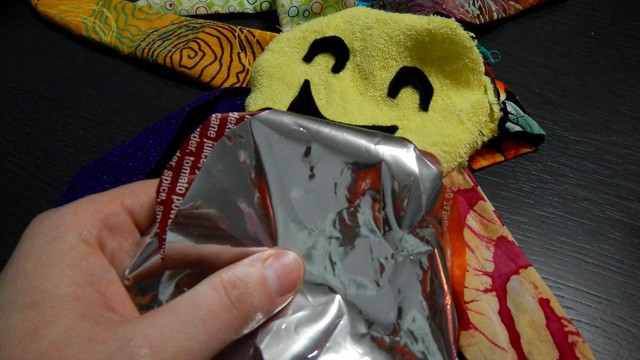
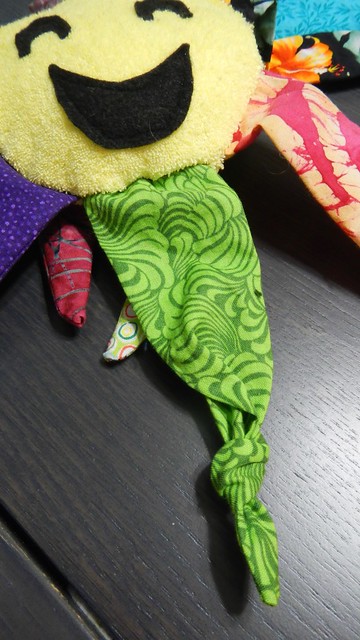
I also decided to dress up the faces of my winter sun with some scraps of felt. I made one side a sleepy sun and one side a happy sun.

DSCN8826

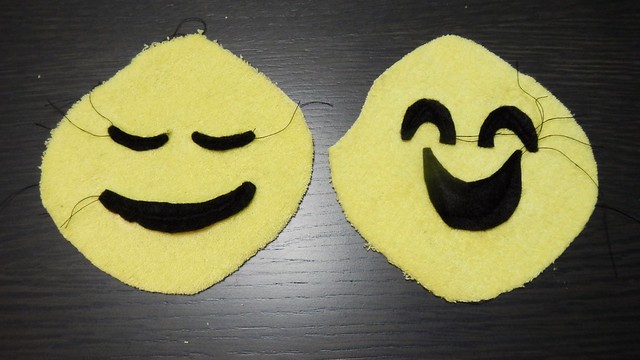
Then I sewed those on carefully. You can use whatever you want to decorate your sun, though I would avoid buttons, as babies tend to swallow those.

DSCN8834

Then grab some more scraps. You’re going to want to cut out long triangles from this stuff. It’s easiest to fold it and then cut a diagonal line towards the fold.

DSCN8830

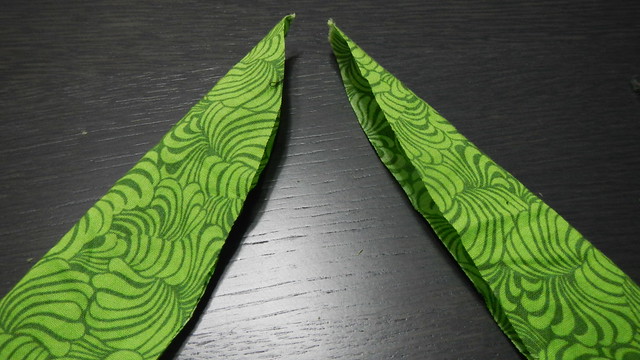
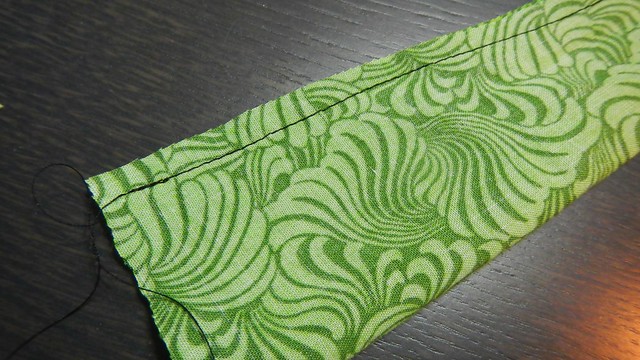
Then you can sew the open long end closed (leave the bottom open).

DSCN8836

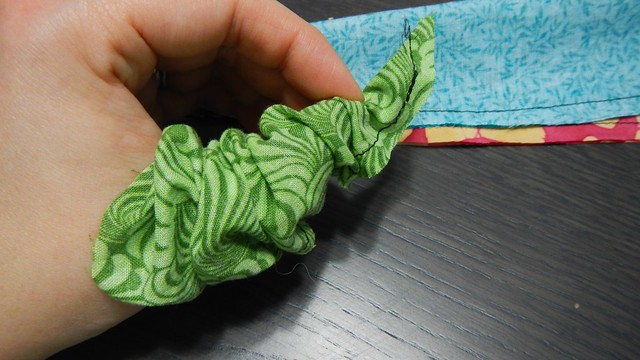
Jam your thumb into the triangle and squish it up so it’s easier to turn inside out.

DSCN8837

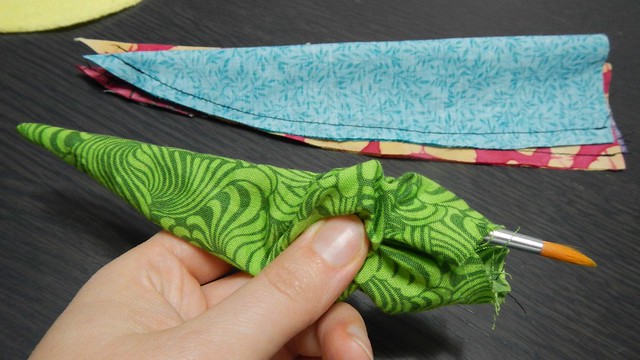
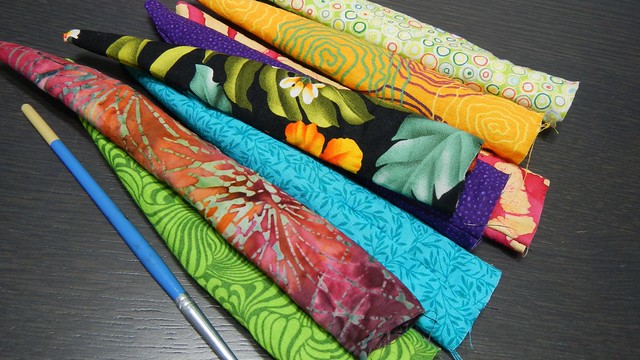
Use a paintbrush or pencil to help you get it inverted properly.

DSCN8839

You’ll want enough scraps of differing colours to make enough triangles to go around the circumference of your sun. I eyeballed it and came up with eight.

DSCN8832

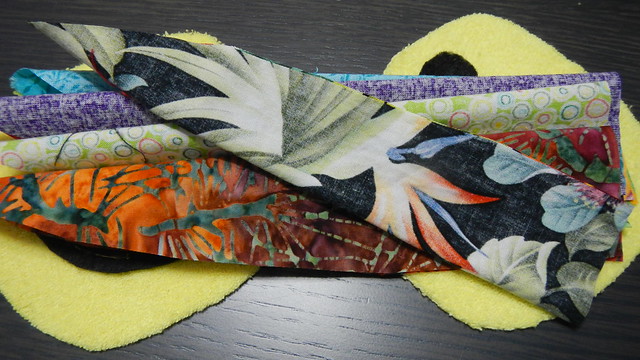
Cut ’em, sew ’em, reverse ’em.

DSCN8840

Now grab one of the faces of your sun and start attaching the rays. You want to attach them to the right side of the sun with the rays all pointing in towards the centre (so that when you turn it inside out they will stick out).
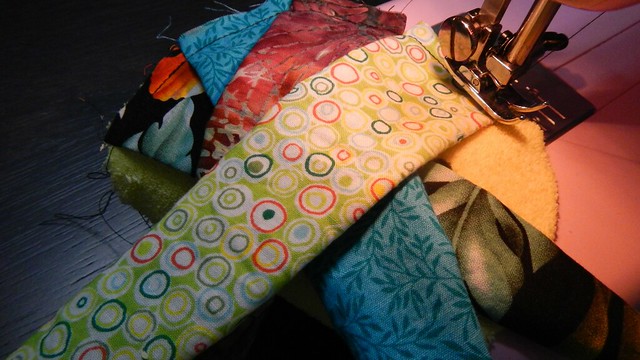
DSCN8842

Like this.

DSCN8844

Then grab the other face of the sun and make sure all the rays are tucked safely inside before attaching it to the whole shebang. Leave a few inches open so you can invert it.

DSCN8845

DSCN8846

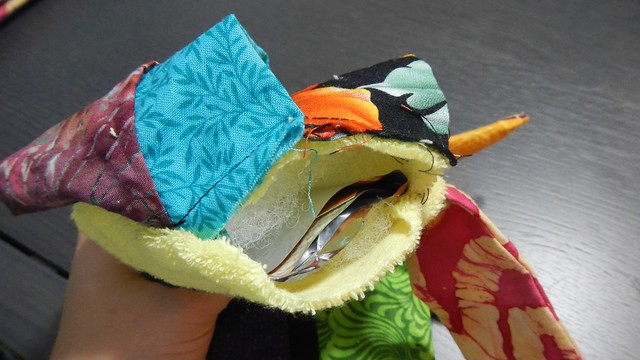
Grab your chip bags and stuff them inside the now right-side-out sun.

DSCN8847

If you have some, you can add a little bit of cotton batting or fill for fluff purposes. Then it’s a simple matter to hand-sew that opening shut.

DSCN8848

Then grab each of the rays and tie a single knot into each one for texture.

DSCN8849

Easy peasy!

DSCN8851

DSCN8852

Jelly(fish) Mobile

Jelly Jelly Mobile 71

You guys. Guys. Seriously. This might be the best thing I’ve ever done. And I have to give it away. Fortunately I’m giving it to someone very, very special, so all the effort that went into it is definitely worth it. I can see that this sort of project could be used in all sorts of different situations: you could have it simply as a delightful window decoration; a baby’s mobile; as the modified shade on some LED chandeliers (like this one from IKEA); a room separator … anything. really. This one in particular is … a rainbow jellyfish.

Jelly Jelly Mobile 4

And you can make one too. All you need for a basic version are some gelatin plastic shapes (you may remember we made them earlier), some fishing line or monofilament line (I picked very fine line that will be nearly invisible) and a wire rack of some kind to hang stuff from (mine is round).

Jelly Jelly Mobile 1

Add-ons to this were some snap swivels I picked up from our local hunting and fishing store and that lovely beaded string I picked up for my miniature chandeliers that I made earlier this summer. I had some flexible wire that I saved from my wire baskets, and I found a set of bent needlenose pliers (and a pair of scissors) to be very helpful.

Jelly Jelly Mobile 2

I’ll show you what I did and then hopefully you can take this idea and improve on it and make it your own. Let’s begin, shall we?

First I took the flexible wire and I cut it into three equal pieces. I hooked each piece around the three little feet on my wire cooling rack and wound them up tight. Forgive the photos as my camera hates taking pictures of wire apparently. I looped each wire between two feet so I had three arcs coming up from the rack.

Jelly Jelly Mobile 7

Jelly Jelly Mobile 8

Jelly Jelly Mobile 9

Then I grabbed all three arcs and squished them together, twisting the wire so that all was left was a nice big hoop at the top, tapering to a straight line in the middle and then it spread out to the three little feet at the bottom, like a tripod.

Jelly Jelly Mobile 10

Then I took my beaded string and I wrapped it around all of those things, to look like bubbles in the sea.

Jelly Jelly Mobile 11

Jelly Jelly Mobile 13

Then I hung it from my ceiling fan, because I figured it was pretty firmly attached to my ceiling.

Jelly Jelly Mobile 14

I added some more beaded string, because I knew that once I started hanging the discs it would be harder to do. I put some loops at the top to distract from all the hardware that was going to be visible up there when I was done.

Jelly Jelly Mobile 20

Jelly Jelly Mobile 22

Jelly Jelly Mobile 23

Next I sorted all my discs into rainbow order.

Jelly Jelly Mobile 18

Then I grabbed my humble snap swivel. And some pliers.

Jelly Jelly Mobile 25

And started attaching them to the discs.

Jelly Jelly Mobile 26

And I did that a million times.

Jelly Jelly Mobile 27

Then I started tying the discs onto my fishing line. I had originally planned to just use one disc per line, so that the snap swivel would provide the weight needed to keep the line straight and the swivel would allow for spin but before I put it together I reconsidered this and decided to tie multiple discs to the same line. This will prevent clutter on the wire rack and make things easier to install. It will also leave more space around each disc for spinning. If you do this, make sure to tie the discs on at irregular intervals, because you want the colours to overlap in places and if you do it all regularly it will look like a very pretty geometric thing but not like a jellyfish. So I guess it depends on what you’re going for.

Jelly Jelly Mobile 29

My inner lines were quite long, and each time I moved out a few circles in the rack I made the lines shorter.

Jelly Jelly Mobile 35

This took several hours, and was quite fiddly because I also used snap swivels to attach the lines to the racks for durability, which necessitated a lot of reaching over my head to fasten a tiny piece of metal to another tiny piece of metal. It is quite a strain on the shoulders after a while. This is where I got to before I threw in the towel for the night.

Jelly Jelly Mobile 39

The next day I got up early in the hopes that I could catch the early morning sun filtering through the discs but alas it was overcast. I kept going, though.

Jelly Jelly Mobile 46

Almost there …

Jelly Jelly Mobile 56

And here is my beautiful magnum opus. The recipients are already in love with it and I still haven’t figured out how to transport it in my car yet. It makes a highly satisfying sound when the pieces click together, like a sink full of popping dish foam.

Jelly Jelly Mobile 60

Jam Session: Saskatoon Berries

Saskatoon Berry Jam 27You may remember that last year I surreptitiously liberated several service or Saskatoon berries from city property. This year it rained on Canada Day, our national holiday, and between thunderstorms I went out and hauled in about 4 litres of them. Everyone who passed through the kitchen during our Canada Day get-together asked where I’d gotten so many cranberries. I got a little testy explaining that they were service berries each time. I guess they DO kind of look like cranberries, but whatever. Saskatoon Berry Jam 2

I decided to make jam out of all my berries (and I actually ended up with so many berries that I had some leftover even after two batches of jam). I bought two dozen of the wee 175mL Bernardin canning jars and popped them into my canner to sterilize. I turned on the stove and brought those to a low boil.

Saskatoon Berry Jam 4I put the rings aside and put the discs in a heatproof bowl. Saskatoon Berry Jam 3

I heated a kettle and poured almost boiling water over the discs to let the rubber soften.

Saskatoon Berry Jam 9I gathered my other canning tools and had them handy. Always use non-metallic implements when making jam. Saskatoon Berry Jam 12

I get very irritated when I make jam because I always end up either burning myself on boiling sugar or burning myself with steam or hot water and everything ends up sticky and it’s already hot making jam in the summer so I decided to double my batch so I wouldn’t have to repeat the process in the same day. When you do this you have to make sure that your proportions are exact so you don’t mess up your ratios of acid to sugar to pectin.

Saskatoon Berry Jam 23The recipe I used is from the Bernardin website and advocates the use of the crystallized pectin, but the liquid stuff had been on sale so I used that instead. The process is a little different using liquid pectin in terms of when you add the sugar and stuff so the process below reflects that. Saskatoon Berry Jam 7

It’s a good idea to pre-cut the packages and sit them upright in a cup so they’re handy when you need them.

Saskatoon Berry Jam 15

Now that all your canning stuff is ready to go, you can get onto the actual jam component. Grab your berries, about 9 cups service berries (for a single batch, though in these photos that’s doubled), and plop them in a pan. I like to use my Lee Valley maslin pan because it’s kind of designed for jam and candy making and I love it. Plus it has a great handle that is very useful. Mush up your berries with a potato masher so they don’t explode on you later and so all the berry goodness gets out there early on. Saskatoon Berry Jam 6

Tip in as well 4 tablespoons lemon juice and 1/2 teaspoon butter or margarine (apparently this helps prevent it from foaming too much but I don’t think it helped in my case).

Saskatoon Berry Jam 8Start heating the berries on medium-high and give them a good stirring. Measure out 6 cups granulated sugar and add that in as well. Saskatoon Berry Jam 10

You’ll find the berries very quickly become way more liquidy.

Saskatoon Berry Jam 14You want the berries to be at a decent boil that doesn’t go away when you stir (watch out for flying berry juice that can burn you). Saskatoon Berry Jam 16

When you get to that state, grab your pectin and quickly add it to the jam and give it a quick but thorough stirring.

Saskatoon Berry Jam 17Let it come back to a rolling boil again and leave that for 1 minute before removing the jam from the heat. Don’t burn yourself! Saskatoon Berry Jam 18

Skim off any foam with a non-metallic utensil. The jam foam was always a huge treat for us as kids to eat with a spoon. I offered it to the Pie and he refused it. I was miffed about that.

Saskatoon Berry Jam 19Grab your jars from the canner and drain them. Saskatoon Berry Jam 20

Fill them with your jam, leaving about 1/4″ of headspace between the jam and where the lid will go. Use a wet towel to wipe off any jam on the edge of the jar where the disc will need to be tightly sealed.

Saskatoon Berry Jam 22Plop the disks onto the jam jars and add the rings and tighten to fingertip tightness. Return the sealed jars to your canner and bring the water back to a boil and leave it for the time required by your canner and the number of jars you have in there. Saskatoon Berry Jam 21

I set my jars on a cookie rack to cool completely. These are the first batch of my DIY holiday gifts this year.

Saskatoon Berry Jam 26And I bought some overflow jars for myself, knowing I didn’t have enough jars for the jam I made. And I quickly filled the overflow jars, and then a bunch of plastic containers I had lying around. SO MUCH JAM. Saskatoon Berry Jam 25

Don’t Fence Me In – Make Baskets Instead

Wire Baskets 12

This is another wee project I picked up to keep me from going stir crazy when I was sick last weekend. I’m behind the trend on this again (surprise, surprise), but I’ve wanted to make these custom wire baskets for ever. The Pie as a rule is against wire baskets because he always feels like he’s going to jam his fingers in the holes and hurt himself, but then again when it comes to me getting up to shenanigans when he’s out of town, I’m not really considering anyone’s happiness but my own. For these baskets all you need is some welded hardware mesh, usually used for fencing off gardens and things like that (this one has 1/2″ square holes), a wire cutter, and a pair of pliers. Or, if you’re lucky, you can get a two-in-one that’s both cutters and pliers. And you’ll need some patience and strong wrists. This is going to take a while.

Wire Baskets 1

I was warned that when I opened the package it might spring open and seriously harm me.

Wire Baskets 2

The only thing between me and certain death was this little bitty wire.

Wire Baskets 4

When I undid the wire, the whole roll spontaneously sprang open — about three inches. I was expecting a large-scale disruption as it fully unraveled and let me tell you, I was disappointed.

Wire Baskets 5

But I kept the wire. Because I always keep wire. And ribbons. And small pieces of string. Man am I a hoarder or what.

Wire Baskets 6

Then it was easy to clip out the basket frame in the size I wanted – the best part about this project is being able to make them exactly the size you need. Make sure to leave those nice sharp open prongs. You’ll need at least one set of those on each seam.

Wire Baskets 7

Folding it up was a little harder than I expected.

Wire Baskets 8

But all the edges matched which was good.

Wire Baskets 9

Folding the prongs down over the other side of the basket took some time. And I made a bunch of baskets on this day. So that took a lot of time.

Wire Baskets 10

I also folded down the tops for a smoother edge.

Wire Baskets 11

It’s just a wee basket.

Wire Baskets 13

But it can hold things like coasters.

Wire Baskets 14

Or my orchid.

Wire Baskets 16

Wire Baskets 17

I even made a round one, out of scraps. It was not as hard as I thought it would be.

Wire Baskets 18

I made a bunch more and even painted them for another project I started that weekend, so stay tuned for the results shortly!

Matchbox Gifts

Matchbox Gifts 14

My mother is absolutely obsessed with match boxes and the things you can put in them, so I kind of had a lightbulb moment when trying to figure out a present for her birthday last week (normally I handle the cake but this year my dad insisted that he had it under control). If you have a mother with a similar fetish, maybe this will work out for you for a nice Mother’s Day present.

Matchbox Gifts 8

For my mother’s wee giftie, it was just a silly little thing: I decided to give her MAGIC BEANS. But instead of magic beans it was actual bean seeds that she could plant shortly in the garden. And then we could eat the beans. I also gave her some rosemary seeds because I killed her rosemary tree while she was in Florida.

Matchbox Gifts 1

I love these little tiny glass jars you can get at the dollar store.

Matchbox Gifts 2

Matchbox Gifts 4

Matchbox Gifts 5

Don’t worry, I DID label all the little jars.

Matchbox Gifts 6

I decided to make a matchbox from scratch so I could ensure it was the right size to fit my beans. In order to do that I downloaded a template from the internet. I cut it out and used scrapbook paper (it’s a decently stiff cardstock) for my boxes.

Matchbox Gifts 7

I used a craft knife to get things exact, but it’s a pretty easy template to cut out.

Matchbox Gifts 9

Then a little bit of strategic adhesion with craft glue.

Matchbox Gifts 10

And the beans, they fit! They’re a little loose though.

Matchbox Gifts 11

So I padded the bottoms of the boxes with a bit of felt.

Matchbox Gifts 12
I broke this photo. It’s okay, though, because it wasn’t a very good one anyway.


Then tied up both boxes with pretty ribbon to give to my favourite mother!

Matchbox Gifts 13

Match boxes (even custom-made ones) are a great creative way to package up smaller gifts of jewelry or what-have-you. Keep that in mind the next time you’re doing some complex wrapping and you don’t have a perfect box to hand.

Have You Tried Milk Art?

Milk Art 13

This is a super popular project for folks with kids, because you can teach them all about surface tension and the properties of soap and fat and all that good science-y stuff in a nice controlled environment, with very pretty results.

Milk Art 15

The supplies are simple: a large shallow tray (a rimmed baking sheet will do), watercolour paper (sized to fit in your tray), cotton swabs, liquid food colouring, a few drops liquid dish soap, and some milk. You can use almond milk or rice milk or homogenized milk or cream or whatever — you just need some milk with a decent fat content. The results will apparently differ depending on the milk you use (almond milk is supposedly the best), but I only had regular old 2% on hand so I can’t really speak to that.

Milk Art 1

On a level surface, pour milk into your tray so that the whole bottom is just covered.

Milk Art 5

Now start dotting the surface of the milk with food colouring. Go with whatever floats your boat.

Milk Art 7

Take a cotton swab and dip it in your dish soap.

Milk Art 8

Gently touch the swab to your milk surface. POW! Watch that science happen.

Milk Art 9

This is that same spot a few seconds later.

Milk Art 11

Touch the swab all over to make the  colours mix or drag it across the surface to make a trail.

Milk Art 12

Now lay your paper down flat on the surface of the milk, then slide it off.

Milk Art 14

Let it drip a bit and lay it or hang it somewhere to dry.

Milk Art 16

I liked how the colours kept changing as I put in more paper, so I didn’t replace my milk, but you can if you like.

Milk Art 20

After a while I had nine full sheets and I was quite pleased with the results.

Milk Art 22

You can do whatever you want with these sheets: cut them into shapes and frame them, use them as stationery or greeting cards … whatever you want.

Milk Art 23

In my case, I ironed them flat using the high steam setting on my iron.

Milk Art 27

You can tell that I let this one dry on a sheet of newspaper can’t you?

Milk Art 28

Then I played around with the order of them a bit.

Milk Art 29

And used Blu-Tack to put them up on the wall in our bedroom.

Milk Art 31

The colours I used complement the other quick wall art I made a few weeks ago so I am very happy with how they turned out – though I would like to try it with almond milk sometime.

Milk Art 36

Peppermint Patties

Peppermint Patties 14

This was yet another “baking” episode Cait and I got up to – except it involved no baking whatsoever. If you’re not a fan of peppermint patties, then you won’t like this. If you ARE a fan, well, then, maybe you’ll like these, which we made from a mish-mash of these two recipes. Just a warning: if you make these puppies around Christmas time, you may have to search a bit to find peppermint extract in the grocery store. Cait and the Pie and I went to three separate stores before we nabbed the very last one hidden at the back of a shelf. If you’re making these for your Valentine tomorrow you may have some better luck!

Peppermint Patties 11

Now, you’re basically making a peppermint-flavoured fondant as the centre of these babies, so let’s start with that.

Peppermint Patties 3

In the bowl of your electric mixer, dump in 2 1/4 cup icing sugar, 2 tablespoons softened butter, 2 teaspoons peppermint extract, and 2 tablespoons cream.

Peppermint Patties 1

Start beating it on low speed until incorporated (so you don’t get a face full of icing sugar), then increase the speed and beat until you have a solid, smooth mass.

Peppermint Patties 2

Now take your fondant and roll it into a long snake between 1″ and 1 1/2″ in diameter (any bigger and the patties will fall apart as you manipulate them).

Peppermint Patties 4

Wrap the snake in waxed paper and chill it for about 45 minutes or so. If you shove the snake into an old cardboard tube from a paper towel then it won’t deform while in the fridge.

Peppermint Patties 5

In the meantime, plop 12oz chocolate (dark is probably best, but it’s your choice) into a double boiler with 6 teaspoons shortening and let that melt. The shortening is what will give the chocolate a shiny, harder exterior once it hardens again. The magic ratio for shortening to chocolate, if you’d like to use it in other recipes, is 1/2 teaspoon shortening for every 1oz chocolate. And as it happens with every chocolate-dipping recipe, depending on the size of your patties and how quickly you get this done, you may need to melt more chocolate.

Peppermint Patties 8

Anyway, let the chocolate cool to almost room temperature (because otherwise you’ll melt the patties when you dip them and that would be bad). Take your snake out of the fridge and slice it into little disks about 1/4″ thick. To avoid the patties warming up and getting floopy, I put half of them back in the fridge.

Peppermint Patties 9

Using chopsticks or a fork, dip the cold patty into the cool chocolate and flip to coat. Lift it out of the chocolate and let it drip for a few seconds. Set the patty on a sheet of waxed paper to harden completely.

Peppermint Patties 10

The demented ones are the ones that Cait did. I take no responsibility for them.

Peppermint Patties 12

Store in an airtight container for up to two weeks. Enjoy!

Peppermint Patties 13

Chocolate Caramel Pretzel Bites

Pretzel Bites 7

Cait and I made these on one of our baking evenings where we wanted to put in as little effort as possible. While it’s inspired by this recipe, I had trouble locating large amounts of the ingredients it required so I ended up changing things around. My process shots for this are also terrible and blurry, and for that I apologize, but you can probably figure out how to make these for yourself without them. They are a quick and easy contribution to a potluck, picnic, or gift, and are simple enough that you can do this with small children if they want to make their own gifts.

Pretzel Bites 8

Start with a bunch of pretzels. Lay them on a baking sheet lined with parchment paper and preheat your oven to 250°F.

Pretzel Bites 1

On top of each pretzel, place one chocolate-covered caramel. The original recipe called for Rolo candies, but I could only find the miniature ones at Bulk Barn so I opted for these salted chocolate caramels instead and while they were wildly expensive, they were totally worth it.

Pretzel Bites 2

Grab a number of pecan halves equal to the number of pretzels and caramels and set them aside. Pop the tray with the caramel-topped pretzels into the oven and leave it there for 5 minutes or so, until the chocolate is melty and the caramel is squishy. The time it will be in the oven is dependent on the size and type of your caramel.

Pretzel Bites 3

Pull the pan out of the oven and press a pecan half into each caramel. Cait was concerned about the structural integrity of the underlying pretzel so she was unwilling to squish the pecan and caramel down with any force. As a result, when the ones she made were cooled, the pretzel came off the bottom and chaos ensued. So make sure to press the pecan down firmly into the caramel and in doing so, push the caramel into the pretzel to hold everything in place.

Pretzel Bites 4

Set those aside to cool and harden, then store in airtight containers until you eat them all.

Pretzel Bites 5

You can see that we have our festive Christmas tins ready to go here. I know it’s February, but tins are tins are tins, right?

Pretzel Bites 6

Fun with BLEACH

Bleach Tees 29

Well, that’s certainly a title that’ll get your attention, eh? This is a quick and easy way to personalize cotton t-shirts just the way you like them – it’s not screenprinting, but the results are just as satisfactory and the whole process is way faster. Plus it’s something that even kids can do (if you trust them to use bleach). And I’m going to show you two ways to do it.

Bleach Tees 2

First, you need some spray bottles that produce a fine mist (the squirty ones won’t do you any good here), and some bleach. Make a solution of about half bleach and half water (or maybe 3/4 bleach and 1/4 water if you trust yourself) and pour that in the bottle.

Bleach Tees 1

Now you need a cotton (or mostly cotton) t-shirt in a dark or bright, saturated colour (you can use pastel colours but the results won’t be as contrasty). Wash and dry the shirt to remove any sizing from the manufacturer that may interfere with the bleach.

Bleach Tees 18

Grab yourself some adhesive vinyl or Con-Tact paper.

Bleach Tees 5

Cut your vinyl into the desired shape you want. You can either use the shapes to mask off an area that you will bleach around, or the vinyl can act as a shield to the rest of the shirt and only your design will be bleachy – that’s up to you.

Make sure to press the vinyl firmly into the fabric of the shirt.

Bleach Tees 7

Slide some waxed paper or plastic inside the shirt to prevent the bleach from leaking through to the other side.

Bleach Tees 11

Spray your design lightly and evenly with bleach.

Bleach Tees 8

Just a light misting.

Bleach Tees 9

Use a rag to dab away any beads of bleach that might drip onto your shirt (unless you want them to drip).

Bleach Tees 10

Wait a few minutes and then carefully peel off your vinyl.

Bleach Tees 13

Watch as the design emerges. When you get the right level of bleachiness that you like, rinse the shirt under cold water to stop the bleach process. Then chuck the shirt in the wash and run it through a cycle with soap to get out all the bleach.

Bleach Tees 17

When your shirt is dry, you will be the coolest person out there.

Bleach Tees 19

Another method, if you don’t have adhesive vinyl on hand is to use paper stencils and a glue stick. So you just cut out your design and slather it with glue from the glue stick. Make sure to go right to the edge.

Bleach Tees 20

Flatten it firmly on your shirt.

Bleach Tees 21

Spritz on your bleach, dab, and remove the paper before it gets too saturated with liquid (because that will soak through). Don’t worry if there’s a bit of paper left – that will come off in the wash. On this design (Serenity!), we added a few extra drops of bleach here and there to make it look like the ship was traveling through a nebula in space.

Bleach Tees 22

Tada.

Bleach Tees 24

On this shirt we did a similar negative image with a Rebel Alliance symbol from Star Wars, and then on the back we did the Galactic Empire symbol, so good on the front and evil on the back!

Bleach Tees 25

Bleach Tees 26

Here we did a positive image, where the paper served as a shield for the rest of the shirt. You may recognize the Autobots symbol from Transformers.

Bleach Tees 27

Another positive image, this one of a stylized Joker’s face from the Dark Knight film series.

More Bleach Tees 2

Because the pupils were hard to glue in place I used a fabric marker to add them back in. The shininess will go away the first time the shirt is washed.

More Bleach Tees 1

On this design the stencil I used was too thin and the bleach soaked around the edges. Not to worry!

More Bleach Tees 5

I simply used some more fabric markers to trace the proper outline and I really like the finished result.

More Bleach Tees 6

Buckle Book

Buckle Book 15

Here’s another pair of presents I made for Rosa and General Zod at Christmas (they’re only four months apart in age so I can get away with getting them the same thing for a while). It’s a good little distraction to take along with you in the car or at the doctor’s office or wherever you have to sit in one place for a while.

Buckle Book 19

You will need some fabric for the inside of your little book and some for the outside. I used a quilted red cotton (from the Pie’s caddy) as the interior and a thick denim for the cover. I originally planned to use velcro to keep the book closed, which is why it’s in this shot, but I ended up going in a different direction.

Buckle Book 2

You will also need assorted notions for sticking inside the book: zippers, ribbon, beads, buckles, snaps, and I even picked up a jewelry chain I thought might be of interest. Some of this stuff I picked up at the dollar store and other bits I scavenged from my mother’s sewing room.

Buckle Book 1

I strung some plastic pony beads onto some narrow ribbon.

Buckle Book 4

I realized after I planned everything out that I had red zippers on a red background, which wasn’t particularly appealing, so I grabbed a contrasting cotton to slide in underneath.

Buckle Book 3

So this is everything laid out as I want it in my “book” (which is more like a scroll, if we’re being honest).

Buckle Book 5

Now it’s just a matter of pinning.

Buckle Book 7

And sewing it all into place. Make sure you sew it on securely – toddlers can destroy pretty much anything.

Buckle Book 8

Time to put a backing on it. This is a general idea of how it will roll up.

Buckle Book 9

There was more pinning, and more sewing. I even mitred the corners, which I learned how to do a few Christmases back.

Buckle Book 13

Then I added on a wide grosgrain ribbon that would tie it shut and was also long enough that you can tie it around a chair back or car seat so it doesn’t go anywhere.

Buckle Book 12

Here’s the ribbon loop.

Buckle Book 16

The finished interior’s got zippy zippers.

Buckle Book 17

And slide-y beads.

Buckle Book 18

And slinky chains and clicky buckles.

Buckle Book 21

And snappy snaps.

Buckle Book 20

And all wrapped up!

Buckle Book 14