Wingin’ It Wednesday: Fruit Cookies for Fall

Fruit Cookies 14

I whipped these up for dessert at Thanksgiving and like all my made-up cookie recipes, they’re dead easy and use the same base. Experiment with what you chuck into them and enjoy!

Fruit Cookies 13

Start by whisking together 2 cups flour, 2 teaspoons baking powder, and a dash of cinnamon. I put the cinnamon in not just for flavour, but also to help me determine if I’ve mixed in the baking powder well enough – if I can’t see streaks of cinnamon then that means there aren’t any streaks of baking powder either. Set that aside.

Fruit Cookies 1

In the bowl of a mixer, or by hand if you’re Hercules, beat together 1 cup butter, 1/2 cup brown sugar, and 1/2 cup granulated sugar until it’s stupid fluffy.

Fruit Cookies 2

Crack in 1 large egg and a dribble of vanilla and beat again until fully incorporated.

Fruit Cookies 3

Slowly tip in your flour mixture and beat on low until smooth and completely combined. The dough will be pretty stiff.

Fruit Cookies 4

Then grab yourself some of your favourite dried fruit!

Fruit Cookies 6

I tossed in rough handfuls (and remember we measured my handfuls and they’re precisely 1/3 of a cup) each of dried papaya, cranberries, golden raisins, and pineapple (though I tore up the larger pineapple pieces first).

Fruit Cookies 5

Chill the dough for about 30 minutes.

Fruit Cookies 7

Preheat your oven to 375°F and line a baking sheet or two with parchment paper. Roll the dough into smallish balls and space evenly on the baking sheet (they will not expand very much).

Fruit Cookies 9

Bake for 8-10 minutes, rotating the baking sheets halfway through, and then set the cookies on cooling rack to chill out.

Fruit Cookies 11

Enjoy!

Fruit Cookies 12

PB & J Gooballs

PB&J Gooballs 15

These are a great little snack when you’re on the go and need some protein. Or when you are pacing around your house with a small baby and have only one hand to get sustenance. Also good for children as a wee treat when they come home from school (although if you’re going to feed these to children under 1 year of age, replace the honey with maple syrup or something else, because botulism ain’t a joke). They were called “snack bites” on the website where I got the original idea but I think GOO BALLS is a way better term. So gooballs they will be. These ones taste like a peanut butter and jam sandwich, but you can pretty much customize these however you would like.

PB&J Gooballs 2

Your basic ingredients are as follows: 1 cup oats, 1/2 cup peanut butter (or sun butter, or whatever), and 1/4 cup honey. The rest is up to you.

PB&J Gooballs 4

I added in a few tablespoons ground flax, for health reasons.

PB&J Gooballs 5

And a handful of Reese peanut butter chips, for non-health reasons.

PB&J Gooballs 6

And some freeze-dried raspberries, because I had them on hand and they’re tasty as heck. Any dried fruit will do, provided you cut it up pretty small.

PB&J Gooballs 7

Assemble all your dry ingredients. I crumbled the raspberries in my hand so they were smaller.

PB&J Gooballs 8

Tip in the wet ingredients.

PB&J Gooballs 9

Stir!

PB&J Gooballs 10

Chill that for about 30 minutes, then take it out and roll a couple tablespoons’ worth of it into a ball. Repeat until you run out.

PB&J Gooballs 11

Store these suckers in the fridge to keep them firm and less sticky. ENJOY!

PB&J Gooballs 12

Chock-Full Muffins

Chock-Full Muffins 14

The thing I like best about muffins is that, while they’re pretty picky about how you mix them, there is no exact science as to what you mix into them.  This means that every time I make a batch, I try my hardest to cram everything I can into each one.  How many things?  All the things.

Chock-Full Muffins 2

Let’s DO this.  Preheat your oven to 400°F and grease a muffin tin or line it with paper liners.  Greasing might actually work better in this situation, as I found the baked muffins were hesitant to come out of their liners.

Chock-Full Muffins 1

In a bowl, whisk together 2 cups all purpose flour, 1 tablespoon baking powder,  and 1/2 teaspoon ground nutmeg.

Chock-Full Muffins 3

Then plop in 1/2 cup bran and 1/2 cup unsweetened coconut and stir that as well.

Chock-Full Muffins 5

Melt about 1/2 cup butter and add it to a bowl with 2 large eggs, 1/2 cup milk, 1/2 cup yogurt (your choice), 2 teaspoons vanilla, and 2/3 cup brown sugar and give that a stir.

Chock-Full Muffins 8

I actually used coconut sugar, because I had it on hand.  I like it because it’s not super sweet.

Chock-Full Muffins 7

Grab a few handfuls of dried fruit and nuts, if you’d like, about 1 1/2 cups.  Here we have dried versions of cranberries, cherries, blueberries, grapes (raisins, duh), and apricots.

Chock-Full Muffins 9

Now here’s the trick with muffins: don’t mix the wet with the dry until you’re ready to plop the batter in your baking tin.

Chock-Full Muffins 10

Add the flour mixture to the egg mixture and stir until just barely combined.  Now you can add in your fruit and stir just until it’s evenly distributed throughout.

Chock-Full Muffins 11

Drop the batter into your muffin tins.  I ended up completely overflowing mine because these puppies don’t expand too much.

Chock-Full Muffins 12

Bake for about 17 minutes, until a toothpick inserted into the centre muffin comes out clean, and let cool for a few minutes.

Chock-Full Muffins 13

So good with butter!

Chock-Full Muffins 16

Chocolate-Filled Eggs

Happy Easter!  And happy birthday to Kª, no longer the Lady Downstairs, but now the Lady in Russia!

Chocolate-Filled Eggs

I never do things and post them in time for the holidays, so this post is coming from you from the distant past … Easter 2012 to be precise.

I wanted to have a bit of a take-away goodie for our Easter dinner guests, and a cute little place-marker in the bargain, so I thought, why not give everyone a chocolate egg — inside a REAL egg?  There are lots of great tutorials out there on how to do this right: both Martha and Not Martha have good ones worth checking out.  Me, on the other hand?  I didn’t look at any of them, except to find out what not to do.  So your options here are simple: you can do it the right way, or you can do it my way.  This is your choice.  Let the chips (of eggshell) fall where they may.

Dyeing the Eggs

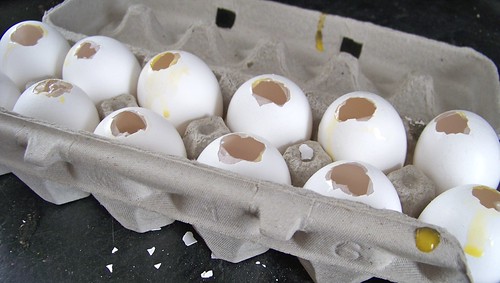
Start with 12 large eggs.  You may break one or two, so work with more than you need.  Using a sharp paring knife, give the bottom of one of your eggs a hard poke.  Not hard enough to puncture the egg sac, but enough to chip through the shell.

Chocolate Filled Eggs

Once you’ve got a wee hole, start enlarging it by prying up bits of shell until you have a hole about the size of a dime.  It doesn’t have to be perfectly circular, and don’t worry if you get a few hairline cracks.  It will all work out in the end.

Chocolate Filled Eggs

Peel up that layer of membrane as well.

Chocolate Filled Eggs

Chocolate Filled Eggs

Once you’ve got a decent hole, take a syringe with a long tube attached (ear syringes and irrigation syringes work well here) and poke it through the egg sac.

Chocolate Filled Eggs

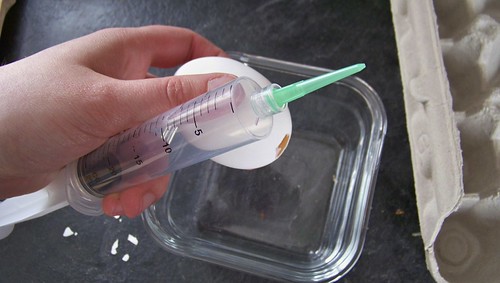
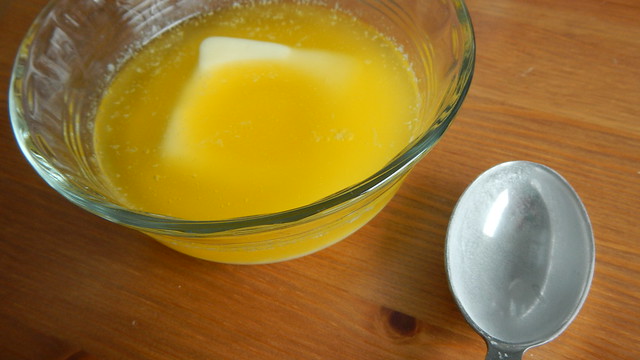
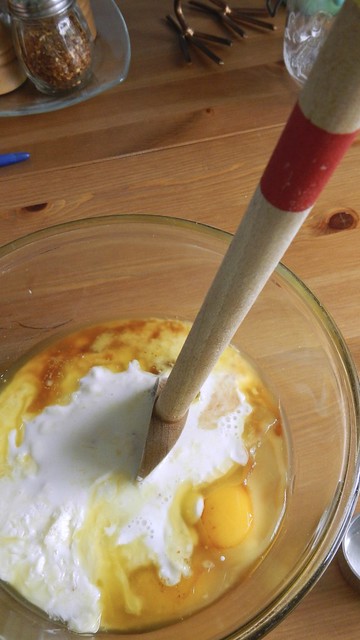
Flip the egg upside down and push air through the syringe into the egg so that it expels all the goo into your waiting bowl.  Save those egg innards for something later on.

Chocolate Filled Eggs

When your eggs are all empty, you’ll need to give them a quick rinse to get rid of anything left behind inside.  I poured a bit of hot water into each egg, enough to fill it about half way, and then gave it a good shake to dislodge anything grody inside.  Empty that out and you’re ready for the next phase.

Chocolate Filled Eggs

Now, if you’re going to do this the right way, you’re going to sterilize your eggs first and THEN you’re going to dye them.  This is because agitating your eggs during the dyeing process will result in a mottled appearance in the dye.

I, however, actually wanted to have a mottled look, so I figured I would kill two birds with one stone and dye my eggs while they were sterilizing.  Easy peasy.  So I filled a large pot with water and added a cup of white vinegar.  I submerged all the eggs, making sure to let each one fill completely with water so it wouldn’t float.

Chocolate Filled Eggs

Then I added the dye — I used food colouring here, some green and some blue to create a turquoise colour.  Then I boiled it for about 10 minutes, making sure to give it a stir to agitate the eggs really well.

Chocolate Filled Eggs

Make yourself a little drying rack by poking skewers into the bottom of your now-empty egg carton.  Tada.

Chocolate Filled Eggs

Using a slotted spoon, remove each egg and drain it of dye before sliding it onto a skewer to dry.  Leave that overnight to make sure that everything is well-set.

Chocolate Filled Eggs

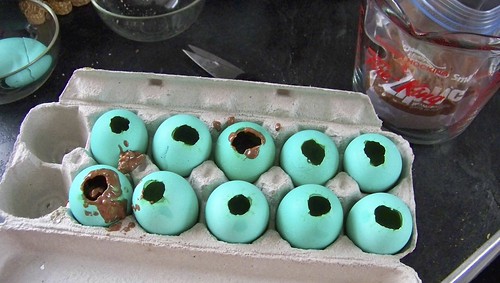
See that nice spotting? I like it.

Chocolate Filled Eggs

Everything was great until I dropped a spoon on the eggs and smashed two to smithereens.  And then there were ten.

Chocolate Filled Eggs

Filling the Eggs

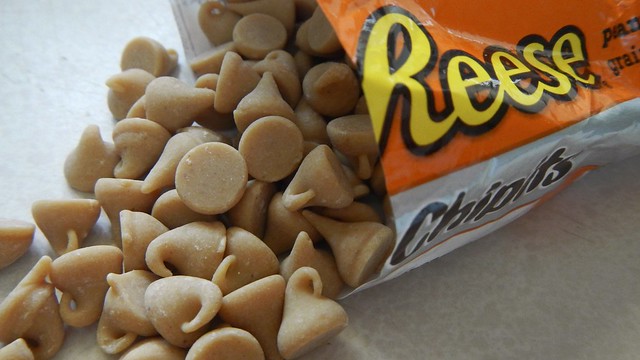
This is the fun part.  You can go crazy and fill your eggs with whatever you want.  I am looking for some kind of fruit and nut combination in my chocolate.

First, weigh a whole egg to figure out approximately how much stuff fits inside it.  Then take that number, multiply it by the number of eggs you have, and that’s how much stuff you need to go in the eggs.

So for me, my average egg weighed in at 60g.  So I needed 600g of chocolate, fruit, and nuts to make this work.  I actually needed more than that, so I suggest you up the chocolate amount significantly.  It’s amazing how much an egg will hold.

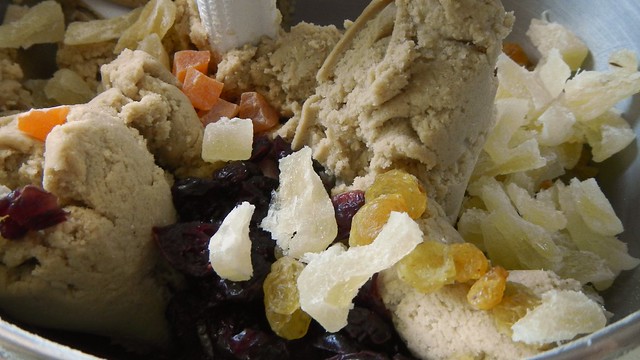
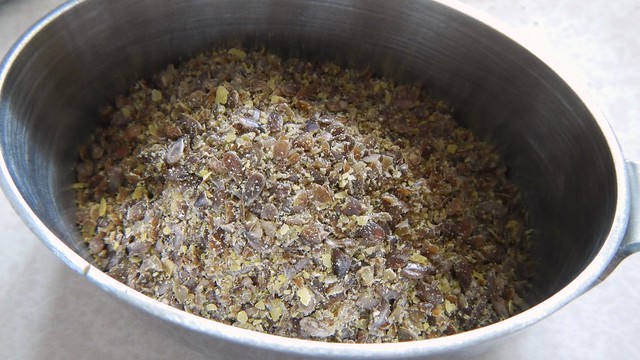
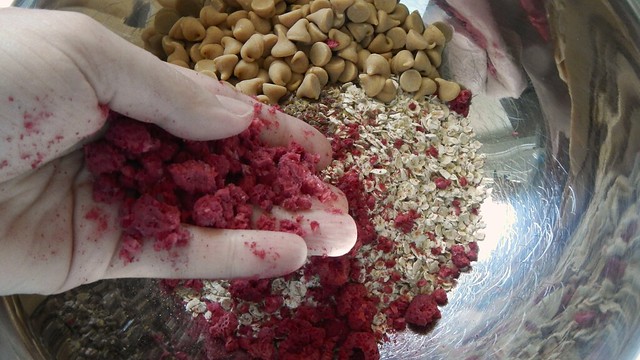
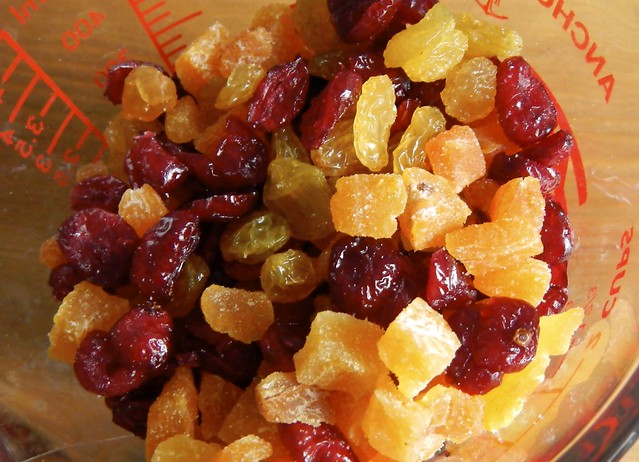
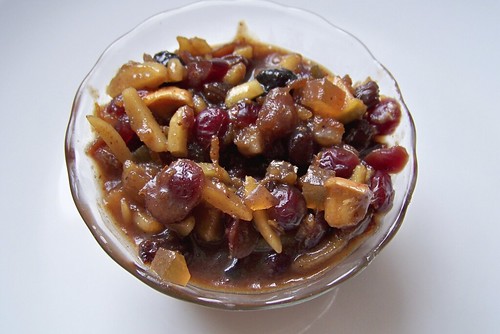
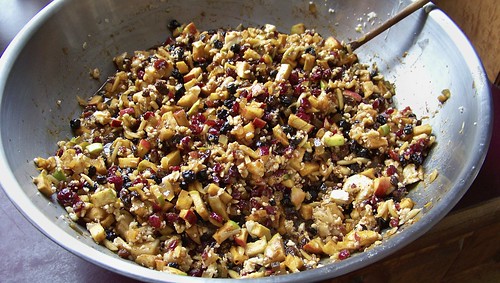
I used cashews and a dried fruit combination of cherries and pineapple.

Chocolate Filled Eggs

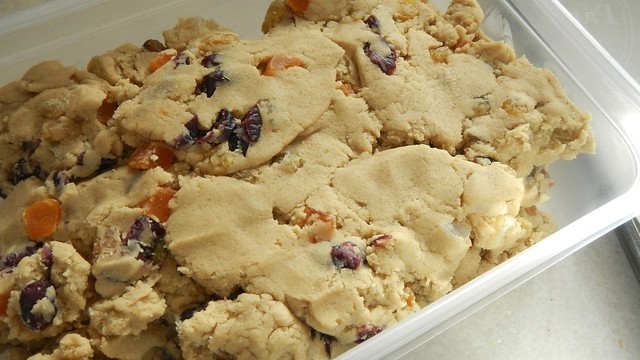
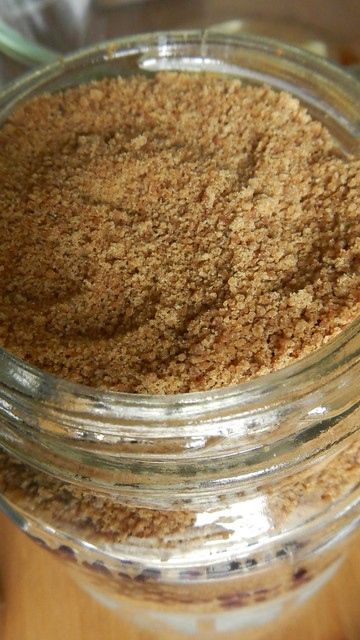
I blended that sucker in the food processor to turn it all into tiny bits.

Chocolate Filled Eggs

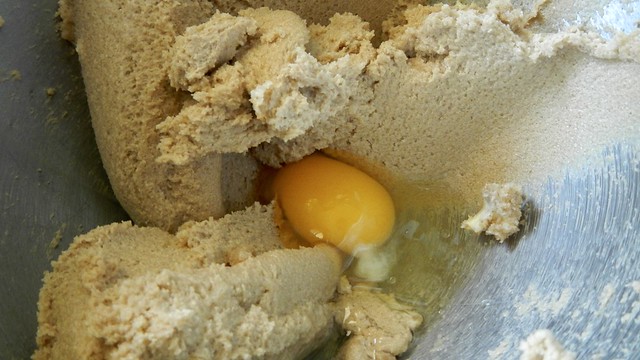
Using a serrated knife, chop up your chocolate.

Chocolate Filled Eggs

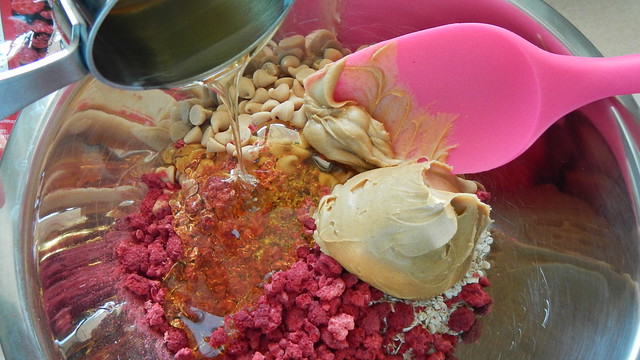
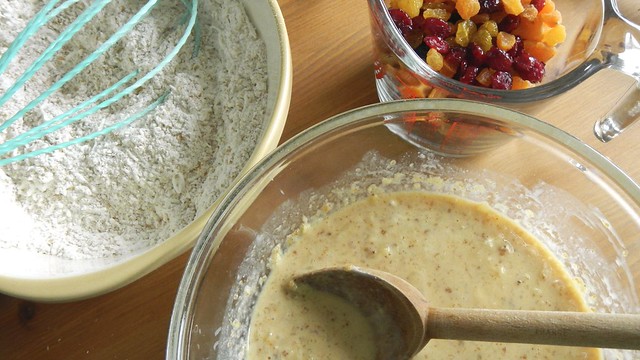
Melt it in a large bowl over a pot of simmering water until it’s smooth and glossy.

Chocolate Filled Eggs

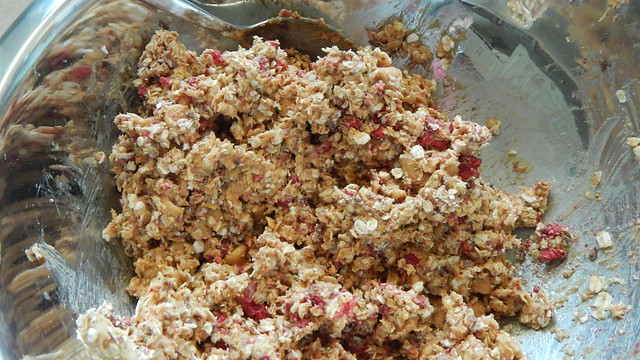
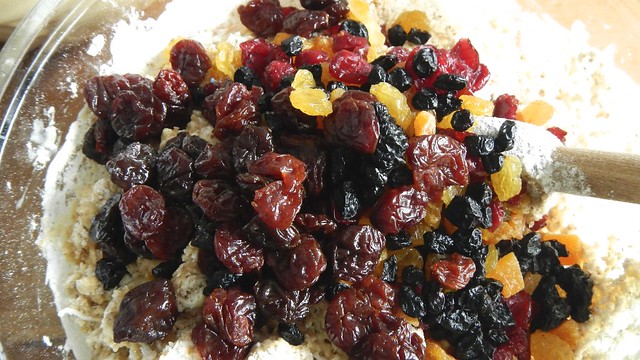
Mix in your minced goodies.

Chocolate Filled Eggs

Pull your eggs off your makeshift drying rack and line them up inside the carton again, hole-side up.

Chocolate Filled Eggs

Now, set a piping bag or a regular plastic freezer bag in a tall glass or pitcher so that one of the ends points down.  Fill that sucker with your melted chocolate.

Chocolate Filled Eggs

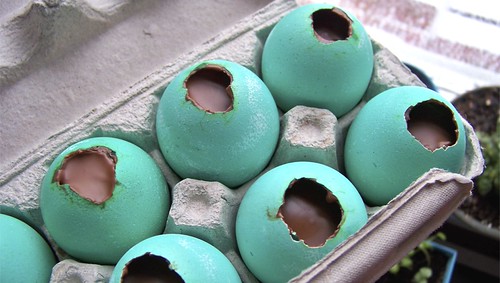
Snip the end, and, working quickly, fill each of the eggs to the top with your chocolate goo. You may need to use your fingers to encourage the solid bits to go through the bag if there’s a bottleneck.  Allow to cool and set completely.

Chocolate Filled Eggs

Just make sure to clean the chocolate off the shells before it sets. If you’re at all like me, there will be chocolate everywhere.

Chocolate Filled Eggs

I was also a little bit of chocolate short, so I melted more (just plain this time) to fill the last little space in the bottom of the egg.

Chocolate Filled Eggs

Now feel free to decorate them any way you wish.  I used some acrylic craft paint to paint each guest’s name on the eggs.  It’s hard to have good penmanship when you are writing on eggs. Apparently I am incapable of following around in a straight line. It always came up slanted every time.

Chocolate-Filled Eggs

Then I set each one in a wee “nest” made out of a cupcake liner and some mini chocolate eggs.  Surprise!

I love me some Granola

Granola 26

My morning meal usually consists of coffee, juice, yogurt, and granola.  Like I could eat that stuff every single day.

Granola 30

Until now, I’ve been buying our granola, but it’s quite expensive for the amount you get and it’s full of all sorts of weird additives and the like that I don’t really want to put in my system.

Granola 28

My mother used to make granola for us sometimes when we were kids, so I figured that I could probably do it myself if I tried.  And it’s easy.  And you can use what you’ve got in your cupboards, or what you can scoop up at the bulk food store.  Which means you can customize each batch.

Granola 6

So preheat your oven to 350°F and get out a large rimmed baking sheet.  I took the precaution of lining mine with parchment paper, so stuff wouldn’t stick.

The majority of granolas start with a base of oats, about 4 cups.  I used four double handfuls, because I measured my tiny hands once and put together that’s about what they hold.  And thus ends my list of measurements for this recipe.  Because you can do whatever you want.  So what else have I got going on here?  In addition to the oats, I have bran, ground flax, shredded coconut, sliced almonds, nutmeg, cinnamon, sesame seeds, poppy seeds, lavender flowers (yes), and then a selection of dried fruits: apricots, mango, and raisins.

Granola 3

Take all your happy dry ingredients (minus the fruits) and plop them in a bowl.

Granola 9

Mix ’em up.

Granola 8

In another bowl, add about 1/2 cup runny honey,

Granola 11

about 1/2 cup maple syrup,

Granola 12

and about 1/2 cup melted butter.

Granola 13

*** EDIT: If you’d like granola that forms clumps (and that’s my favourite kind), whisk 1 or 2 egg whites into a froth and add them to the mixture as well.  The protein in the whites will stick everything together during the baking process.  Just use caution when stirring mid-bake, as the amount you stir will affect the size of the clumps you create. ***

Pour that golden loveliness into the dry mixture and stir until all the dry ingredients are coated.

Granola 14

Spread that stuff out on your baking sheet and chuck that in the oven for about 40 minutes.

Granola 16

Make sure to stir with a spatula every 10-15 minutes or so to keep the stuff on the bottom from burning.

Granola 18

While that’s on the go, get your dried fruit ready. I chopped up the apricots and mango slices a little to make them easier to get on a spoon.

Granola 21

Remove from the oven and let it cool in the pan, stirring it occasionally to break up the chunks.  The finer grained your ingredients are, and the more sticky wet ingredients you use, the chunkier your granola will be.

Granola 19

While it’s still a little warm, stir in your dried fruit.

Granola 22

Store in an airtight container for up to 3 weeks, and enjoy whenever you want!

Granola 27

Fruity Oat Muffins (Gluten-Free!)

Fruity Oat Muffins 20

Fussellette sent me this gorgeous recipe from the CBC and I had to try it out after listening to her rave about the results.

Fruity Oat Muffins 2

The best part about this recipe is that it’s flexible — you can change the flavours around by changing up the fruit you’re using, even using fruit-flavoured yogurt if that’s what you have on hand.  I’d also like to play with the flours a bit, maybe swapping in some coconut or almond flour if appropriate.

Fruity Oat Muffins 3

Preheat your oven to 375°F and spray or line a muffin tin with paper cups. I recommend paper cups for these, because gluten-free baked goods tend to like to stick to what they’re baked in.

Take 1 cup oats (if you have a sensitivity, make sure they’re gluten-free), and pulse in a food processor until they’re all fine and powdery.  Plop that in a large bowl.

Fruity Oat Muffins 4

Add to that 1/3 cup brown rice flour, 1/3 cup tapioca flour, 1/3 cup corn starch, 1 tablespoon baking powder, 1 teaspoon baking soda, 3/4 teaspoon xanthan gum, 1/2 teaspoon cinnamon, and a pinch of salt.  Whisk that all together.

Fruity Oat Muffins 5

Then add in 1/2 cup each dried cherries, dried cranberries, and golden raisins.  I had this multi-pack with all those in it already, so I chucked that in, together with some chopped dried apricots.

Fruity Oat Muffins 1

Fruity Oat Muffins 7

In another bowl, rub 2 teaspoons orange zest and 2 teaspoons lemon zest (I used 4 teaspoons orange because I had no lemons) into 1/2 cup granulated sugar.

Fruity Oat Muffins 8

Fruity Oat Muffins 9

Fruity Oat Muffins 10

Whisk in 2 large eggs, then 1 1/4 cups Balkan-style plain yogurt1/3 cup light olive oil or vegetable oil, 2 teaspoons vanilla, and 1 teaspoon cider vinegar.

Fruity Oat Muffins 11

Add the flour mixture to the wet ingredients and stir only until just combined.  It will seem lumpy but don’t fret.  If you stir it too much you’ll end up with flat muffins, which, especially in gluten-free recipes, is the opposite of what we want to happen.

Fruity Oat Muffins 12

Spoon into your muffin tin (it should make 12 regular-sized muffins or 6-7 super large ones).

Fruity Oat Muffins 13

If you end up with some empty space in your muffin tin, add a bit of water into the empty cups — it will ensure that your muffins bake evenly.

Fruity Oat Muffins 14

Sprinkle some more whole oats and maybe some brown sugar on the top of each muffin.

Fruity Oat Muffins 15

Bake for about 25 minutes, until the tops are firm to the touch.  Allow to solidify in the pan for about five minutes after removal from the oven.  Use a fork to transfer the muffins to a rack to cool completely.  As with most gluten-free material, they won’t last long, so make sure to eat them or freeze them within a couple of days.

Fruity Oat Muffins 17

Making Mincemeat (Outta You)

Mincemeat is to the winter holidays what chocolate and beer are to the Stanley Cup Playoffs (I’m serious.  Cadbury Mini Eggs and a microbrew during the finals is to die for).  Originally a combination of dried fruits, spirits, fat, and meat, over the centuries the meat part has all but disappeared from the recipe, and now it’s more of a dessert type of thing.  It does still employ three of the age-old methods of preserving, however: fat, sugar, and alcohol. 

I have adapted Allora Andiamo’s recipe from Jamie Oliver‘s website and it is incredible.  I quadrupled some things, and other things I just chucked in the amount I had, so it’s not particularly faithful to Ms. Andiamo’s original recipe but I give her full credit.

In a very large bowl I chucked the following, by weight:

275g raisins

55g dried blueberries

475g dried cranberries

575g candied orange peel

250g blanched almond slivers

400g finely chopped marzipan

474g (1lb) shredded butter (put the butter in the freezer, then grate it, or break it into chunks and run it through the food processor until you have fine crumbs)

1kg apples, finely chopped (I left the skins on and used a variety of different kinds, whatever I had lying around)

juice and rind of 5 large oranges

juice and rind of 2 large lemons

1kg soft brown sugar

3 teaspoons almond extract

8 tablespoons rum or brandy (I used both, of course)

2 tablespoons ground cinnamon

4 teaspoons ground nutmeg

6 teaspoons ground ginger

4 teaspoons ground coriander

1 teaspoon ground cloves

1 teaspoon allspice

Give that a good stir, cover it, and leave it somewhere to marinate for about 24 hours.

The next day, distribute the mincemeat into casserole dishes (or, if you are clever like me and used a metal bowl, don’t bother), cover with aluminum foil, and bake at 225°F for 3 1/2 hours.

I stirred mine halfway through, just to be thorough.  And also because I don’t trust anything on its own in an oven for three and a half hours.

Remove from the oven and allow to cool a bit.  The liquid will thicken as it cools so make sure to stir it occasionally in order for the syrup to coat all the fruit. 

Before it completely cools, pour into sterilized jars and seal — can according to your canner’s instructions, or check out our tips to canning here.

Store in a cool dark place for about 3 weeks before using.