It’s been HOT here in Ottawa. Very hot, like with heat warnings at least half of every week. Fusselette has been in town on furlough from her job up in Northern Ontario and she brought down with her a small pot of pineapple mint, which I’d never heard of before.
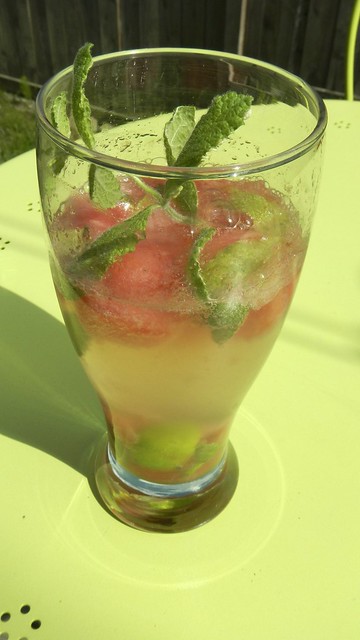
And when in possession of mint in the hot summer, one must make mojitos. Obviously. And these ones were just a wee twist on the classic.
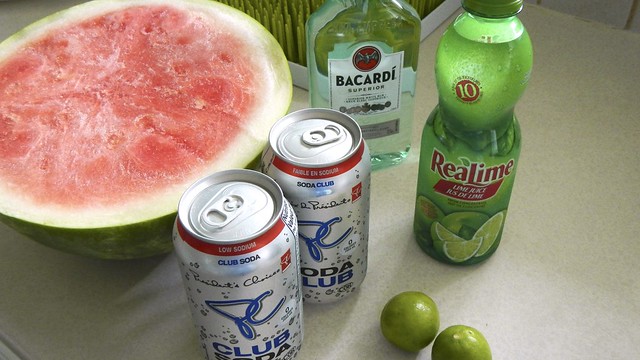
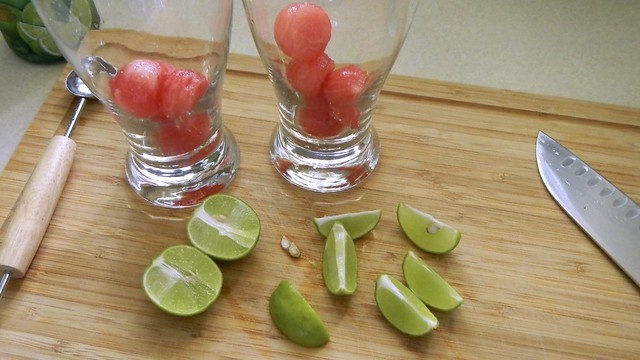
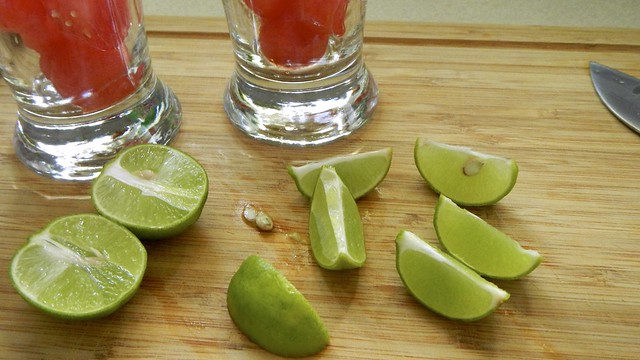
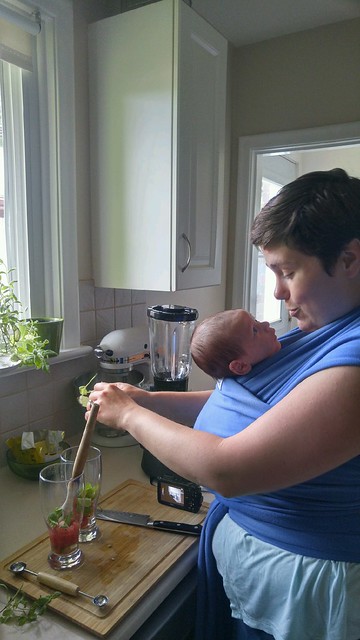
Grab a couple glasses and scoop a few balls of watermelon into each one. You can use cubes if you don’t have a melon baller. You’re just gonna squish ’em anyway. Slice up some lime wedges and add them in as well.
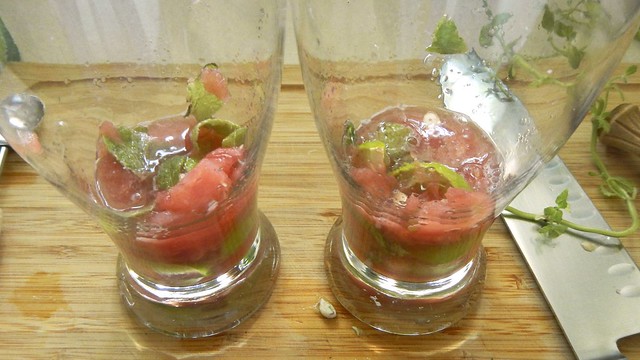
Yes, those are key limes. Just wait for the post where I deal with them. Add some mint leaves (pineapple mint!) to the glass as well. I also added an extra splash of lime juice because of my wee limes.
Use a muddler (or in my case, my trusty spurtle) and mush those up. LongJohn helped, as you can see.
Let them sit for a few minutes so the juices can meddle with each other.
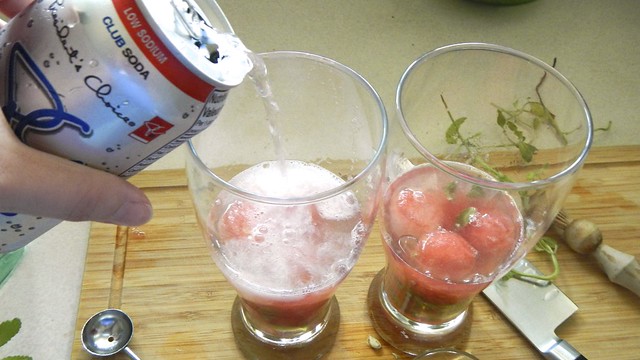
I added in a few more balls of melon, then 2 ounces of white rum.
Top that up with club soda.
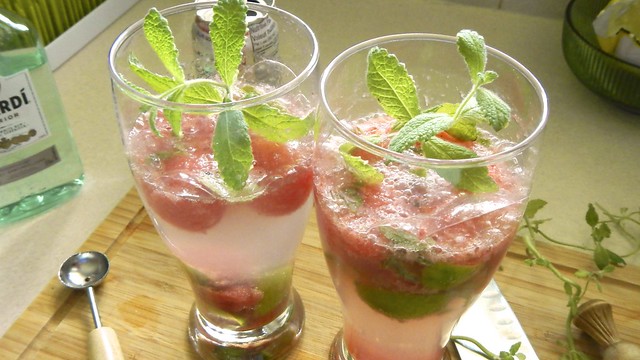
Garnish with more mint and enjoy in the summer sun!
It’s not summer yet, but you’ll be glad to have this in your arsenal when those long hot days finally roll around. The Minion and I discovered this amazing beverage while we were tooling around Salt Lake City and ended up having dinner at a Brazilian grill. The funniest part about it is that it contains no lemons whatsoever. But that is what it’s called.
The traditional method follows the rule of threes: 3 limes, 3 cups water, 3 tablespoons sweetened condensed milk, and 3 tablespoons sugar, but you can play with it as much as you like to come up with something that suits. I like it with a hint of mint added, myself.
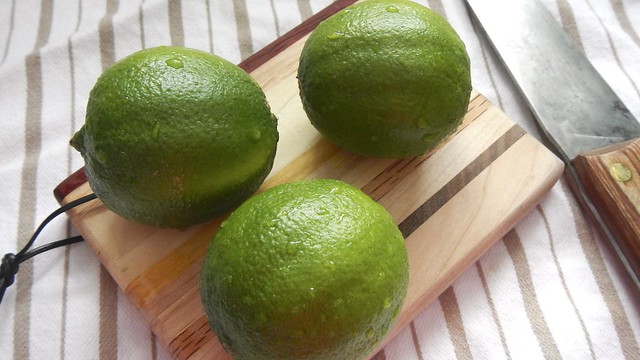
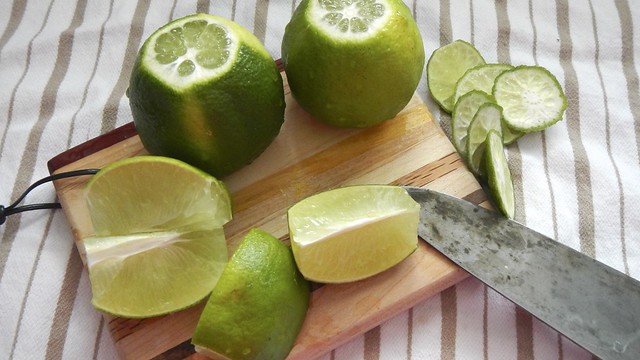
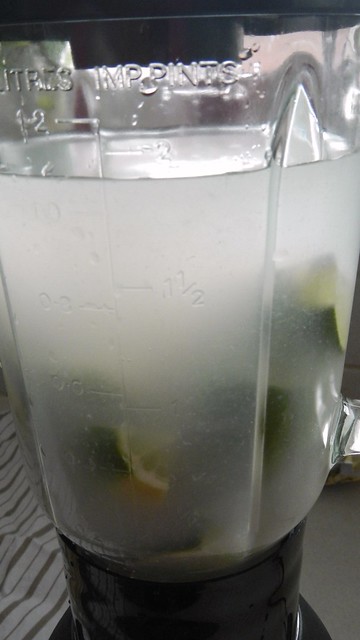
Take your 3 limes, washed and scrubbed, and slice off the stem and leaf bits at the top and bottom, then quarter them. If you have a really good blender, traditionalists will chuck the limes in whole, but my blender is not that great, so I quarter them. I found wedges were better than cutting rings, as the rings tended to get stuck around the blade at the bottom.
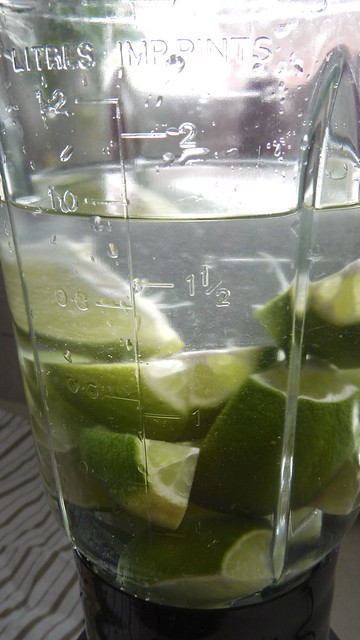
Fill your blender with 3 cups water and chuck those limes in.
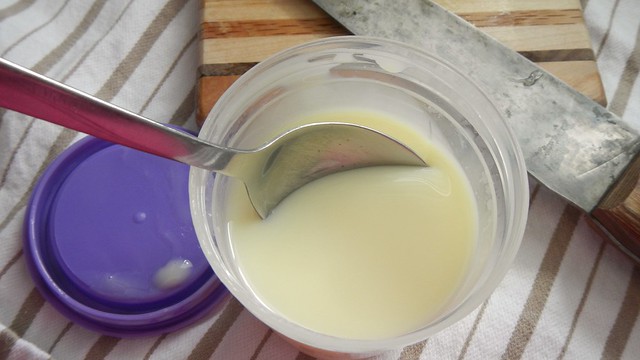
Next, add in 3 tablespoons sweetened condensed milk and 3 tablespoons granulated sugar. I thought at first I could leave out the sugar but it’s necessary. The milk is just not sweet enough. Feel free to use any sugar substitute you like, of course.
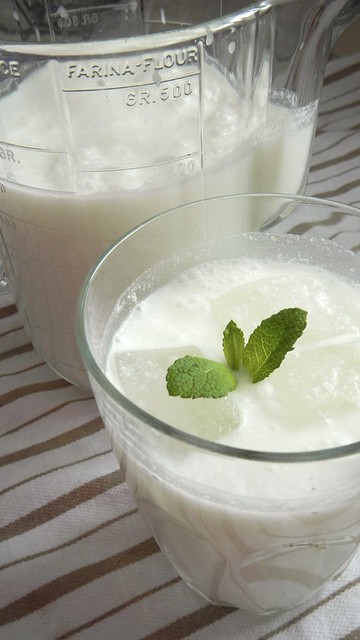
Now this looks way less appetizing, I’m sure. If you want to add some mint, tip in some fresh leaves at this point.
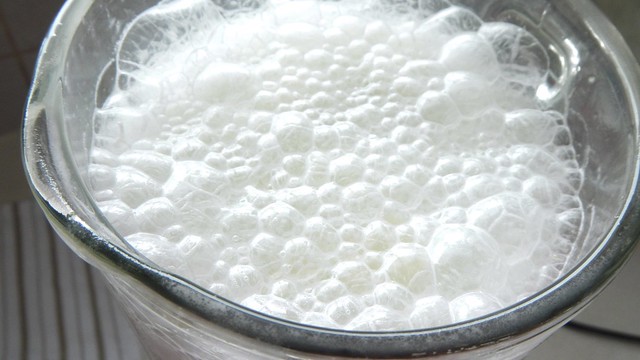
Blend for about thirty seconds, until you have this frothy goodness.
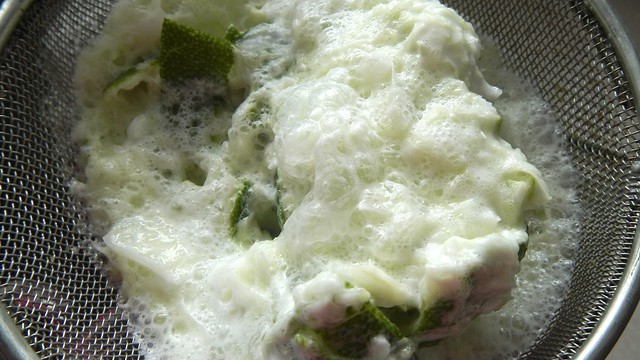
Strain out all the solids and compost those. Your compost bin will smell amazing.
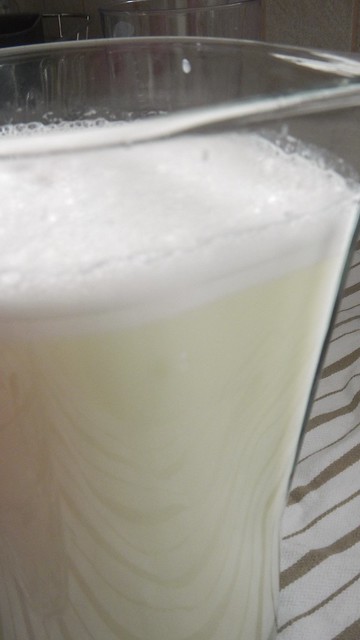
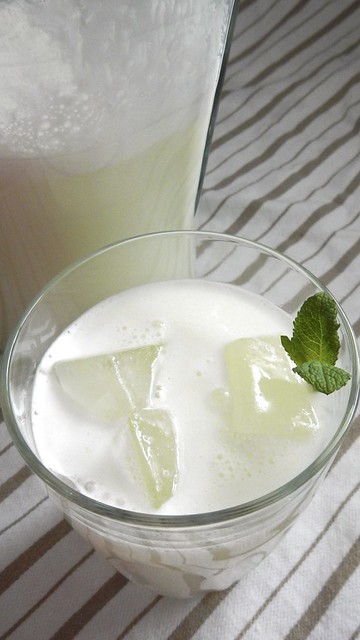
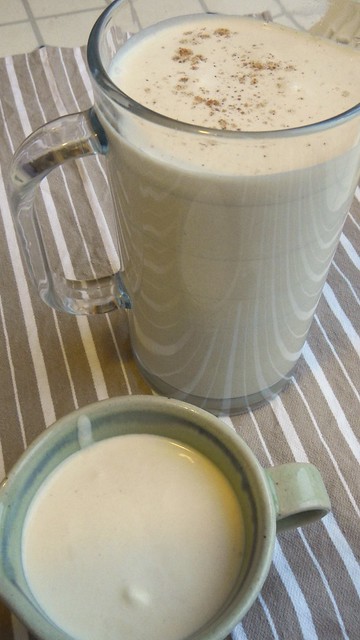
What you’re left with is a pale green milky liquid and a bit of froth.
Serve over a glassful of ice and enjoy how refreshing it is.
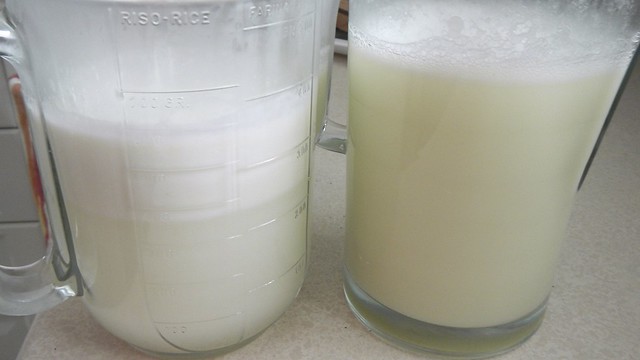
Want a dairy-free version? Not a problem. Tip a can of coconut milk into the blender and top it up with water to equal three cups. You will need to double the sugar to six tablespoons to compensate. The result is a slightly creamier version, and I can’t decide which I like more.
In terms of longevity, this beverage is meant to be served immediately (possibly with some white rum mixed in), but I couldn’t drink both batches by myself that quickly so I tossed them in the fridge. The one of the left is the one I made with coconut milk, and you can see that over time it separates quite a bit. That said, a quick stir and it’s back to emulsified goodness, with no alteration in flavour.
I love egg nog. So much so that I wish I could have it all year ’round. So of course I learned to make my own. And every time I offer it to people, I try to do it in Denholm Elliott’s voice from (my favourite movie of all time — don’t judge) Trading Places. He’s just so emphatic.
I know. I don’t know why I showed you that. I just love egg nog that much. So when I found this recipe on Design*Sponge I knew the time had come. THIS WAS IT.
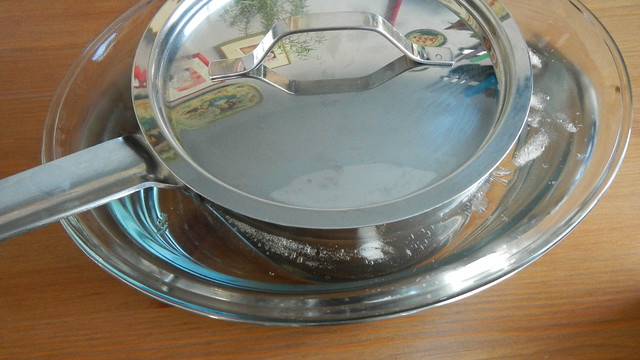
So first you start by creating an ice bath. That means either filling your sink with water and ice cubes, or a large bowl that will hold your pot. My sink is terrible at retaining water (not my sink, not my problem), so I opted for a heat-proof bowl.
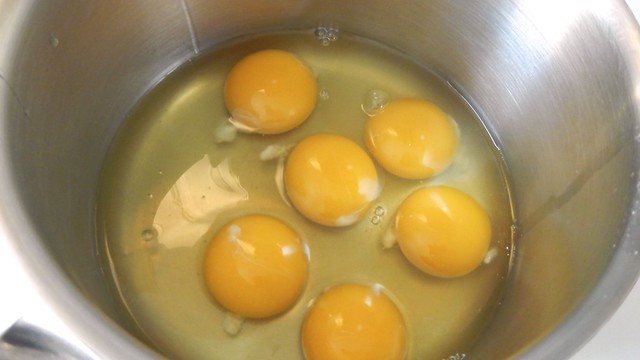
Then grab a medium-sized pot and crack in 6 whole eggs. Give those a thorough whisking.
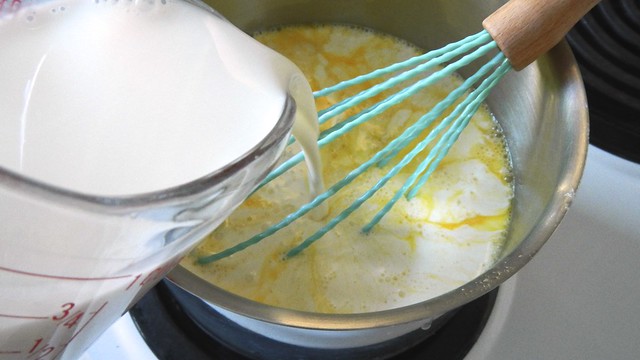
Pour in as well 2 cups whole milk (we call it homogenized here in the Great White North), 1 cup heavy (whipping) cream, and 1/2 cup granulated sugar.
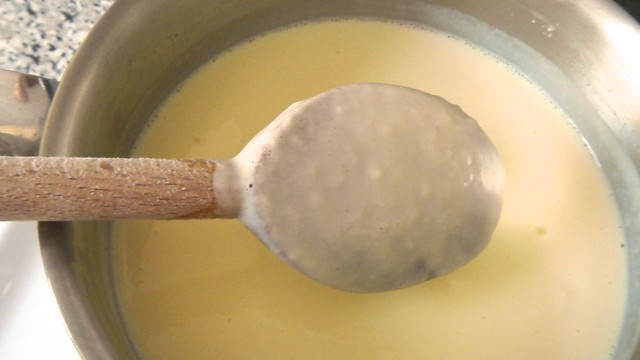
Cook over medium heat, stirring often, until the custard (because that’s what it is) thickens and coats the back of a wooden spoon. Resist the urge to speed things up by turning up the heat. That’s how you get scrambled eggs plus milk. Not cool.
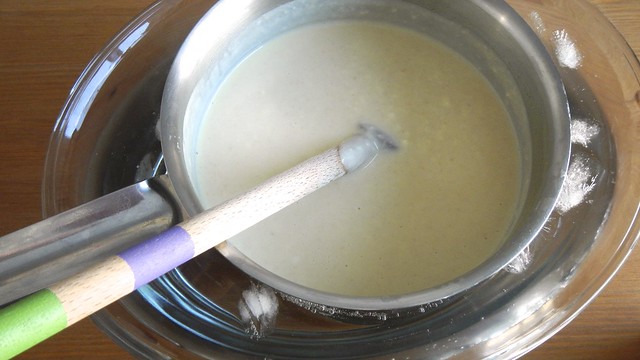
Plop the pot into the ice bath. Add in 2 teaspoons vanilla extract and whisk the whole shebang for about 3 or 4 minutes.
Put the lid on the pot, haul it out of the ice bath, and let it come to room temperature, about an hour (I had some errands to run so I actually put mine in the fridge for about four hours and it was fine as well).
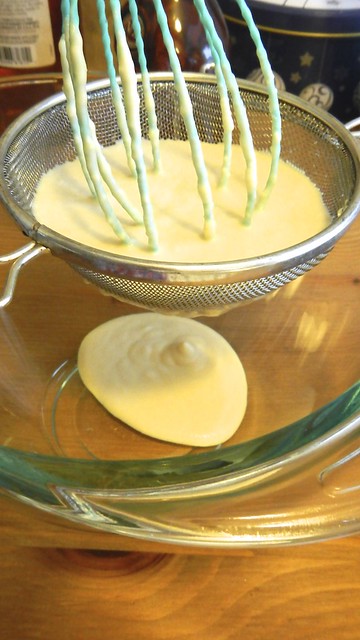
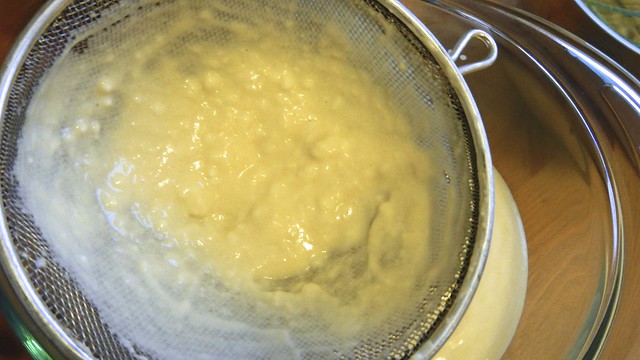
Next, strain the egg solids (those lumpy bits) out of your custard by pouring it through a sieve over a bowl.
You can throw these out. Or compost them like a good citizen.
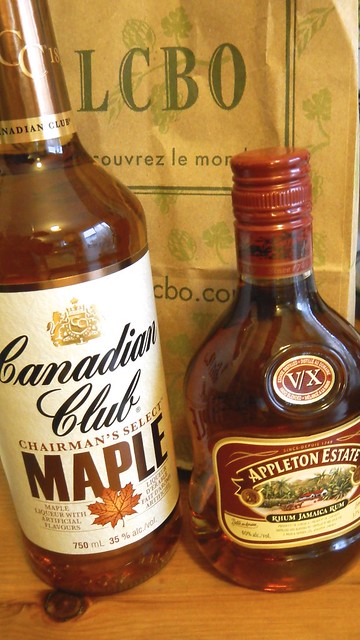
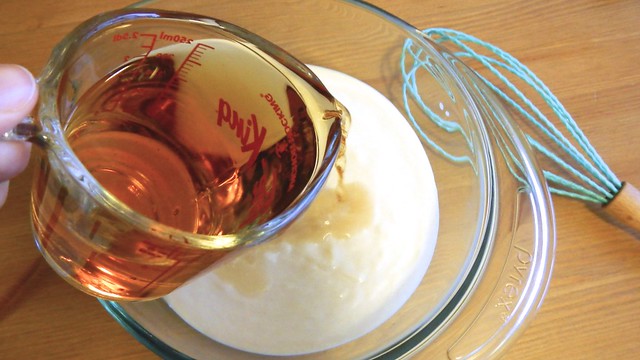
Now whisk in your booze***. The original recipe calls for brandy or rum plus bourbon, but the Pie and I are not bourbon fanatics like Trav, so we opted for 1/2 cup rum plus 1/2 cup maple whisky.
Whisk that whisky right in there.
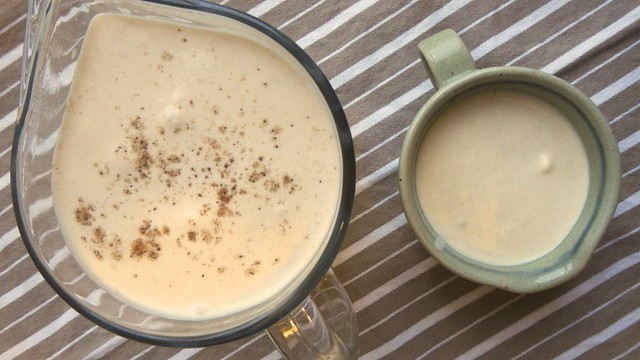
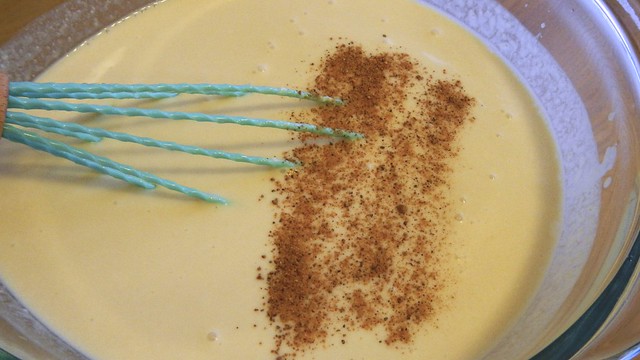
Might as well add a few dashes of grated nutmeg as well.
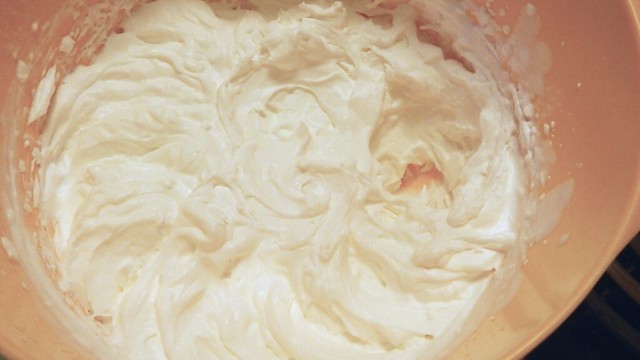
Now pour 1 cup whipping cream into a bowl and beat the crap out of it until it forms stiff peaks.
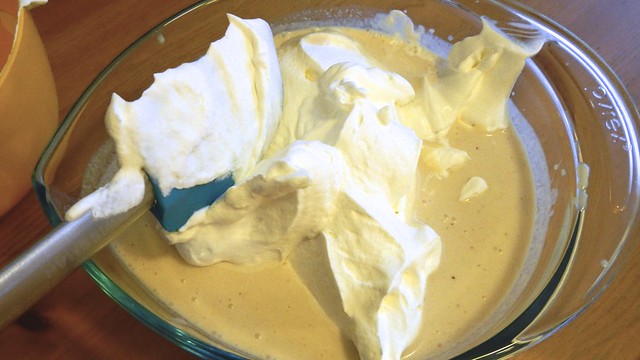
Then fold that gorgeousness into your eggnog.
Let your eggnog chill for a couple of hours before drinking. It’s like drinking whipped cream, essentially. I personally don’t think the recipe would be that good without the alcohol to kind of dilute it, so if you’re looking for a non-alcoholic version, this is probably not it.
*** That said, however, if you want to try this particular recipe without the booze, this is what I recommend: instead of adding 1 cup booze, add 1 cup whole milk, and then when it gets to the final 1 cup whipping cream, just add it in without whipping. Then the whole thing is much less solid and easier to drink on its own.
This adapted Nigella Lawson recipe is a perfect way to get rid of those stale croissants. Because we seem to always have one or two lying around. Despite it using only two croissants, this recipe is rich enough to feed four comfortably.
Start by buttering a small casserole dish and preheating your oven to 350ºF. Then take your 2 stale croissants and tear them up into the dish. These were particularly stale so they were extra crumbly.
Beat up 2 large eggs in a small bowl and set those aside.
In a measuring cup, pour in 1 cup half and half cream (the original recipe is 1/2 cup heavy cream and 1/2 cup whole milk but I worked with what I had). Then add a few tablespoons bourbon or rum. I used Screech, naturally. Give that a stir and set it aside for now as well.
Next, find a small saucepan and dump in 1 cup granulated sugar and 2 tablespoons water. Give the water time to bleed into all the sugar. You won’t need to stir this.
Put the saucepan on medium high heat and let it come to a boil.
Keep going. Resist the urge to stir.
And going …
When the sugar turns a nice deep amber colour you can remove it from the heat. Once it starts to change colour it will do so rapidly, so keep an eye on it.
Turn the heat down to low and add in the cream. Whisk that sucker like crazy. It will foam and go a bit nuts on you.
Now you can remove it from the heat and slowly whisk in your beaten eggs. It will thicken, but not as much as you’d expect (probably more if you used the cream).
Pour over your croissant pieces.
Let them steep for a while, maybe ten minutes or so, especially if your croissants are super stale.
Now bake it for 20 minutes and serve with ice cream.
We’re entering that long, dark stretch of winter here in Eastern Canada where we just want it to END but we know there’s at least another three months of it waiting for us. So we come up with ways to keep ourselves from getting suicidal. In Ottawa we have our Winterlude festival, in which we pretend that we actually LOVE winter for the benefit of the tourists. And after we’ve spent all day freezing our toes off while traversing the world’s longest skating rink, we appreciate a hot beverage or two to help us thaw out. So here are two ideas for you.
HOT DR. PEPPER
Don’t freak out — this isn’t one of those newfangled sugar drinks that “kids these days” are coming up with to get themselves all wired up. The recipe for this odd potation comes from the 1960s, when the makers of Dr. Pepper came up with it as a way to keep their sales strong in the winter months when a cold soda pop wasn’t as appealing. I’m not even kidding.
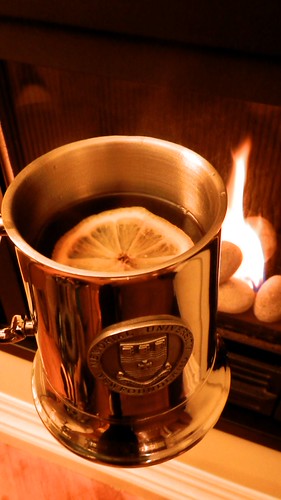
So first you want to slice up a lemon. Really thin. You’ll need one slice for every serving. Stick a slice in the bottom of a heatproof mug.
I used Navy tankards, complete with glass bottoms to prevent someone from slipping you the King’s shilling.
Then take your Dr. Pepper (if you can get it in your country), and pour it into a saucepan. I used 3 355mL/12oz cans of the stuff because Trav was over and we were all curious.
Heat it to precisely 180°F. I’m not sure why, but I think it has something to do with the stuff losing its carbonation. It’ll fizz as the carbon dioxide escapes, so that will keep you entertained.
Pour your hot Dr. Pepper over the lemon slice and add a shot of rum if you want to turn it into the adult version of the beverage (I personally think that it’s a little too sweet without the rum). Enjoy!
HOT APPLE CIDER
While I’m not a fan of apple juice, I will always go for a refill of apple cider. And not just in the fall — any time of year. Obviously there are a million ways to make hot spiced apple cider, but this one is what I felt like making today.
In a medium sized saucepan, plop in 4 thin slices of lemon, 2 cinnamon sticks, 1/4 teaspoon nutmeg, 1/2 teaspoon cinnamon, and 2 tablespoons brown sugar (you could also use maple syrup, or leave out the sugar altogether).
Pour in 4 cups fresh unsweetened apple cider and 1 tablespoon vanilla.
Whisking occasionally, bring that to a boil and let it foam up for a minute or two before removing from the heat and serving.
Garnish it with a slice of apple and your cinnamon sticks. This amount serves two generously with room for a small refill, or four if you’re not as greedy as I am.
If you’d like to make a grown-up version of this with alcohol, a nice dark rum, bourbon, brandy, or cognac would work well. I’ll leave it to you to decide how much will work for you to keep away the chill.
Cait and I made these last year for her contribution to our annual potluck extravaganza. The recipe is a little fuzzy, because we decided to ignore what we were told. And we also decided to take a shot of rum for every step we did in the recipe. It’s all kind of a blur.
Me and the Captain.
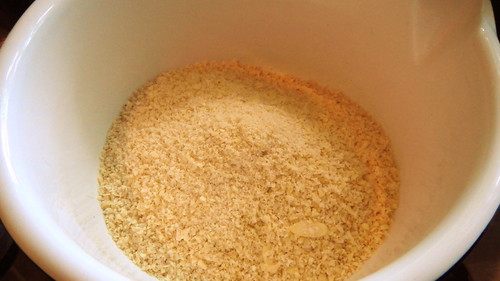
Start with your dry ingredients. First we used a food processor to grind up about 1 1/2 to 2 cups blanched almonds. Cait had to climb up on the counter again to get the processor down. Her kitchen requires acrobatics.
You could use 1 1/2 to 2 cups almond meal for convenience’s sake.
Whisk together with about 2 cups icing sugar.
Take a shot.
In a haze, melt about 8oz chocolate in a double boiler or heatproof bowl set over a pot of barely simmering water.
While you wait, take pictures of whatever dogs are handy. I swear that it was Ruby who kept moving, not me.
Let the chocolate cool a bit, and then add to it about 2/3 cup dark rum — you could use spiced if you like — and 2 teaspoons vanilla. Give ‘er a stir.
Pour the rummy chocolate into your icing sugar/almond mix and whisk thoroughly.
Chuck that in the fridge for a few minutes to solidify a bit.
Take a scoop of this goodness and roll it in your hands to form a ball.
Set each completed ball on a sheet of waxed paper.
Dip each finished ball into more rum, then roll in chocolate sprinkles.
Set the finished balls on the waxed paper to dry, then seal in an airtight container at room temperature for up to a week.
The Pie made this amazing chocolate cake for me for my birthday so I figured I’d return the favour when Cait and Jul got here and the Pie thought they could celebrate a joint party with the two girls. I’m not even sure you can really consider that this thing is a cake — there’s no powder in it at all — no flour, no cocoa — nothing like that. It’s like a mousse in cake form. It’s from Baked — my favourite, of course.
So first you preheat your oven to 350°F, and then you’re going to butter a springform pan. And then put a circle of parchment paper into the bottom. And then you’re going to butter it again. With lots of butter.
Then you’ll want to bust out your double boiler or equivalent and chop up 10 ounces dark chocolate and chuck that in.
Melt that sucker until it’s smooth and set it aside to cool a bit.
Chuck 10 tablespoons softened unsalted butter into a stand mixer with 1 cup granulated sugar and beat the crap out of it. For like, five minutes.
Until it’s all fluffy and whipped and creamy and amazing.
Separate yourself 7 eggs. All seven of them.
Then add the yolks to the butter/sugar mixture, one at a time, and beat it on low until incorporated.
Pour in the chocolate and mix that as well. Scrape down the bowl a bit and add in 1 teaspoon vanilla extract. Beat it again for a few seconds until just incorporated.
In another bowl, and with an electric mixer, take your seven egg whites and add 1 teaspoon salt and beat them silly until soft peaks form.
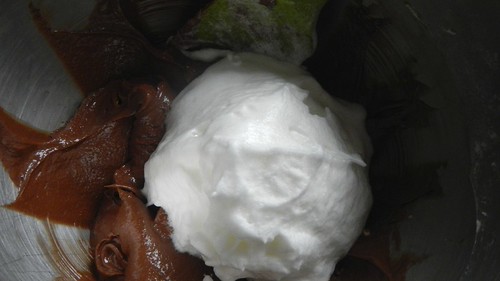
Scoop about 1 cup of the whites into the chocolate mixture and use a spatula to fold it in gently. Don’t feel you have to rush this — just be all cool and hip about it, fold it in like you don’t really care. Take about 30 seconds to do this and then add in the rest of the whites and keep going. Again, don’t rush it.
Scoop that foamy goodness into your prepared pan and smooth it out.
Then bake for about 35 minutes, until the centre is firm to the touch and everything is set. Let it cool completely in the pan before you take it out.
Meanwhile, heat 1/2 cup heavy cream and 1/4 cup light corn syrup in a small saucepan. Once you’ve got it just to a boil, remove it from the heat.
Pour it into a heatproof bowl over more chopped chocolate — 9 ounces chocolate, to be precise. Let that sit for two minutes.
Then take a whisk and start stirring.
And stirring. Until it’s all smooth.
Add a bit of liqueur if you like.
Smooth your ganache all over your cooled cake and eat it all up. Wrap the cake up and store it at room temperature if you’re not going to eat it right away.
Even better next day! (Sorry, when you eat cake at night the photos are never particularly good.)
The Pie wanted to call these things “fruit puffs” but that didn’t seem right to me. I’m still trying to come up with something catchy, as these things happened almost by accident.
While I was away in Ottawa with Gren, the Pie had purchased some strawberries on sale and they needed to be eaten. As well, in retrieving something from the freezer, he’d pulled out some cream cheese and forgotten to put it back until it was already thawed, so we needed to eat that as well. Cheesecake comes to mind, doesn’t it? Or a strawberry cream cheese pie? That is what the internet told me to do. But I didn’t have anything on hand with which to make a crust. I DID, however, have some puff pastry that was nearing its expiration date (you see how I don’t like to let things go to waste?)
So I made up this bad boy of a recipe, which has a strawberry and a banana variation.
Make sure your package of puff pastry has fully thawed and your cream cheese is room temperature.
Chop up about 1 cup to 1 1/2 cups fresh strawberries. Sprinkle them with 2 tablespoons granulated sugar and add a dash of vodka, to bring the juices out. Leave that to sit for a spell.
Slice up about 2 bananas. Sprinkle those suckers with 2 tablespoons brown sugar, add a few pinches cinnamon, and a dash of dark rum, and leave it to marinate a bit.
In a smallish bowl, use a hand mixer to beat together 1 250g package plain cream cheese, 1 large egg, 2 teaspoons vanilla extract, and 1/3 cup granulated sugar. Then repeat that whole process in another bowl.
Preheat your oven to 350°F and haul out a non-stick baking sheet.
On a floured surface, roll out both halves of 1 package puff pastry until they are the approximate diameter of a dinner plate.
Place one piece of pastry on one side of your baking sheet. Take one of the bowls of cream cheese mixture and pour it carefully into the centre of the pastry. You may need to hold up some of the sides if it’s runny. Also, don’t feel pressured to use all the cream cheese or even all the fruit, if it doesn’t look like it’s going to fit.
Now plop your fruit on top of that.
Then exercise all sorts of magic physics and wrap that sucker up like a burrito. Or something close to a burrito. Or whatever sticks together. I found that if you had one end that was longer than all the others if you folded it over the top everything kind of stayed in place.
For the most part.
Bake your cheesecake burritos for 35-45 minutes, until the pastry is puffy and golden and the filling has set.
Allow them to cool most of the way before cutting and eating them.
Store the leftovers wrapped in the fridge for a few days. If there are any left!
Wait a second. Are you telling me that French toast is Canadian?
No, not really. In fact the first reference to a dish resembling French toast is written in Latin and dates back to the 4th or 5th century. French toast, or pain doré (“golden bread”), can be found in a lot of recipe books from all over the world.
But it does form part of what the Pie and I refer to as a “lumberjack breakfast,” and that makes it part of our Canadian cuisine.
Picture this: most of Canada is unpopulated by people, and in many places still there are huge tracts of old-growth forest stretching off past the horizon. One thing we do got is trees. A steady supply of timber is one of the reasons Canada was colonized in the first place. Our capital city was founded in the 1850s as a lumber town, and mills operated there even as late as the 1960s, clogging the Ottawa river with rafts and rafts of logs.
From our old $1 bill, image from Steve Briggs
The timber that flowed downriver to the mills came from logging camps far upstream, and these camps were occupied by big, rough men, mostly immigrants from Poland, Ireland, or the wilds of Québec, working in miserable conditions to earn enough money to send to their families, who often lived hundreds of miles away.
Logging was (and still is) a rather dangerous occupation, and it took a lot of energy just to stay alive and get the job done. That is why every logging camp worth its salt (and many weren’t) had a reputable camp cook, and this cook was responsible for providing all the loggers with the caloric intake they needed to last out the day. This meant a breakfast crammed with carbohydrates, proteins, and fats: bacon, biscuits, eggs, pancakes, bread, sausages, steaks — and French toast.
The traditional lumberjack French toast would have originally started out as a loaf of stale bread, sliced and left to soak overnight in a mixture of milk and eggs. It was fried up and served hot, slathered with sugary maple syrup and dusted with more sugar. Our version is only slightly more refined. Oh, and if you’d like to read a bit more about logging camps, John Irving produced a great novel recently on the subject called Last Night in Twisted River. It’s a good read, one of Irving’s best, in my opinion.
Anyway, French toast. Here we go. This recipe will give you six to eight slices of eggy toast, depending on the size and absorbency of your bread.
In a shallow bowl, whisk together 2/3 cup milk (or half milk and half cream) and 4 eggs.
Add in as well 2 tablespoons sugar and 1 teaspoon vanilla. If you want to go very traditional, try a teaspoon of rum instead and replace the sugar with maple syrup.
One at a time, soak your pieces of bread in the egg mixture. Here we used raisin bread because we love it.
Traditionally you would use a thick hearth loaf, but if you want to get fancy, it’s also good with brioche, or pannetone, or even biscuits. Experiment. Make sure to get both sides good and eggy.
Slip the bread into a hot buttered skillet.
Brown both sides (this takes about three minutes a side if you use medium heat).
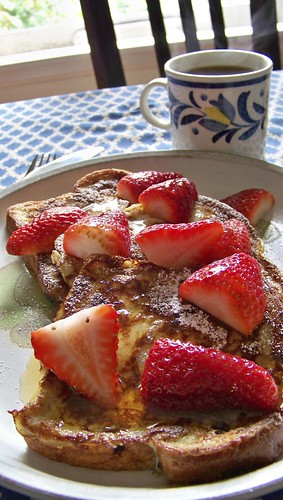
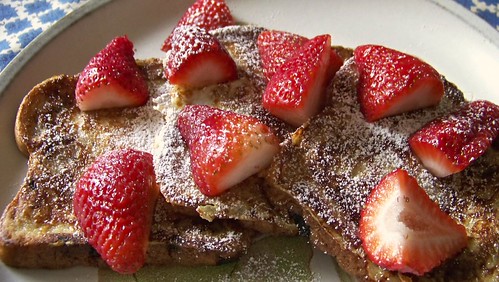
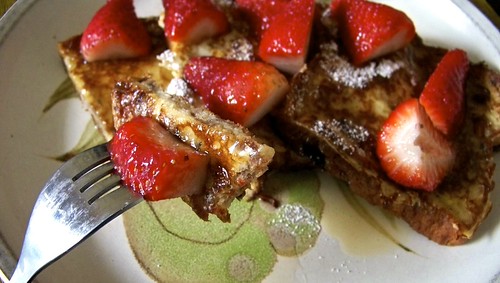
Serve hot, sprinkled with icing sugar and fresh fruit, if available.
You can add a sprinkle of cinnamon, too, if the mood strikes you.
Canadian-style means, of course, lots and lots of maple syrup. Lumberjacks need their caffeine, too, so have it with a hot cup of coffee.
I use vanilla extract in absolutely everything. So I go through it like gangbusters. And pure vanilla extract is the only way to go.
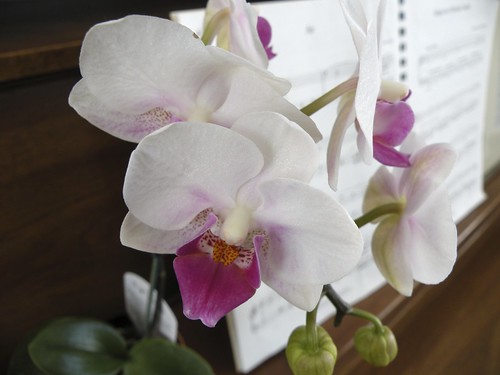
I also like orchids, and that’s where vanilla beans come from. I kid you not. A climbing orchid native to Central America, called Vanilla V. planifolia (or V. fragrans) is the source of that costly little brown bean. This is not a vanilla-producing orchid but it’s pretty enough anyway.
And the reason vanilla tastes so good in sweet things? Well, the vanilla bean makes its own sugars:
Vanilla’s rich flavor is the creation of three factors: the pod’s wealth of phenolic defensive compounds, preeminently vanillin; a good supply of sugars and amino acids to generate browning-reaction flavors; and the curing process. The plant stores most of its defensive aromatics in inert form by bonding them to a sugar molecule. The active defenses — and aromas — are released when damage to the pod brings the storage forms into contact with bond-breaking enzymes. The key to making good vanilla is thus deliberate damage to the pods, followed by a prolonged drying process that develops and concentrates the flavor, and prevents the pod from spoiling.
That’s an excerpt from On Food and Cooking: The Science and Lore of the Kitchen by Harold McGee. Doodle gave it to me for Christmas. I highly recommend it if you are interesting in knowing why things work the way they do in the kitchen. It’s a great blogging tool, as well.
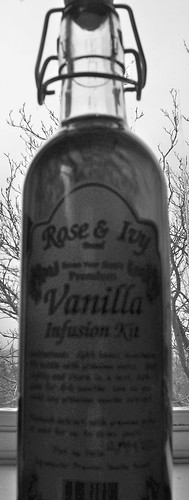
Did you know you can make your own vanilla extract? It’s super easy. I already have some steeping that I put up in October in preparation for Chel and Invis‘ wedding cake in June, but I got this cute little bottle from my brother Ando for Christmas. In it were two vanilla beans and all the tag said was “For Al: BLOG IT.”
So this is what I am doing. I love presents for the blog!
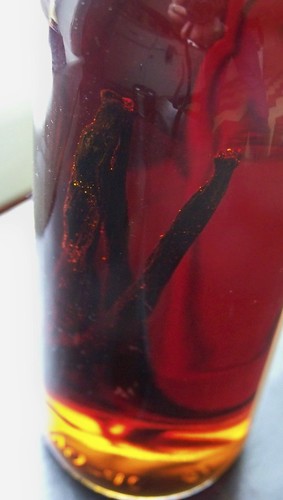
Basically, all you need to do is fill your bottle (make sure it has a good seal) with two vanilla beans and some booze. The instructions here call for vodka, but I have read elsewhere that rum makes a more mellow flavour that lends itself better to darker sweets. You can use bourbon as well, especially if you have bourbon vanilla beans from Madagascar.
Then you seal it and store it away for about 4-6 months.
TADA.
That was so easy it was almost a non-DIY. That’s why I had to give you some science. I had to make you feel like you worked for it.