Jammy Bran Muffins

These muffins are a little bit different from your usually brown bran muffins. As you may know, I have a love/hate relationship with bran, so I’m always looking for new ways to ingest fibre without feeling like I’m eating sawdust. It’s a never-ending challenge. The additional challenge of these is that for some reason I have four jars of jam in my fridge and neither the Pie nor I is eating a lot of toast at the moment. So I decided to use it as my sweetener in this shindig.

Jammy Bran Muffins 2

Start by setting your oven to preheat at 350°F and spray a muffin tin or rub it with butter. If you don’t have any buttermilk on hand, feel free to sour some milk by adding 1 tablespoon lemon juice to every cup of regular milk. Give that a stir and leave it for 5 minutes.

Jammy Bran Muffins 1

In a large bowl, whisk together 2 cups all-purpose flour, 1 1/4 cup bran, 1/4 cup ground flax (because it’s good for you – make sure it’s partially ground before you add it in), and 1 1/4 teaspoons baking soda.

Jammy Bran Muffins 3

Jammy Bran Muffins 4

In a smaller bowl, scramble together 4 tablespoons melted butter3/4 cup of your favourite jam (this one is serviceberry), 1 large egg, and 2 cups buttermilk (or alternative).

Jammy Bran Muffins 6

Now pour the liquids into the solids and gently whisk until only just combined.

Jammy Bran Muffins 7

Dump in 1 cup raisins (or not, if you’re not a fan of raisins) and whisk until just combined again – never over-mix muffins. If you do they end up flat. And that’s lame.

Jammy Bran Muffins 8

Divide the batter in your tin. Bake those puppies for 20-25 minutes, until the centre muffin tests clean when stabbed with a toothpick.

Jammy Bran Muffins 9

Leave them in the pan for about 5 minutes to cool a little bit before digging them out and eating them or letting them cool completely.

Jammy Bran Muffins 11

We always like our muffins hot, with butter. Because, well, butter.

Jammy Bran Muffins 14

Cinnamon Rhubarb Muffins

Rhubarb Muffins 15

My mother foisted off some of her bumper crop of rhubarb on me so today’s and Monday’s recipes are both going to be rhubarb-related, and I think you’re going to like both of them if you are a fan of the sour stalks of not-fruit-not-vegetable. This recipe comes from Fine Cooking and the original recipe involves a streusel topping but I decided to skip it this time around. You can do what you like. But before you do, position a rack in the centre of your oven and preheat it to 400°F. Grease a muffin tin or line it with cupcake cups.

Rhubarb Muffins 1

Chop up 1 1/2 cups’ worth of fresh rhubarb into 1/4″ pieces. Set that aside for a few minutes.

Rhubarb Muffins 2

In a large bowl, whisk together 2 cups flour, 3/4 cup granulated sugar, 2 1/2 teaspoons baking powder, 1 teaspoon ground cinnamon, and 1/2 teaspoon baking soda.

Rhubarb Muffins 5

In a small heatsafe bowl, melt 1/2 cup butter and then let that cool slightly.

Rhubarb Muffins 4

In another bowl, whisk together 2 large eggs, 1 cup sour cream (I replaced this with 1 cup buttermilk), and 1 teaspoon vanilla extract. Add in the slightly cooled butter and mix that well.

Rhubarb Muffins 6

Make a well in the centre of your flour mixture and pour in the liquids.

Rhubarb Muffins 8

Stir that with a fork until just combined. Let it be lumpy.

Rhubarb Muffins 9

Tip in your rhubarb and stir that in, again, until just combined.

Rhubarb Muffins 10

Scoop the muffin batter into the prepared tin until each cup is full, then bake for 18-22 minutes, until a toothpick inserted in the centre of the centre muffin comes out clean.

Rhubarb Muffins 12

Let the muffins cool in the pan on a rack for about 5-10 minutes before scooping them out and eating them still warm with a little bit of butter.

Rhubarb Muffins 16

Oh my!

Banana Oatmeal Bran Muffins

Banana Oat Bran Muffins 15

I’m not a huge fan of bran muffins, to tell the truth. I mean, the older I get the more I appreciate their functionality in my diet, but they’re still not a favourite. The Pie absolutely LOVES them, though. I swear he’s actually seventy. So I thought I’d play around with the mixture a bit and see if I could come up with something that still had all the benefits of bran with a bit more of a flavour, and these not-too-sweet muffins did the trick.

Banana Oat Bran Muffins 12

These can also be frozen in their unbaked form for cooking up later, which is handy for me as I am yet again filling up friends’ freezers in anticipation of future little ones. All you do is scoop the mixed batter into cupcake liners, freeze them, and then add five minutes to the baking time when you bake them from frozen. Easy peasy.

Banana Oat Bran Muffins 9

But of course you want to try some of these puppies right away. So preheat your oven to 350°F and line some muffin tins with liners (or give them a good spraying or buttering, whatever suits). I doubled this recipe (so I could freeze some) so don’t be alarmed at the massive amounts in the pictures. Deep breaths.

Banana Oat Bran Muffins 1

In a bowl, whisk together 2 cups all-purpose or whole wheat flour, 1 cup oats (rolled, not steel cut), 1 cup bran, 2 tablespoons sugar, and 1 1/4 teaspoon baking soda. That’s your dry bowl.

Banana Oat Bran Muffins 3

For your liquids you’ll likely need a bit more preparation. First, I had some bananas in the freezer that needed thawing out, but when they were good and squishy I went ahead and mushed up 3 ripe bananas.

Banana Oat Bran Muffins 4

You’ll also need some buttermilk. If you don’t have buttermilk you can simply sour regular milk by adding 1 tablespoon lemon/lime juice or vinegar to every cup of milk you use and letting that sit for about 5 minutes. For this recipe you’ll need 2 cups buttermilk/soured milk. I also opted to switch out the traditional molasses used in bran muffins for 1/2 cup honey. In addition to that in your liquid bowl you’ll need 1 large egg and 4 tablespoons melted butter.

Banana Oat Bran Muffins 5

Mix both the liquids and the dry stuff well, but SEPARATELY. The whole trick with muffins is not mixing them too much. I think in this case with me trying to incorporate the bananas I ended up overmixing but you should try not to do that.

Banana Oat Bran Muffins 6

Your batter should still be pretty lumpy when you tip in 1 cup raisins or nuts (optional).

Banana Oat Bran Muffins 7

Scoop your batter into your prepared tins and either freeze them or bake them for about 25 minutes, until a toothpick inserted in the centre muffin comes out clean.

Banana Oat Bran Muffins 8

Let those cool in the pan about 5 minutes before scooping out to a wire rack to cool completely.

Banana Oat Bran Muffins 10

I like eating them still-hot with a wee bit of butter. So good!

Banana Oat Bran Muffins 17

Apple Streusel Muffins

Apple Streusel Muffins 25

A couple weeks ago, in the beginning stages of November, I had a strong hankering for apple muffins. I was reading a book where one of the main characters kept making them and I just couldn’t resist the temptation anymore. I found this recipe from Sally’s Baking Addiction and the rest is really history.

Apple Streusel Muffins 9

Let’s start with the streusel crumb topping, shall we? It’s what elevates these simple muffins into items of historic greatness. Melt 1/4 cup butter in a bowl, then dump in 1/3 cup brown sugar, 1 tablespoon granulated sugar, and 1 teaspoon ground cinnamon. Give that a good stirring.

Apple Streusel Muffins 1

Then add in 2/3 cup all-purpose flour and mix it up with a fork or your hands.

Apple Streusel Muffins 2

You’re going to get a lovely crumbly mix. Set that aside for a minute.

Apple Streusel Muffins 3

Now, preheat your oven to 425°F. I know that seems high, but don’t worry, we’ve got a plan. You might want to grease or butter a muffin tin while you’re at it. I also set 2 large eggs in a bowl of warm water to bring them to room temperature. Because I didn’t plan ahead.

Apple Streusel Muffins 4

In the bowl of your mixer, cream 1/2 cup room temperature butter until all fluffy and amazing. Then add in 1/2 cup brown sugar and 1/4 cup granulated sugar and beat that up again.

Apple Streusel Muffins 5
Why yes – that granulated sugar IS pink. It’s a long story.

Then add in your 2 large eggs and beat until fully combined. Don’t forget to scrape down the sides of the bowl.

Apple Streusel Muffins 8

Now add in 2 teaspoons vanilla extract, and 1/2 cup yogurt (any flavour). You can use sour cream if you have no yogurt. I had neither sour cream nor yogurt, so I used buttermilk. Well, I had no buttermilk either, so I used milk that I had soured with lemon juice.

Apple Streusel Muffins 12

Now, peel and chop up 2 medium apples – you want about 1 1/2 cups diced apples for this. Can you peel your apple all in one piece? It’s one of my special skills.

Apple Streusel Muffins 10

In another large bowl, whisk together 1 3/4 cup all-purpose flour with 1 teaspoon baking powder, and 1 teaspoon ground cinnamon. The original recipe also calls for a teaspoon of baking soda but I found I could really taste it in the muffin so I would leave it out.

Apple Streusel Muffins 7

Add your wet ingredients to your dry ingredients and mix until just combined.

Apple Streusel Muffins 13

Plop in your apples and 1/4 cup milk (any kind) and mix that up again.

Apple Streusel Muffins 14

Scoop that glorious stuff into your prepared muffin tin, filling the whole cup.

Apple Streusel Muffins 15

Sprinkle generously with the streusel topping and shove that in the oven. Bake for 5 minutes at 425°F, then reduce the heat to 350°F and bake for a further 15 minutes, until a toothpick inserted in the centre of the centre muffin comes out clean.

Apple Streusel Muffins 16

While the muffins were baking, I glanced out the window and the bright sunny day had suddenly become a blizzard.

Apple Streusel Muffins 17

And then the sun came out again. Though the snow kept falling.

Apple Streusel Muffins 20

Set the hot muffins on a wire rack to cool down and start on your glaze.

Apple Streusel Muffins 23

Whisk together 1 cup icing sugar with 3 tablespoons heavy cream and 1/2 teaspoon vanilla extract.

Apple Streusel Muffins 21

Drizzle that insanity over your still warm muffins.

Apple Streusel Muffins 26

Eat these glorious gems within a couple days, as they will tend to get soggy over time.

Apple Streusel Muffins 28

Chock-Full Muffins

Chock-Full Muffins 14

The thing I like best about muffins is that, while they’re pretty picky about how you mix them, there is no exact science as to what you mix into them.  This means that every time I make a batch, I try my hardest to cram everything I can into each one.  How many things?  All the things.

Chock-Full Muffins 2

Let’s DO this.  Preheat your oven to 400°F and grease a muffin tin or line it with paper liners.  Greasing might actually work better in this situation, as I found the baked muffins were hesitant to come out of their liners.

Chock-Full Muffins 1

In a bowl, whisk together 2 cups all purpose flour, 1 tablespoon baking powder,  and 1/2 teaspoon ground nutmeg.

Chock-Full Muffins 3

Then plop in 1/2 cup bran and 1/2 cup unsweetened coconut and stir that as well.

Chock-Full Muffins 5

Melt about 1/2 cup butter and add it to a bowl with 2 large eggs, 1/2 cup milk, 1/2 cup yogurt (your choice), 2 teaspoons vanilla, and 2/3 cup brown sugar and give that a stir.

Chock-Full Muffins 8

I actually used coconut sugar, because I had it on hand.  I like it because it’s not super sweet.

Chock-Full Muffins 7

Grab a few handfuls of dried fruit and nuts, if you’d like, about 1 1/2 cups.  Here we have dried versions of cranberries, cherries, blueberries, grapes (raisins, duh), and apricots.

Chock-Full Muffins 9

Now here’s the trick with muffins: don’t mix the wet with the dry until you’re ready to plop the batter in your baking tin.

Chock-Full Muffins 10

Add the flour mixture to the egg mixture and stir until just barely combined.  Now you can add in your fruit and stir just until it’s evenly distributed throughout.

Chock-Full Muffins 11

Drop the batter into your muffin tins.  I ended up completely overflowing mine because these puppies don’t expand too much.

Chock-Full Muffins 12

Bake for about 17 minutes, until a toothpick inserted into the centre muffin comes out clean, and let cool for a few minutes.

Chock-Full Muffins 13

So good with butter!

Chock-Full Muffins 16

Eggs Benny, Two Ways

Eggs Benny Two Ways 23

Two weeks ago the Pie and I decided to head downtown for a late Saturday breakfast and we ended up at the Bagel Cafe, which is consistently voted as having the best breakfast in town almost every year.  We’d never been before, so it was an interesting experience — the place is pretty cozy so I wouldn’t recommend going in a big group — but the menu was massive and I had the best breakfast I have ever had.  It was eggs Benedict served with a sliver of smoked salmon and a dreamy, creamy Hollandaise, but instead of the standard English muffin, this poached beauty was perched atop a genuine Newfoundland cod fish cake.  It was truly one of the more divine things I have eaten in recent memory.

And I can’t stop thinking about it.  So I had to recreate it.  I mean, who did I think I was?  This, then, is what I did the following weekend.

So first, for the man I married who refuses to eat fish, I whipped up another batch of English muffins.  And then I learned that he has never had eggs Benedict before.  I was shocked.  I order them pretty much every time we go out for breakfast, but it never occurred to me to find out if he had ever done the same.  And then I made the fish cakes, which conveniently store well in the refrigerator.

Eggs Benny Two Ways 3

For the Hollandaise, you want to get your whisking arm limbered up.  Set a large pot of water to simmer on your stove and find a metal bowl that fits snugly over the opening but that does not touch the water (if you’re poaching eggs you probably have a large pot of water already on the simmer so this makes things easy).  While that’s heating up melt as well 10 tablespoons unsalted butter and set that somewhere convenient.

Eggs Benny Two Ways 4

Into the metal bowl goes 3 egg yolks and 1 tablespoon lemon juice.  Whisk that until it’s frothy.  

Eggs Benny Two Ways 5

Set the bowl over the pot and keep whisking.  Lift the bowl away from the heat every once in a while to make sure that it doesn’t get too hot and curdle.

Eggs Benny Two Ways 6

Keep whisking until you produce a thick creamy substance that forms strings when you lift the whisk away.  This is called a sabayon, and that’s basically the structure of your Hollandaise base right there.

Eggs Benny Two Ways 7

Away from the heat, and whisking all the while, trickle in your nice hot melted butter and mix until fully incorporated.

Eggs Benny Two Ways 8

Season with salt and pepper.

Eggs Benny Two Ways 9

And maybe a little Tabasco sauce.  Taste it and season again accordingly.

Eggs Benny Two Ways 10

Keep the Hollandaise warm (but not hot) while the rest of your chaotic morning is going on.  I did this by putting it a bowl of hot water.  This is enough sauce for 4-6 eggs, by the way.

Eggs Benny Two Ways 11

You should also be toasting your English muffins (if you’re using them) and frying up your fish cakes (which you should be eating because they’re awesome).  And if you’re using peameal bacon, fry that up as well.

Eggs Benny Two Ways 13

Eggs Benny Two Ways 15

Now everything else is a matter of timing.  Everyone has their own methods for poaching eggs, and how long they take will depend on the size of the egg, how many you are cooking, water temperature, blah blah blah.  Gordon Ramsay had a neat tip, though: swirl the water into a vortex before sliding in your egg.  The circular direction of the water will ensure that all those little tendrils of egg will end up stuck to the egg itself, making the finished product nice and round.  I also tried the Julia Child method here, where you poke a small hole in the fat end of the egg with a pin.

Eggs Benny Two Ways 2

Then you get your water simmering and you dunk each egg for 10-15 seconds and then you haul them out.  This pre-cooks the whites a little bit so the egg stays in shape a bit better.

Eggs Benny Two Ways 12

THEN you add a bit of vinegar to the water.

Eggs Benny Two Ways 17

And crack your eggs into the barely simmering stuff, one by one. Let them do their thing for 3-4 minutes, depending on how hard you like ’em poached. When they were done I plopped them in a bowl of hot water to stay warm while I set everything up.  This also washes the vinegar off the eggs. Drain them on a clean towel before you put them on your muffins or they’ll get soggy.

Eggs Benny Two Ways 20

Smear a dab of Hollandaise on your toasted muffin, layer on a piece of peameal bacon, follow that with the egg and more Hollandaise and a sprinkle of parsley or chives and salt and pepper.

Eggs Benny Two Ways 18

Eggs Benny Two Ways 22

Alternately, plop a dollop of sauce on your crispy fish cake, ladle on the egg, more sauce, and a flake of smoked salmon.

Eggs Benny Two Ways 19

Eggs Benny Two Ways 21

Eat it while it’s hot!

Eggs Benny Two Ways 24

Fruity Oat Muffins (Gluten-Free!)

Fruity Oat Muffins 20

Fussellette sent me this gorgeous recipe from the CBC and I had to try it out after listening to her rave about the results.

Fruity Oat Muffins 2

The best part about this recipe is that it’s flexible — you can change the flavours around by changing up the fruit you’re using, even using fruit-flavoured yogurt if that’s what you have on hand.  I’d also like to play with the flours a bit, maybe swapping in some coconut or almond flour if appropriate.

Fruity Oat Muffins 3

Preheat your oven to 375°F and spray or line a muffin tin with paper cups. I recommend paper cups for these, because gluten-free baked goods tend to like to stick to what they’re baked in.

Take 1 cup oats (if you have a sensitivity, make sure they’re gluten-free), and pulse in a food processor until they’re all fine and powdery.  Plop that in a large bowl.

Fruity Oat Muffins 4

Add to that 1/3 cup brown rice flour, 1/3 cup tapioca flour, 1/3 cup corn starch, 1 tablespoon baking powder, 1 teaspoon baking soda, 3/4 teaspoon xanthan gum, 1/2 teaspoon cinnamon, and a pinch of salt.  Whisk that all together.

Fruity Oat Muffins 5

Then add in 1/2 cup each dried cherries, dried cranberries, and golden raisins.  I had this multi-pack with all those in it already, so I chucked that in, together with some chopped dried apricots.

Fruity Oat Muffins 1

Fruity Oat Muffins 7

In another bowl, rub 2 teaspoons orange zest and 2 teaspoons lemon zest (I used 4 teaspoons orange because I had no lemons) into 1/2 cup granulated sugar.

Fruity Oat Muffins 8

Fruity Oat Muffins 9

Fruity Oat Muffins 10

Whisk in 2 large eggs, then 1 1/4 cups Balkan-style plain yogurt1/3 cup light olive oil or vegetable oil, 2 teaspoons vanilla, and 1 teaspoon cider vinegar.

Fruity Oat Muffins 11

Add the flour mixture to the wet ingredients and stir only until just combined.  It will seem lumpy but don’t fret.  If you stir it too much you’ll end up with flat muffins, which, especially in gluten-free recipes, is the opposite of what we want to happen.

Fruity Oat Muffins 12

Spoon into your muffin tin (it should make 12 regular-sized muffins or 6-7 super large ones).

Fruity Oat Muffins 13

If you end up with some empty space in your muffin tin, add a bit of water into the empty cups — it will ensure that your muffins bake evenly.

Fruity Oat Muffins 14

Sprinkle some more whole oats and maybe some brown sugar on the top of each muffin.

Fruity Oat Muffins 15

Bake for about 25 minutes, until the tops are firm to the touch.  Allow to solidify in the pan for about five minutes after removal from the oven.  Use a fork to transfer the muffins to a rack to cool completely.  As with most gluten-free material, they won’t last long, so make sure to eat them or freeze them within a couple of days.

Fruity Oat Muffins 17

English Muffins: easier to make than you think

English Muffins 22

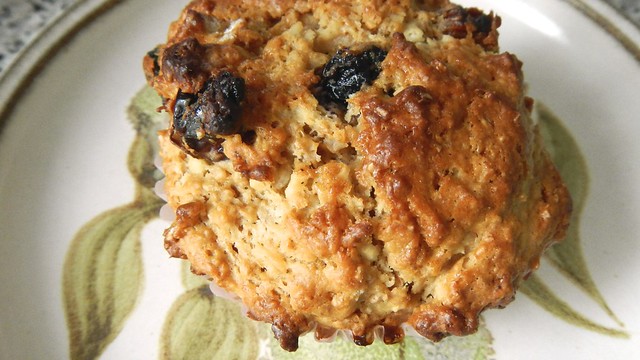
I have a recipe for real, old-fashioned English muffins in my Peter Reinhart.  And some day, I totally plan to make them the way he says to (because he’s a genius).  Until then, I’m too darned lazy.  But I found this version by the Foodess (also a genius) that seems to be more up my alley in terms of ability and time.  It’s nice to finally have a decent English muffin in the morning, full of all those wee holes designed simply to hold melted butter and honey.  The Newfoundland version of the English muffin is just … WRONG.  It’s more like a hamburger bun or something.  It’s not right.

English Muffins 23

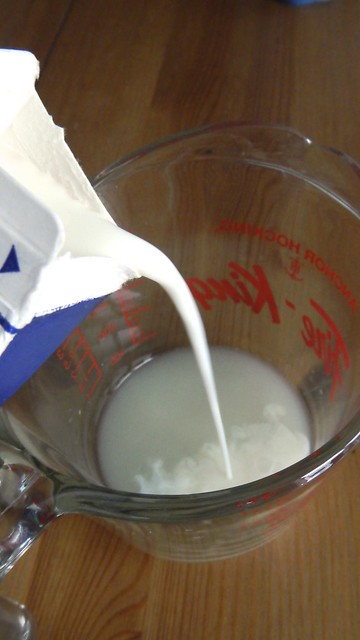
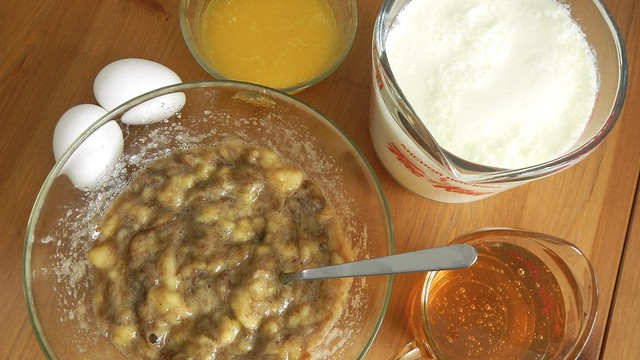
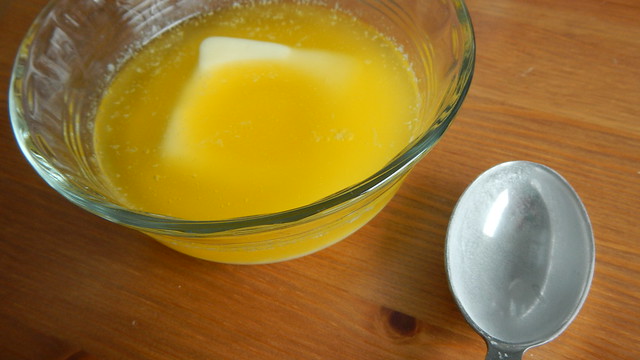
Anyway.  Start with 1 1/2 cups milk, and plop that in a microwave-safe bowl or measuring cup, and microwave for 2 1/2 – 3 1/2 minutes, until the milk begins to simmer around the edges.

English Muffins 1

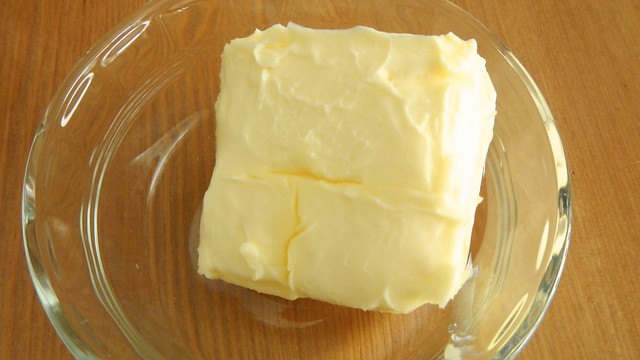
While that’s on the go, cube up 1/4 cup cold butter.  The coldness of the butter will help to cool your milk down.

English Muffins 2

Stir the butter into the milk and swirl it around until it’s all melted.  Leave the milk aside for a bit to cool down.

English Muffins 4

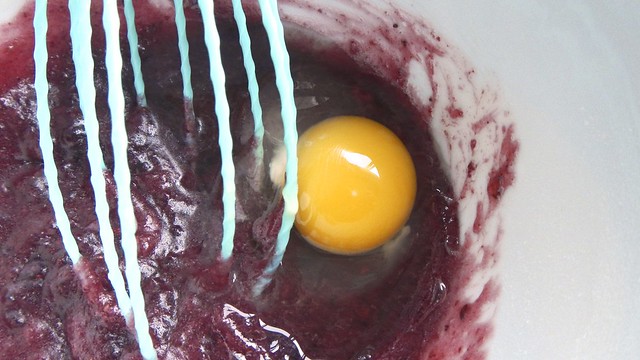
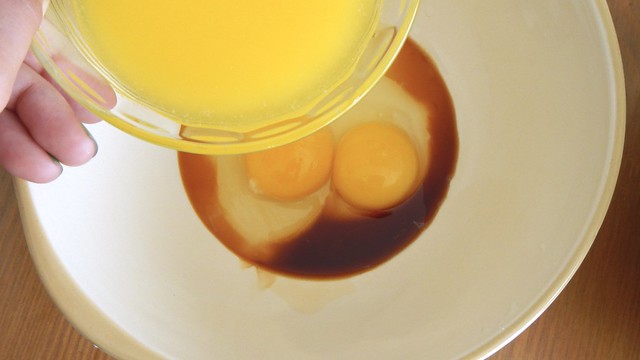
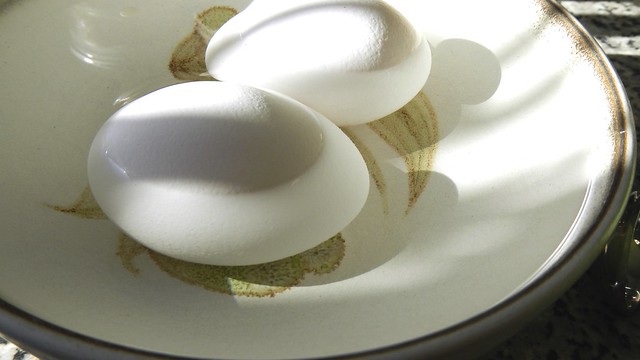
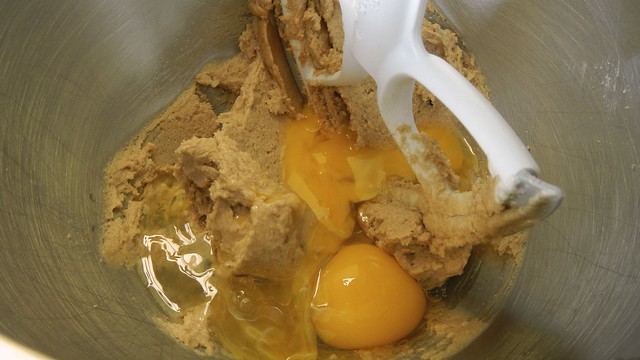
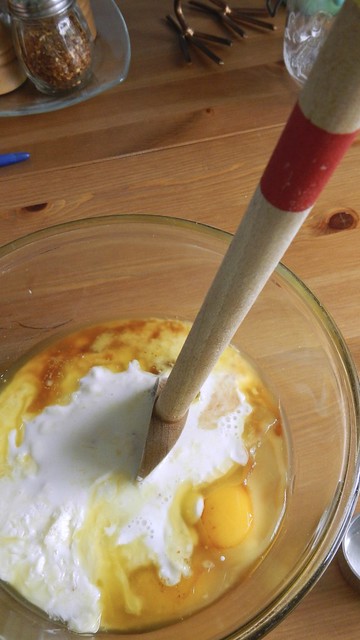
Beat up 1 large egg and add to it 1/4 cup plain yogurt (I used Balkan style).

English Muffins 3

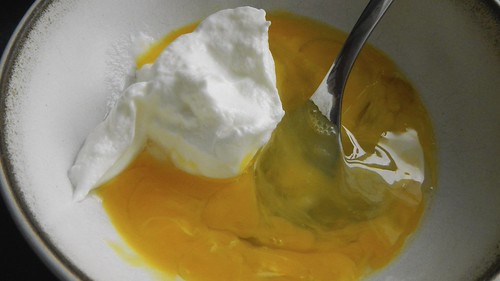
When the milk mixture has cooled to just warm, you can mix the egg/yogurt in.

English Muffins 6

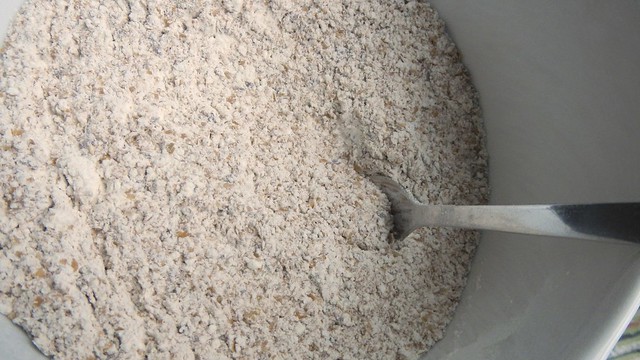
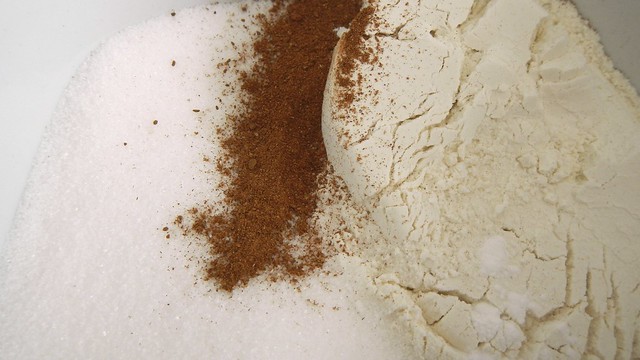
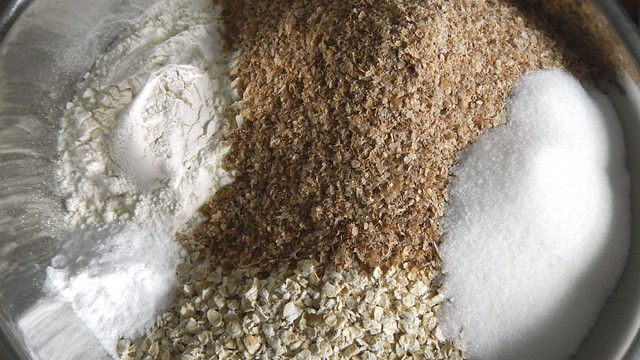
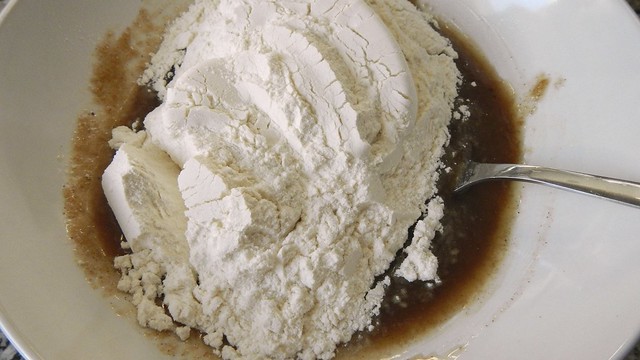
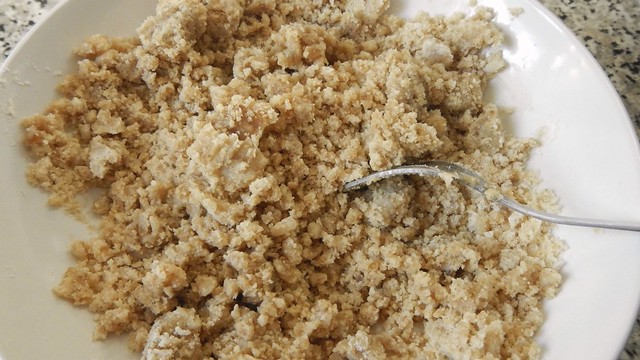
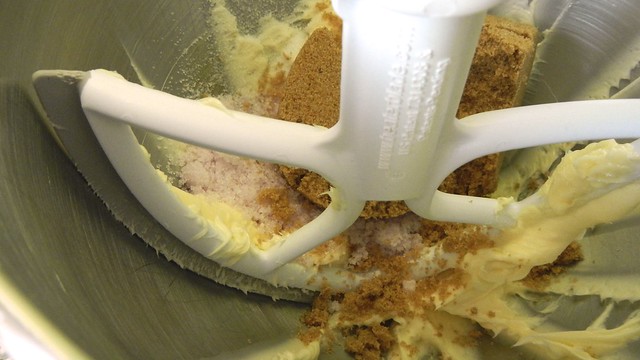
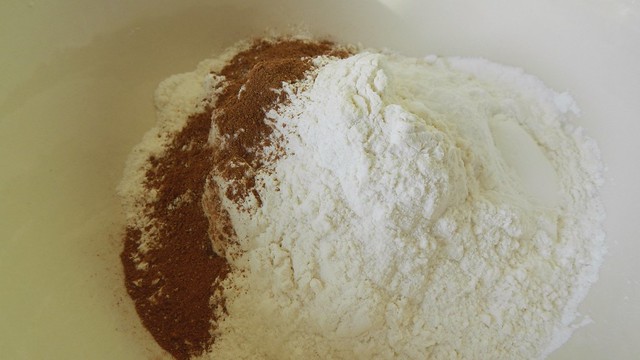
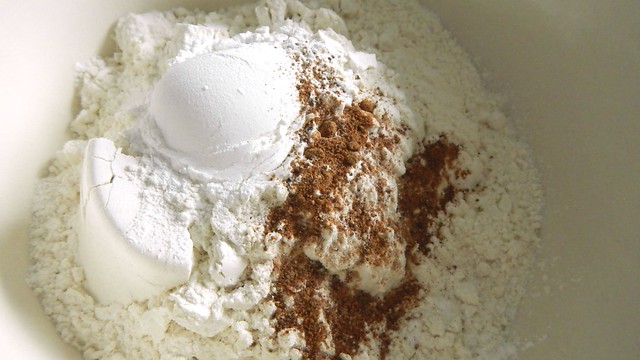
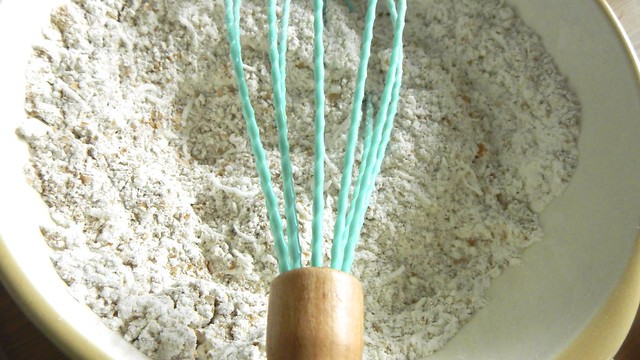
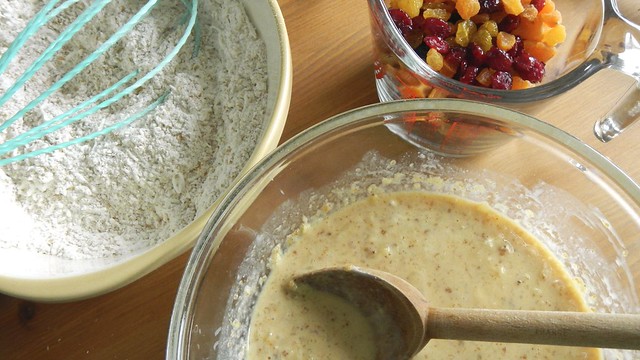
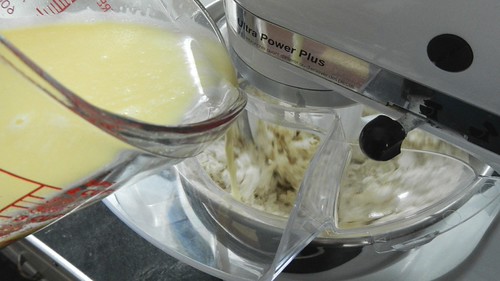
In the bowl of a stand mixer, add 4 cups flour to 1 tablespoon sugar, 1 1/2 teaspoons fine salt, and 2 1/4 teaspoons active dry yeast.

English Muffins 5

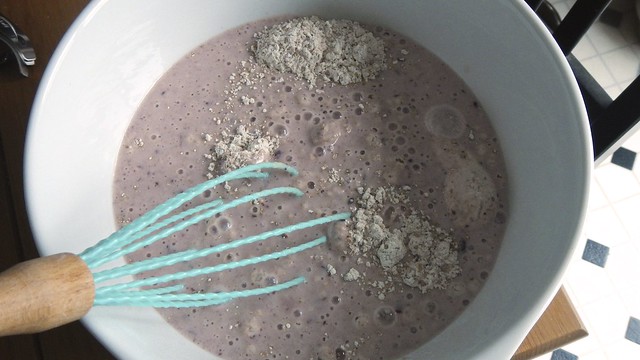
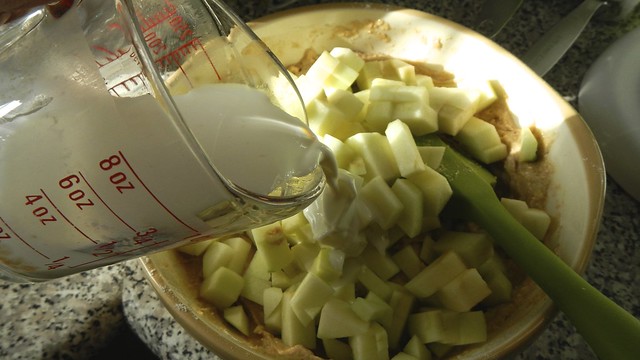
Put that sucker on low (use a shield around the top if you’ve got one), and slowly pour in your dairy mixture.  Keep going until it’s all in there, and then beat (again, on low) for another full minute.

English Muffins 7

English Muffins 8

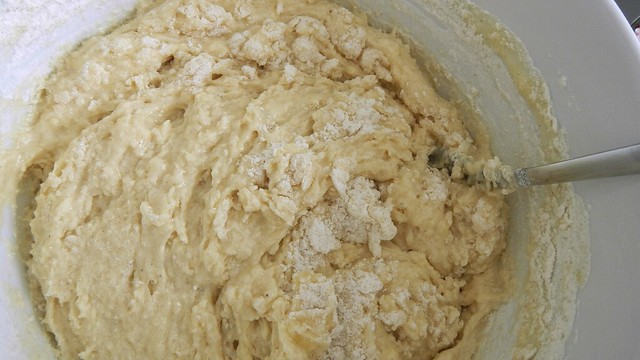
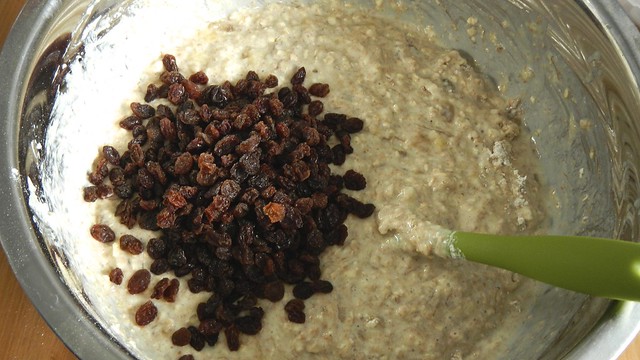
You can see that although the dough is still really sticky it’s starting to become stringy as well.  Gluten in action, folks.  SCIENCE.

English Muffins 9

Scrape down the sides of the bowl with a spatula, cover the top with plastic wrap, and put it in a warm place for an hour to rise.

English Muffins 10

When it’s ready to go, lightly flour a clean work surface.  Find yourself a 3″ biscuit cutter or use the opening to a large drinking glass (mine was about 2 1/2″).

English Muffins 11

Scrape the dough out of the bowl onto the floured surface and sprinkle the top of it with flour as well.  Use your floured hands to pat the dough down until it’s about 1/2″ thick.

English Muffins 12

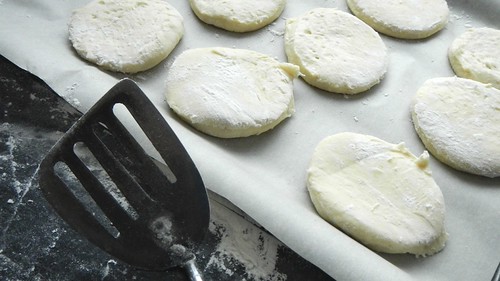
Using your cutter or glass, get busy cutting out little disks of dough.  Fold all your scraps together and repeat the process until you’ve used all your dough.  I ended up with 19 muffins in my batch.

English Muffins 13

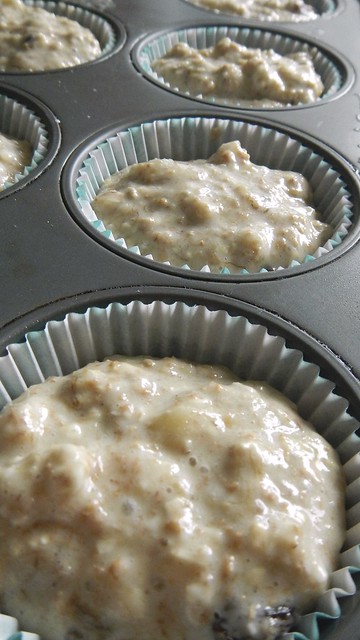
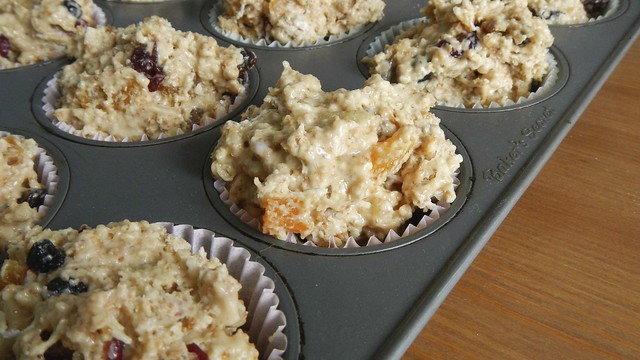
Use a floured spatula to transfer them onto a baking sheet lined with parchment and set those somewhere warm to rise for another 20 minutes.

English Muffins 14

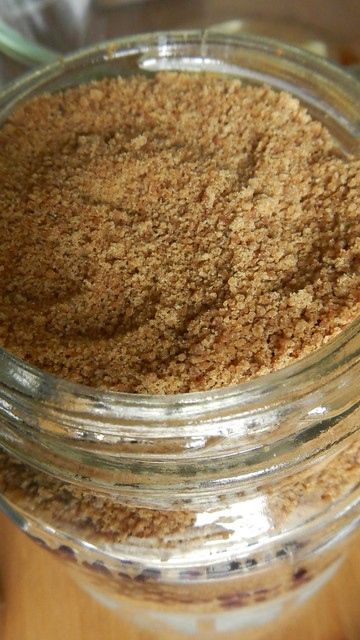
Now, preheat your oven to 400°F and plop a large cast iron skillet (or two) on your elements.  Heat those up to medium heat and dust them lightly with corn flour.  Do not use a non-stick pan for this; it will not work.  If you don’t have an iron skillet, use a steel, non-non-stick pan instead.

English Muffins 15

Plop some of your dough disks into the dusted, heated pan and let them cook on one side for about 3-4 minutes, or until the bottoms start to brown.

English Muffins 16

Flip them over and do it again to the other side.  Keep dusting the pan with more flour as needed, and keep in mind that the flour may start to smoke after a while.  As your pan heats up you will find it takes a shorter amount of time for your muffins to brown so keep an eye on them.

English Muffins 17

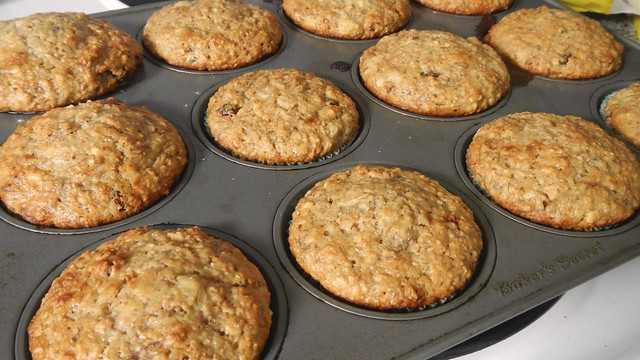
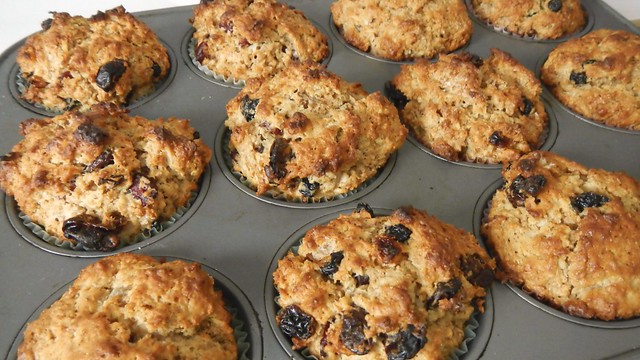
You can see how they are starting to rise up with the cooking and look more like real English muffins.  The reason you cook the tops and the bottoms is so that when the muffins are baking in the oven they don’t get all round and puffy like a dinner roll.

English Muffins 18

Transfer the browned muffins back to the parchment-lined baking sheets.

English Muffins 19

When you’re all ready to go and they’re all browned, pop them in the oven for 7-10 minutes, until the muffins sound hollow when you tap on them.

English Muffins 20

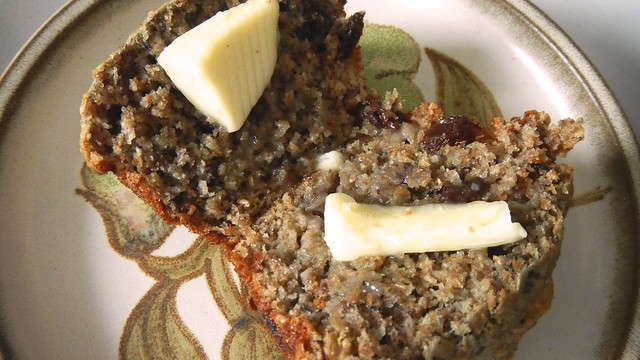
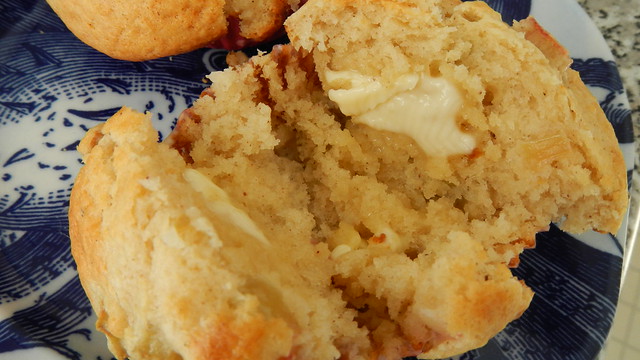
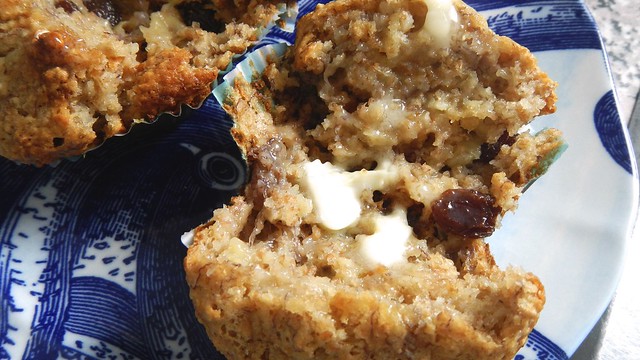
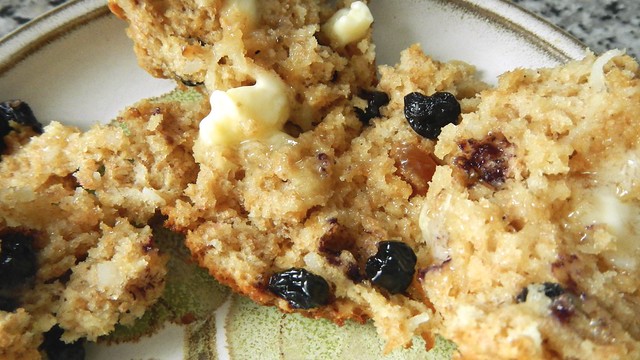
When you are ready to eat them, pierce the middle with a fork several times to break the muffin open.  If you cut them with a knife you won’t get the benefit of all the perfect little bubbles.

English Muffins 21

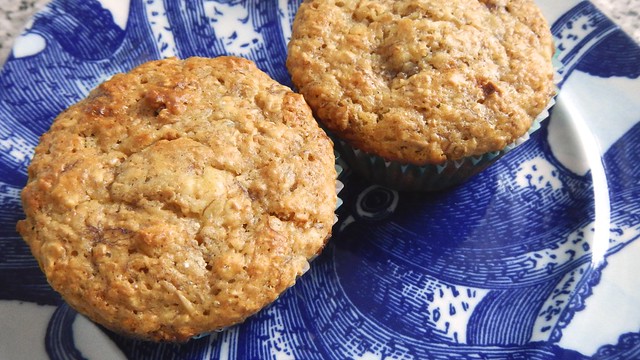
Look at those perfect little bubbles.

English Muffins 24

Then you can do whatever you’re going to do with them.  Toast them, use them as sandwich material (the Pie loves making his own version of the Egg McMuffin), eat them as a base for Eggs Benedict … whatever floats your boat.  They freeze well, too — just make sure to wrap them up really tightly.

English Muffins 25

Pumpkin Muffins

Pumpkin Things 2012 29

The Pie is a huge, HUGE fan of muffins.  Not really sure why.  But he is.  And he requested that with the massive amounts of pumpkin purée we have that I make up some pumpkin muffins.  And I love the Smitten Kitchen so much that I knew I had to use her recipe for these delightful little things.

Pumpkin Things 2012 36

Start by preheating your oven to 350°F and line a muffin tin with cupcake cups.  I made these pre-Hallowe’en so the festive liners are TOTALLY justified.

Pumpkin Things 2012 17

In one bowl, use a whisk to mix together 1 1/2 cups flour, 1 teaspoon baking powder, 1/2 teaspoon baking soda, 1/2 teaspoon salt, 1 1/4 cups granulated sugar, and 2 teaspoons pumpkin pie spice (I told you we were going to need it again soon!).

Pumpkin Things 2012 14

In yer other bowl, whisk together 1 cup pureed pumpkin (if you’re using a canned variety, make sure that it’s the pure stuff, not the stuff pre-mixed with spices), 2 eggs, and 1/3 cup vegetable oil.  I also added in 1 teaspoon vanilla.

Pumpkin Things 2012 15

Pumpkin Things 2012 16

Now pour your wet ingredients into your dry ingredients and use that same whisk again until it’s fully combined.  The whisk means that you can get all the ingredients all mixed in but you don’t have to worry about overmixing.

Pumpkin Things 2012 18

Spoon the batter into the muffin tin, so that each cup is about 3/4 full, and combine 1 tablespoon granulated sugar with 2 teaspoons cinnamon to sprinkle over top.

Pumpkin Things 2012 19

Bake until they are lovely and puffy and gold and a toothpick inserted in the centre of the centre muffin comes out clean, about 25-30 minutes.

Pumpkin Things 2012 28

Let those sit in the pan on a rack for about five minutes before you transfer them out of the pan and directly onto the rack.  Then you can go ahead and eat them.

Pumpkin Things 2012 30

I love mine with butter.

Pumpkin Things 2012 38

The Pie just loves them, period.

Pumpkin Things 2012 34

Especially that glorious crusty top.

Pumpkin Things 2012 32