For the Birds: Edible Holiday Ornaments

For the Birds 14

For the Birds 13

Merry Christmas to everyone!  I hope you are all enjoying the winter holiday season, whichever tradition you celebrate.

Today we’re going to celebrate by feeding our backyard birds.  Both the Pie’s parents and my parents are supremely fond of the feathered creatures that appear outside their windows, so we thought we’d make them a little holiday treat, courtesy of Design Sponge.

First, I’d like to show you a little behind the scenes shot of my office during my Christmas gift-making chaos.  I made these on a tiny patch of floor I’d cleared specifically for the purpose.  It’s amazing what you can hide in a close-up shot …

For the Birds 1

Aaaand the closeup.  You will need these things: waxed paper, a spoon, a giant bowl, a tablespoon measure, corn syrup, flour,

For the Birds 2

and a honking hunk of birdseed.

For the Birds 3

Plop 2 cups bird seed in your bowl with 3/4 cup all purpose flour (we doubled our recipe, hence the enormous amount pictured).

For the Birds 4

Give that a stir, then drop in 3 tablespoons corn syrup and 1/2 cup water.  Stir that up too.  It’s gross.

For the Birds 5

Prepare your moulds.  You can use cookie cutters on top of waxed paper, but I used these cake moulds I picked up at the Superstore.  If your surfaces are non-stick, that’s cool, but if not you might want to spritz them with a bit of cooking spray first.

For the Birds 6

Spoon your sticky birdseed into your moulds and pack it down with a spoon.

For the Birds 8

I had extra (obviously), so I made little pucks of bird seed in a muffin tin as well.

For the Birds 7

Use a paint brush or straw or pencil to wiggle a hole at the top of each of your bird seed packs. Don’t make it too close to the top of the ornament, as you’ll need enough dried birdseed there to support the weight of the thing.

For the Birds 9

Let them dry overnight and then tip them out onto waxed paper.  If they’re still wet, leave them longer to dry or, if you’re in a hurry, bake them for an hour at the lowest temperature in your oven.

For the Birds 10

See, it kind of looks like a Christmas ornament …

For the Birds 11

I used butcher’s twine to string up my ornaments.

For the Birds 12

Then I wrapped them up in waxed paper and tied them with string to give as gifts.

For the Birds 15

For the bird lover in every family.

For the Birds 16

DINOPOTS

DINOPOTS 14

I’ve been seeing these all over the internet for the past year or so, but it took a while before I could actually acquire what I needed to do it (basically I had to move back to Ottawa and buy a car so I could go shopping …).

DINOPOTS 2

Basically, you need some hollow plastic figurines.  I picked some of these up in a giant bag from Value Village, while I got another handful at Target.

DINOPOTS 1

Then you take your knife and you cut a hole in the back of each one.

DINOPOTS 4

Some will be softer than others, and cut easily.  This small triceratops and apatosaurus were a breeze.

DINOPOTS 3

Others, like this pachycephalosaurus, will result in several horrible cuts to your thumb, after which your husband will make you wear gloves.  And don’t even get me started on that darned elephant.  I had to eventually cut it open using a drill press and then file off the rough edges to the hole.

DINOPOTS 6

Once they’re cut, decide what kind of plants are going in them.  If they need drainage, then you’d better drill a hole in the bottom.  Then you can spray paint them.  Use a spray paint that is designed to bond to plastic.  I did not, and as a result, bad things happened to that little apatosaurus.

DINOPOTS 8

Then you just put plants in them and you’re ready to go.

DINOPOTS 12

I like the elephant the best, but I’m still fond of my actual DINOpots, too.  Makes a great hostess gift or a special something for your quirky office mate.

DINOPOTS 10

Victorian-esque Hanging Mirror … from Toilet Paper Rolls

Victorian Mirror 31

Okay so I’m not really setting any trends these days when it comes to weird stuff I make that I find on the internet.  I must be getting old.  Or it might be that I seem to never be sitting in front of my computer anymore.  In any case, I made this thing, and you can see things like it all over the internet.  But this one is mine.  And I like it.  So the basic ingredients you need for this are toilet paper/paper towel rolls (how many?  MANY.), a mirror, and something to mount your mirror in.  In this case, I had a 10″ round mirror so I stuffed it in a 10″ embroidery hoop.   You’ll also need scissors and pencils and rulers and glue and paint and something to stick to the whole shebob so it hangs.  Sorry for the technical language.

Victorian Mirror 3

Geez, where to begin?  Okay, start with your paper rolls, which you have been assiduously collecting for a month or two.  Or three.

Victorian Mirror 1

Pull all the paper bits off them, of course. This is how many I had. I didn’t end up using them all, but I figured from the outset it would be useful to cut them all in case I needed them later.

Victorian Mirror 5

Then I measured the depth of my embroidery hoop, which was about 1/2″ inch.

Victorian Mirror 6

So then I cut all the paper rolls into 1/2″ segments, to match.

Victorian Mirror 8

Now, I discovered that the mirror didn’t fit in the embroidery hoop if the inner hoop was still in place …

Victorian Mirror 9

So I took it out and tightened the outer hoop and that was fine.

Victorian Mirror 10

I set the hoop (minus the mirror) on my work surface, and then started thinking about a plan. There are many different patterns you can make with those little paper cat’s eyes.

Victorian Mirror 11

Victorian Mirror 12

But I figured the best way was to lay it out around the hoop and see what it looked like. This was one incarnation. I may do that one again sometime.

Victorian Mirror 13

Then it all started to come together. I had a design in mind similar to those overly ornate Victorian embellishments, so that’s kind of what came out.

Victorian Mirror 14

Victorian Mirror 15

I figured I would freehand the rest. So then I started gluing, using a hot glue gun.

Victorian Mirror 16

But at the top, I had that screw to contend with.

Victorian Mirror 17

So with some poking of holes and cutting of slits and things I got it all worked out.

Victorian Mirror 18

Then you just kind of keep going.

Victorian Mirror 19

Victorian Mirror 21

When I was satisfied with the number of pieces of paper I’d glued together, I tested out the size and weight. Remember that adding a glass mirror to your design will make it significantly heavier.

Victorian Mirror 22

Then I painted. I bought a craft spray paint that was supposedly designed specifically for wood and paper. It turned out to be a different colour than advertised, and it seemed to just get absorbed into the paper and wood, but that was fine. I finished it off with a spritz of glitter and some sealant and there it is.

Victorian Mirror 23

Back onto the work surface, face down.

Victorian Mirror 24

I set some erasers inside the hoop to hold the mirror at the height I wanted it.

Victorian Mirror 25

I bought this mirror from Value Village years ago and I think it was one of those display mirrors for crystal collections, so it already had this nice felt backing on it. I did two tracks of glue around the border and then extra-glued on a piece of hanging hardware.

Victorian Mirror 27

It’s cloudy today but you get the idea. I’m quite pleased with it.

Victorian Mirror 30

Jelly Bean Row

Jelly Bean Row

I love Quality Street chocolates. They remind me of everything good. And I love the colourful wrappers they come in. I’ve wanted to make something out of them for years. This year at Christmas I made sure to save all the wrappers so I’d have lots to work with.

Jelly Bean Row

Quality Street also appeals to my environmentalist side. You can re-use the tins for anything you like. You can recycle the foil wrappers that go under the clear ones, and recently, the company started making the clear wrappers out of vegetable products, so you can actually COMPOST them. How cool is that?

Jelly Bean Row

So what am I making with these?  I’m glad you asked.  St. John’s is famous for its colourfully-painted and artfully crooked row houses.  They’re often likened to a line of jelly beans, stacked on their ends — Jelly Bean Row.

Jelly Bean Row

If you watch any of those ever-popular tourism Newfoundland and Labrador commercials, you’ll see a few of them (though in real life they’re not quite so quaint — or clean).

Jelly Bean Row

So I thought I would make a few out of Quality Street wrappers, something to send people to paste in their windows, or to hang on their Christmas trees as ornaments, something that will catch the light and give them a taste of St. John’s at home.

Jelly Bean Row

Jelly Bean Row

The house construction is pretty simple.  I used black construction paper, folded in half, as a frame.  Then I cut out the frame using a craft knife and inserted and glued down the wrappers in the appropriate spaces.  Then I cut out windows and doors from the black paper as well, making sure to glue them to both sides so the ornament is reversible.

Jelly Bean Row

The problem with this particular material is that the wrappers always want to go back to their wrinkled state, and the construction paper doesn’t do a lot to prevent it.

Jelly Bean Row

A heavier-grade card would probably work better in keeping the stuff rigid, but at the same time, it would be harder to manipulate.  I wanted to make several of these hanging ornaments and create a sort of mobile for Doodle for her birthday, but the physics of it continued to defeat me — the ornaments were simply too light to be able to balance everything properly.  And I had it all planned so the houses went up on a slant, too!

Jelly Bean Row

Alas. In any case, they are pretty enough placed in a window or on your tree.

Jelly Bean Row

Fat Quarter Napkins

Happy Birthday Rusty!

[In case you ever marvelled at my magic efficiency, please note that I started this particular project on Labour Day Weekend and didn’t finish it until the 12th of December.  If that makes you feel better.]

I love fabric.  I am the worst sew-er in the world, but I seem to adopted a love of pretty cloth from my mother.  It’s both a blessing and a curse.  To assuage my inability to live without fabric and to compensate for the utter lack of storage space I have for it, I buy fat quarters.  These are squares of quilting fabric (usually cotton).

Fat Quarter Napkins

So a metric fat quarter is 50cm square, or 20″ x 20″.  But an American fat quarter (and alas, most of these are), is based on another archaic system and so the pieces are either 18″ x 22″ or 18″ x 21″.  And it’s all approximate anyway.  I’m not really sure of the logic there.  Something to do with yards and standard widths and blah blah blah.

Fat Quarter Napkins

You can also get colour-coordinated fat quarters (usually in packages of four or five).  The nice thing about these is they all go together, so you can hand someone a set of napkins, but they’re all different enough that people can tell theirs apart when they want to re-use them.

Fat Quarter Napkins

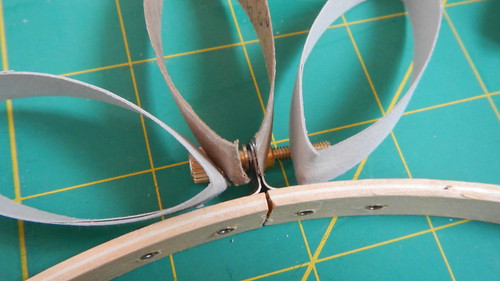
A handy home-made napkin ring will also help to differentiate.  The Pie made all of these himself by bending spoons with a set of pliers.  We then sprayed them with a metallic copper paint.

Spray-Painting Indoors

You can also use fabric remnants as well.  You can pick them up for a dollar or two in a fabric store, or use the scraps from another project of yours.

Fat Quarter Napkins

Speaking of fabric remnants, I picked this one up at Jo-Ann last year and didn’t unwrap it until now.  I chose it because turquoise and teal are my favourite colours, and I thought the design on this was pretty.

Fat Quarter Napkins

Then I unwrapped it.  WOW.  Talk about a hidden gem!  This will NOT be going into a napkin.  I gotta think on what to do with this one.  Suggestions are welcome.  Just barely not enough to make a skirt, if that gives you an idea of the size.

Fat Quarter Napkins

Anyway, back to the napkins.  First thing you need to do is wash and dry your fabric.

Fat Quarter Napkins

Don’t be alarmed — they will fray.  Oh mercy did these ones ever fray.

Fat Quarter Napkins

And then this one has a slash in it.  I will have to come up with an artful patch of some kind.

Fat Quarter Napkins

Then you have to iron them.  I hate ironing.

Fat Quarter Napkins

Then comes the actual napkin-making.  It involves hemming and sewing in straight lines and nice edges and stuff and MORE ironing.  None of which I’m particularly good at.  But Maia from Glass Beach has a fantastic and clear tutorial on hemming napkins here that you should check out.  It’s brilliant in its simplicity.  I will try to re-create her instructions as best as I can, but hers are better.

First I used a rotary cutter and a ruler to trim all the squares so that I had right angles.  They don’t necessarily all need to be the same size as their partners (unless you’re making napkins for the Queen or something), but right angles make things a lot easier to deal with.

Fat Quarter Napkins

I highly recommend using a rotary cutter and mat for this job.  It’s very hard to get straight lines with scissors alone, and it’s easier on your hands.

Fat Quarter Napkins

Gren helped by sitting on the fabric as I was trying to cut it and making off with the scraps once I cut them loose.

Fat Quarter Napkins

Save the scraps to stuff a toy later on.  Or do something else with them.  I made mine into a placemat, which you will see on Friday.

Then I gave myself a 1″ seam allowance and traced that with a fabric marker.  Actually I couldn’t get to the fabric store and so used a Crayola washable marker.  It washes out just as well, if not better, than a fabric marker.  Guaranteed.

Fat Quarter Napkins

Then you cut 1/2″ tips off all the corners.

Fat Quarter Napkins

Fold the edge of the fabric so the cut line matches up with that line you drew and iron it to create a flat edge.

Fat Quarter Napkins

To get a nice mitred corner, unfold one of those new flaps at the corner.

Fat Quarter Napkins

Fold the other flap over itself, along that marked line.  This seals in your raw edge and prevents fraying.

Fat Quarter Napkins

Now take the corner bit and fold it down so the edge of the folded part lines up with the drawn line on the side with the unfolded flap.  If you have big fingers or are in general not the most dexterous, you could use an awl or a seam ripper to hold things in place for you, like I did in this photo.

Fat Quarter Napkins

Then you can fold down the unfolded part again, and then fold it over itself again to seal in the raw edge. You can either iron these new edges flat, or simply pin them.  Either way, I’d add a pin or two in the corners just to hold everything in place.

Fat Quarter Napkins

And look at that — it looks like you know what you’re doing!

Fat Quarter Napkins

Now all you have to do is sew that down, making sure to backstitch at the beginning and end to keep your thread from unraveling.  Use an awl or seam ripper to hold the corners in place while you’re sewing them down, too.

Fat Quarter Napkins

And what a pretty napkin you’ve come up with. They look nice with these copper-sprayed spoon napkin rings, don’t they?

Fat Quarter Napkins

Tie them up in a nice little bundle and give them all away!

Fat Quarter Napkins

Have a Drink on Me

Happy New Year!

I’m still catching up on some DIY gift posts here, so I’d like to show you some drinking glasses I made for some special people for Christmas this year.  If you’d like to know more about how to cut glass bottles, or how to etch glass, click on those links back there.

I spent a lot of time with a rotary tool (the most popular brand name of these is a Dremmel), grinding down the edges so they were safe for human mouths.  There was a lot of sparkly dust everywhere after that.

Drinking Glasses

These ones were for Cait, who has a lovely dachshund named Ruby.  The glass I used came from vinho verde (the pale blue) and riesling (the dark blue).  Out of curiosity (and as a rather lengthy aside), I asked my cousin Lindz, who studied as a sommelier, why certain wines come in different coloured bottles.  I figured she’d know the answer — of course she did.  It’s all about the UV exposure.  Wines that are to be consumed in a short amount of time require no UV protection, hence the whites you pick up at the wine store coming in clear or blue bottles.  Reds need more time to sit around, and so come in the darker green or brown bottles.  Blue bottles, according to Lindz, are not as commonly manufactured, and so are more expensive, but easier to recycle.  I hope to have a bit more on the amazing machinations of Lindz and her very clever team when I’m in Vancouver this summer, but until then you can check out their most recent television appearance here.  If you are on the lower mainland, I recommend checking Re-Up out!

Drinking Glasses

The dog stencils I got off the internet and stretched a bit to fit the glass diameter.  I used a cutout for one and then produced a “negative” using the bit I cut out and by frosting the rest of the glass.

Drinking Glasses

These ones are for Rusty, who is living the life in a bachelor pad with another dude and an enormous television set.  I figure these glasses, which I made out of some fancy Italian water bottles, will hold beer and also a Rusty-sized serving of milk or juice.

Drinking Glasses

I figured he would like to know how much he’s drinking. I like the slightly blue tint of these glasses, though the thinness of the bottle meant that I did crack two attempts by overheating it. That’s why there are only three — I cracked two bottles and then the grocery store stopped stocking that brand of water, so I couldn’t get any more.

Drinking Glasses

And these ones are for Kristopf, who moved in with his fiancée, Atlas, this year.  I figure the glasses are grown-up enough that both male and female members of this household will approve.  They are made out of Perrier bottles, many of which I broke while learning how to cut on a curve.  I think the little sprout pattern is well-suited to the green glass.

Drinking Glasses

Crystal Cascade

Crystal Cascade

My niece vacillates between wanting to be President of the United States and wanting to be a princess. She can probably be both. She’s a smart kid. A smart kid who likes things that are pretty and sparkly.

So once I can figure out how to package this properly, I’m sending it off to her for Christmas.

You’ll remember that I experimented with cutting rings when I learned how to use my glass-cutting kit a while back.  Of course, I broke way more rings than I succeeded in creating, but finally I managed to make enough to have this work out the way I wanted it. I have some rings from a ginger jar, a salsa jar, some beer bottles and two wine bottles.

Crystal Cascade

My first step was to gather my gear together: the rings, some sturdy fishing line, a pair of scissors, a strong stick, a towel, and a bowl of warm water and vinegar.

Crystal Cascade

The water and vinegar help to remove any residue on the glass from my cutting process.  Gets rid of fingerprints, too.

Crystal Cascade

So now I have arranged the rings in the order in which I want them.

Crystal Cascade

And I used the scissors to score some lines on the stick, to hold the fishing line in place and keep it from sliding off under the weight of the glass.  I will put a dab of glue on each knot afterwards just to be on the safe side.

Crystal Cascade

Now to tie everything together.  I used reef knots, to ensure everything was super tight.

Crystal Cascade

Then I attached it to the stick and looped some more fishing line on the top to use as a hanger.

Crystal Cascade

The full deal, though the light could be better.

Crystal Cascade

A cascade of pretty colours!

Crystal Cascade

Fast, Fun, Free “Fine” Art

This is probably the most awesome thing you can do with a printer in five minutes, for free.

Fast Fun Free Fine Art

Do you know what this is?  Probably not.  But don’t worry, you will soon figure it out.

I found out about this through Creature Comforts, and I loved it.

So you go to this site and you can use their online application, called The Rasterbator (gross, I know), or you can download it and use it on your computer.

Just follow their instructions to upload a photo of yours or to link to another photo on the internet.  Select the size you want and how you want to crop it, then get the program to rasterize the image.  Your computer will download a multi-page PDF document that you can then print out and assemble.

Fast Fun Free Fine Art

Of course the pages are in order, but they’re not as easy as you think to put together.  But you can figure it out.

Use a paper cutter or scissors to carefully cut out the excess border and then stick them all together.

Fast Fun Free Fine Art

Is this … ?

Fast Fun Free Fine Art

Yes, it’s Grenadier!

Fast Fun Free Fine Art

I used this photo here:

Gren Learns to Swim

Now, it’s not a perfect job by any means — you can see the tape and the edges of the paper.  But for something this simple, it’s hella cool.

Fast Fun Free Fine Art

And now it’s up in our kitchen, the only place with any free wall space.

Fast Fun Free Fine Art

I can see these shellacked to a board for more permanence, or used as decoration at a party — the picture is the guest of honour, perhaps.  Or you could print one and give it, unassembled, to a friend for them to put together.  What a lovely surprise!

Fast Fun Free Fine Art

Frosty Lights

Frosty Lights

We never decorate this early for Christmas.  We’re more of the put-it-up-a-week-before-Christmas-and-take-it-down-New-Year’s-Day kind of people.  In fact, because the Pie and I always travel home to Ottawa for the holidays, we don’t decorate at our house in St. John’s at all.

But there is snow on the forecast tomorrow, and we decided we wanted to enjoy a little bit of the holiday spirit while we were still home.  Just a little bit, of course.

I was practicing my glass cutting technique and I had three jars with no tops.  What was I to do with them?

Frosty Lights

I like lights.  Why not make little hurricane lamps out of them, but without the prospective fire hazard of sticking a candle inside?  Yes.

I also remembered an idea that Karen over at The Art of Doing Stuff had, and worked from there.  If you don’t read her blog, you should.  She’s hilarious.  I discovered her site when she stole one of my photographs in the middle of the night.  Sneaky lady.

So here’s the plan.  I have these jars, and I have these LEDs that I can stuff in the jars.  You get the picture?  Good, because we’re not done yet.

Frosty Lights

I wanted these jars to look frosted, like someone had frozen three jar-shaped ice cubes and left them melting on my mantle.  So it’s time to haul out the etching cream.

You can get a full how-to on etching glass from a previous post here, but I’m going to remind you again to observe all the safety rules and wear the proper equipment: goggles, mask, and gloves.

Frosty Lights

And because my sink is ceramic, I needed a plastic bucket full of baking soda in which to rinse my glass, to neutralize the acid.

Frosty Lights

I used a different cream this time than I had before, because when I needed it Lee Valley had temporarily stopped selling it.  So this stuff looked like peanut butter with salt crystals in it, and it smelled much stronger than the other stuff I was using.  But it had the same results.  I didn’t want an even coating of frost, so I only applied a thin layer of cream and I only did one application.  I was hoping that some spots would remain un-etched, and that my brush strokes would show through.  And I was right!  That doesn’t happen very often.

Frosty Lights

So here are the jars after frosting and rinsing.  You can see that they look really like someone has just steamed them up on the inside.

Frosty Lights

Stuff some lights in them, however, and they go from steamy to frosty.

Frosty Lights

Up close, you can see my brush strokes in evidence.

Frosty Lights

Lined up on the mantle, with other things seasonal, it’s quite cozy.

Frosty Lights

Ruched Scarf

Sorry for the delay in this posting — technical glitch!

Ruched Scarves

I love scarves.  They’re a very popular fashion accessory in Ottawa, and they’re starting to become more common here in St. John’s.  Mags gave me this one for Christmas a few years back and I love it.  I always get compliments on it.

Ruched Scarves

So why not give one back, to both my sisters-in-law, Mags and Thidz, and Atlas, my sister-in-law to-be?

Ruched Scarves

This was a little tricky, because I was working with slippery fabric and going entirely by hand from a plan locked inside my mind.  But it was simple enough, thankfully, that I couldn’t screw it up.  It just took a while.

Ruched Scarves

I had two pieces of fabric that I thought would make great scarves, and they were a decent length.  I cut them in half lengthwise, and so ended up with four scarves — one extra.

Ruched Scarves

To hem the outside edges, I rolled the fabric under itself, as you can see here.

Ruched Scarves

Then I used a whip stitch, which I pulled tight, to get a gathered border.

Ruched Scarves

For the middle, I ironed a crease down the centre of this fabric as a guideline.

Ruched Scarves

Then I used a gathered whip stitch again to make the ruched edge.

Ruched Scarves

This is the completed white scarf. Or a part of it at least. My lightbox isn’t big enough for you to get the full effect.

Ruched Scarves

On this silver fabric, it was harder to do the edges because the fabric kept fraying, but easier to do the ruching in the middle because I could follow the pattern on the cloth.

Ruched Scarves