Baby Boy Blue Blanket

Here is yet another project courtesy of the felted wool sweater.  It’s a present for the newest addition to Kª and Kº’s family.  We shall have to see what young Il Principe thinks of this.  Being an only child is pretty sweet.

Il Principe, in the flesh.

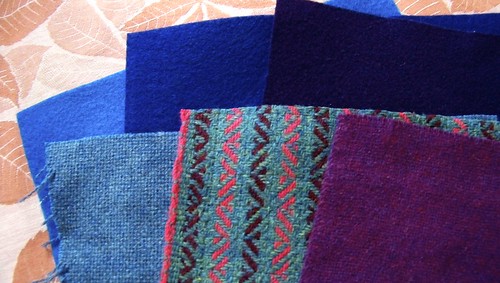
Here I took four sweaters, two gray, one navy, and one black.  These sweaters were of the softer, thinner natural fabrics, such as cashmere and merino.  They felt a bit differently than regular sheep’s wool, with less fuzz.  I cut those suckers up into tons of 3″ squares.

Then I laid them out into a pattern and, like in our other wool patchwork quilt, started sewing them together in long strips.

Because of the nature of the wool I had to do it all by hand, with a needle and thread, using the blanket stitch.

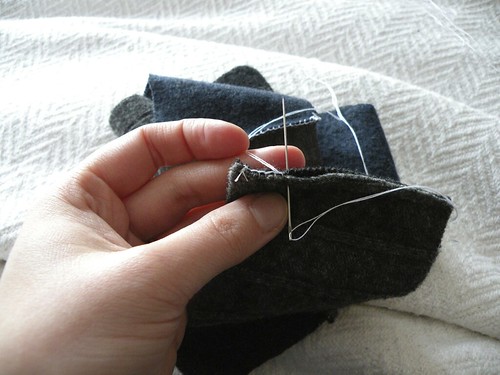
Then I sewed the strips together. 

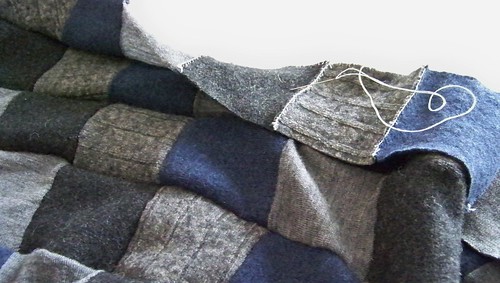
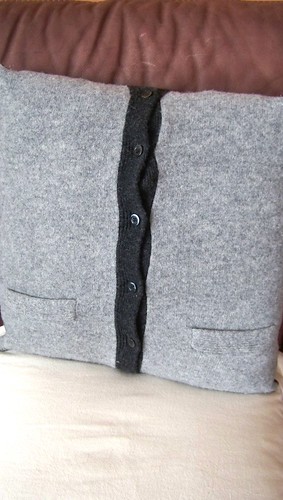
It looks rather nice, don’t you think?

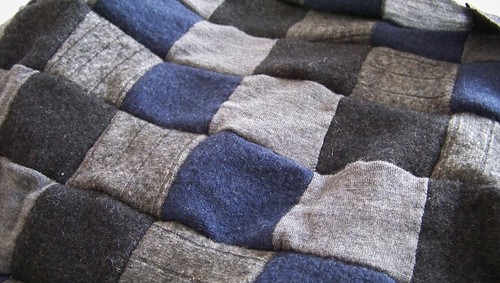
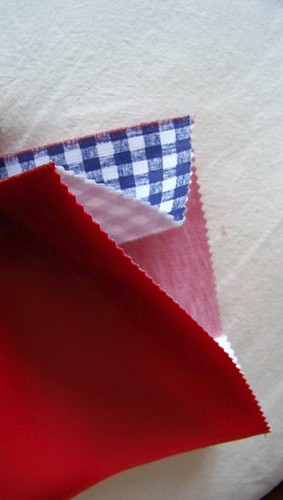
This is the back of it.  It’s kind of cool, too, but it will be hidden from view.This is the soft cotton I am going to use as the backing.  The blue and the gray match perfectly with the colours of the wool.

Then with great care I pinned the top to the backing.  

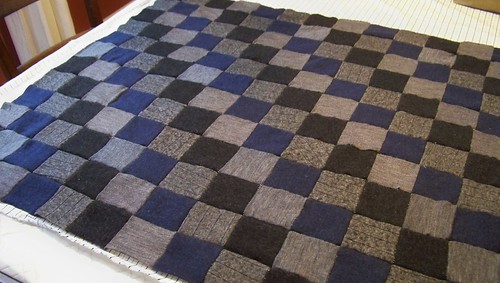
The backing is a grid pattern so I was careful to line things up properly. 

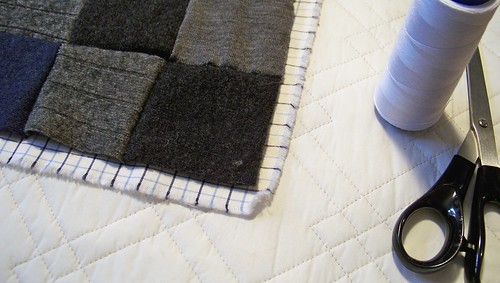
I folded over the edges of the cotton to guard against fraying.

Then, with great difficulty owing to the stretchiness of the wool, I machine-basted the two pieces together.  Next time I would probably do this by hand, just because of the way the wool bunched and stretched.

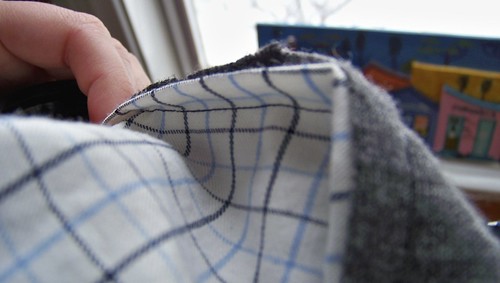
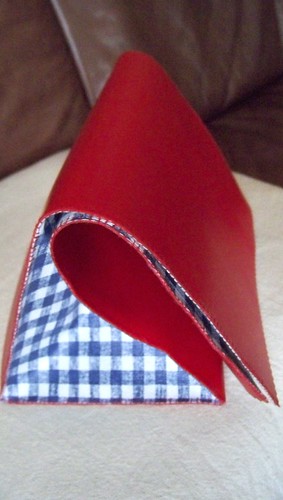
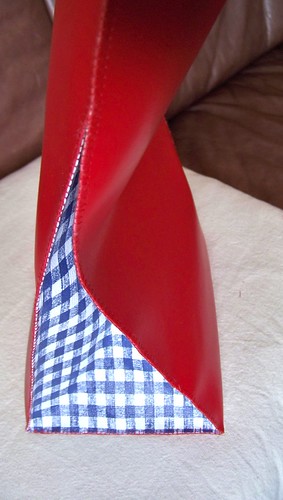
To bind it, I used blanket binding, which I folded in on itself to make smaller.  Shockingly, I had to actually PURCHASE the blanket binding from Fabricland.

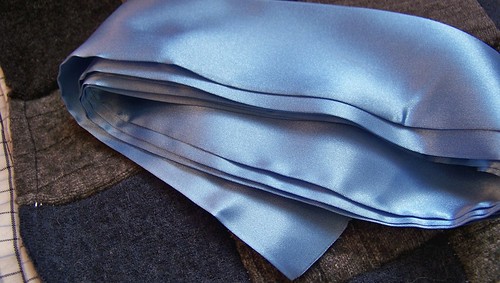
It was a simple matter to fold it towards its own centre …

… and then iron a new crease.

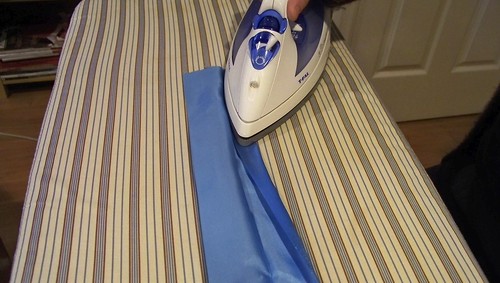
My mother was kind enough to sew the binding onto the blanket for me, in exchange for my making of kumquat marmalade.  She has more patience for such things.

The corners are a bit tricky.  You can see here how Mum pins flush across the corner.

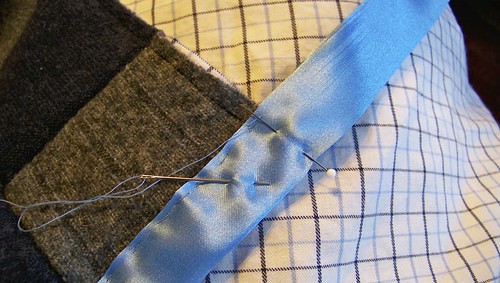
Then folds the fabric over the pin as a guide.

Then pins it in place before sewing it down.

Its pretty slick.

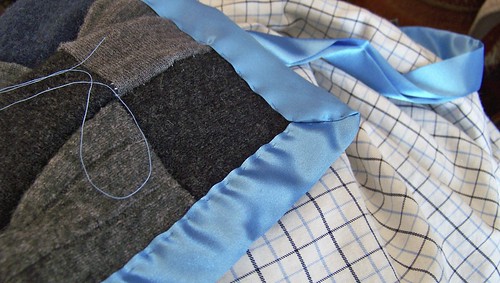
You can see at the end she just folded it under itself again before sewing it down.

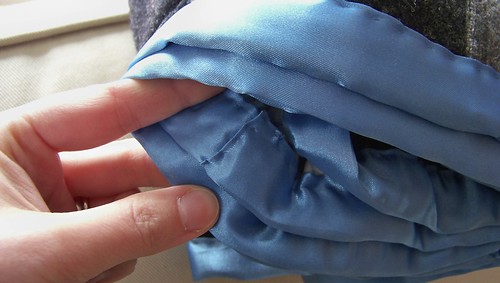
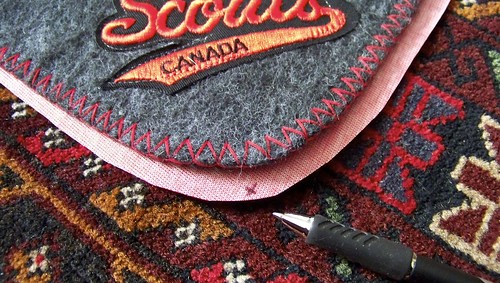
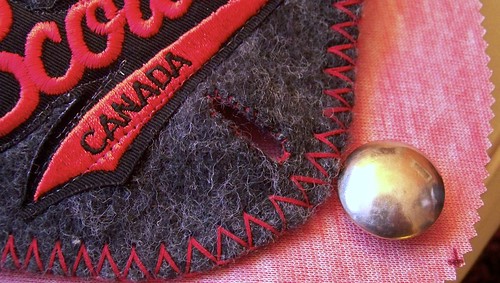
Embellishments are always important when it comes to babies, but you have to be careful.  No buttons, or anything that babies can eat.  Colourful yarn is a good option.  I thought the orange would look great next to the gray and blue.

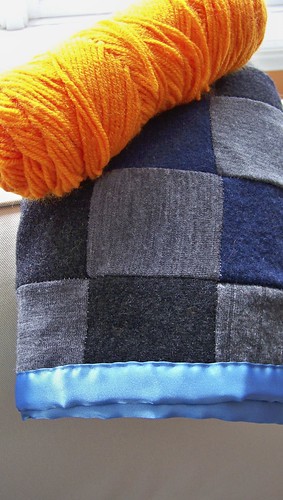
The yarn here also serves to anchor the top of the quilt to the bottom so it doesn’t shift around.

I threaded a tapestry needle with the yarn.

Poked it through and back out again.

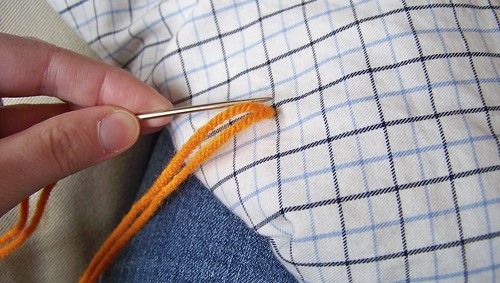
Here it is back through.

And tied a double knot.

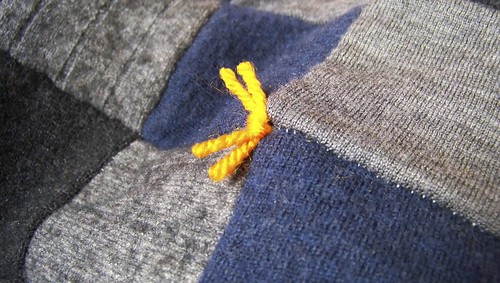
This is what it looks like on the back.

I did that at random points all through.

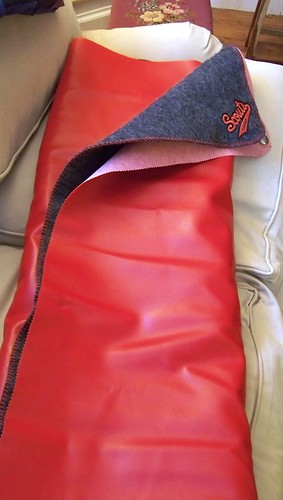
Here is the finished product.

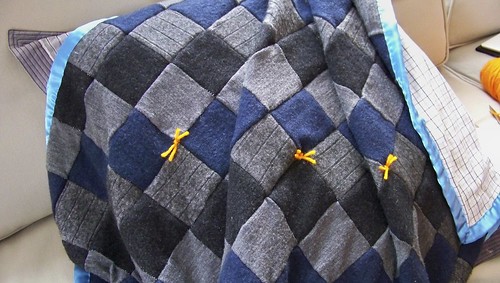
All ready to be gifted away!
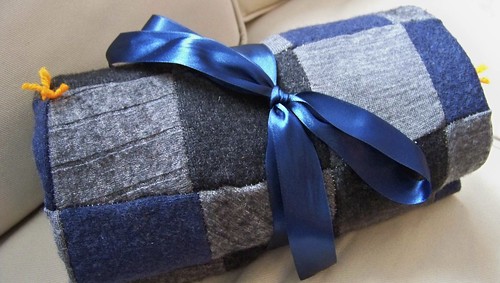
Knitting with Four Needles

My grandmother makes the best mittens of all time.  There is no question.  And it was her maid when she was a girl who taught her.  Sounds pretty fancy, doesn’t it?  Well these mittens are anything but fancy.  They are comfortable and last for ages.  I still have a pair that belonged to my uncle when he was a child and they’ve held up remarkably well.  My grandmother is also the only person who can make mittens that will fit my tiny carnie hands.  Unfortunately, due to growing pain in her hands due to arthritis my grandmother is no longer knitting, and so my mother and I have taken it upon ourselves to learn all her secrets.

This post is part of the process of learning the magic mitten “recipe.”  First we had to learn how to knit with four double-ended needles.   Easier said than done.  Though she makes it look pretty easy.

You have to keep track of not two but FOUR slippery slide-y needles that will get in your way and cause a ruckus. If you think you can handle that, then we can move on.So you start first with two needles, and you want to cast on ten stitches.Then you want to start to cast on an eleventh stitch, but stop just before you get to the point where you put the stitch on the first needle.Just like that you’re on to the next needle.  Stick another needle through that one and start casting on again.Cast on another ten, and then an eleventh and start again on the next needle.On the third needle we’re just going to cast on eight stitches.This next step is very important.  You take the dangly bit of wool from the first knot you tied when you started casting on and you tie that firmly to the strand of wool you are working with.  What you will see in the below image is incorrect.  As you can see, the cast-on rows are all twisted and higgledy-piggledy, and the knot should be flush with the stitched rows so you have a tight triangle.Make sure the rows on all your needles are facing the same way before you tie a nice tight knot.
Now you can start your knitting, and, because your needles are all connected now you can start where you left off and end up in a circle.  Start knitting, knit two, purl two, switching from needle to needle as you go through, and you will see the cuff of your mitten emerging.It’s hard at first to adjust to the other two needles just sitting there and getting in your way while you work on the first one but you get used to it.  Keep going until the cuff is as long as you’d like it to be.And that, so far, is all I have learned.  Stay tuned!

Tweed Felt Oak Leaf Bowls

Here’s another cute idea I picked up from Martha Stewart.  These bowls are great for odds and ends and for serving nuts and things as well.

Download the template from the website and resize it however you wish, so that it fits on the fabric you choose to use.

I decided to make three bowls here, but for each one you will need equal-sized rectangles of felt, fusible webbing (that’s the stuff that is sticky on both sides), and wool tweed.  The thicker your tweed, the better your bowls will stand up.

For the fusible webbing I used this stuff, which I picked up from Fabricland.

Follow the instructions closely on your packaging to use the webbing to fuse the felt to the tweed.  It took me a couple tries to get it right, so make sure to do exactly what the package tells you to do.

Cut out your template and use it to cut out the shapes from your fused tweed/felt.

Use a blanket stitch to sew up the V-shaped notches.

That’s it, that’s all.  Cute, huh?

Vinyl Lunch Bags

This is an idea I got from Martha Stewart and modified, because I couldn’t find any oil cloth.

Using two contrasting pieces of vinyl, I cut out the main panel (29 1/2″ x 8″) and the two side panels (12 1/4″ x 5″).

It is a simple matter to blanket stitch them all together (because vinyl doesn’t fray).

Then I used pinking shears along the top edge to make them look like the paper lunch bags.It’s a great gift to give to anyone who brown-bags it to work or school, and makes a handy gift bag as well should you want to stuff it with goodies.

Waterproof Picnic Blanket

Here’s a great gift idea for avid picnic-ers that you know.  This was a Christmas gift for Doodle and her man.

I found a brand-new Scouts Canada campfire blanket at Value Village in the fall, and I immediately thought of Doodle, who, although she has lived in the United States for several years now, is a staunch Canadian, and, like my brother Ando, who is also an ex-pat Canuck, likes to surround herself with various items of Canadiana.

Normally the little Scouts cut holes in the centres of the blankets to wear them like ponchos, and often sew badges and other things onto the blanket itself. Then they sit around the campfire and tell dirty stories.

I’m not sure exactly what the blanket is made of, but I hope it’s flame-retardant.

Anyway, I purchased a measure of bright red vinyl to match the red thread on the blanket itself, and cut it to fit.  Because the blanket wasn’t an exact rectangle, I made a little mark on the vinyl to indicate where the Scouts Canada logo should go.

I used pinking shears to finish the edges of the vinyl.  Then I cut buttonholes at all the corners and along the sides.  I reinforced the buttonholes with red thread in a blanket stitch.

I then sewed on all the buttons, making sure that none of them matched each other.  I saved the big silver button to go under the Scouts Canada patch.

And there you have it, a simple picnic blanket.  Just unbutton it to wash it and you’re set!


Chocolate Cherry Cordials

These wee confections are the favourite treat of both my brother Ando and my father-in-law Papa John so finding a recipe on the internet was a small step towards making a really cool home-made Christmas present for the both of them.  Thanks to Veronica at Recipe Rhapsody for the idea.

These are pretty easy but they are quite time-consuming and you have to be vigilant about your chocolate coating.  You can make your cordials more alcoholic by soaking your cherries overnight in kirsch or amaretto or other liqueur but I prefer my chocolates to be teetotallers.

You will need about 2 10oz jars maraschino cherries in syrup (about 30-40 cherries), which you will need to drain (make sure to reserve some of the cherry syrup while you’re at it, a couple tablespoons’ worth just to be on the safe side).  Plop the drained cherries on a paper towel and pat them dry.

In a bowl, cream together 1/4 cup softened butter and 1 cup icing sugar.

Add in 1 tablespoon reserved cherry syrup, 1/2 teaspoon vanilla extract, and 1/2 teaspoon almond extract.  Stir it until you get a slimy pink goo.

Stir in a further 1 1/4 cups icing sugar.  You will end up with a nice pale pink dough.  If the dough sticks to your fingers too much you can add more icing sugar.  You need it to stick to itself but not to you.

Lay out a sheet of waxed paper and take a pinch (about 1-2 teaspoons) of your pink dough (fondant) in your hand.  Roll it into a ball and then clap your hands together to make a flattened patty.  Plop a cherry in the centre and pinch the dough all around the cherry.

Roll the cherry and fondant between your palms to create a nice sphere and set on the waxed paper.  Repeat with the rest of the fondant and cherries.  I found I had to make extra fondant to do all my cherries, but that’s fine.  Chill your fondant cherries in the freezer (overnight is good) while you melt your chocolate.

Melt 12oz chopped chocolate (dark or milk, it’s your preference) with 2 tablespoons shortening in a double boiler.  The shortening is there to make the melted chocolate smoother and shinier.  Who knew?

Using a fork, dip the cherry balls into the chocolate and set on waxed paper.

You can see here how the fork marks leave some of the fondant exposed.

Dip a spoon in the melted chocolate and use it to repair the holes.  The cherries have to be completely sealed in chocolate or bad things happen.

When the chocolate has hardened, remove from the waxed paper.  You will find that you have to re-seal the bottoms that were touching the waxed paper as well.  Make sure you get all the gaps!

You can store the chocolates in the refrigerator until they are set, but you will want to store them elsewhere so that they can liquefy like they are supposed to (this takes about two weeks).  Once they are ready, feel free to enjoy!

I think next time I would dip the cherries and put them on a wire rack (to avoid that unfortunate puddle at the bottom) and then, when dry, I would just dip them in their entirety again.  I would probably also be less vigilant in patting my cherries dry, as I think they would liquefy better if they had some liquid in them to begin with.

Wool Patchwork Quilt

This was one of the more time-consuming DIY Christmas projects the Pie and I had on our list, and one I couldn’t manage all by myself, so I waited for him to come home before we tackled this in earnest.

This patchwork quilt is an adaptation of a project from Martha Stewart.  Instead of using old sport coats, I had actual bolts of fine wool that I cut up, and my quilt is probably twice the size of the Martha version.

I am not very good at cutting in straight lines, so if a fabric will tear for me, I’m all for it.  I started by tearing 5″ strips from three different coloured pieces of wool fabric.

I then cut those strips into approximate 5″ squares (when am I ever exact?).Now to lay out your quilt in the pattern of your preference.  We did repeating colours, in a 12 x 18 square layout.  Pile up the squares for each of the 12 18-square rows in order, just to get them out of the way.Sew your squares together with about a half-inch seam allowance.

Then have your lovely husband press all those seams flat open.Then, making sure your top ends all line up with each other (because really, nothing else will), sew all the strips together with the same seam allowance.  Make sure that the other seams are sewn flat.Then you can prevail again upon that sunshine of your life to do some more ironing and flatten out the long seams as well.Now you have the top part of your quilt.So now you need a lining and a backing.  We used an old flannel sheet for the lining and a plain cotton broadcloth for the back.  Cut the sheet and broadcloth to size and lay everything out.  The flannel sheet should be on the bottom, with the broadcloth in the middle, right-side-up, and then the quilt top on the top, right-side-down, like so:

Make sure everything is as lined up as possible and pin it all together.  If you are me, one of the edges of your quilt will be a ragged mass of unevenness, where all the square strips end at different spots.  Don’t fret about this — we will do some fixing later.

Sew three edges of the pinned-together fabric up, leaving the fourth edge open (I made the open edge the same as my uneven fabric edge).

Stick your hand into the giant sewn pocket you have created, between the broadcloth backing and the woolen front and turn the whole thing inside out.

Now simply trim the uneven edge until it’s straight and fold it into the pocket before sewing it closed.  I then went around all the edges and sewed them in a similar manner so they all matched.And there you have it folks: a cozy quilt for two.

Roll it up and tie it with ribbon for a quaint and quilted gift!

Etching Glass

This project was probably one of the most enjoyable that we did this past Christmas.  Hazardous, yes, because you are dealing with a caustic liquid and its attendant dangers, but fun nonetheless.  This is NOT a project you can do with children.  You need to work in a well-ventilated area and you need to wear rubber or latex gloves as well as safety goggles while you are doing it.For etching glass I used Armour Etch, a glass etching cream that I picked up from Lee Valley.  You can get it at Michael’s as well, if you are prepared to pay about three times the price for it.  It’s good stuff.  Keep in mind it does not work on plastic and most Pyrex.

First, however, you need to create your stencils.  I printed out some images from the internet and then traced them onto clear vinyl masking (also from Lee Valley).The tracing and cutting out is really the hard part in all of this.Next, carefully peel the backing form the mask and apply it firmly to your clean and dry glass.  Make sure there are no bubbles or gaps.You can also use masking tape to outline certain areas.Next, very (very) carefully paint on the etching cream in a thick layer in the area you wish to be etched.  If you accidentally get cream anywhere else than you intended, it will leave a permanent mark.The instructions say to leave the cream on for 5 to 10 minutes, but I found it worked better if I left it on for 20.  In some cases you may also find that a second application is in order.When your time is up, rinse the glass object thoroughly in warm water.  I found the cream came off best if I brushed it with the paint brush.  As a side note, do not rinse off the etching cream in an enamel sink — only rinse in a metal or plastic sink or you will find yourself without an enamel sink …Peel off your masking and throw it away.  You may have to rinse the glass again if there was any cream caught in the crevices of the stencil.  Dry the glass thoroughly and you’re all done.  This is a jar for my brother-in-law Rusty to keep his keys and phone in so he doesn’t lose them.  If you don’t recognize it, that’s the Rebel Alliance insignia from Star Wars.I also used the cream on a vase for my sister-in-law Meg:Some cups and saucers for the Mtree Duo:An AT-AT jar for my brother Ando (in keeping with the Star Wars theme):And a coffee jar for the ever-caffeinated Cait, among other things:This was so much fun the Pie and I agreed we would try to think of new glass objects to give people for Christmas next year.  You can pick up glass items from pretty much anywhere for relatively little: IKEA (where I got the jars), Winners/Home Sense (where Rusty’s and Meg’s vases came from), and let’s not forget second-hand shops (Mtree duo’s cups and saucers came from there).  Get creative!


Scottie Cardigan Cushion Cover

This isn’t really a how-to kind of post.  I just wanted to show you one of the other things you can make with old wool sweaters that you have felted.  You may remember KDB, in whose house Kristopf and I made those amazing cocoa-caramel-pecan cookies.  This was a present for her for Christmas.

I found an image of a scottie dog on the internet and used it as a pattern to cut it out of a sweater.  I then blanket stitched it onto a red background from another sweater.

Then I took a cardigan that was slightly larger than the cushion I wanted to make out of it.  I cut out two squares, from the front of the cardigan and the back, making sure that the buttoned opening to the cardigan was in the centre on the front.

Then I sewed the scottie square onto the back of the cardigan (which will now be the front of your cushion) and then sewed the back and the front together.

Now you have your cushion.  The button-front of the cardigan now serves as a way to pull out your cushion when you need to wash the cover.  And it’s super cute!

Painting Glass and Ceramics

Adding a personal design to glass and ceramics is very easy and something fun you can do with creative kids. You can pick up plain glass and ceramic housewares secondhand, and I find some good stuff in the clearance section of places such as Home Sense and Winners.

I used the Vitrea 160 and Porcelain 150 pens that I picked up from Michaels.

To make your designs, you can freehand with the pens, or use masking tape to contain your ink.You can also use transparent adhesive masking (from Lee Valley) to create a stencil as well.Peel the mask away carefully.  This is easiest to do when the design is still wet.Once the design has dried you can use a razor blade or craft knife to carefully scrape away any ink that has bled through the masking.If you’re not happy with your design, you can always use a scrubby sponge to scrape it off and begin again.  Leave your final design to cure for 24 hours, then bake your glass or ceramics in the oven according to the instructions on the ink.That’s all there is to it.  Have fun!