Molasses Oat Cake with Glazed Pineapple

Molasses Cake Pineapple 36

If you have checked me out recently on Instagram, you may have noticed that LongJohn and I just spent the last three weeks hanging out with my parents in Florida, where we both got a nice tan and the kid grew about four inches.

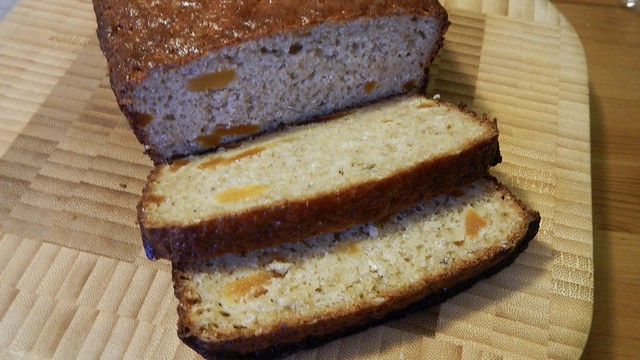
I didn’t do too much cooking while I was there, but I did make one or two things, and here’s one of them. My dad was trying to clear out the pantry in preparation for their trip back to the True North, so in my efforts to help him get rid of a few things, I came up with this puppy. It’s a good cake for the winter or the summer (I think).

Molasses Cake Pineapple 27

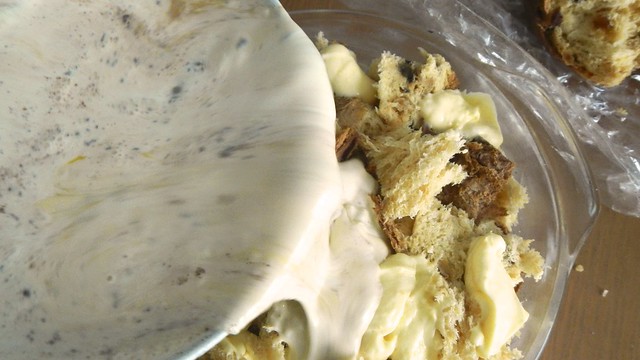
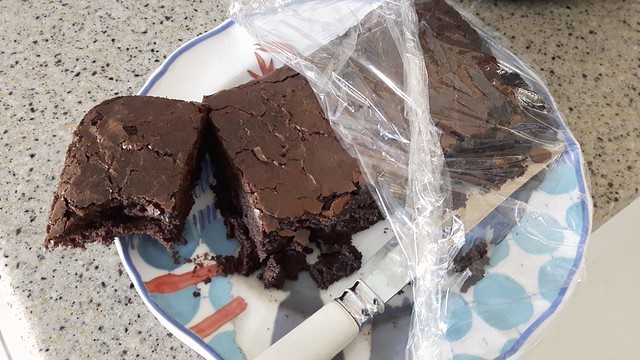
Preheat your oven to 350°F and spray or butter an 8″ x 8″ glass baking dish. Might as well polish off some of the brownies-from-a-box you made the day before. Gotta keep cleaning out that cupboard, right?

Molasses Cake Pineapple 1

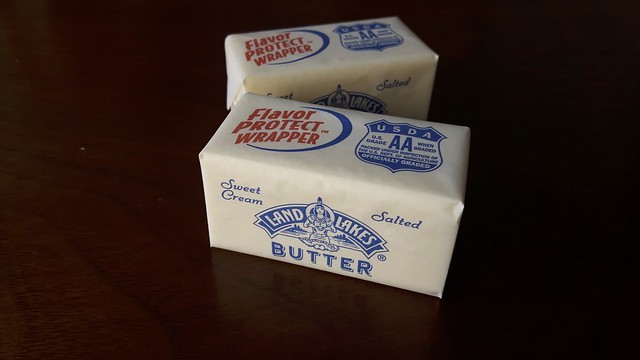
Grab some butter (oh, the land where butter is always at a spreadable temperature!) and melt 3 tablespoons of it.

Molasses Cake Pineapple 2

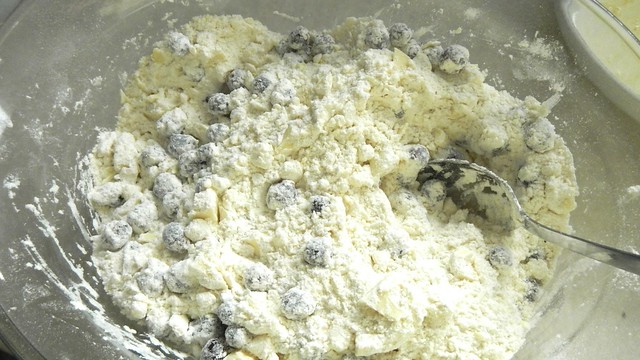
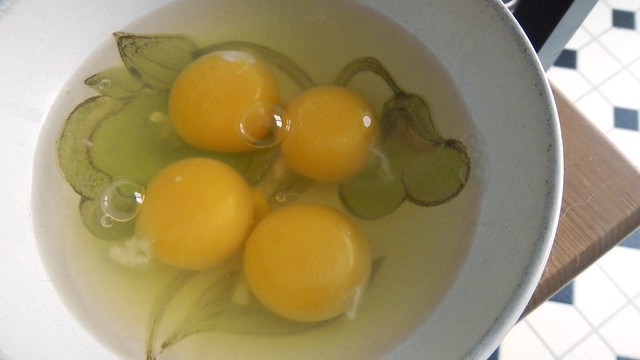
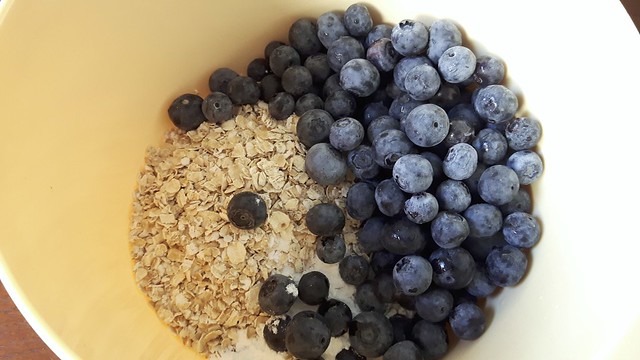
Grab a small bowl and tip in 3/4 cup flour, 1/2 cup oats, and 1 teaspoon baking powder. Then assemble the rest of your stuff: 1/4 cup brown sugar, 1/2 teaspoon ground cinnamon, 1/4 teaspoon ground ginger, a pinch ground cloves, 1/3 cup molasses, 1 egg, and of course your 3 tablespoons melted butter. You’ll see here as well about 1-ish cup fresh (not frozen) blueberries. If you use frozen blueberries the juice from the broken blueberries will get all through the batter and alter the molasses taste. It might also take longer to cook.

Molasses Cake Pineapple 3

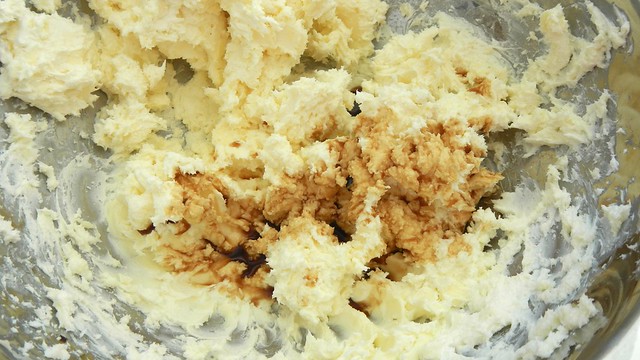
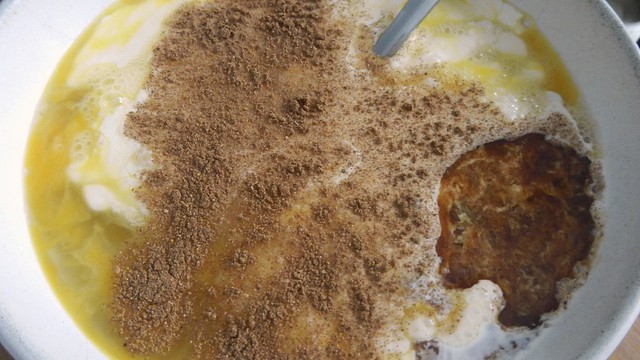
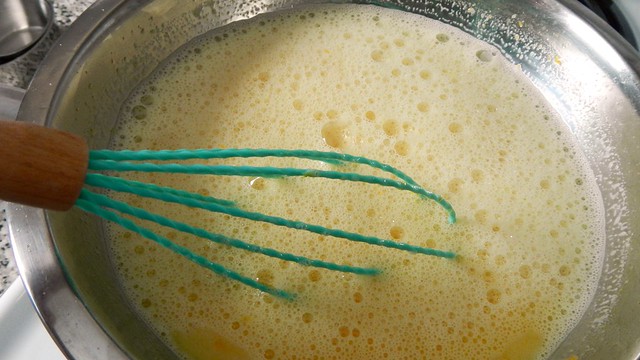
Take all the stuff that isn’t in a bowl with oats or is blueberries and beat that together.

Molasses Cake Pineapple 4

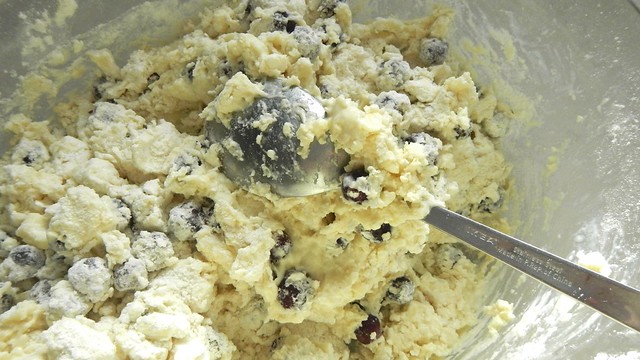
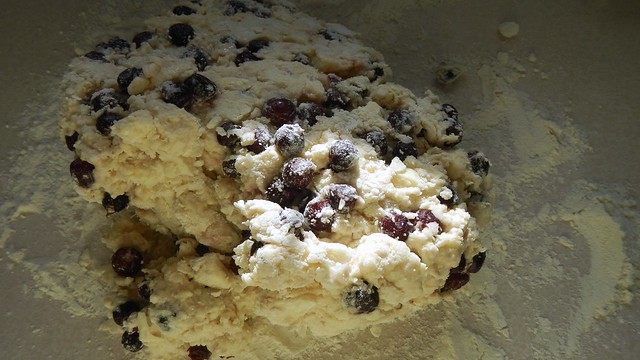
Take the blueberries and tip them in the bowl with the oats and flour and stir that a bit. Coating the blueberries in flour prevents them all from sinking to the bottom of the baking dish.

Molasses Cake Pineapple 5

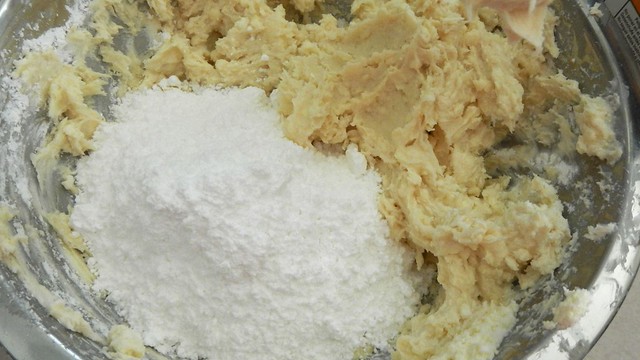
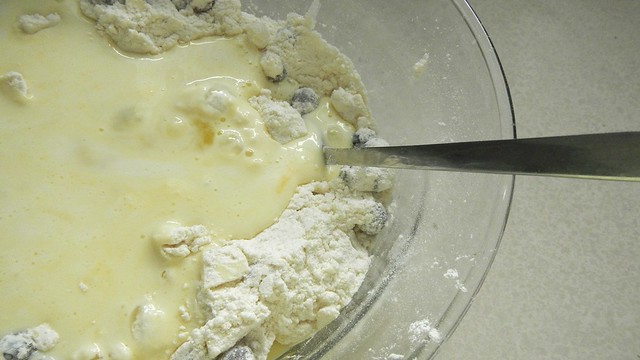
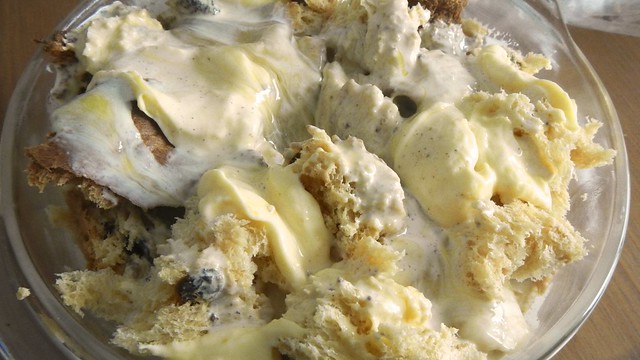
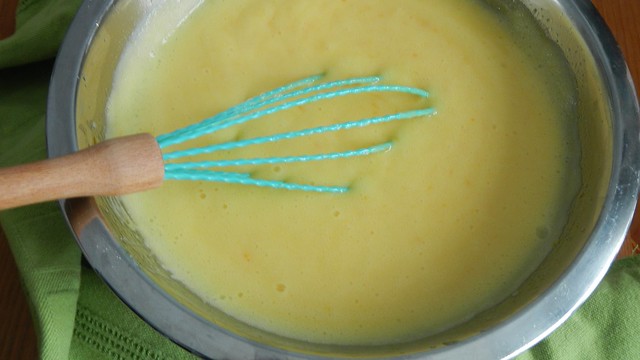
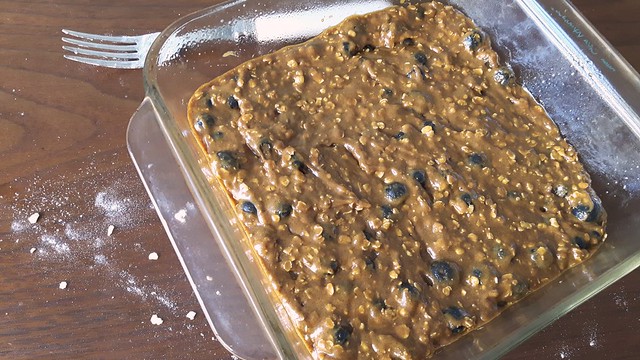
Plop the oats, flour, and blueberries into the molasses mix and stir until smooth(ish).

Molasses Cake Pineapple 6

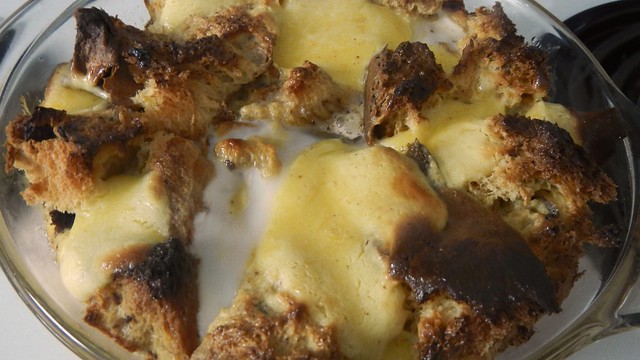
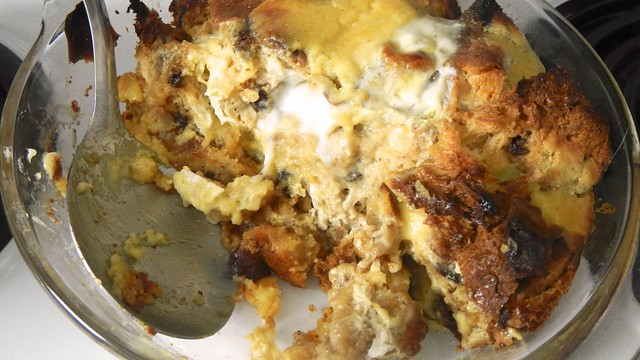
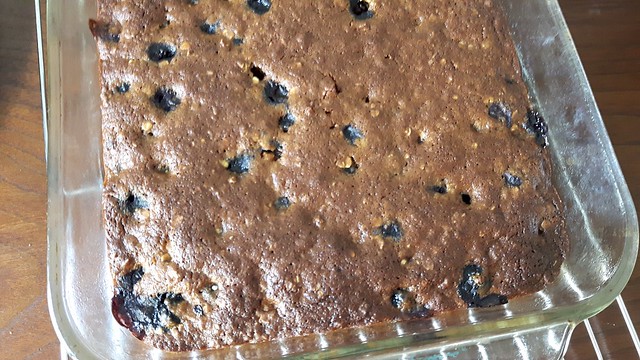
Spoon that into your prepared dish and bake for 25-35 minutes until a toothpick inserted in the centre comes out clean. This timing will really depend on how thick the glass on your dish is. I cooked this in a convection toaster oven which I think is slightly hotter than it says it is, and so it was done in 25 minutes. Put the cake, still in the dish, on a wire rack to cool completely.

Molasses Cake Pineapple 7

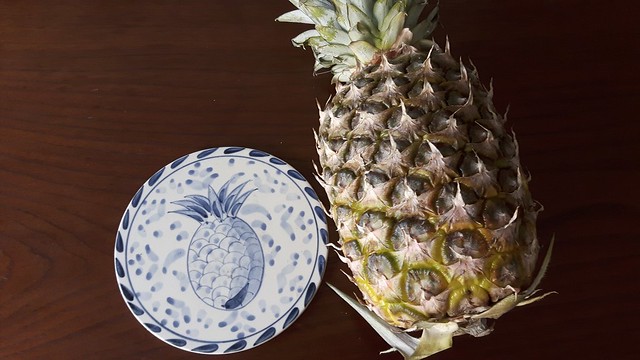
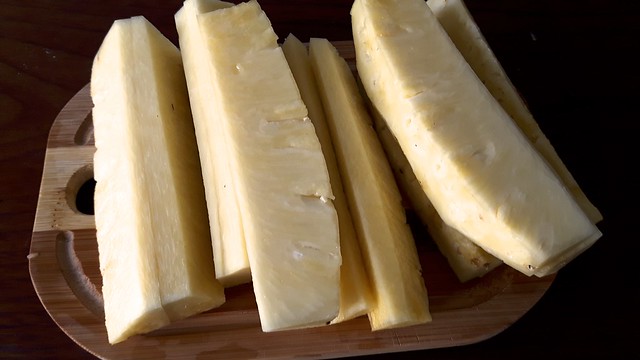
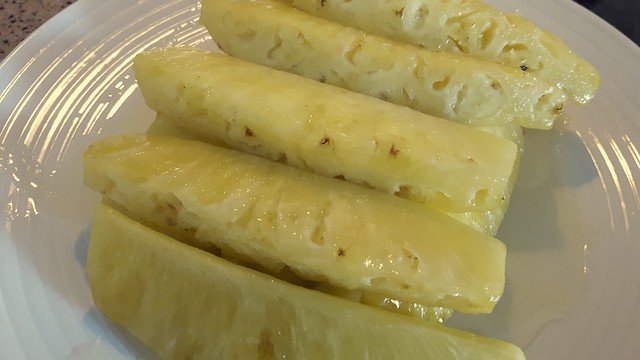
Now if you want to make it fancy, grab yourself a nice ripe whole pineapple. The pineapple trivet is optional.

Molasses Cake Pineapple 8

Cut the top and bottom of the pineapple up and then slice off the skin.

Molasses Cake Pineapple 9

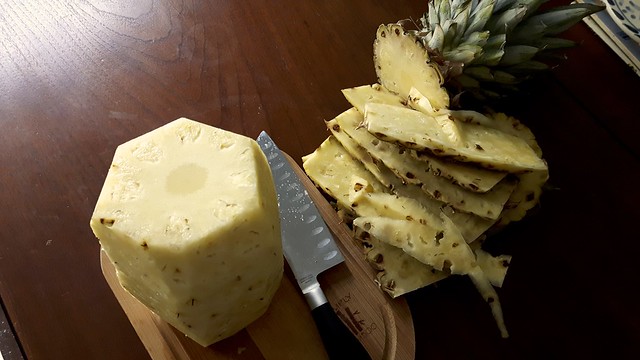
Cut the pineapple into quarters along its core, and slice off the core from the quarters.

Molasses Cake Pineapple 10

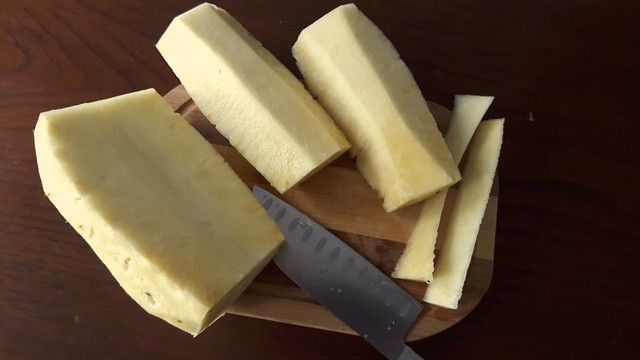
Cut each quarter lengthwise into three pieces. Too complicated? Just cut it up any way you would like. I’m not your mother.

Molasses Cake Pineapple 11
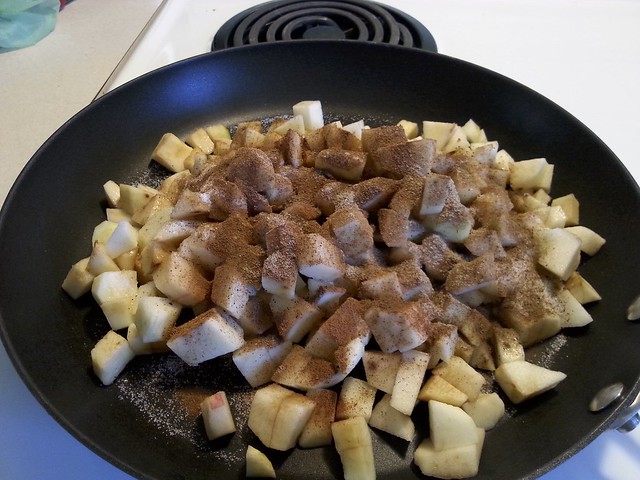
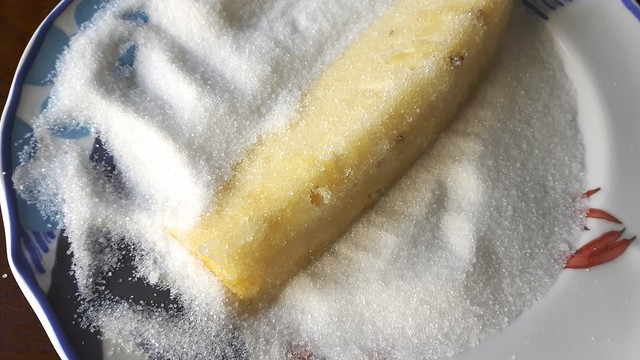
Coat each one of the pineapple pieces in granulated sugar.

Molasses Cake Pineapple 13

Set those aside for a minute.

Molasses Cake Pineapple 15

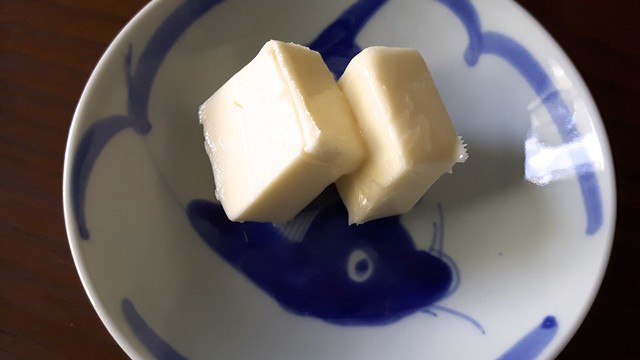
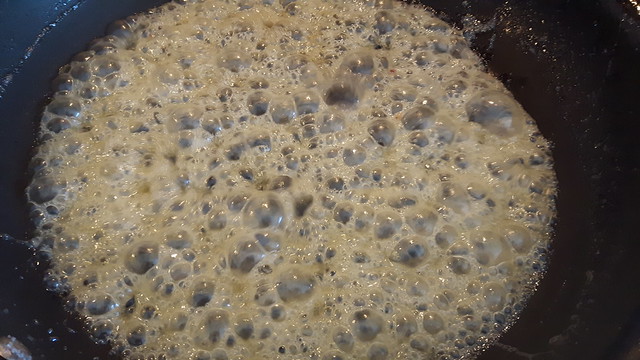
In a large skillet or frying pan (or saucepan, whichever is your biggest), melt another 3 tablespoons butter.

Molasses Cake Pineapple 14

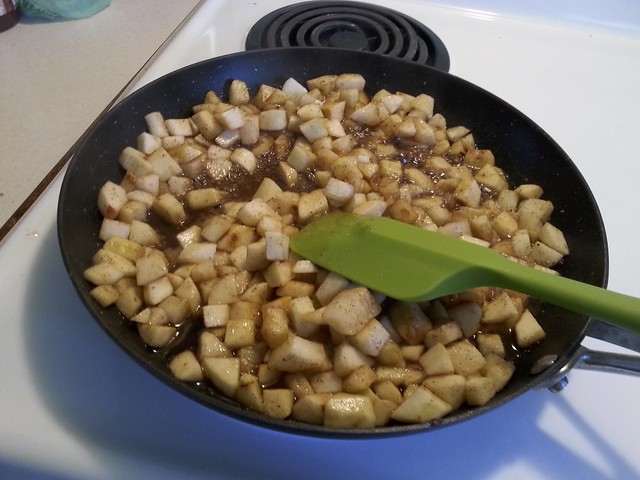
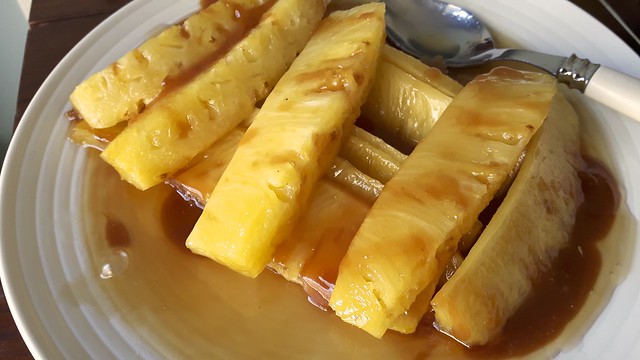
Cook all the slices of pineapple in the skillet on medium heat until they’re cooked through and kind of shrunken, about 8-10 minutes. If you don’t have room to cook them all in the pan at once, wait until some of them shrink before adding a few more slices.

Molasses Cake Pineapple 17

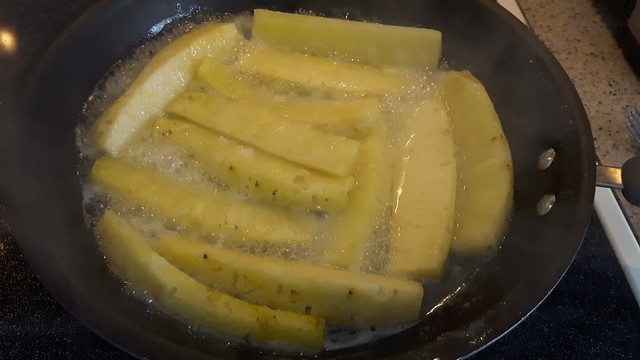
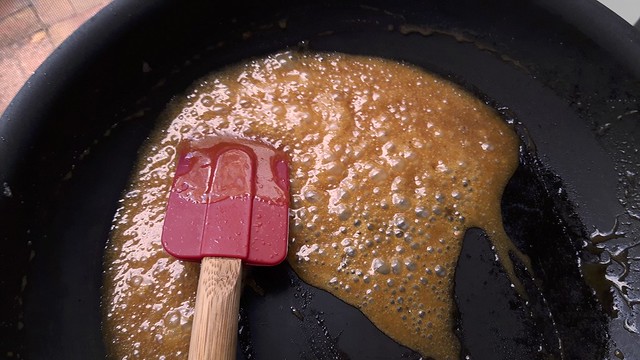
Remove from pan and set on serving plate. They will start to ooze thick sugary juice.

Molasses Cake Pineapple 19

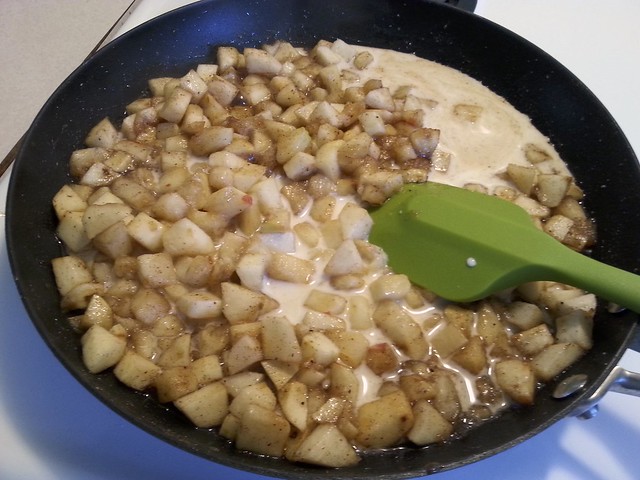
Add 3 tablespoons water to the butter and sugar in pan and let it thicken, stirring, JUST until it starts to brown then remove immediately from the heat. It will continue to brown as you stir, off the heat.

Molasses Cake Pineapple 21

Molasses Cake Pineapple 22

Drizzle that over the pineapple.

Molasses Cake Pineapple 23

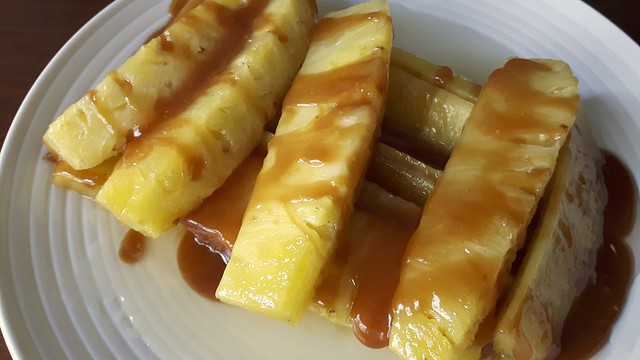
You can serve them hot but if you leave the caramel on the pineapple as it cools it will slowly dissolve back into the juice, leaving a nice sauce you can spoon over the pineapple and the square when you serve it.

Molasses Cake Pineapple 25

Molasses Cake Pineapple 28

Enjoy!

Molasses Cake Pineapple 33

Happy Windfall Handpies

Handpies 1

There’s this tree in the green space where I walk with Gren and LongJohn in the mornings. It’s a beautiful old apple tree. I know it’s old because the apples on it are tiny and REALLY sour. But that doesn’t stop people from picking them – no sir. All the apples within a reasonable reach have been removed, so I scoured through the windfall after a recent storm and brought home about 15 or so more or less unscarred apples (because as you know I can’t resist stealing fruit from public places). I wanted to make turnovers, or handpies.

Handpies 2
Holy Hannah are strollers ever handy for carrying crap. And babies, I suppose.

This is the first bit of baking I’ve done while solo in the house with an active and demanding baby on my hands, so it was a challenge to test both my rusty cooking skills and my son’s patience threshold. All in all, it worked out for the most part. I also cheated and used puff pastry but can you really blame me?

Handpies 4
We didn’t cut the lawn for a long time and the long grass killed our mower. So now we REALLY need to cut the grass.

First, you need to peel the apples. I used about 15 of these tiny sour things but if you’re using regular apples maybe 3 large apples would suffice. Actually, before you peel the apples, you need to install the baby in his swing chair with Raffi for company. This will buy you about fifteen minutes.

Handpies 5

It takes a while to peel 15 tiny misshapen apples.

Handpies 6

Avoid the wormy ones.

Handpies 7

Chop the apples up roughly and sprinkle the pieces with lemon juice, both to keep them from going brown and to add some tartness to the mix (not that you really need tartness with sour apples). Wrap them up and set them aside.

Handpies 8

Next, whisk together 3 tablespoons cornstarch with 1/2 cup water.

Handpies 9

Tip your apple pieces into a pan with some liberal dashes of cinnamon, cloves, nutmeg, and some sugar. Use about 2 teaspoons sugar for each regular apple – for the sour ones I went a bit more generous and added about 6 tablespoons for the whole lot.

Handpies 10

Re-install your baby in a new location with new focal points. You’ve got another fifteen minutes or so.

Handpies 11

Cook the apples on medium heat until they’re bubbly and the liquid is starting to cook down.

Handpies 12

Tip in the cornstarch mixture (you may need to re-whisk it because it’s not a solution and the cornstarch will likely be sticking firmly to the bottom of your dish).

Handpies 13

Stir quickly in and watch the juices thicken.

Handpies 14

Remove from the heat and spread in a thin layer on a plate to cool. Attempt to put your baby down for his nap.

Handpies 15

After failing to put your baby down for his nap (strange how a logical argument does not work on a three-month-old), grab some thawed puff pastry (this stuff comes in a box with two rolled out squares in it) and use a rolling pin to gently expand the sheet. You want the pastry a little thinner than it comes standard.

Handpies 16

Cut the square into 9 equal(ish) pieces.

Handpies 17

Place a dollop of the cooled apple goo on each square.

Handpies 18
Mmm, cooled goo …

Carefully peel the pastry off the paper and fold it over itself to form a triangle. Pinch the seams closed.

Handpies 19

Puff pastry objects to being handled so roughly so they look a little demented.

Handpies 20

Give your baby a different toy to punch. Encourage him to yell obscenities at the toy (I don’t speak baby so that’s what I’m assuming he’s doing) to buy yourself some more time.

Handpies 23

On the second sheet, I didn’t roll the pastry out as much, and it was easier to remove it from the paper. They looked less demented.

Handpies 24

Crack and beat an egg and brush each of the pastries with a bit of egg goo. Set them on a sheet of parchment on a baking sheet.

Handpies 22

Bake your pastries for about 20-25 minutes at 375°F and eat them as soon as they’re cool enough to hold in your hand. The demented ones stayed together better than the non-demented ones – just keep that in mind.

Handpies 26
Non-demented …
Handpies 29
Demented …

Enjoy!

Handpies 28

Banana Chocolate Breakfast Cookies

Banana Oat Cookies 11

These popped up on my Facebook feed a few weeks ago and they looked so easy I figured there was no harm in trying them. And they’re fantastic! Switch out the oats for gluten-free oats and you can please those with dicky digestive systems. Replace the chocolate chips with dried fruit or nothing and it’s a great treat for wee folks who are learning how to eat solid foods with their hands. Shove some peanut butter in there and you have a handy dog treat. It’s really a versatile little cookie full of natural sweetness and texture.

Banana Oat Cookies 12

Plus it’s basically only got three ingredients, so it was an instant hit with Cait of chicken-salsa-cheese fame. I used slightly more than three ingredients because I was out of chocolate chips so I made do …

Banana Oat Cookies 1

I doubled this recipe because in a house with a large male and a very pregnant female these bite-sized morsels were simply not big enough. Start by preheating your oven to 350°F and lining a large baking sheet with parchment or spraying it with cooking spray.

Grab yourself at least 2 large ripe bananas (this is also a good recipe for when the bananas are just starting to go, and you don’t want to chuck them in the freezer for YET ANOTHER banana bread batch).

Banana Oat Cookies 2

Mash the crap out of those suckers. Not just a little bit of mashing, like you’d have for banana bread, where you want the chunks.

Banana Oat Cookies 5

I’m talking full-on banana soup. Yes. There is no picture. It was too gross.

Add in 1/4 cup chocolate chips (or whatever else you have that you want to use: this is a few spoonfuls each of dark chocolate bar, broken up, Skor bits, and peanut butter chips).

Banana Oat Cookies 6

Now tip in 1 cup oats (a little bit of shredded coconut and some ground flax would be nice here too, I think).

Banana Oat Cookies 8

Stir-stir-stir! Plop flattened gobs of those things on your baking sheet and shove it in the oven for about 15 minutes.

Banana Oat Cookies 9

These bigger ones took about 18), then let sit on the cookie sheet for about five minutes before eating.

Banana Oat Cookies 10

Definitely eat them warm – and all at once!

Banana Oat Cookies 14

Slow Cooker Dip Trio – Dessert!

Dip Trio 33

Basically, it’s cream cheese glazing for cinnamon buns, in a slow cooker. This is definitely a fun dip to make for parties, and there’s plenty to go around. We also served cut up fruit and there was a ton of sauce still left at the end. If you have a large slow cooker, follow the instructions in the original recipe from Chelsea’s Messy Apron for making the fondue in a separate container within the slow cooker. If you have a wee one, you can just plop all the ingredients straight in (as we did) and go from there.

Dip Trio 22

Start by grabbing a bowl and using it and an electric mixer to beat together 1 8oz package plain cream cheese (room temperature) and 1/2 cup butter (also room temperature) until mixed and fluffy.

Dip Trio 16

Tip in 1 1/2 teaspoons vanilla extract and beat that up too.

Dip Trio 17

Then slowly add in 2 cups icing sugar and beat it (carefully) until fully combined.

Dip Trio 18

Dump that whole thing in your slow cooker and leave it on low, stirring occasionally, for 1 1/2 – 2 hours.

Dip Trio 19

When you’re ready to serve it, you probably want some cinnamon buns to go with it. If you don’t have any pastries handy, but want some, grab some of those rolls of pre-fab biscuits.  The Pie did not know that the rolls kind of exploded when you opened them, and even though I warned him in advance he was still startled by it, so exercise caution. Preheat your oven to 400°F and spray a muffin tin or two with cooking spray.

Dip Trio 25

Grab one of the biscuits from the tube and flatten it into an oval.

Dip Trio 26

Dip it first in melted butter, then in a mixture of cinnamon and granulated sugar.

Dip Trio 27

Plop.

Dip Trio 28

Roll the oval into a tube.

Dip Trio 29

Then roll the tube into a spiral. Give it a squeeze in the hopes that it will stay together.

Dip Trio 30

Plop the spiral into your muffin tin. For the record, the Pie made all the ugly ones.

Dip Trio 31

Bake for 8-10 minutes, until the rolls are golden and no longer gooey.

Dip Trio 32

Serve them hot with your fondue and a couple forks.

Dip Trio 34

And some napkins!

Dip Trio 35

Berry White Chocolate Scones

Berry White Chocolate Scones 21

Every once in a while, I get a craving for scones, and they’re so easy to whip up that there’s really no point in NOT making them. I like to use this base recipe from Canadian Living for versions where I’m adding in buttermilk, and then I just kind of wing it from there. Today we’re adding white chocolate chunks and some frozen service berries.

Berry White Chocolate Scones 1

Preheat your oven to 400°F and line a baking sheet with parchment paper. Grab your chocolate and roughly chop up a few ounces. Here I used 6 ounces white chocolate.

Berry White Chocolate Scones 5

In a bowl, dump about 2 1/2 cups all-purpose flour, 2 1/2 teaspoons baking powder and 2 tablespoons granulated sugar. Give that a good stir.

Berry White Chocolate Scones 2

Cube up 1/2 cup cold butter and tip that in as well. Use a pastry blender or two knives to cut the butter up into coarse crumbs.

Berry White Chocolate Scones 3

Now tip in 1 cup frozen berries. If you’re using big berries I recommend a rough chop first. You can add in your chocolate chunks too at this point.

Berry White Chocolate Scones 6

Give them a stir until everything is coated in flour.

Berry White Chocolate Scones 7

Whisk together 1 cup buttermilk and 1 large egg.

Berry White Chocolate Scones 4

Tip that into the mix and stir until just combined.

Berry White Chocolate Scones 8

It will be sticky and gross.

Berry White Chocolate Scones 9

Form it into a rough ball and tip it out onto a floured surface.

Berry White Chocolate Scones 10

Dust your hands with flour and pat the dough into a flattened cylinder that is about 1-1 1/2 inches thick.

Berry White Chocolate Scones 11

Slice that sucker into as many pieces as you want. Twelve is always a good number.

Berry White Chocolate Scones 13

Line ’em up on your baking sheet – if they’re sticky then flour the parchment as well.

Berry White Chocolate Scones 14

Bake for about 18-20 minutes, until the scones are dry to the touch and slightly browned. If you are using extra frozen fruit, you may want to add a few extra minutes to the baking time.

Berry White Chocolate Scones 16

Serve immediately for breakfast, lunch, or dessert – or just a snack!

Berry White Chocolate Scones 19

Lemon Bread Pudding

Lemon Bread Pudding 21

Here’s yet another recipe for trying to get rid of the massive amount of lemon pudding/curd I have left. Also a recipe for dealing with a lazy breakfast when you still have weird leftovers from the holidays. Here I have some of my pudding, half a panettone (my favourite fruity egg bread), some cream, and some eggs.

Lemon Bread Pudding 1

Preheat your oven to 350°F and butter up a baking dish.

Lemon Bread Pudding 2

Crack 4 eggs into a bowl and whisk ’em up.

Lemon Bread Pudding 3

Pour in a dollop or two of the cream, and add some vanilla and some pumpkin pie spice (or cinnamon or whatever) and give it a beating.

Lemon Bread Pudding 4

Grab your panettone. Inhale the gorgeous fruity aroma.

Lemon Bread Pudding 6

Then rip it to shreds and drop some of the bits into the baking dish. Add a few dollops of pudding.

Lemon Bread Pudding 7

Then add some more panettone. And more dollops of pudding.

Lemon Bread Pudding 8

Then when you’re done/you’ve filled the dish, pour your eggy/cream mixture all over the whole thing.

Lemon Bread Pudding 10

Let it soak in for a minute.

Lemon Bread Pudding 11

Then pop it in the oven for about 45 minutes, until the middle is solid. If it starts to brown too much on the top while you’re waiting for the interior to solidify then cover it up to keep it from burning.

Lemon Bread Pudding 12

Let it sit for a few minutes after taking it out of the oven so that you don’t burn your face off.

Lemon Bread Pudding 16

Then serve for breakfast with a bit of maple syrup or some whipped cream!

Lemon Bread Pudding 17

Creamsicle Pudding

HAPPY BIRTHDAY RUSTY!

Creamsicle Pudding 17

I adapted this recipe from Food52 when I had three oranges and two lemons and I didn’t know what to do with them (other than simply eat them, but that’s not very exciting).

Creamsicle Pudding 1

Start by zesting and juicing your 3 oranges and 2 lemons.

Creamsicle Pudding 3

You should end up with just over 1 cup juice (like a cup plus a couple tablespoons, which is good).

Creamsicle Pudding 4

Set a medium-sized pot on the stove with a couple inches of water in it and set it to simmer.

Creamsicle Pudding 5

Then grab a metal or heatproof glass bowl and crack in 6 large eggs plus 2 egg yolks. Give those a thorough beating-up. They probably deserve it, the jerks.

Creamsicle Pudding 6

Whisk in 1 1/2 cups sugar.

Creamsicle Pudding 7

Then toss in your zest and your juice.

Creamsicle Pudding 8

What a lovely colour.

Creamsicle Pudding 9

Set that on top of the simmering water and make sure the water doesn’t touch the bottom of the bowl. Stir pretty much constantly. If you leave egg yolks and granulated sugar alone for more than a minute they get a bit grainy and we don’t want that. Keep stirring!

Creamsicle Pudding 10

After about 10 or so minutes, the foam will disappear and you’ll have this lovely thick stuff that leaves a trace when you move the whisk. If you test this with a thermometer it should read around 180°F.

Creamsicle Pudding 11

Remove the bowl from the heat and let it cool a bit, stirring occasionally to release more heat. You want it somewhere around 140°F before you put your butter in. My butter was actually frozen so I started adding it in at around the 150°F mark.

Creamsicle Pudding 12

Tip all your lovely citrusy goo into a blender (you can use an immersion blender if you have a deep enough bowl) and add in 2 cups of unsalted butter, a few cubes at a time, mixing thoroughly between each addition, until your concoction is pale and very thick. I may have overfilled my blender here. Oops. All the more reason to make sure the lid stays on.

Creamsicle Pudding 13

The finished product is more or less a curd, so you can use it to fill tarts, spread it on scones or toast (I have some panettone that is simply itching to be slathered), or eat it as a pudding. I’m also tempted to whip up some cream and fold them together to make a frozen fool (though the weather outside is too cold to make me crave cold treats). Just keep it covered and in the fridge if you don’t eat it all right away.

Creamsicle Pudding 16

Pretty Pomegranate Parfait

Merry Christmas!

Pretty Pomegranate Parfaits

I remember as a kid on Christmas morning it took my parents a Herculean amount of effort to peel us away from the treats in our stockings and get us to eat a half-decent breakfast before our day of gorging ourselves on candy and chocolate. With the promise of that in store, plain cereal or toast just seemed too … BLAH to eat, and we ended up picking at our food and being cranky later on.

Pretty Pomegranate Parfaits

This quick dish might tempt even your most stalwart refusers this morning. Pomegranates are in season now and they’re an amazing superfood, full of antioxidants, vitamin C, and a satisfying crunch. The whole thing is just yogurt, pomegranate seeds, and granola, but you can assemble it in seconds and it looks like a fancy treat.

Pretty Pomegranate Parfaits

Grab a pretty glass (it is a special occasion after all) and scoop in a bit of granola, followed by some pomegranate seeds. Layer in a bit of yogurt and smooth it so it touches the sides and sort of “seals” in the layer.

Pretty Pomegranate Parfaits

Repeat until you get all the way to the top, and garnish with a sprinkling of granola and pomegranate seeds (maybe a sprig of mint if you’ve got it handy).

Pretty Pomegranate Parfaits

Scarf it down and have the energy to start your day!

Pretty Pomegranate Parfaits

Apricot Oatmeal Loaf

Apricot Oatmeal Loaf 10

I’m always looking for new ways to put more fibre into my baking that don’t necessarily involve bran (I feel like that sentence alone puts me in the “grown-up” category.  And you know what’s good for you if you’re not getting enough fibre? APRICOTS. So I made an apricot loaf. And if you like apricots you can make one too.

Apricot Oatmeal Loaf 1

Preheat your oven to 350°F and spray or butter a loaf pan in preparation. In a medium-sized bowl, whisk together 1 1/2 cups flour, 1 1/2 teaspoons baking powder, 1/2 teaspoon baking soda, and 1/2 cup granulated sugar. I don’t even have a picture of it because it’s just a bowl of white (and because maybe I forgot). Sprinkle in 1 teaspoon cinnamon and 1 teaspoon nutmeg for colour (and flavour).

Apricot Oatmeal Loaf 3
Because I forgot, you get a slightly more interesting picture of chopped apricots instead.

In a small bowl, scramble together 2 large eggs.

Apricot Oatmeal Loaf 4

Then tip in 1/2 cup melted butter, 1/2 cup plain yogurt (or fruity yogurt, maybe apricot yogurt, it’s up to you), 1/3-1/2 cup apricot jam, and 1/2 cup milk.

Apricot Oatmeal Loaf 5

Pour that wet stuff into the dry stuff and stir until combined. Then pour in 1 cup oats and 3/4 cup chopped dried apricots. Stir stir stir!

Apricot Oatmeal Loaf 7

Smooth that into your pan and then bake for about 1 hour, until a deep caramel brown and a toothpick inserted in the centre comes out clean. Let it mostly cool in the pan and tip it out onto a rack to cool completely.

Apricot Oatmeal Loaf 8

I’m really enjoying it toasted, with butter, for breakfast.

Apricot Oatmeal Loaf 12

Jammy Bran Muffins

These muffins are a little bit different from your usually brown bran muffins. As you may know, I have a love/hate relationship with bran, so I’m always looking for new ways to ingest fibre without feeling like I’m eating sawdust. It’s a never-ending challenge. The additional challenge of these is that for some reason I have four jars of jam in my fridge and neither the Pie nor I is eating a lot of toast at the moment. So I decided to use it as my sweetener in this shindig.

Jammy Bran Muffins 2

Start by setting your oven to preheat at 350°F and spray a muffin tin or rub it with butter. If you don’t have any buttermilk on hand, feel free to sour some milk by adding 1 tablespoon lemon juice to every cup of regular milk. Give that a stir and leave it for 5 minutes.

Jammy Bran Muffins 1

In a large bowl, whisk together 2 cups all-purpose flour, 1 1/4 cup bran, 1/4 cup ground flax (because it’s good for you – make sure it’s partially ground before you add it in), and 1 1/4 teaspoons baking soda.

Jammy Bran Muffins 3

Jammy Bran Muffins 4

In a smaller bowl, scramble together 4 tablespoons melted butter3/4 cup of your favourite jam (this one is serviceberry), 1 large egg, and 2 cups buttermilk (or alternative).

Jammy Bran Muffins 6

Now pour the liquids into the solids and gently whisk until only just combined.

Jammy Bran Muffins 7

Dump in 1 cup raisins (or not, if you’re not a fan of raisins) and whisk until just combined again – never over-mix muffins. If you do they end up flat. And that’s lame.

Jammy Bran Muffins 8

Divide the batter in your tin. Bake those puppies for 20-25 minutes, until the centre muffin tests clean when stabbed with a toothpick.

Jammy Bran Muffins 9

Leave them in the pan for about 5 minutes to cool a little bit before digging them out and eating them or letting them cool completely.

Jammy Bran Muffins 11

We always like our muffins hot, with butter. Because, well, butter.

Jammy Bran Muffins 14