For some reason I still don’t understand, I volunteered to do some baking for prizes to give out at the Pie’s final video game tournament before we move. Because the group is called Newfoundland Fighting Jam, the Pie and I thought it would be funny to make up some Newfoundland Fighting Jam Jams.
You may have heard of jam jams. From what I understand, the general version is a round sugar cookie sandwich with jam in the middle, where the top cookie may or may not have a hole in it. The Newfoundland version of this uses a softer molasses cookie. If you don’t want to make your own you can order some from Newfoundland’s own Purity Factory.
Of course, because we can’t leave well enough alone, we had to mess with the recipe a little bit, and we used our ninjabread cutters to make the cookies. Keep in mind that below is a doubled recipe, so unless you want a million cookies, I suggest you cut it in half.
Start with 1 cup butter and 1/2 cup shortening (both at room temperature).
Cream those together in an electric mixer with 1 1/2 cups packed dark brown sugar (the darker the sugar, the fluffier your cookie will be, due to the high concentration of molasses). Beat the crap out of those ingredients until they’re super fluffy.
Now beat in 3 eggs, one at a time, waiting for each one to be fully incorporated before you add in the next one. If you want to halve this recipe, I would use one egg plus the yolk of another.
Add in 1 cup molasses (fancy or whatever, whichever intensity of flavour you prefer) and 3 teaspoons vanilla extract.
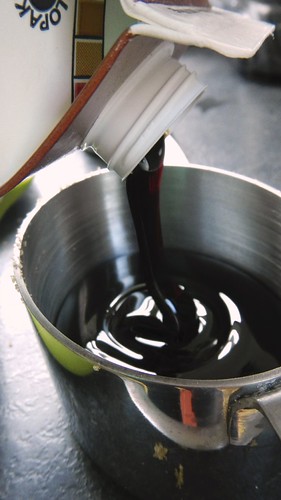
Look at that silky, creamy molassesy goodness.
In a separate bowl, sift together 6 cups all-purpose flour, 4 teaspoons baking powder, 2 teaspoons ground allspice, and 2 teaspoons ground ginger.
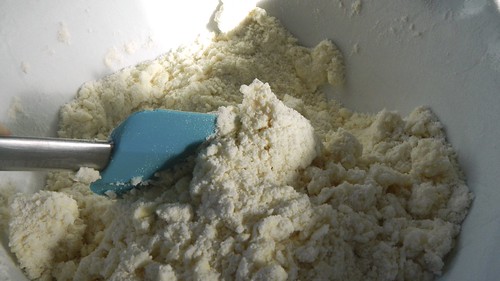
Slowly add your dry ingredients to your wet ingredients until you form a nice soft dough. And I mean really soft. Resist the urge to add more flour. The squishier your dough is now, the squishier your cookies will be.
Split the dough into 4 parts (2 if you’re halving it) and chill it for at least an hour. Two is preferable. And you want to have all your working surfaces, tools, hands, etc., as cold as possible while you’re working with it.
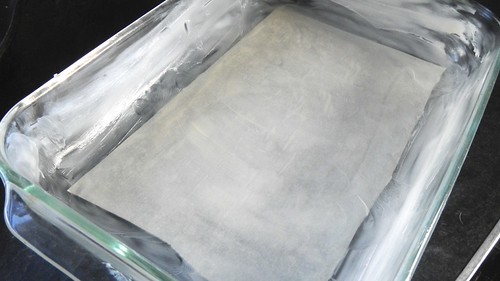
When you’re ready to go, preheat your oven to 350°F, line some baking sheets with parchment paper, flour a work surface, and get your rolling pin handy. And you’re going to need a lot of flour. Like for the work surface, for your pin, for your hands, for the dough … It’s tacky stuff.
Working with one part of your dough at a time, leaving the others in the refrigerator, roll it out to about 1/4″ thickness (or about half a centimetre, if you’re feeling metric), and cut it out with your cookie cutters. If you’re doing a circular cookie, some jam jam aficionados like to cut a small hole in the top cookie for the jam to poke through, but that’s up to you, my friend.
If you’re making something other than circles or symmetrical shapes, remember to flip your cutter over so you can make a top and bottom to your cookie. Our ninja cutters had a duller edge on top, so it made it a little harder, but we persevered.
Eventually we developed an easy system, but it took a bit of time. You will probably sort something out yourself.
If your dough gets too soft, huck it back in the fridge for a bit to stiffen up.
Bake your cookies, rotating the pans halfway through and keeping a close eye on them, for somewhere between 5 and 10 minutes, depending on the heat of your oven and the size of your cookie. You want these babies to be nice and soft, so make sure to pull them out before they get too brown. If they don’t look done yet, don’t worry — they will continue to cook on the baking sheet.
Spot the corgi for bonus points!
Allow the cookies to cool completely, then take a wodge of your favourite jam (I used raspberry here, but you could go full-Newfie and use partridgeberry or bakeapple if you want to be truly authentic) and spread it thinly on the bottom of one of your cookies. These ones used about a teaspoon of jam per cookie. Press that cookie’s pair on top of the jam and then heave the whole batch into a warm oven (like 250°F) for a few minutes to make the jam all cement-y. This also warms up the cookies again and makes them soft so you can do a little bit of repair work if any of them got bent too out of shape.
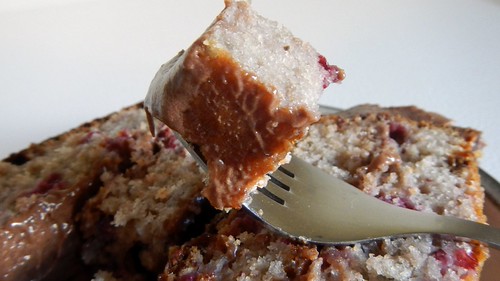
TADA. Newfoundland Fighting Jam Jams. A mouthful to say. A mouthful to eat. A win-win situation for everyone!
I made this up after doing a bit of research, and my main inspiration for ingredients came from these four down-home recipes, in addition to my own family recipe for Molasses Gems:
Good morning! Today we’re taking Ali Does It west as we travel home to spend the holiday season with our families. We’ll be in Ottawa for a WHOLE MONTH. During this time, Gren will have his second birthday (hopefully he’ll be able to celebrate it with his sister, Bakhita, who also lives in Ottawa). And Cait and I will be starting on a new category of blog posts for you: Mad Science. Because who doesn’t love science? I know I do. Especially when it involves things that fizz or glow. So stay tuned for a wide variety of madcap experiments in the coming months.
From left to right: unnamed female puppy, Gren, Paddy (Gren’s dad), and Bakhita (Gren’s sister).
And not to fret! I will continue to blog while I’m home with the family — in fact, I will probably make them help out, so we should have uninterrupted posts all the way into the new year!
Before we go, though, I have a quick cleaning tip for you. I hate leaving a dirty house. I just can’t stand coming home to a mess, dirty laundry and expired food and stale whatever. I’m not in the mood. So the Pie and I tend to do a whole-house clean before we go, just making sure the surfaces are clean, things are dusted, the laundry and dishes are done, and the fridge is empty of anything that might expire in our absence. It just makes for a better homecoming, especially when the first thing we do upon our (usually late night) reentry is open our suitcases in the middle of the living room and make a big mess.
Now, there’s a lot of work to do in the days leading up to our travel — usually the Pie is writing exams and I am packing and getting Gren ready for the airplane. So anything that saves me time and effort is number one in my books. So here’s a handy tip for quickly and lazily cleaning your microwave — while you do something else. And this even works on super gross, super crusty microwaves. Trust me. I own one of those kind. I’m a terrible housekeeper. And I’m freaking LAZY.
Take a small bowl and fill it with about a cup of water, maybe a cup and a half. Whatever floats your boat. Then add in a few tablespoons lemon juice (you don’t have to be all elitist and use fresh lemons for this — bottled lemon will do just fine).
Pop that bad boy into the microwave in the middle and nuke it for 3 minutes. Then leave it in there, without opening the door, for another 5 minutes. While cool and awesome science is going on behind that door, you can work on cleaning something else. Or check Facebook. Or play with your dog. That is up to you. What is happening is the steam from the boiling water is loosening baked on goo, and the acid in the lemon is breaking up all the grease.
Then take your handy dandy scrubby sponge and simply wipe away all that grease and grime. That’s all it takes, is a little wipe. I kid you not. It’s that simple.
Even gets the stuff on the ceiling of the microwave. Easy peasy. And even if you forget about the microwave, all that lovely condensation will have done its job, even if you come back an hour later.
And once the lemon water in the bowl has cooled, you can dip your sponge in it and use it to sanitize your counter tops and cutting boards. BLAMO KABLAM.
Unidentified blurry glowing object. Produced by SCIENCE.
As you may remember, I recently entered Movita Beaucoup’s pumpkin carve-off 2012. I didn’t win. It was very upsetting to me. But all is not lost. Movita also holds an annual gingerbread house contest. And I’ve had this idea that’s been percolating in my wee brain meats for some time. And I think I just might pull it off. When I mentioned the idea to Cait over Google Talk, this was how our conversation went:
me: so the lady who does the pumpkin carving contest also does a gingerbread house contest
but I was thinking, what about an igloo, made of meringue? with a yeti attacking a camp full of ninjabread men?
Cait: you’d have to experiment. it may not take much to cause that to happen… i don’t know.
i am not a glowing igloo scientist
also they can’t taste it on an internet contest.
me: find me a recipe for glowing meringue
I just don’t see how the tonic water fits into it
Cait: oh well google says tonic water has quinine which glows brilliant blue under black light
and so whenever they make glowing whatever on baking shows they use tonic water
and it glows
so make some test meringue, brush that s**t with tonic water, or sprinkle, or whatever
and then stick it under a black light for science
me: you know, I could use it in the slurry i’m making with cornstarch, which will stabilize the meringue
Cait: i mean people’s minds will be blown by the googley eyed ninja bread men
but BAM the damn thing glows
i don’t even know why anyone else would bother entering
me: don’t forget the yeti
So you can see how this woman completes me in every way. Long story short, this is what we’re doing. And by We I mean me and a slightly-less-than-willing Pie, who, as Cait says, does not understand our vision. And Cait will be offering moral support over Google Talk as she concocts a contraption for Ruby. I wish my computer could always be in the kitchen …
Before we got started I wanted to lay out my supplies. I needed a piping bag (I used a plastic one with a piping tip stuffed in one corner), and my baking sheets lined with parchment paper. I also needed some form of structure for my igloo, so I grabbed a metal bowl that looked like it was the right size to fit the ninjas I had in mind.
It was kind of an origami fest getting the parchment to cover the bowl in an appropriate way. I used freezer tape to stick stuff down — on the non-meringue side, of course.
Then I made a little door as well. I hope this works.
As we know, the first trick to making meringue is to bring the whites to room temperature, so I did that with 8 egg whites (wash out the shells and keep them for later). And rather than use my usual method, which produces a beautiful, flaky and delicate meringue, I modified this recipe, which involves stabilizing the meringue with corn starch.
In a small saucepan, combine 1/3 cup granulated sugar and 1/3 cup cornstarch. Whisk it up until you are sure it’s well mixed.
Whisk in 1 1/3 cups tonic water (I let mine get flat so the bubbles wouldn’t interfere — if you don’t want yours to glow you can use regular water) and heat over medium, stirring constantly, until the mixture is clear and thick, kind of like petroleum jelly. Remove that from the heat and allow it to cool. If you do it for too long you end up making plastic. I’ve definitely done that before. The science of it is pretty neat but it’s a pain to clean.
I also made some royal icing to use as glue for later on.
In a large metal or glass bowl (copper apparently works the best), plop down your egg whites, 1 teaspoon cream of tartar (another stabilizing acid), 1 teaspoon salt, and 2 teaspoons vanilla extract (who knows, these could end up being tasty). Whisk that up until it gets all nice and foamy and soft peaks form.
Then, a tablespoon at a time, add in 1 cup granulated sugar. The sugar, if you add it slowly enough, is another stabilizing agent.
Add in slowly as well that gross vaseline-like stuff you just made.
Whip that silly, until you get a nice opaque, shiny mass with stiff peaks. The best thing about meringue is that unlike whipping cream, which relies on fat to stabilize, you can’t overwhip this stuff. So if you’re not sure, just keep going.
I think we’re ready to go here. Preheat your oven to 225°F. The cooler your oven is and the longer you bake your meringue, the drier and crisper it will be. And we want to do this right.
I had a lot of meringue to work with, so I did some experimenting, shoving the meringue in a freezer bag with a piping tip jammed in the corner, I tried out different shapes, scrapping what I didn’t want.
I ended up making three yetis, and a tree. And some blobs.
And signing my name. If I’d dyed this with vitamin B12 it would have come out yellow, and I could have done the ol’ yellow snow joke, eh?
And the igloo itself. I originally piped on the meringue, but I didn’t like it.
So I used a spatula to smooth it out.
Then I baked them for about 3 1/2 hours (because there was so much stuff in the oven), and when they were done I turned off the oven and let them sit in there until the oven was completely cool. Only then did I attempt to remove the parchment paper. This is why I made more than one of everything. Well, except for the igloo. That was enough of a pain in the ass.
I know you’re saying, what’s a gingerbread house without gingerbread? Well, this is a meringue igloo, so it’s not complete without ninjabread men. Am I right? Cait gave me these cookie cutters (by Fred & Friends) when she and Jul were here this summer and so I relished the opportunity to use them.
I won’t extend this post still further by walking you through the ninjabread process (because really, the point of this exercise is in the meringue igloo, people), but I’ll show you a few that we decorated, and I got the recipe from here.
Yes, I really do suck at piping icing. I just don’t care enough to get better at it. So deal.
I also just happened to have some empty gelatin capsules on hand, so took the opportunity to make edible googly eyes for all my participants. If you’re interested in doing this, you can get the capsules from drug stores or health food stores, but you might have to call around.
So you take your capsule and you carefully puncture a hole in the end of one of the halves with fine pointy scissors (or a sharp craft knife or razor blade), then cut around until all you’re left with is a wee dome. Do that to the other half of the capsule as well.
Now you need eyes that google. I found these sprinkles at the grocery store, and they will make handy eyes — in pretty colours, too!
Use an empty capsule to make indentations in the meringue to hold your eyes, then jam the eyes in the indentations you made. Make it go in far enough that it stays, but not too far that the eyes aren’t all wiggly. I don’t know why it’s important that my eyes are googly here in a still photo, but it just is, darnit.
For the ninjabread, I glued them in with piping gel. It meant they weren’t very googly, but this is a still shot anyway.
And now the setup. Fortunately everything I have here is very lightweight, so I just set everything up on a piece of cardboard. For the “ground” I used jumbo marshmallows that I cut in half. The stickiness of the marshmallow made excellent glue for keeping it attached to the cardboard. I also snuck a few of those empty egg shells in there, glued down with royal icing. Egg shells glow pale pink under black light. I thought they might look a little like very subtle snow monsters. Then I set everything else up, using toothpicks and royal icing to keep everything in place.
And here we have our scene of mayhem and terror: poor ninja researchers travel to the Canadian north, only to be set upon by the very creature they came to study: the elusive yeti.
Yeah, I know. It’s not the handsomest design in the cold light of day. It looks like a hungover drunken science experiment.
And in the dark? Well, I’ll let you reflect on that by yourself. I never really thought this would ACTUALLY work. BUT IT DOES! It glows in the mother-freakin’ DARK!
The eggs don’t glow as pinkly as I wanted them to, but it was, indeed, very subtle.
Somewhere in the world it is pomegranate season. I know this because for once, the shiny red fruit arriving in our St. John’s stores is lustrous and blemish-free. So they’re raring to go. Plus, instead of spending $6-$7 per fruit, I’m only spending $3. That’s still a lot, but you know, it’s Newfoundland. I’ve long since stopped being concerned about saving money on produce. Just ain’t gonna happen.
Especially when you consider how awesomely good a pomegranate is. I used to love picking them apart as a kid. I appreciate food you have to work for, like artichokes. I think my mother loved them too because it kept me quiet and occupied for long periods of time, though it was quite messy. Small price to pay I suppose.
As far as I know, there are two decent ways to get all those juicy seeds out of a pomegranate. There is the official, POM-certified method (which has its own brochure, situated neatly above the pomegranate bins at the grocery store), and then there’s the way that we all learned recently from the internet, which I call the SMASHY method. I bought two pomegranates the other day so I thought I would test both methods at the same time and tell you which one I liked the best. It’s a battle!
The Smashy Method:
This is the most fun I think of the two methods. First, you pare off the top and bottom of the pomegranate.
Then you score the skin around in a circle.
And carefully pry it apart into two pieces.
Set the fruit cut side down on your palm over a bowl, and make a little loose cup out of your fingers so the fruit can fall through. Then you take a giant spoon, and you start smacking the skin of that pomegranate half. I mean you can really go to town, smacking it all over.
And the fruit will start to fall between your fingers into the bowl.
And the skin will start to crack. Keep going. Beat the crap out of that thing.
Of course there will be casualties. Some seeds may fly elsewhere. Fortunately our canine vacuum is a fan of any form of fruit that may fall on his floor.
But it’s quite effective in getting most of the stuff out.
It does tend to leave some large chunks of pith in your bowl.
Not to mention splatters of pomegranate juice in places you’d rather it wasn’t.
The Official Method:
Chop off the top and bottom and score and pry apart, just like last time.
Submerge your fruit in a bowl of water and gently pull off the seeds.
This may take a while.
But note how the pith just floats to the top. You can scoop it out with a slotted spoon or your fingers. I ended up dumping the fruits of my labour (hahaha) with the other method into the water bowl as well, to get rid of the extra pith.
Then you just pour it all into a strainer to drain and you’re good to go.
VERDICT: While the “official” method was tidier, it took a lot longer (and didn’t involve hitting things with a spoon). If there were ways to combine the two methods (smacking it with a spoon while under water) then I’d be completely sold. Until someone comes up with a method like that, I’m just going to sit here and eat these.
I get a lot of questions from readers I meet about my husband. The main one is, “why is he called the Pie?” Well, I’ll tell you why. And this goes back about nine or ten years, back when we had first met, and long before we started dating. It’s really a great story. I’ll tell it to you here:
One day, he told me that he really liked pie.
Yep. That’s the whole story. That’s why he’s called the Pie. And now you know. I hope you aren’t too disappointed.
Sometimes, the Pie’s favourite pie is blueberry. Sometimes it’s apple. I can’t keep track. But I know that pumpkin pie, even though it doesn’t qualify as a “true pie”, is at the top of my husband’s list of favourite pies. And now that I have sort of mastered the art of vodka pie crust, and especially considering the amount of pumpkin purée I have in my possession, it is a logical choice, and this recipe looks lovely. So here it is, a pumpkin pie that is so from scratch with its home-made pastry crust and fresh pure pumpkin that it’s almost like I made it entirely by hand-stitching individual atoms together (I can do that, you know).
So, now. It’s been a while since I made that vodka pie crust from Smitten Kitchen/Cooks Illustrated, so I think I’m going to lay it all out for you again, just so we both can get some practice. If you like, you can take some more of Smitten Kitchen’s tips on better pastry from her second tutorial. Like her, I’m not a fan of shortening, so I went with an all-butter version of the crust today. And this dough recipe makes enough dough for two single crusts, so I guess that means I HAVE to make two pumpkin pies. I will try to sneak one into the freezer so the Pie doesn’t eat it too fast. That way later on when he grumbles about having no more pie I can dramatically reveal that he is wrong. I like doing that.
For the pastry, you need to make sure everything is cold. If your kitchen is frigid, like mine, this is easy. For everyone else, just keep chucking stuff in the refrigerator if need be. Ingredients. Tools. Bowls. You name it.
In a large bowl, whisk together 2 1/2 cups unbleached all-purpose flour with 2 tablespoons sugar and a pinch of salt.
Cut 1 1/4 cup cold butter into cubes and make sure it’s cold (re-chill it after you cut it before adding it to the mix).
Dump that into the flour and use a pastry blender to chop it into tiny buttery-floury pieces. You want to keep going and going and going, using a knife to clean off your pastry blender occasionally, until you end up with a mixture that closely resembles cornmeal.
Put a dishtowel under the bowl to keep it from sliding around on you.
Here’s the right consistency. You still need whole chunks of butter in there but you want them small.
Drizzle 1/4 cup cold vodka (keep that baby in the freezer) and 1/4 cup ice water over the mixture.
Use a big rubber spatula and a folding motion to bring everything together.
You don’t want to stir so much as squish and squash everything into one big blob. It will be pretty tacky, but that stickiness will disappear when the vodka burns off in baking. You can use your hands to gently squish the remainder together, but don’t work it too much. If you feel you need to add more liquid, drizzle a bit more vodka onto it, but just a little.
Divide your blob into two even pieces and flatten them into disks. Wrap them tightly in plastic wrap for at least 15 minutes, and for up to 2 days.
When your dough is sufficiently chilled, lay a piece of plastic wrap out on your work surface. Unwrap one of the disks (keep the other in the fridge) and place it in the centre of the plastic wrap. Place another sheet of wrap over top.
Working from the inside and moving out, use a rolling pin to flatten your disk into a nice round piece of pastry. You’ll need a rough circle of about 12″ in diameter to fit in a 9″ pie pan. Most plastic wrap is about 12″ wide, so you can use that as a guide.
Notice how you can see gobs of butter in my dough? That means I will have some lovely flaky pastry. As the butter melts it will leave a little open space, which will fill with steam from the vodka and water, which will in turn expand the empty space, making the proper pastry flake.
Chill your flattened pastry again for a bit. If you put it on a baking sheet and chuck it in the fridge you should be good. When you’re plopping it in your pie pan, make sure to remove the bottom layer of plastic wrap before rolling it over a rolling pin or folding it into quarters to place it in the pan. I’ve done both methods here, so you can see what I mean.
Rolling pin:
Folding:
Gently lift the edges of the dough to make it easier to press into the bottom of the pan without tearing.
Trim off the excess pastry from the edges of the pan.
I used a fork to press the edges more firmly down onto the glass. Chuck those back in the fridge when you’re done.
I had some scraps left over from trimming, so I cut up a small apple, sprinkled it with cinnamon and sugar, and rolled out the scraps again to form a small circle.
I put the fruit on one half, folded it over, and pinched the edges shut. Then I put it in a sprayed pan and baked it with the pie.
It looks a little demented, but we’re not going for high quality here, just a snack.
For the pie filling, you need some pumpkin purée. You can be lazy and buy the stuff that already has the eggs and spices in it and whatever and just dump that in your pre-bought frozen pie shell but that’s just not cool here at Ali Does It. Make sure if you’re using canned pumpkin that it’s pure pumpkin, without the sugar and salt and all things spicy.
Now, you American folks are likely working from the 14 oz can of Libby’s or whatever it is you have. Fourteen ounces is about 1 3/4 cups of pumpkin goodness. Here in the FAR NORTH of Canada we have E.D. Smith pumpkin, which comes in 28 oz cans (~3 1/2 cups), so we generally use half a can for one pie, a whole can for two. And of course I’m working from a I-have-way-too-much-pumpkin-purée-in-my-fridge perspective. So I will be using that instead of the canned stuff.
Preheat your oven now, to 425°F and position a rack in the centre of the oven.
Beat up 4 eggs in a large bowl. Whisk in 3 1/2 cups pumpkin purée, 2 cans (300 mL) sweetened condensed milk (I believe some countries sell condensed milk in 400 mL cans — I would just use the whole can anyway for a slightly sweeter pie), 1 cup packed brown sugar, and 4 teaspoons pumpkin pie spice.
Take your pie shells out of the fridge and divide the mixture between them. You may end up with extra filling (lord knows I always do). I emptied it into a smaller pie pan and baked it as-is, for a sort of pumpkin pudding.
Chuck the pies (and whatever else you now have on the go) in the oven and bake for 15 minutes. Then reduce the heat to 375°F and keep baking for about 35 more minutes, until the pastry is all golden and lovely and you can stick a knife in the centre of the pie and bring it out clean again (i.e. the filling has set). You can see that our crustless pie and the turnover turned out equally well, though with them in the oven everything took an extra 15 minutes or so to cook. Let the pie cool completely on a rack and refrigerate until ready to serve. You can heat it up again if you like. We enjoy ours with a dollop of whipped cream or ice cream. Yum!
So on the 15th day of March, 2010, I caved to peer pressure (*ahem*, Kª), and I started this blog. Ali Does It … Herself. That sounded about right. The Pie and I try to be as self-sufficient as possible, and having been raised by very DIY-oriented parents, I figured I might as well start telling the world about my own experiments in grown-up living. Five hundred (!) posts later, we’re still going strong. Ali Does It has been featured THREE times on WordPress’s Freshly Pressed page, twice on FoodPress.com, and last year won third place in both the Canadian Weblog Awards and the Canadian Blog Awards competitions. I’m so grateful for the 1600+ subscribers who visit regularly and for everyone who has come to see and read in the past almost-three years. If you’re reading this, then thank you so much for coming!
It’s amazing what this blogging experience has taught me to do. Previously, I cooked, and fixed stuff, and did crafty things, and I was pretty good at it, but I never really tried to venture too far out of my comfort zone. Now, if someone sends me a message saying, “do you know how to do this?”, my answer is usually “why yes!” (ha. rarely), or “no, but I’ll figure it out.” And then I do. It’s very empowering to know that doing stuff on your own is not as scary as you think it is. The internet (and my parents) are very good teachers.
My very first post was about cake — wedding cupcakes, to be specific. And if you’ll look below, you can see all the other posts I have made about cake and cupcakes since then (not to mention the posts about cookies, and brownies, and knitting, and sewing …). In commemoration of that, I think I’ll make another cake!
I’ve been brainstorming with the Pie and our friends about what to create for this particular occasion, but they’ve been absolutely useless. They keep suggesting that I make a cake THAT I’VE ALREADY MADE. What would be the point of that? Well, it’s not called Ali Does It on the Advice of All the People She Knows, after all, so I started thinking about what *I* wanted. Something a little bit fun, not too big, not too complicated, but a wee bit different. And something that I have made up all by myself. So here goes.
What about a berry cake? I want something pink. And I have a temptingly large container of partridgeberries in my freezer, which I picked up from Bidgood’s in the Goulds over the summer. If you know anything about this place, you’ll know that Bidgood’s is where you go to get stuff like this. That same day we picked up moose burgers and a rabbit pie. Both excellent.
Now, I’m making this into a layer cake with icing, but you could easily skip the cutting and frosting and have it as a nice coffee cake. It’s a versatile little thing, and it will freeze beautifully, unfrosted. So. Take your favourite 9″ x 13″ baking pan/casserole dish and butter it generously. Plop a sheet of parchment in the middle and butter that, too. It will just make it easier to get the cake out in one piece. Preheat your oven to 375°F while you’re at it.
Grab yourself some partridgeberries. You’ll probably only find them frozen, but if you’re in a part of the world where they come fresh, then more power to you. If you don’t know what a partridgeberry is, it looks like a small cranberry, but isn’t as tart. You may know it better as a lingonberry or a cowberry. You could substitute other berries in this recipe, obviously. If you go the cranberry route, though, I’d add a bit more sugar. Anyway, you’ll want about 2 cups partridgeberries for this cake.
Plop them in a pan with about a tablespoon lemon juice and 1/2 cup granulated sugar, and stew on medium heat, stirring occasionally, until the berries are thawed and juices are running everywhere. Pop a few with the back of your spoon to increase the juiciness, and remove from the heat so they cool down a bit.
In a large bowl, cream together 1 cup butter with 2 cups granulated sugar.
Add in 6 eggs, one at a time.
Then jump in your stewed berries, along with 1 cup sour cream.
Almost ready — now, a little bit at a time, stir in 3 cups all-purpose flour and 1 teaspoon baking soda.
Smooth your batter into your prepared pan. I love that delicate pink colour. Too bad it never lasts through the baking without artificial boosts — blech.
Bake your cake on the middle rack for about 45 minutes to an hour, depending on your oven. Mine took 47 minutes. Place it on a rack to cool, and when it’s cooled enough to tip out, let it cool completely on a rack before frosting.
A note on frosting:
Now, you don’t HAVE to frost your cake. That is entirely up to you. But I’m going all out here, and I feel that fruits like this need a bit of cream cheese in the frosting to make me super happy. If you’re going to layer this cake, make the full amount of frosting I’ve set out here. If you’re just going to frost the top, then make about 1/3 to 1/2 of the amount laid out below. And if you want a non-chocolate version (also yummy), substitute vanilla for the Kahlua and leave out the cocoa.
In a large bowl, beat together 1 cup butter and 1 250g package plain cream cheese. Make sure both of them are soft but not melty.
Tip in about 5 tablespoons powdered cocoa together with 1 tablespoon Kahlua (or other coffee/chocolate liqueur of your choice) and mix that in thoroughly. Once you get that in, add about 3 1/2 cups confectioner’s (icing) sugar. You may need more or less depending on your preference. Beat that to a pulp.
Then pour in 1 cup cream, whipping cream if you’ve got it. Or leave it out, if you want a frosting that is a bit stiffer. Lovely. Chuck that in the fridge to chill while you wait for your cake to cool.
Then I simply cut the cake in half down the middle, like so.
Then cut each half horizontally so I had four slabs of cake. Slather on some icing between layers, plop the next one on, rinse, repeat.
It reminds me of a massive peanut butter and jelly sandwich.
I didn’t bother with a crumb coat when doing the outside, and I didn’t really go to too much trouble getting the icing all perfect (because I really don’t roll that way, don’t you know that by now?).
I think I have laundry on the brain — I seem to do it often enough. It’s not quite the celebratory bunting you were expecting, eh? Fitting, though.
Thanks for seeing me through 500 posts as I learn to be a grown-up. Here’s to 500 more!
Thirty-Four other posts about CAKE (brownies, bars, and other eatables and noneatables not included, but feel free to use the search function on the sidebar to find whatever you want!):
I may have mentioned to you before that my new sister-in-law, Atlas, has the coolest mom, who may very well be my new hero. This woman runs her own business, runs her family, runs the kitchen … essentially, she’s in charge of everything, but she does it in such a way that you don’t even notice. And always with a big smile on her face. Anyway, she gave me a recipe for making my own yogurt that doesn’t sound intimidating at all.
I remember my mother trying to make yogurt with that weird little machine and the starter and all that stuff, and how I hated what came out of it. It had a weird skin on it and was super runny. But this stuff? Not the same. So much easier. So much better. In fact, my own mother has adopted the process and there’s always a huge tub of fresh yogurt in her fridge as well. The recipe I’m going to give you below has been halved, because there are only two of us in our little house. However, now that I’ve made it and I see how quickly we use it, I will probably make a full batch next time!
So what you need is a large pot, a spoon, 2L homogenized milk, 500mL half-and-half (“blend cream” is what they call it here), and about 1/2 cup plain yogurt (with no gelatin) as your starter.
In the pot, stir your milks together and bring them to a boil.
When they boil, they will foam the heck up, so stir vigorously for a minute before removing the pot from the heat. Mine may have boiled over. Twice. I may have shouted some choice four-letter words. Several times. Note to self: next time, use a bigger pot.
Leave the milk to cool to a nice warmer-than-room temperature (Atlas’s mom says somewhere between 40°C and 50°C). She says to stick your finger in it to feel if it’s warm. I decided, in the interests of science, to use a thermometer to confirm. For your edification, 114°F is about 46°C.
Mmm, milk skin … you can just get rid of that.
Then add your 1/2 cup yogurt and give that a stir.
Put the lid on the pot (or pour it in a container with a lid), wrap the whole thing in a blanket, and put it somewhere warm for 6-8 hours (or overnight). Atlas’s mom puts it in the turned-off oven with the oven light on, but our oven doesn’t have a light, so I put it in our living room on top of the Pie’s computer. It seemed to do the trick.
And you can easily turn this into strained yogurt (“Greek” yogurt) by straining it for a few hours through a cheesecloth. After 8 hours on top of the computer, I lined a colander with cheesecloth and dumped the yogurt in. I let it sit over another bowl overnight in the fridge to drain off the whey and this thick loveliness is what came out of it.
Goes great in soups and stews, in dips like tzatziki, on breakfast cereals, with a little honey and some strawberries … you name it.
I’m not the biggest soup fan (I prefer to drink my hot liquids), but I’m starting to acquire a taste for them. I’m especially fond of blended soups (because then it’s like a savoury pudding and I’m less likely to burn my tongue on the hot broth). This one comes from Martha Stewart and is a good match for a nice late-summer lunch or a good accompaniment to a fall comfort meal. It’s quick and easy, which I like in a soup. You can also freeze it and enjoy it at any time.
First, do your chopping. In this case, chop up 1 medium onion, 2 cloves garlic, and 1 large butternut squash. Peel the squash, cut it open and remove the seeds, and then hack it into smallish cubes.
Then, get your spices ready to go. You’ll need 1/2 teaspoon dried thyme, 1/4 teaspoon ground cinnamon, and 1/4 teaspoon cayenne pepper. Also, not shown, is a pinch or two of coarse sea salt. Feel free to add more or less, according to your own taste. It’s only soup, after all.
Melt about 3 tablespoons butter into the bottom of a large saucepan. Add in the onion, garlic, and the spices and cook until the onion is tender and translucent, about 7 minutes.
Dump in the squash cubes, as well as about 15oz chicken broth and 1 cup half-and-half (you could use plain milk if you wanted to be healthier, but do you really want to do that?), and then about 3 cups water. Bring that whole thing to a boil and reduce it to a simmer for about 20 minutes. Your squash should be squishy at this point. You should be able to squish your squash with the back of a spoon.
Remove the pot from the heat and use your immersion blender to squish — er, purée — your squash and onions and all that stuff.
Serve with a dollop of sour cream and a sprinkling of cayenne, if desired.
I had some leftover potatoes that I’d cut for the gratin I showed you on Monday. The Pie suggested that we attempt to fry them up as thick potato chips, not unlike those of a popular restaurant chain.
So we did. This is a few inches of vegetable oil in a large saucepan. You heat it on medium-high (like at 7 or 8) until a pinch of flour dropped in goes all fizzy.
Then I fried the potatoes in batches until they were slightly crispy, but not too dark.
Stirring often with my big mesh spoon.
Plop them on a paper towel to drain and immediately salt them.
We had them with a chicken sandwich and some salad. It makes up a bit for the grease.