Clay Leaf Bowls

Clay Leaves 33

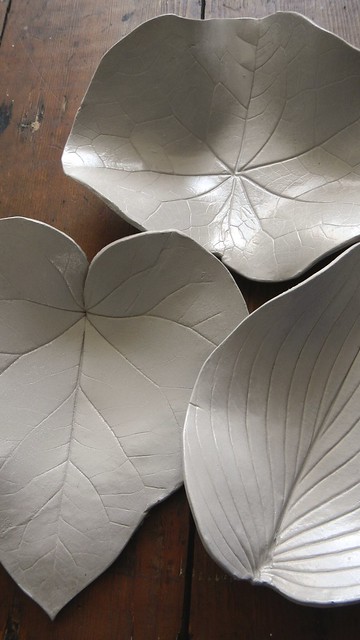
My mother is an artist and as such has a lot of artist friends. When I was a kid, a couple of them ran various art schools and camps and to show support, my mother sent me. I have very little artistic skill, but I loved the camps, because I got to learn new techniques and work with my hands. I especially loved working with clay. I once made a beautiful pistol replica (I was a weird kid) but it blew up in the kiln so I never saw the fruits of my effort. My lack of skill hasn’t stopped me in the years since, and when I saw these beautiful dishes from Urban Comfort, I thought, “I can do that!” So I did.

Clay Leaves 54

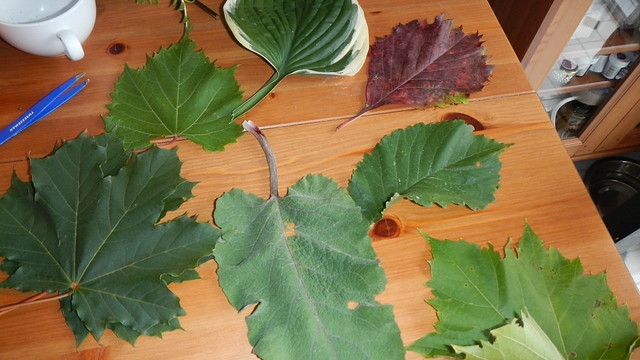
First, you need to gather yourself some leaves. Go for the fresh ones, as they’ll be the most flexible. In these sorts of projects everyone seems to go for the beautiful fig leaves and things like that. Well, figs don’t grow in this Arctic wasteland. So I went with what was available: various forms of maple (it is Canada, after all), some ornamental grapes, random roadside vegetation … What ended up working the best, however, in terms of creating easy dishes, was from my own backyard: hostas, nasturtiums, and the gorgeous morning glory that has been tumbling over my fence all summer.

Clay Leaves 13

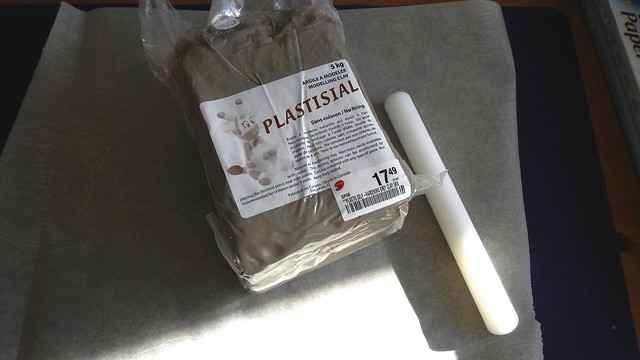
Then grab yourself some air-dry clay (this means you don’t have to shove it in a kiln, though if you have access to a kiln, you should probably use it for these as it will make them much more durable). I picked up a 5kg block of it for $17.49 at DeSerres (actually, I had a gift card, so it was FREE).

Clay Leaves 1

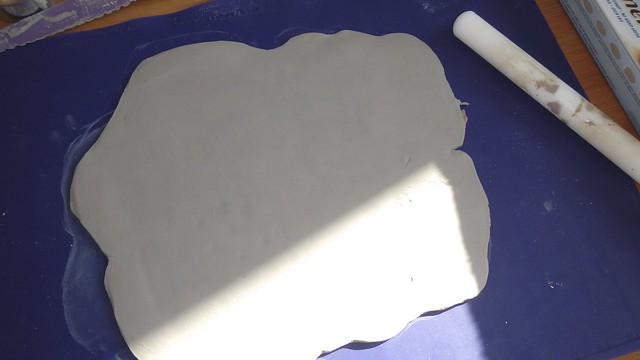
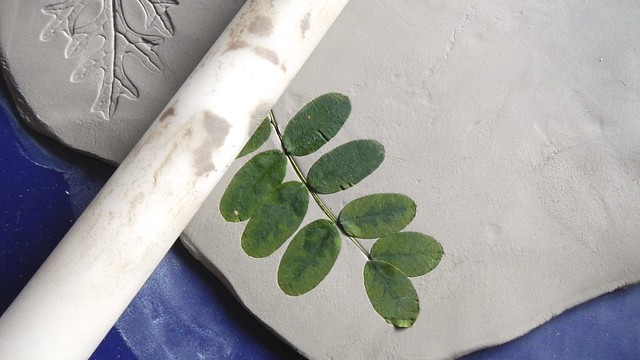
Grab a hunk of it and roll it out to your desired thickness. I used a fondant roller to get a smooth surface. The leaves look better in clay about 2mm (~1/8″) thick, but that makes it much more fragile to handle, so you probably want to aim for around 5-7mm (~1/4″). I use this Kitchenaid silicone mat as a work surface for anything non-toxic, including pies. It’s amazing and portable and easy to clean.

Clay Leaves 2

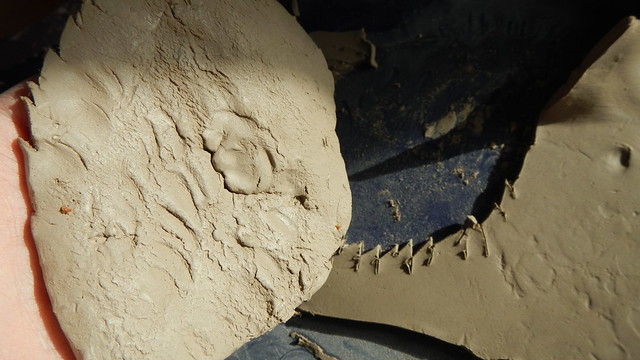
Now, I did find that if I went straight to leaf pressing and cutting from this stage, my clay was too firmly stuck to the surface to get a good result.

Clay Leaves 12

Accordingly, I carefully peeled the clay sheet off the mat and flipped it onto a piece of parchment paper and went from there. It was just easier and made sure both sides of the sheet of clay were smooth.

Clay Leaves 14

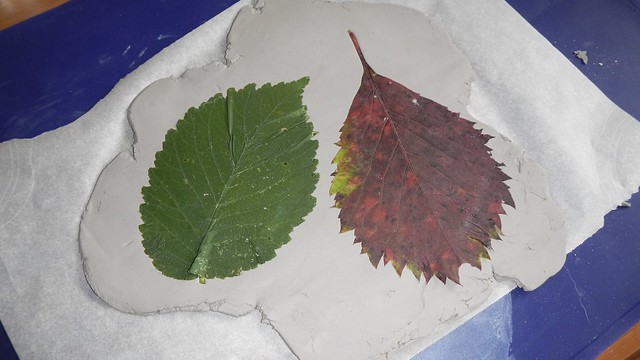
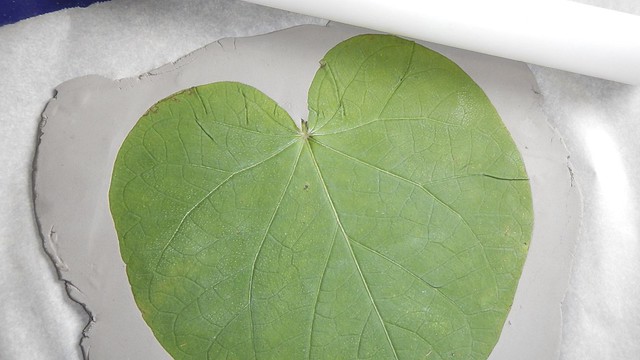
Then you grab your leaves and flatten them into your clay. I used the fondant roller again to get them in there nice and good.

Clay Leaves 5

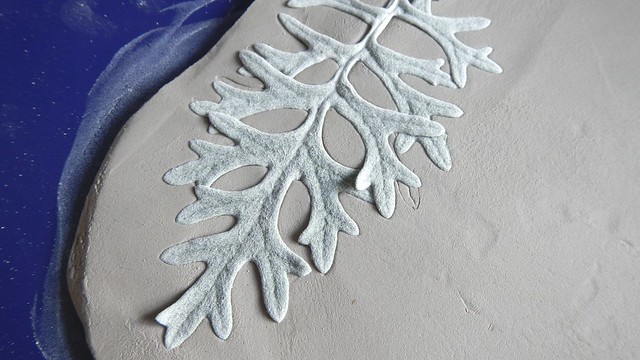
These ones I am not turning into dishes – I just wanted to see what effect they would create.

Clay Leaves 3

It’s neat.

Clay Leaves 7

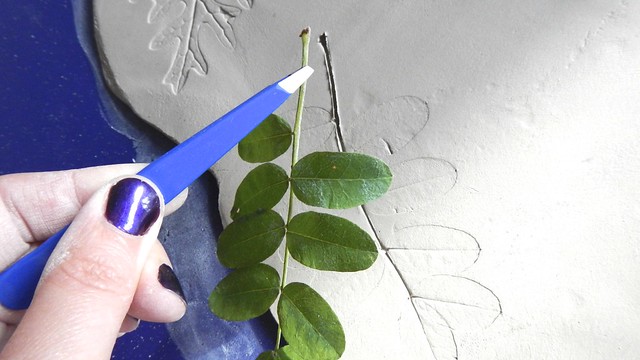
Use tweezers to get tricky ones out of the clay and pick out any stray bits of debris.

Clay Leaves 6

You will have some folds and wrinkles in your leaf, just because it’s hard to press something flat that isn’t naturally flat. But don’t freak out – it just adds to the texture.

Clay Leaves 16

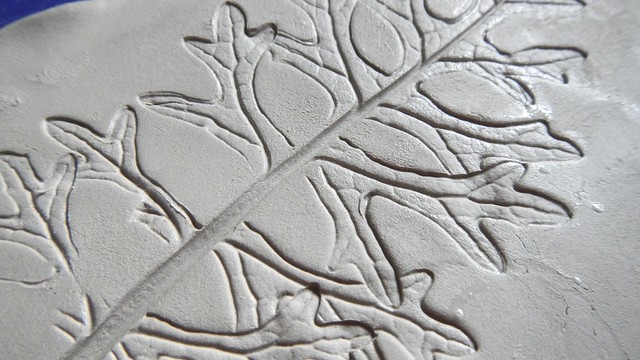
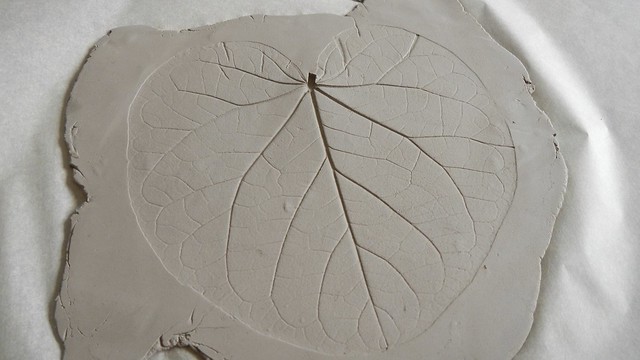
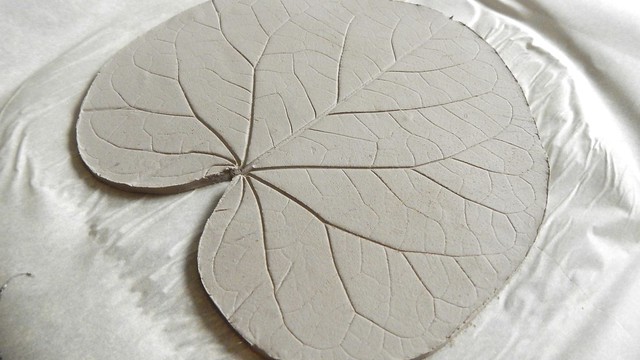
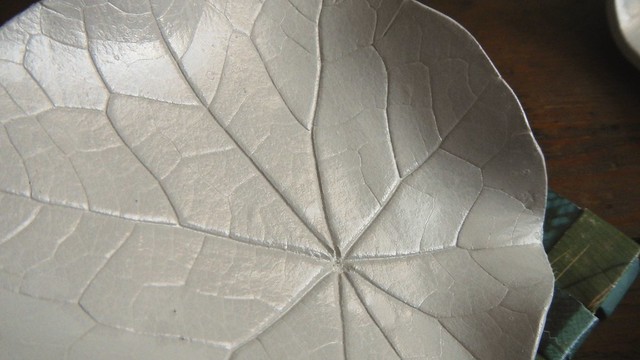
Once you’ve gotten your leaf carefully removed you end up with this lovely impression, veins and blemishes and all.

Clay Leaves 17

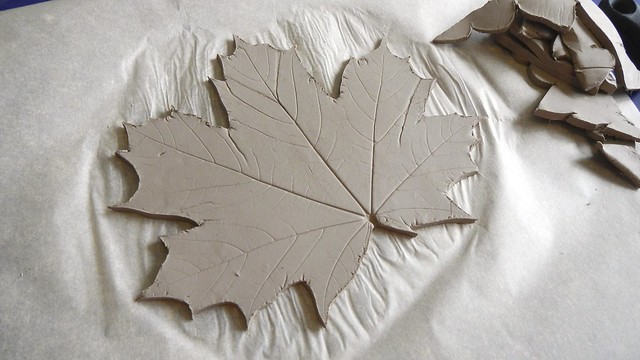
Use the tip of a small sharp knife (Xacto, paring, whatever) to cut along the edge of the leaf and carefully peel away the excess clay.

Clay Leaves 18

This was way easier to do with round leaves than with the pointy ones, as you can see, and the round ones made better dishes anyway.

Clay Leaves 15

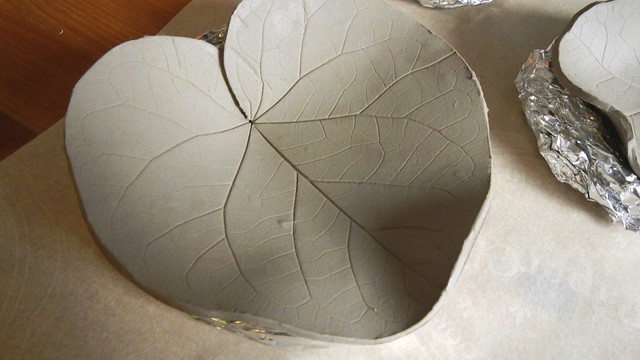
Make a little ring out of aluminum foil and pick up your clay leaf. Bend the leaf into a more natural shape (which it will want to do anyway) and set it inside the ring to dry. Feel free to play with curling the edges up and down, in the way that the leaf would do in nature. I left mine to dry overnight, then I flipped them over (with support) to dry on the bottom for another night.

Clay Leaves 19

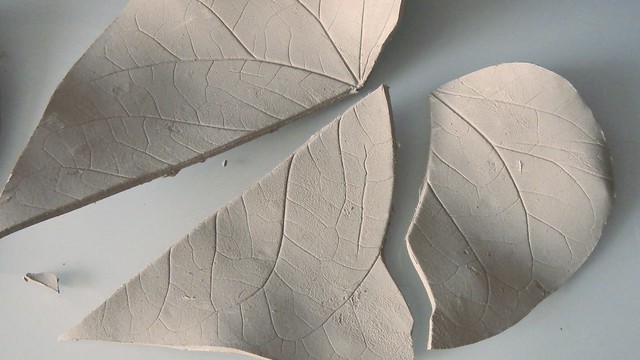
Now you’re done! It’s up to you what you do with them next. They’re pretty fragile still, so nothing hardcore. My biggest morning glory ones broke along their vein fault lines just from picking them up wrong.

Clay Leaves 43

Clay Leaves 42

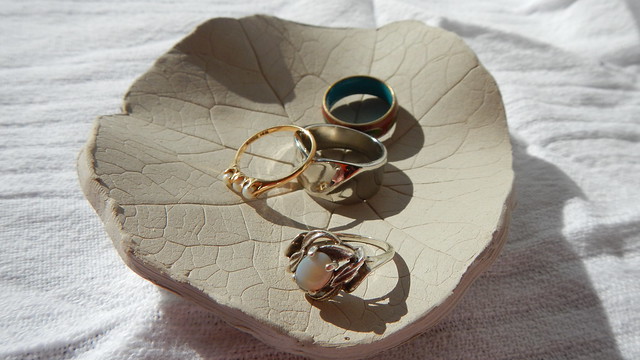
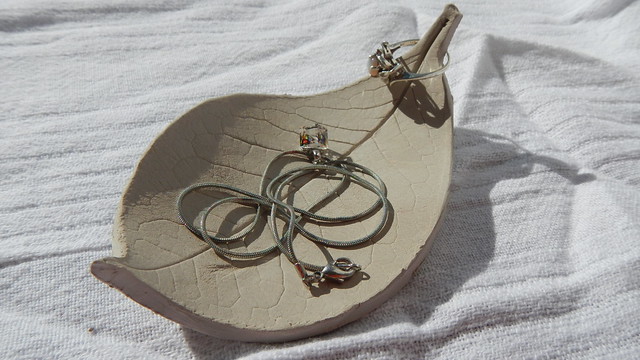
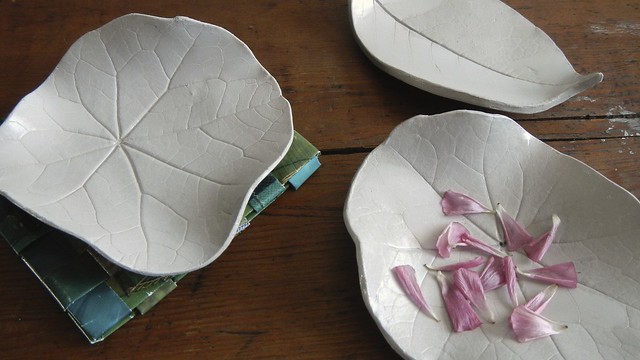
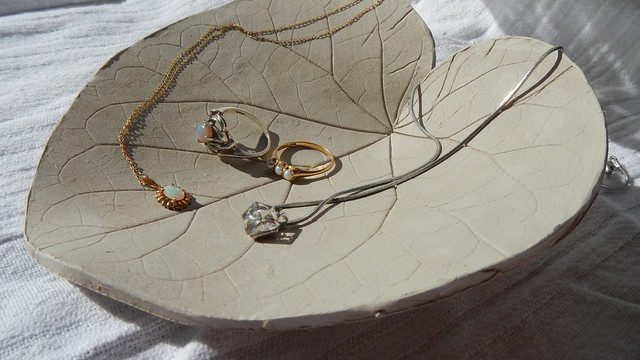
But they make pretty neat little dishes for small items, such as jewelry.

Clay Leaves 24

Clay Leaves 26

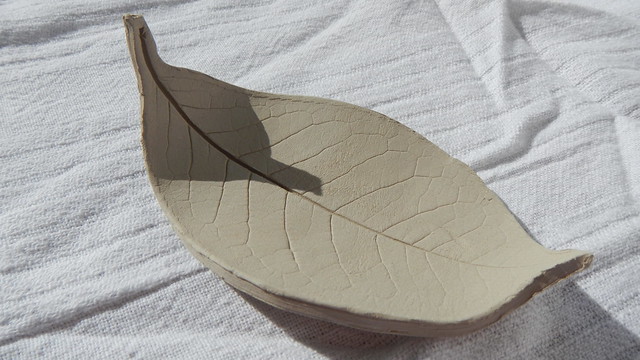
This leaf with a stem makes a nice holder for rings.

Clay Leaves 21

Clay Leaves 22

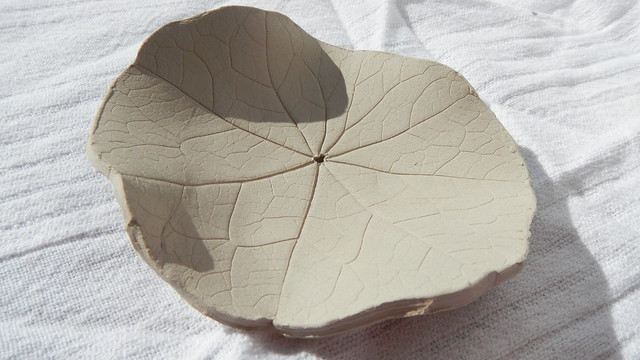
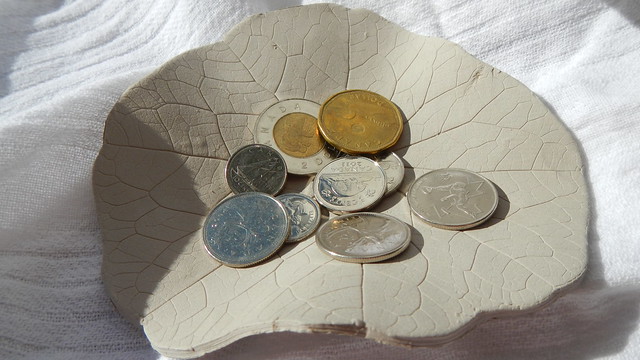
The larger nasturtiums make neat bowls for pocket change. In Canada we recently got rid of our penny, but with both our $1 and $2 denominations in coin, we still have plenty of change kicking around!

Clay Leaves 36

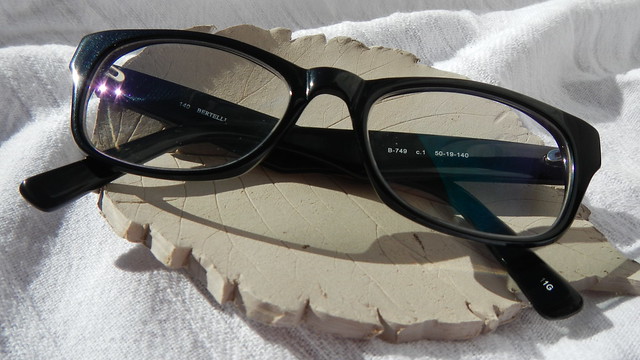
And these grape leaves make a good place to keep your spectacles, if you’re the type of person who forgets where you put them.

Clay Leaves 39

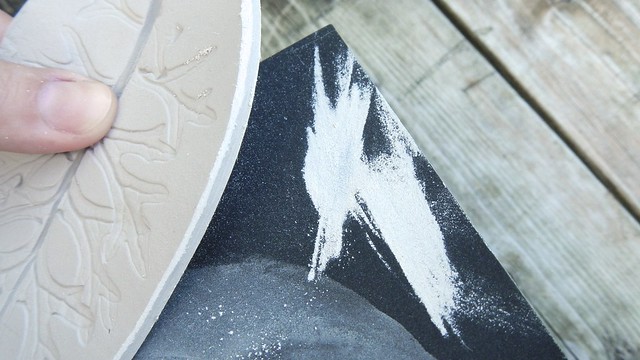
Because the clay is uncured, it tends to scrape off and leave a residue, so I wanted to finish them off a bit. I used an ultra-fine sandpaper to smooth off the edges of each dish. Make sure you do this outside in a well-ventilated area. Not only does the clay dust get everywhere, but you’re also likely to inhale a bunch of it if you’re not careful. Dust off each piece completely before you do anything else. Compressed air is handy for this, but make sure to do it outside.

Clay Leaves 40

I then painted each piece with an outdoor satin sealer that adhered pretty well to the clay surface. I like the soft shininess of it and the fact that it didn’t sink into the porous clay and discolour it.

Clay Leaves 45

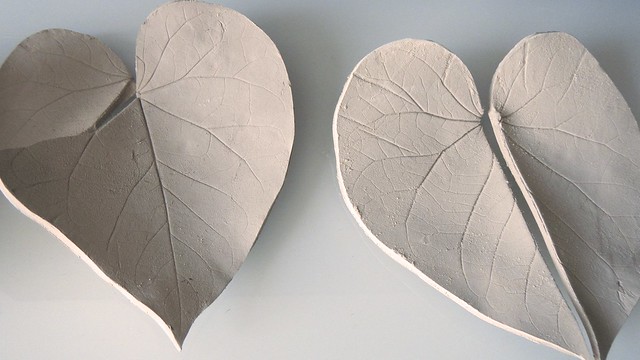
Some of the finished dishes. The one on the left is my favourite, because it’s so thin and delicate. I’m betting good money that whomever I give it to will break it within a week, and it won’t even be that person’s fault.

Clay Leaves 44

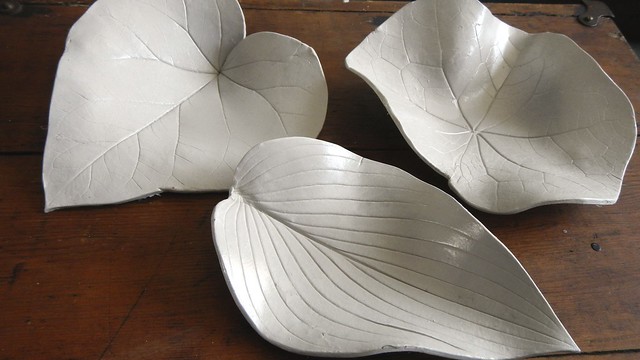
And some of the bigger ones. I made so many that pretty much everyone on my gift list is getting at least one. And because of that handy gift certificate, this cost me nothing but time!

Clay Leaves 52

Art with Glue and Shoe Polish

Foil Glue Shoe Polish 23

I have been wanting to try this for YEARS, ever since I saw it on Make It … a Wonderful Life.  I don’t exactly know why it is that I haven’t made any yet — but now is my chance.  With the new place we have an excess of blank wall space and the Pie and I were both raised to believe that a) if you can see the colour of your walls you don’t have enough art on them; and b) there is no such thing as “enough” art.

Foil Glue Shoe Polish 10

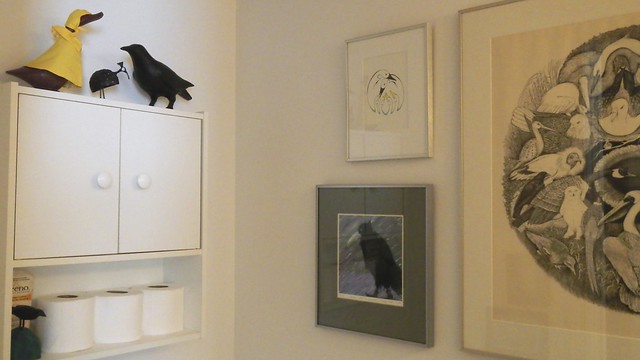
In our lower bathroom we have kind of an avian theme going on, so I thought I’d continue it while trying out this nifty craft.  Make It … designed it to be a craft for school kids to learn different techniques, but I’ve taken out a few steps for us silly adults who have trouble following instructions.

Foil Glue Shoe Polish 26

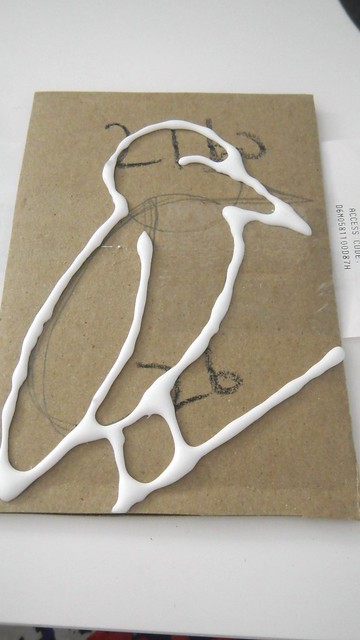
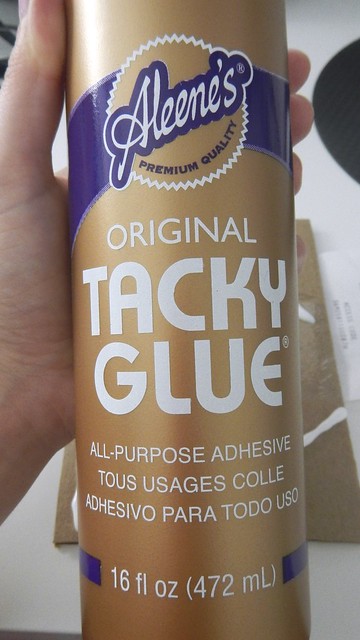
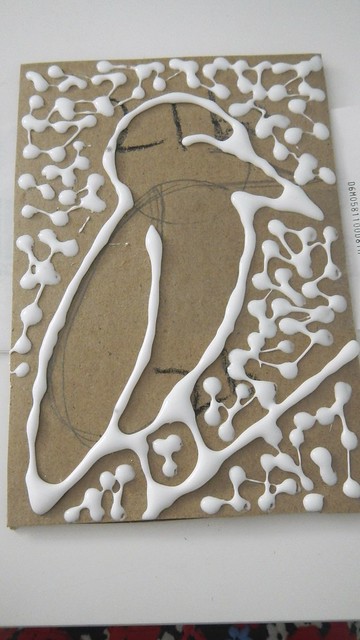
Start with a piece of cardboard the size and shape you want your finished piece to be.  Draw a simple design onto the cardboard with a pencil or marker, and by simple I mean really simple.  Big lines and grand shapes only.  You can get fancy and detailed later.  Now trace those lines with Tacky Glue.

Foil Glue Shoe Polish 1

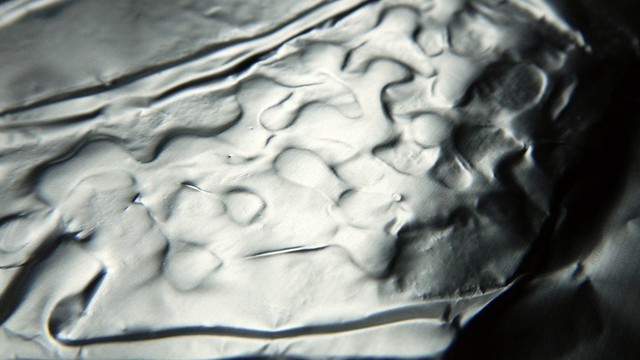
I actually prefer the brand name glue for this, as it’s the only white glue I can find that dries in the same thick lines in which  you lay it down.

Foil Glue Shoe Polish 2

Anyway, once you’ve got all the lines traced, and filled in everything you want to, set that somewhere to dry completely, probably overnight.

Foil Glue Shoe Polish 3

Foil Glue Shoe Polish 4

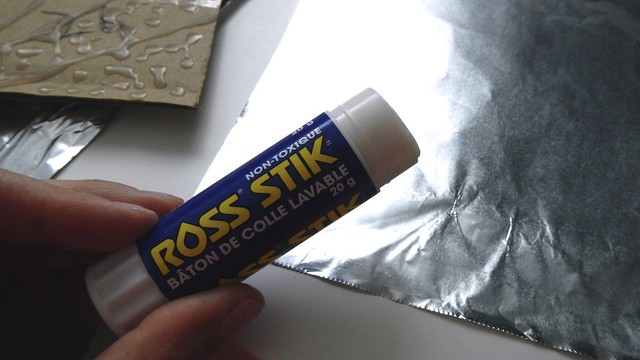
When it’s all ready to go, grab a piece of aluminum foil just slightly larger than the piece of cardboard and cover one side (shiny or dull, it’s your choice) with a glue stick (you have to use a glue stick or it will show through the foil).

Foil Glue Shoe Polish 7

Be generous with the glue stick, and go over the foil a couple times with it.  On my first one I didn’t use enough and had trouble sticking it down.

Foil Glue Shoe Polish 8

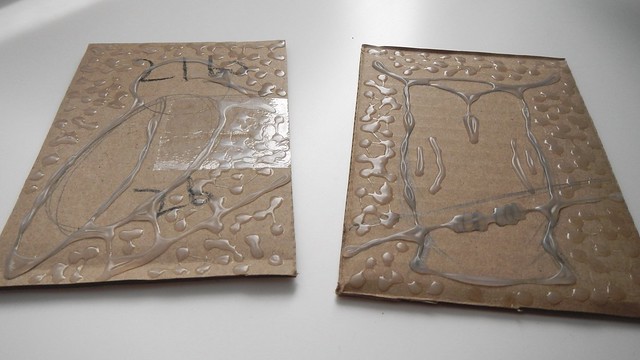
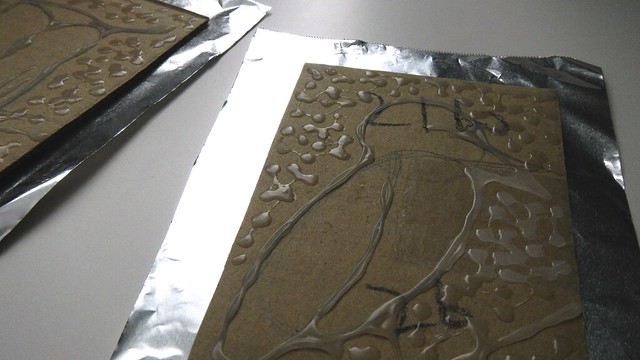
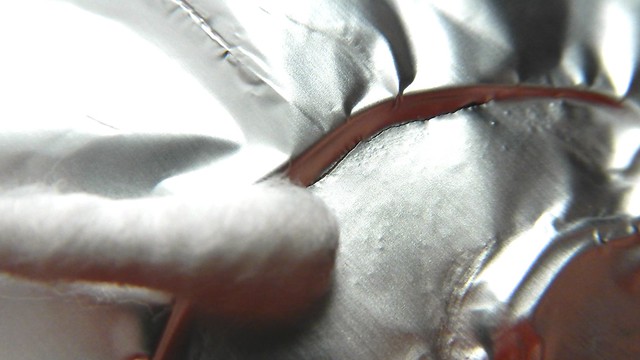
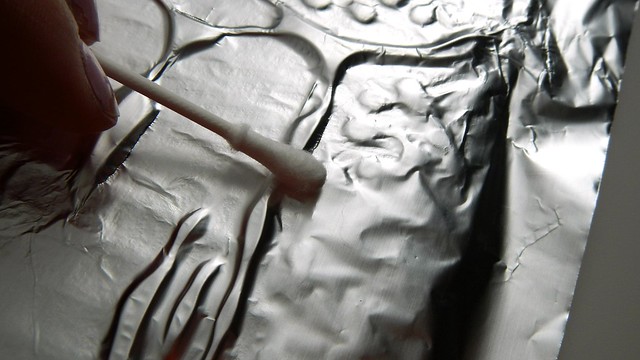
Press the foil, glue side down, over your design.  It’s best to start from the centre and work your way out.  Press the foil against the glue lines.  You can rub them in gently with a paper towel wrapped over your finger and use a cotton swab to gently press the foil close against the glue lines so everything is tight.

Foil Glue Shoe Polish 17

You may get rips, just because the foil is too tight.  But don’t fret — they’ll be camouflaged later.

Foil Glue Shoe Polish 9

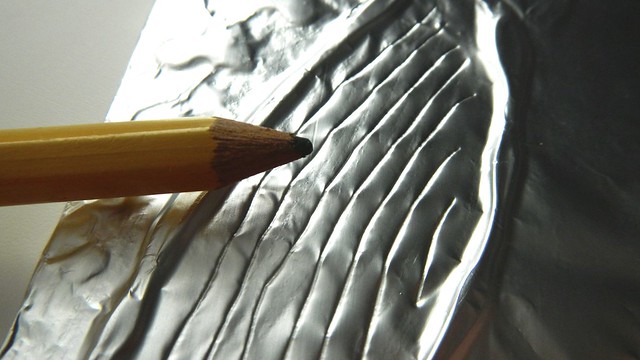
Now, if you like, you can take a dull pencil and start drawing in patterns in the blank spaces between the glue lines.

Foil Glue Shoe Polish 11

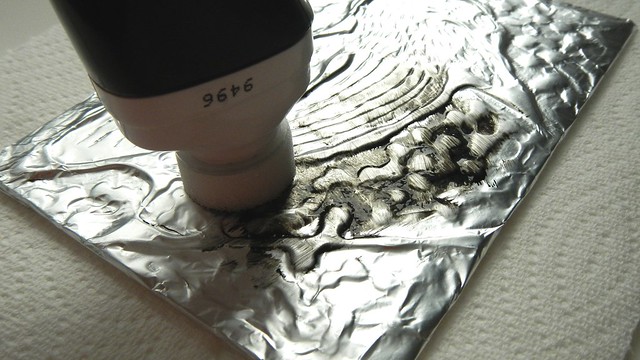
When you’ve decorated to your liking, take some black shoe polish and give the whole thing a once-over, getting the polish into all those little lines you made.

Foil Glue Shoe Polish 13

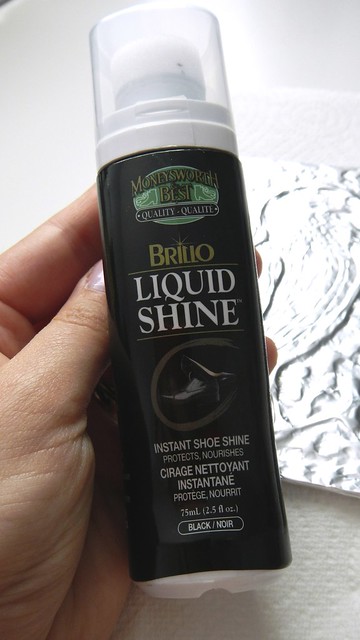
Make It … recommends the sponge-applicator shoe polish for ease of use, so that’s what I did.

Foil Glue Shoe Polish 12

Leave it for a moment and then gently buff it off with paper towel.

Foil Glue Shoe Polish 14

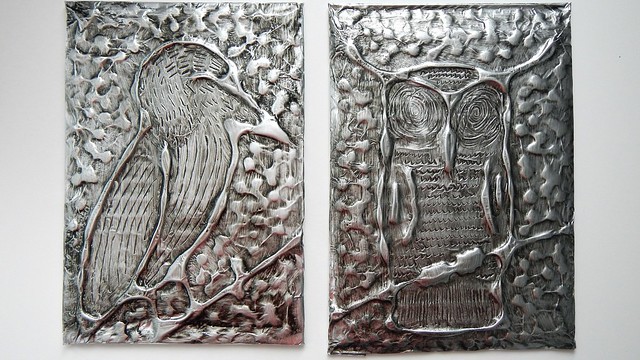
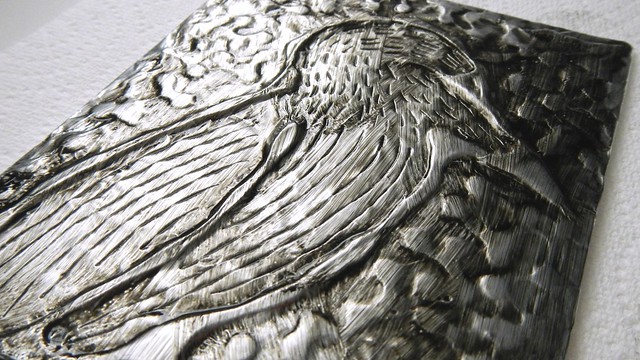
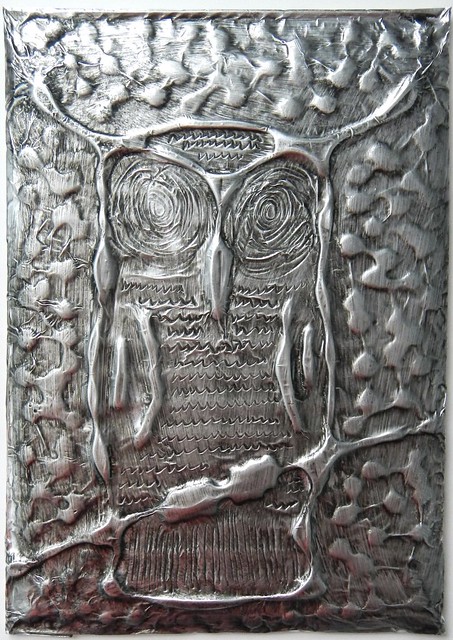
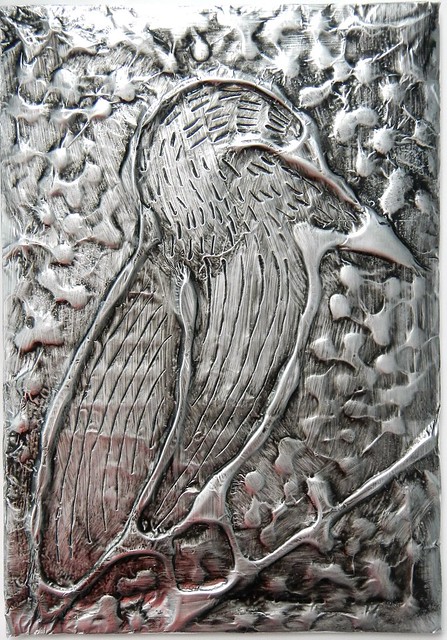
It leaves a lovely silvery patina and makes the whole thing look really cool.

Foil Glue Shoe Polish 21

Foil Glue Shoe Polish 22

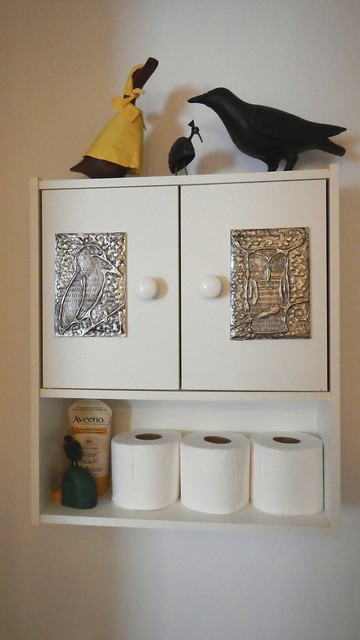
I stuck these to the boring bathroom cabinet to jazz things up a bit.

Foil Glue Shoe Polish 30


Beeswax Food Wrap

Beeswax Food Wrap 7

Christmas may be over for you, but I’m still going strong with my backlog of gift ideas, so stick with me.  And this one might come in handy for you as you are dealing with festive leftovers.

Start with some scraps of fabric, cut into various shapes, that you can wrap around bowls or sandwiches or whatever.  I finished the edges with pinking shears, so that they wouldn’t fray so fast (once they’re waxy, they won’t fray at all).

Beeswax Food Wrap 2

Then grate a whole bunch of beeswax.  I did 3oz beeswax, which gave me just enough to finish 11 pieces of fabric.

Beeswax Food Wrap 1

Turn your oven on to about 180°F, or as low as it will go, and line a baking sheet with aluminum foil.  Lay a piece of fabric on the baking sheet and sprinkle it evenly with beeswax.  You want enough that when it’s melted it will saturate the cloth.

Beeswax Food Wrap 3

Shove the fabric in the oven for a few minutes.  Keep an eye on it and watch for how long it will take the beeswax to melt — between five and ten minutes.

Beeswax Food Wrap 4

When the beeswax is entirely melted, haul out your baking sheet and immediately remove the cloth from the foil — if you don’t it will stick and get gross.  I waved mine in the air a few times before the wax set and I could set them down.

Beeswax Food Wrap 5

Keep going until all your sheets are finished and thoroughly saturated with beeswax.  If you miss a spot, you can always top it up and shove it back in the oven for a few minutes.

Beeswax Food Wrap 6

Beeswax Food Wrap 8

Use these wraps like you would plastic wrap.  They will mould into shapes with the heat of your hands and stick to themselves, so you can even cover bowls with them.

Beeswax Food Wrap 9

I was going to show you the wrap on a sandwich but I was out of bread so you get deli meat instead in a wrap.  Beeswax is naturally antibacterial, and the wax itself blocks out air, so it makes a really good seal for keeping your food fresh.

Beeswax Food Wrap 10

Wash gently in warm (not hot!) water to remove food goo and to ease the wax back into shape.  TADA!
Beeswax Food Wrap 11

Classic Sticky Buns

Sticky Buns 33

This is a recipe that the very pregnant Atlas found in a magazine my mother picked up called Donna Hay (it’s Australian.  Hello, Australians!).  I figured I would master the basic sticky buns so that later she and I could do the more complicated, fancy variations (so stay tuned for that).  We’ve already made one version of lovely cinnamon buns on Ali Does It, but I’m not above trying new recipes to see which ones I like the best.  So here goes!

Sticky Buns 30

Let’s start with the dough.

Take a small bowl and 2/3 cup milk and heat up the milk until it’s lukewarm.  Add to that 2 teaspoons vanilla extract and 1 1/4 teaspoons active dry yeast and give it a wee stir.

Sticky Buns 1

Set that someplace warm for 5 minutes, until the yeast starts to bubble and foam up.

Sticky Buns 5

Lightly beat up 2 eggs.  Just bruise them a little.  Rough ’em up but no broken bones.

Sticky Buns 2

And melt 125g (1/4 cup) unsalted butter (I used salted butter and left out the 1/4 teaspoon sea salt I was supposed to add).

Sticky Buns 3

Plop 3 cups flour and 1/4 cup sugar into the bowl of your electric mixer.

Sticky Buns 4

Add in the yeast mixture, the butter, and the eggs and mix on low for 1 minute until everything is combined.  You are supposed to use the dough hook attachment but I couldn’t find it so I went with ol’ reliable the paddle here.

Sticky Buns 6

After a minute, turn the mixer to high and beat for another 5-8 minutes, until the dough pulls away from the sides of the bowl.

Sticky Buns 7

Scoop the dough out into a clean, lightly greased bowl, cover it with a damp tea towel, and set it somewhere warm to rise for an hour.

Sticky Buns 8

Now the tops of these puppies are going to be covered in a sticky gooey maple glaze, which is actually going to go in the bottom of the pan and then when it’s all ready you’re going to flip it upside down.

For the glaze, take a small saucepan and dump in 1/3 cup maple syrup, 1/3 cup brown sugar, and 75g unsalted butter (or salted, if you’re daring like me — it’s roughly 1/3 cup for you imperials).

Sticky Buns 9

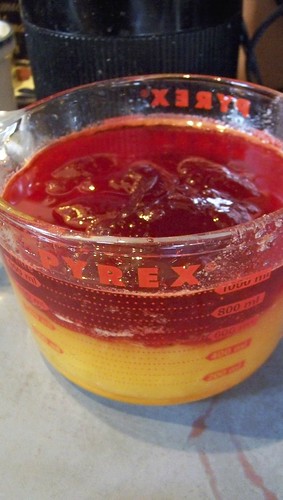
Cook, stirring, over low heat until everything is melted and dissolved.  Raise the heat to medium and bring your sugar mix to a boil. Cook for 3-4 minutes or until smooth.

Sticky Buns 11

Pour the glaze into the bottom of a lightly greased 20cm x 30cm baking pan (~9″ x 13″) and set aside.  Isn’t this pan nice?  It’s like the one in the magazine, and I said to my dad, “hey, if you were thinking of a Christmas present for me, this would be nice,” and he said, “we did.  It’s upstairs.”  TADA.  Early Christmas present.

Sticky Buns 13

Once the spatula cooled off enough not to burn my face, I ate the toffee off it. It was lovely.

Sticky Buns 14

Now we’re going to make a cinnamon butter to spread inside the rolls.  In the bowl of your electric mixer, dump 100g softened unsalted butter (I used salted, and eyeballed it to be somewhere between 1/4 cup and 1/3 cup — this isn’t an exact science), 1/2 cup brown sugar, and 2 teaspoons ground cinnamon.

Sticky Buns 15

Whip those silly for about 5 minutes, until all pale and fluffy and heavenly.  Set that aside.

Sticky Buns 16

Now take your dough, which should have doubled in size, and slap it between two sheets of parchment or waxed paper.  Roll it out into a rectangle that is about 60cm x 25cm (2 feet by a little less than 1 foot).

Sticky Buns 18

Spread your cinnamon butter all over the rectangle, leaving a 1cm border all around.

Sticky Buns 19

Sprinkle that with 1 cup toasted pecans (I had no pecans, so used raisins instead. I like raisins).

Sticky Buns 20

Take your dough by the long side and roll it up tightly into a happy tube.

Sticky Buns 21

Trim the edges of the bun so everything is even and cut it into 12 equal disks.

Sticky Buns 22

Place the pieces cut side up in the maple glazed baking tin, cover with another damp tea towel, and leave somewhere warm to rise for another 45-60 minutes or until they’re doubled again.

Sticky Buns 23

I took advantage of a cold day to sit them in front of the fire. This is the proofing stage.

Sticky Buns 24

Here they are all puffed up.

Sticky Buns 25

Preheat your oven to 350°F and place your baking tin on a baking sheet (to prevent burning sugar spillovers).  Bake for 20 minutes, cover with aluminum foil, then bake for another 15-20 minutes, until all golden and lovely and fully cooked.

Sticky Buns 26

I erred on the side of caution and resisted the urge to continue to bake mine after 35 minutes. The dough around the sides was soft and pale and I wasn’t sure it was cooked but it totally was and made a nice moist bun.

Sticky Buns 27

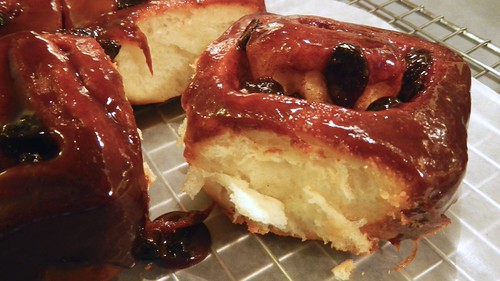
Let those stand in the pan for 2-3 minutes before turning out onto a wire rack to cool (you might want to line your rack with some parchment to catch drips).  I think I may have cooked  my maple glaze a bit long because it hardened quite a bit.  It was still super good, but not as sticky as I thought it should have been.

Sticky Buns 29

Final step: EAT THEM.

Sticky Buns 31

Life-Changing Burritos

Life-Changing Burritos

I know.  We just had a burrito post recently.  But when we were in Portland, and I was busy doing wedding related things with Doodle and the other bridesmaids, the Pie was often left to his own devices.  Luckily, Portland is a very walkable city, and there was a good Street Fighter tournament on the web for him to watch when he got bored with walking about.  One afternoon, he happened upon a place called the Burrito Bar.  The burrito he had there, according to him, changed his life forever.  So last week, he recreated what he had eaten there and I got to enjoy it as well. Plus, we had to do something about our raging onion population.

Life-Changing Burritos

First, he started by making up a batch of his famous Mexican rice.

Life-Changing Burritos

While he was doing that he gently poached 2 boneless, skinless chicken breasts.

Life-Changing Burritos

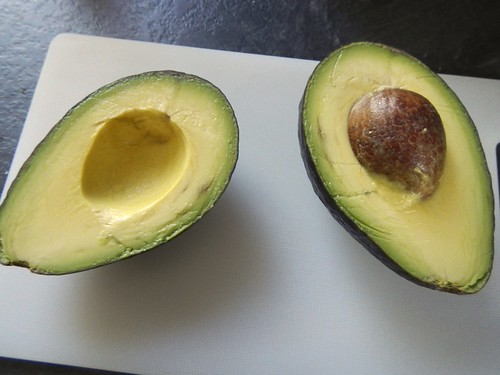
Then he put me to work as his sous-chef.  I had to make the “salad” component.  First, I opened up an avocado.

Life-Changing Burritos

Then I cubed it.

Life-Changing Burritos

Then I found a tomato.

Life-Changing Burritos

And cubed that as well.

Life-Changing Burritos

Chopped up a handful of cilantro and added that in, as well as some salt and pepper and lime juice.

Life-Changing Burritos

Toss that and set it aside.

Life-Changing Burritos

Open up a can of black beans and drain and rinse them well.

Life-Changing Burritos

Then he had me finely chop a jalapeno pepper, to go in his cheese sauce.

Life-Changing Burritos

Life-Changing Burritos

The cheese sauce is made by melting a tablespoon butter with a tablespoon flour to form a paste, then adding a half cup of milk.  When that is well-mixed you can add your grated cheese, about 1 1/2 cups.  The Pie used a mixture of old cheddar and spicy Monterey jack.

Life-Changing Burritos

Once the cheese was melted he dropped in the jalapenos and let that sit for a bit.

Life-Changing Burritos

At this point the chicken was ready to be shredded. Just pull it apart with some forks. It’s pretty fun.

Life-Changing Burritos

We added a few tablespoons salsa to the chicken.

Life-Changing Burritos

So now we are ready to make these burritos, baby.  We have Mexican rice, salad, salsa-y chicken, black beans, cheese sauce, and some sour cream as well.

Life-Changing Burritos

You’re going to need the biggest flour tortillas you can find.  These ones are ten inches, though the Pie says the one he had in Portland was THIRTEEN inches.  Set your tortillas on a sheet of aluminum foil.

Life-Changing Burritos

Start piling on your ingredients in the centre of your tortilla.  Be generous.

Life-Changing Burritos

To properly fold a burrito, we looked to the internet.  If you’re not sure, try YouTube.

Life-Changing Burritos

Take the opposite side of your tortilla and bring it towards you, so the ingredients get all jumbled together and pushed to one side. This also leaves a bit of food sauce on the empty side of the tortilla, which provides a bit of friction to keep things stuck together.

Life-Changing Burritos

Unfold the tortilla and lift up the sides, to sort of hold everything in. Take the side of the tortilla closest to you, with all the ingredients, and flip it up and over on itself.

Life-Changing Burritos

Then, tucking in the top of the tortilla, start rolling towards the end.  Try to get it as tight as possible.

Life-Changing Burritos

Make sure your ends are tucked in and slide the rolled tortilla to one side of your aluminum foil.

Life-Changing Burritos

Tightly roll the burrito up in the foil, and twist off the ends when you are finished, to hold everything together.  That is your burrito, all wrapped up.  We had enough ingredients to make seven of these puppies, and we tossed a few in the fridge for a later meal, and a few in the oven for about ten minutes to heat up a bit.

Life-Changing Burritos

To eat, just peel off some of the foil and you are all set. Take a bite.

Life-Changing Burritos

This is one of the burritos the next day, cut in half.  Look at that lovely combination of ingredients!

Life-Changing Burritos

Ivy Vanilla Wedding Cake – Day Two

First thing to do this morning is take the white chocolate frosting and the fondant out of the fridge to come to room temperature.  Don’t forget!

Right.  So when we left off, we had just set the gum paste ivy leaves out to dry overnight. Fortunately for me, they didn’t completely dry, so I was able to cut tiny sticks of floral wire and stick them into each leaf as a stem.  Had I known how rigid and brittle dried gum paste got, I would have done this the day before, when the leaves were still flexible.  Also, the thicker the leaf, the better it worked.My plan was to wrap these new “stems” around my green licorice whip “vine” and then drape the whole thing over the cake.Of course the leaves were pretty heavy and the licorice was pretty delicate so of course the vine broke.In any case, I got all the stems in and flipped the leaves over to dry completely.My next idea was to simply drape the licorice vine over the cake, pin it in place with a few concealed floral wire “staples”, and then stick the leaves directly into the cake in strategic places.  Of course I wouldn’t get to see if my plan worked until the following day.  The tension starts to build.The worst part of decorating the cake today was that I had a medical procedure scheduled for late in the afternoon, and I wasn’t allowed to EAT ANYTHING until after it was over.  You try icing a cake and not licking your fingers.

Now, when you make a tiered cake you need to give it support so it doesn’t sag.  Not to mention the fact that a three-tiered cake is tremendously heavy, so everything has to be strong and secure.

The entire cake rests on a cake board, which you can buy at any cake or craft store.  My lovely father decided he’d make one for me out of plywood, as a cake board is essentially just a board wrapped in foil.  In addition, you need cake circles, essentially made of cardboard (though my dad used matting board here) that are exactly the size of each of your upper tiers.  They will go on the bottom of each upper tier so that you can move them around and so cutting one tier won’t result in cutting all three tiers.  It’s really amazing the amount of hidden structural material goes into a wedding cake.Now, you want to keep your cake as cold as possible, so I worked in shifts, putting each tier back into the fridge when I was finished each step.  A cold cake is stiffer and less likely to come apart on you.  Of course, the fridge I was using was downstairs in the basement and I had to negotiate several hallways in between.  As the cakes became more and more complete, my mantra became “Don’t drop it don’t drop it don’t drop it …”

First you need to level the tops of your tiers.  Use a long serrated knife to remove the round bit at the top.  To ensure a perfectly smooth top, I flipped my tiers over so the natural “pan line” was the one that showed.  I had to work super hard to get the 16″ tier to come out level.

Use some royal icing or other stiff-drying frosting (which I also purchased) and plaster some on the surface of each cake circle.  This will be your glue, and will prevent the tier from sliding off when you move the cake.I did the same with the cake board, and placed the tiers on their respective surfaces, cut-side down.Then I wrapped up the ones I wasn’t using and put them back in the fridge. Don’t drop it don’t drop it don’t drop it …I’m sure I’ve spoken to you before on the importance of a crumb coat.  It is what it sounds like: a coating of icing designed to freeze all your crumbs into place so they don’t show up on the surface of the finished cake.  So, smooth a thin layer of white chocolate frosting all over the cake and try to keep it as even as possible.  Then chuck the tiers back in the fridge for at least fifteen minutes so the frosting can firm up.

I found the smaller tiers easier to decorate if I placed them on an upside-down plate on top of an inverted bowl.  Of course, if you have a rotating cake stand then you’re ahead of the game.And a handy tool like a fondant smoother is useful when you are trying to make your sides uniform.  And on your second coat of icing, be generous.  This stuff can hide many mistakes.  Chuck the tiers in the fridge again after the second coat.  Don’t drop it don’t drop it don’t drop it …As I mentioned earlier, this cake is no lightweight.  In order to avoid a Leaning Tower of Pisa thing, we have to provide adequate structural support for each tier on top of the bottom one.  We are going to create hidden support columns for our tiers, putting them inside the cake itself.  This next part is a little weird, but you gotta trust me on this one.

Enter the Slurpee straw.Let’s ignore the fact that I had to purchase a Slurpee in order to make off with all these straws.  The key to Slurpee straws is that they’re incredibly wide, which makes your support column all the more strong.  Another plus is that they come in lurid colours, so you are unlikely to mistake them for the substance of the cake and consume them by accident.

So, you take your bottom tier.  Rest the edges of the pan of the next tier on top for a second, just to leave a wee mark in the frosting where you want the next tier to go. 

Insert the straw into the centre of your guideline, pointing straight down, press it all the way to the bottom, and remove it.  You will remove a tiny plug of cake while you do this, but don’t worry, you’re going to put it back. 

When you pull it out you can see the line that the frosting has left on the straw.  Cut the straw at this point, then cut four more sections of straw to match this length.

Return the centre column to its original position in the cake and insert the other four columns around the centre one to evenly distribute the weight.  Repeat this straw process for every tier except the top one and put the cakes carefully back in the fridge.Now we are going to start on our fondant embellishments.  Slice off some fondant with a sharp knife and knead it with your hands to make it more malleable.I used a small amount of the icing colour we used to make the ivy leaves to create this pale green.I rolled it flat and used a pizza cutter and a metal ruler to cut long strips of the stuff.These are going to form bands at the bottom of each tier.Working carefully, so as not to stretch the fondant strip, place them along the bottom of each tier.  Because my fondant was a little on the dry side, I found it easier in the end to cut the fondant strips into sections and handle them with a fondant smoother.  You can see that I’m wearing gloves in this shot to avoid putting fingerprints on the fondant.

I used the smoother to provide support as I pressed the strip portions onto the cake.

Then, with a soft paintbrush, I gently brushed on some green lustre dust for texture.Not bad, not bad.  You won’t notice all the imperfections from a distance, once the ivy is in place.Next I rolled out some white fondant and got out the French curvesI traced the edges with a sharp pointed knife and pulled away the excess fondant.

Then ever so carefully transferred the shapes to the cake.  I used the biggest curves on the bottom tier.On the top two tiers I used used the smaller curve.Now put those all in the fridge and leave them there.  More on Monday, when we put this baby together!

Sweet Texas Pork Ribs

Obviously it’s been a sweet week with Rusty and Mags in town.  We’ve even had some awesome weather, and what better way to celebrate summer than ribs on the back porch?  It’s become kind of a yearly tradition with us and The People Downstairs, so we took advantage of a sunny day last Friday and had ourselves some ribs.  The sauce here makes enough for four racks of ribs and comes from an old LCBO magazine.

We got these ribs from Costco, and it’s a hit and miss process.  These ones were a very strange cut, and probably tougher than we would normally prefer.  But ribs is ribs. Preheat your oven to 350°F.

First you need to remove the membrane across the bone.  This will help to tenderize your meat and will ease the absorption of juices.  It also facilitates the removal of excess fat, and boy, did these ribs ever need some trimming!  Use a paper towel to help you grip the membrane on the bone side.  Then, with steady pressure, slowly pull it off.  It’s simple.After you’ve removed the membrane, place the ribs bone-side-up in a baking dish.Now you concoct the sauce.  In a bowl, mix together the following:

1/2 cup soy sauce

3 garlic cloves (or 4 teaspoons minced garlic)

2 bay leaves

3 tablespoons maple syrup

1 tablespoon chili sauce

2/3 cup beer (the darker the better)

1/2 teaspoon ground pepper

1 tablespoon Worcestershire sauce

1 tablespoon green Tabasco sauce

2/3 cup barbecue sauce

1 tablespoon rice vinegar

Pour that stuff all over your ribs.

Use a pastry brush to coat the ribs evenly.

Cover with aluminum foil and bake for an hour.  Remove the aluminum foil and bake for a further 30 minutes to thicken the sauce.

Remove the ribs from the oven. 

Place the ribs on your serving plate and cut to serving size (you might want to keep it in a low oven to keep the ribs warm). You can also toss them on the barbecue for a few minutes to caramelize the juices on them.   Drain the  sauce from the pan into a gravy separator to get rid of the fat.  Discard the bay leaves.  Then cook the sauce in a saucepan for a further ten minutes until it is reduced and thickened.  You can add corn starch to push this along if you need to.

Drizzle the hot thick sauce over your ribs and serve. 

We had ours with creamy garlic mashed potatoes and a fresh green salad.

Christmas Fruit Cakes

My mother calls them fruit cakes.  My father calls them Christmas cakes.  Or it’s the other way around.  I can’t keep track of those two.

Nevertheless, before every holiday season, my dad makes between two and three dozen of them to give away to all their family and friends.  Being the stalwart Scots that we are, we fight over who deserves a whole cake and who gets only a slice.

You can’t be ambivalent about fruit cake.  You either love it or you hate it.  And I can promise you that this is not the leaden, dry, horribly frosted version that you hate.  This is the ooey-gooey sticky sweet and moist brick of goodness that you will LOVE.  Guaranteed.

Keep in mind that this recipe is easy to make.  Especially if you make several dozen.  However, you have to start your preparations the day before and baking time can take up to four hours for large cakes.  Not to mention that you can’t eat them right away — these cakes need a spell before they’re good to eat.  These ones here are from back in 2007.  They should be super excellent now.

Day the First:

In a large bowl, measure in 1 1/2 cups whole blanched almonds (blanched is key because the skin is bitter), 2 cups dark raisins, 2 cups light raisins, 1 cup currants, 2 1/2 cups chopped dates, and 2 1/2 cups candied citron peel.  My dad says that when making several batches it helps to bring a measuring cup to the health food or bulk store and measure what you need right into the bag so you don’t have to worry about having any leftover.

Drain a 12oz (340g) bottle of maraschino cherries, saving the juice.  The cherries should measure about 1 1/4 cups.  Add them to the mixture in the bowl.

Pour in 1/2 cup brandy (or fruit juice, if you prefer) and give it a stir.  Cover the bowl with plastic wrap and leave it at room temperature overnight.

In a heavy saucepan, simmer one 19oz (540mL) can crushed pineapple with 2 cups granulated sugar.  Cook, uncovered, until thickened, about 45 minutes.  Make sure to stir frequently. 

By the end, the sugary pineapple should measure 2 1/2 cups.

Let the pineapple cool, and then stir in 1/2 cup reserved cherry juice.  Stir in as well 1 cup strawberry jam (the more all-natural, the better).  This doesn’t necessarily need to be done the day before, but it has to be cool before you add it to the cake batter.

Day the Second:

Preheat your oven to 275°F.  Butter your pans (we use four regular-sized loaf pans) and line them with parchment paper.The knob on our oven is positioned badly so we take the knob off in order not to hit it accidentally.  And yes, we probably should clean our oven more often.

In a large measuring cup, whisk together 4 cups all-purpose flour, 2 teaspoons ground cinnamon, 1/2 teaspoon ground cloves, 1/2 teaspoon allspice, 1 teaspoon salt, and 1 1/2 teaspoons baking soda.

Add about a cup of the flour mixture to the fruit and nuts and toss until the bits are all covered.  This will prevent them from sinking to the bottom when you mix them in the batter.  Set the rest of the flour aside for now. 

In another large mixing bowl, cream together  2 1/4 cups granulated sugar with 1 pound (2 cups) butter.

Beat in 12 eggs (yes, 12!), two at a time.  This is less of a pain in the butt if you have someone crack the eggs while someone else runs the mixer.

Take your flour mixture and your pineapple mixture and, alternating them, stir them into the butter and egg mix.  Make 3 dry and 2 liquid additions and stir it all in well. 

Your batter will be a lovely pink colour once you’re all ready.

Pour over your flour-coated fruit and nuts and mix well. 

Pour into your pans and chuck them in the oven.

Place a shallow pan of water on the bottom rack of the oven to keep the cakes moist.

Bake in your oven for 3 1/2 to 4 hours, for the larger cakes.  Smaller cakes might be done in about 3 hours. If you have a fast oven you might want to lay a sheet of aluminum foil loosely over the top to prevent them from drying out in the last hour or so.

The cakes should be fairly firm to the touch in the centre and should test clean with a toothpick.  Once you’ve removed the cakes from the oven let them cool in the pans for about five minutes. 

Then remove the cakes from the pans and peel off the paper.  Let the cakes cool completely.

Now you do your wrapping.

Lay a sheet of aluminum foil on your work surface.  Overlay that with some plastic wrap.

And some cheesecloth.

Plop your cake in the centre.

Baste it generously, all over, with rum or brandy (if you don’t baste you will need to keep the cakes in the refrigerator).

Wrap the cheesecloth tightly around the cake.  Then the plastic wrap.  Then the aluminum foil.

As the cloth dries out, give your cakes a periodic dousing with rum or brandy.  Don’t freeze the cakes or the flavours won’t mellow properly.

The cakes will make good eating in about three weeks, just in time for the holidays.

Monolithic Date Squares

The Pie and I spent several long hot days in the kitchen, doing the prep-work for my brother’s wedding celebration.  One of the confections we produced were some rich, tall date squares.

Interesting fact for you: date squares are a Canadian invention.  I kid you not.  If you look up date squares in some of the older cookbooks you’ll find it under “matrimonial date squares”.  If anyone knows the reason for this, I’d love to hear it.

As a bit of a preparation for this, zest an orange.

While you’re at it get the juice from it as well.

And take 1/4 cup of hazelnuts and pulse them in a food processor until you have some lovely crumbs.

Preheat your oven to 350°F.

Now you start with the filling.

In a saucepan, stir together 2 cups water with 1 package (375g) pitted dates, 3/4 cup granulated sugar, and the juice from your orange, about 4 tablespoons.  Let that stand for about 30 minutes.

Afterwards, bring it to a boil, then reduce the heat to medium and boil gently, stirring often, until it’s thickened.  This will take about ten minutes.  And when it bubbles it will more resemble swamp goo than anything else.  Let it cool.

In a large bowl, whisk together 2 1/2 cups rolled oats, 1 1/4 cups flour, and 1 cup packed brown sugar.

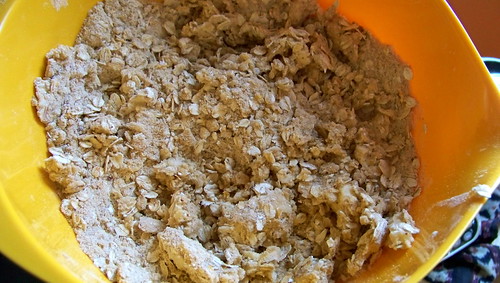
Cut in 1 cup cold cubed butter.  Keep going until the mixture is in coarse crumbs.

Press half (or slightly more than half) the oat mixture evenly into an 8-inch (2L) square pan lined with parchment paper.

Spread the mixture with your date goo.

Add the hazelnuts to your remaining oat mixture and toss well.

Pile the remaining mixture on top of the date goo and press it down lightly.

Bake for about 45 minutes, until golden brown on top, and let it cool before cutting into squares.

If you keep it covered it will last for weeks.  You can also freeze the squares before baking, wrapped in aluminum foil.

“Mexican” Rice

I’m not sure how truly “authentic” this particular recipe is, but it makes for a good side for our enchiladas.  The Pie found this recipe on the internet in preparation for a potluck, I think.  It’s very easy, and it makes you look like you know what you’re doing.

Preheat your oven to 350°F.

Mince a small onion and chuck it in a pan with about two tablespoons vegetable oil and two teaspoons minced garlic and sauté them until translucent.

Toss in one teaspoon chili powder and one tablespoon ground cumin and stir it around.

Pour in one cup uncooked rice.  Pour in two cups chicken stock.  Then add about 1/4 cup of spaghetti or other tomato sauce.

Bring it to a boil.

Pour the whole thing into a casserole dish and stir it to evenly distribute the rice. 

Cover it with aluminum foil and bake it for about 35-40 minutes, until the stock is all absorbed and the rice is tender.

Let it rest for about five minutes before serving.  It’s best to transfer it to a nice bowl so you can stir everything up again.

We had it with enchiladas.  Mmm.