When in doubt, make soup!

Beef and Cabbage Stew 15

My parents are down in Florida and I’m looking after the house while they’re gone. This entailed cleaning out the fridge after they left, and so I arrived home with this oddment of groceries: 1 small zucchini, 4 wilted green onions, 2 baby bok choi, 9 multicoloured carrots, half a large sweet onion, half a large rutabaga, and half a large Savoy cabbage.

Beef and Cabbage Stew 1

Welp, that looks like a soup to me. Fortunately I had some stewing beef in the freezer which I chucked in the sink to defrost. Then I got to chopping.

Beef and Cabbage Stew 3

I also chopped up 1 head of garlic, and sautéed it with the onions in a large stockpot with a drop of olive oil until they were soft and sweet.

Beef and Cabbage Stew 4

Remember when cutting up rutabagas to be very careful. Slice off the top and bottom first so you have a flat surface to work on before you go after the skin, as it will be tough, especially if it’s been waxed.

Beef and Cabbage Stew 5

I added all the other chopped veg to the pot. I only scrubbed the carrots, didn’t peel them. All that vitamin-y goodness is in the skin and these are such tender carrots it seemed like a waste to remove the skin.

Beef and Cabbage Stew 6

Make sure to dry your beef before you brown it. It will make browning way quicker.

Beef and Cabbage Stew 7

I also like to dredge it in flour for a nice crust, and the flour will help thicken the stew as it cooks. You can use rice flour for a gluten-free option.

Beef and Cabbage Stew 8

Brown the meat until it has a nice seared edge all the way around.

Beef and Cabbage Stew 9

Then you can chuck that in the pot, too. I added about 8 cups water and two mini cups of concentrated beef bouillon, but go with whatever floats your boat.

Beef and Cabbage Stew 10

Give it a stir and set it to simmer for about 30-45 minutes, until the rutabagas are soft when you smush them with a spoon.

Beef and Cabbage Stew 11

I added in a pinch of ground nutmeg and cloves, as well as a few teaspoons of dried oregano. Add salt and pepper as well, if you like.

Beef and Cabbage Stew 12

To combat the bitterness of the cabbage I also added in a few tablespoons each of maple syrup and rice vinegar (it sounds weird, I know, but it works). You can also use cider vinegar.

Beef and Cabbage Stew 13

My scrumptious savoury stew!

Beef and Cabbage Stew 14

I shoved it into large freezer bags that I froze flat for easy storage. I can’t wait to haul one of these babies out in the dead of winter for some comfort food!

Beef and Cabbage Stew 17

Made-up Macaroni Salad

Made-Up Macaroni Salad 11

Pasta salads are ideal for summer parties.  You can make them ahead of time and you don’t have to worry about heating up the house.  This one came together on the fly, as most of them tend to do.  I stuck with a reddish theme and it worked out.

Made-Up Macaroni Salad 2

Start with a bowl of cooked pasta.  I used cavatappi, or Scoobi-do pasta.

Made-Up Macaroni Salad 1

Chucked in a diced onion, tomatoes, garlic, red peppers, and green olives.

Made-Up Macaroni Salad 3

Then some fresh oregano, chives, and some cubed feta.

Made-Up Macaroni Salad 4

Then I decided to throw in a few bocconcini as well.  I also tossed in some tandoori spice and some Hungarian paprika for kick.

Made-Up Macaroni Salad 5

When you make a pasta salad, make a lot of dressing to go with it, because the pasta will absorb so much extra liquid.  The base of this one was olive oil, maple syrup, Tabasco, and rice vinegar.

Made-Up Macaroni Salad 6

As I said, make a lot.

Made-Up Macaroni Salad 7

Put half in now and then the other half right before you serve it.

Made-Up Macaroni Salad 8

TADA.

Made-Up Macaroni Salad 9

There was enough left over that I added some pasta sauce to it, topped it with cheese, and baked it into a casserole afterwards.  Waste not!

Made-Up Macaroni Salad 10

Petite Piglet Patties

Petite Piglet Patties 14

I was going to call these things “savoury sausage sliders,” or even “summer savoury sausage sliders,” but then the Pie suggested the above title and for some reason I started to laugh so hard I needed a tissue and had to sit down.  And then he suggested that, since we used hot italian sausage meat, we call them “picante petite piglet patties” and I may have told him to shut up at that point.

Petite Piglet Patties 13

Anyway.  These are sliders, if you hadn’t gathered that by now.  I picked up a package of ground sausage meat the other day and this is what we did with it.  Basic ingredients are about 1lb ground pork, 1 egg, half a white onion, and some fresh summer savoury.

Petite Piglet Patties 2

Mince up the savoury and the onion and chuck them in a bowl with the sausage meat and the egg.  Season with salt and pepper.

Petite Piglet Patties 3

Give that a good stir with a spoon and then mix in about 1/2 cup panko bread crumbs (or whatever kind of bread crumbs you have on hand).

Petite Piglet Patties 4

Form the goo into balls slightly larger than a golf ball but smaller than a cricket ball and flatten them into patties (I ended up with eleven patties).

Petite Piglet Patties 7

Fry those suckers up.  For some reason the light was such in my kitchen on this particular afternoon that it took us twelve tries (the Pie tried to help) of blurry patty photos before I gave up and used flash.

Petite Piglet Patties 11

While that’s on the go, why don’t you have yourself a salad, too?  Here we have a mixture of baby spinach, a small hunk of plain goat’s cheese (chevre), a handful of sliced almonds, another handful of dried cranberries, and a diced ripe pear.

Petite Piglet Patties 9

Then the dressing is 3 equal parts vegetable oil (I used almond, because we’re trying to use it up), rice vinegar, and orange juice).

Petite Piglet Patties 10

Toss it up!

Petite Piglet Patties 18

Top your sliders with whatever floats your boat.  I used mayo, tomatoes, avocado, and spinach.  The Pie voted for barbecue sauce and cheese.  We had them on some picnic buns I grabbed in the bakery section.

Petite Piglet Patties 8

All in all, a good summer meal. Don’t forget to eat your veggies! You see them peeking at you in the background? Don’t forget them!

Petite Piglet Patties 16

Chicken Orzo Salad

Chicken Orzo Salad 10

The Pie’s parents, Mrs. Nice and Papa John, are in town on a visit for the Pie’s graduation (B.Sc. Honours in Geography and Computer Science, booyah), so I get a good number of opportunities to cook new things that I think might appeal to them.  This one I made with Mrs. Nice in mind, and reminds me somewhat of that amazing orzo salad we had at Ferryland a few years ago.

Chicken Orzo Salad 5

Chicken Orzo Salad 2

Prep your vegetables.  Dice up half a large red onion, 1 red pepper, and half a large cucumber (I cut out the seeds).  I also halved 250g grape tomatoes and defrosted 1 cup each frozen corn and frozen peas.

Chicken Orzo Salad 3

Prep your dressing.  In a small jar (or other container with a lid), dump 1 tablespoon minced garlic, 2 teaspoons dried savoury (or basil, or oregano, or whatever you want), 2 tablespoons lemon juice, 2 tablespoons honey, 3 tablespoons rice vinegar, and 3 tablespoons vegetable oil.

Chicken Orzo Salad 7

Close the lid tightly and give that a shake.  Let it sit for a while.

Chicken Orzo Salad 8

Fill a large saucepan with about 4L of water and salt it generously.  Put it on to boil.  When it’s boiling, remove the lid, turn the heat down a bit, and pour in 450g orzo pasta.

Chicken Orzo Salad 6

While that’s on the go, cut up about 3 boneless skinless chicken breasts into small cubes and  pitch those in a frying pan or skillet with a bit of vegetable oil.

Chicken Orzo Salad 9

Sauté those until fully cooked and browned on the outside.  Remove from the heat.

Chicken Orzo Salad 14

Drain your orzo and plop it in a big bowl. This bowl was not big enough.

Chicken Orzo Salad 20

My peas and corn were still a little frozen so I added them to the still-hot chicken pan to let them thaw properly.

Chicken Orzo Salad 17

Then I chucked in the rest of the vegetables and stirred that around.

Chicken Orzo Salad 18

Then you just add your veg to your pasta.  Give that a good stir.

Chicken Orzo Salad 21

Give your dressing another shake and toss that with all the rest of your salad (don’t worry about the amount — it will be absorbed into the pasta) and serve warm or cold.

Chicken Orzo Salad 22

Mean Slaw

Happy belated birthdays to Thidz and Stef!

Mean Slaw

I have never made coleslaw before in my life.  In fact, I don’t even really like coleslaw.  For this, though, I will make an exception.  And I made all this without even consulting a recipe!  I guess a lifetime of watching my mother cobble together a slaw left a lasting impression.  This particular combination offers a bit of a snappy uptake on the traditional Southern slaw, and I hope you like it. If I do say so myself, I make a mean slaw.  Remember that a slaw is always best the next day, after the flavours have had a chance to intermix.  Also, if you say slaw a lot it starts to sound weird in your head.  Slaw.  Slaw.  Slaw, slaw slaw.  Slaw.  What a weird-looking word.

Before we begin, I would like to introduce you to my cabbage.  This was the smallest one I could find in the produce section, and, to give you a size comparison, that is a two-litre kettle sitting next to it.

Mean Slaw

Cabbage is the basis of every slaw.  I am not too fond of the bitterness of red cabbage, though I know it adds a bit of colour to the salad.  Nevertheless, I’m sticking with the green one.  If you have a food processor, then this salad is a snap to prepare.  I like to do certain things by hand, however, and me and my stupid sharp knife get along real well.  You’ll want to hack off a hunk of your cabbage and then start slicing off bits real nice and thin.

Mean Slaw

If they are too long and dangly for your liking, feel free to cut the little cabbage strips in half before tossing them in a large bowl.

Mean Slaw

I also have some fennel here, which makes for a nice aniseed-y aftertaste in the salad.

Mean Slaw

Don’t worry too much about the green bits — focus on cutting up the white parts really thin and chuck those in with the cabbage.  Don’t add too much, or your slaw will just taste like liquorice.

Mean Slaw

Next, I’m going to grate a large carrot and add that in for sweetness and colour.

Mean Slaw

Some sweet red peppers.

Mean Slaw

Feel free to add ones that are a little spicy, but not too spicy.

Mean Slaw

And some red onion.  Give that a toss.

Mean Slaw

Now you make up your dressing.  I think coleslaw dressings are kind of like curries — they need a lot of ingredients in order to encapsulate all the important flavours a slaw needs.  In this one I have olive oil, rice vinegar, dijon mustard, minced garlic, brown sugar, celery seed, and mustard seed.  You can replace the rice vinegar with white vinegar if you want something a little stronger.  The Pie is not a huge fan of heavy vinegar usage which is why I take the milder rice vinegar more often than not.

Mean Slaw

I poured all that into a plastic container with a lid and gave it a good shake.

Mean Slaw

Now your salad is all ready to be dressed.  Pour on the dressing in stages and toss to coat.  You want enough dressing so you get some pooling at the bottom.  It will be absorbed into the salad while it sits.

Mean Slaw

Seal your tossed and dressed salad in a container and refrigerate overnight.

Mean Slaw

Serve with burgers and fries, or any other summery food you can think of.

Mean Slaw

Peanut Butter Spaghetti

This recipe is actually called something like “Whole Wheat Spaghetti with Snow Peas and Carrots”, but the Pie and I have made it so many times that our version is better.  It came out of an Every Day Food from eons ago, and it’s kind of like a lazy man’s pad thai.

We made it for Kª one night when Kº was off gallivanting in Russia, leaving her alone with Il Principe and the Incredibly Little Hulk.  Served with our crispy won ton crackers, it was a great and easy meal.  Even Il Principe approved.

Start some water a-boilin’.  Like enough to cook about 8-10oz of whole wheat spaghetti (to serve 4).  Then you can, you know, cook that there spaghetti for about ten minutes, or according to your package instructions.

While you are waiting for the water to boil and for your pasta to cook, prepare the following mis en place:

3 medium carrots, shaved with peeler

8oz snow peas, tough strings removed

1 (300g) package of firm tofu, cut into small cubes (if you’re not a fan of tofu it’s conceivable that you could replace this with thin strips of cooked chicken or steak)

Prepare as well this wee bowl of sauce:

5 tablespoons organic peanut butter (smooth or crunchy, it’s your choice)

2 tablespoons brown sugar

2 teaspoons rice vinegar

2 teaspoons soy sauce

2 teaspoons lemon juice

2 teaspoons sweet chili sauce

Stir that all together.  If you can’t get the peanut butter to go, don’t worry, the heat from the pasta will melt it.

When your pasta is cooked, scoop out about a cup of the pasta water.  You may or may not need it later.  I like to keep you guessing.

Drop all the vegetables and tofu into the pot with the pasta and let sit in the boiling water for 2 minutes before draining the whole thing.

Toss the pasta to make sure everything is mixed around.

Pour in your peanut butter sauce and toss to coat.  If the sauce is too thick and won’t coat properly, pour in some of the reserved pasta water to thin it out a bit.

Garnish with crushed peanuts and serve.  Fantastic cold the next day.

Sweet Texas Pork Ribs

Obviously it’s been a sweet week with Rusty and Mags in town.  We’ve even had some awesome weather, and what better way to celebrate summer than ribs on the back porch?  It’s become kind of a yearly tradition with us and The People Downstairs, so we took advantage of a sunny day last Friday and had ourselves some ribs.  The sauce here makes enough for four racks of ribs and comes from an old LCBO magazine.

We got these ribs from Costco, and it’s a hit and miss process.  These ones were a very strange cut, and probably tougher than we would normally prefer.  But ribs is ribs. Preheat your oven to 350°F.

First you need to remove the membrane across the bone.  This will help to tenderize your meat and will ease the absorption of juices.  It also facilitates the removal of excess fat, and boy, did these ribs ever need some trimming!  Use a paper towel to help you grip the membrane on the bone side.  Then, with steady pressure, slowly pull it off.  It’s simple.After you’ve removed the membrane, place the ribs bone-side-up in a baking dish.Now you concoct the sauce.  In a bowl, mix together the following:

1/2 cup soy sauce

3 garlic cloves (or 4 teaspoons minced garlic)

2 bay leaves

3 tablespoons maple syrup

1 tablespoon chili sauce

2/3 cup beer (the darker the better)

1/2 teaspoon ground pepper

1 tablespoon Worcestershire sauce

1 tablespoon green Tabasco sauce

2/3 cup barbecue sauce

1 tablespoon rice vinegar

Pour that stuff all over your ribs.

Use a pastry brush to coat the ribs evenly.

Cover with aluminum foil and bake for an hour.  Remove the aluminum foil and bake for a further 30 minutes to thicken the sauce.

Remove the ribs from the oven. 

Place the ribs on your serving plate and cut to serving size (you might want to keep it in a low oven to keep the ribs warm). You can also toss them on the barbecue for a few minutes to caramelize the juices on them.   Drain the  sauce from the pan into a gravy separator to get rid of the fat.  Discard the bay leaves.  Then cook the sauce in a saucepan for a further ten minutes until it is reduced and thickened.  You can add corn starch to push this along if you need to.

Drizzle the hot thick sauce over your ribs and serve. 

We had ours with creamy garlic mashed potatoes and a fresh green salad.

Japanesey Dinner with Doodle

Hooray!  It’s our 200th post!

I am fortunate to have three best friends (and yes, the superlative applies to all of them).  You’ve already met Cait and Chel, and now I would like to introduce you to Doodle (she’s not that fond of the nickname but she used to call me Poo so she’ll just have to suffer).

When she was home from Chicago for Christmas, she got her mother, who is Japanese, to teach her how to make gyoza, a crispy-fried dumpling, basically the Japanese version of a pot sticker.  With her new-found knowledge she came over to cook dinner for my parents and the Pie and myself.  And we were all so very glad she did.

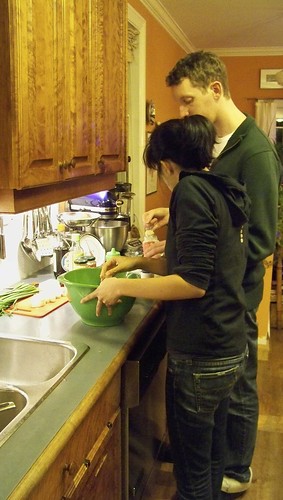
For a very short person and a very tall person, Doodle and the Pie make a good cooking team.

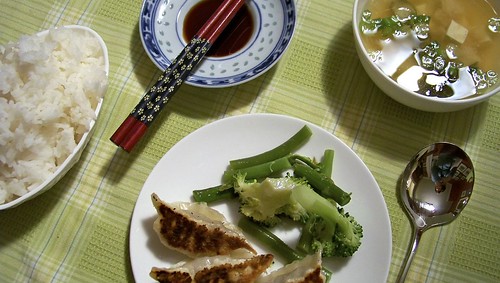
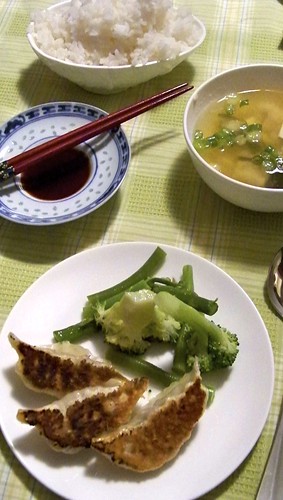
To accompany the gyoza, Doodle decided on a simple green salad and miso soup, with rice on the side.

For the soup:

I’m sure you remember my earlier attempt at miso soup with an Atlantic flavour.  I can assure you that this is the real deal.

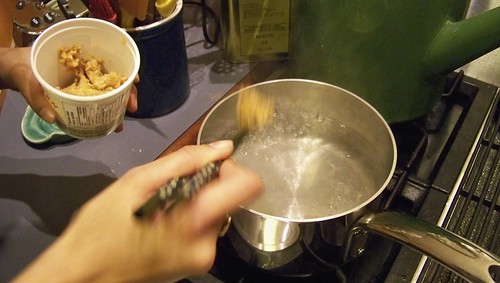
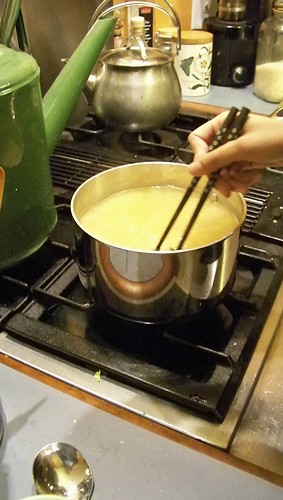
Start a pot of water boiling, with as much liquid as you will need to feed all your hungry mouths.

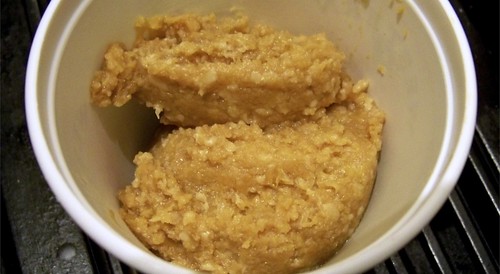
Grab yourself some miso.  This particular miso was made BY HAND by Doodle’s mother, so it was extra good.

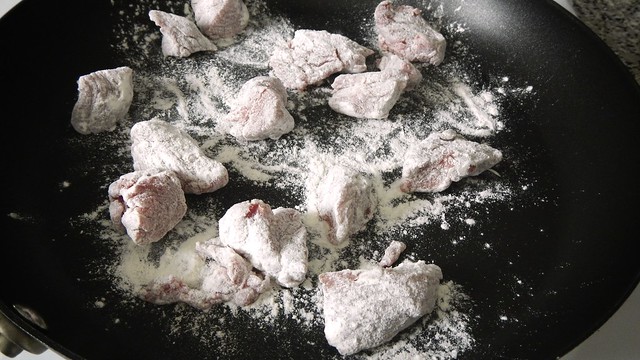
Add the miso bit by bit to the boiling water, until you have achieved the desired consistency and taste. 

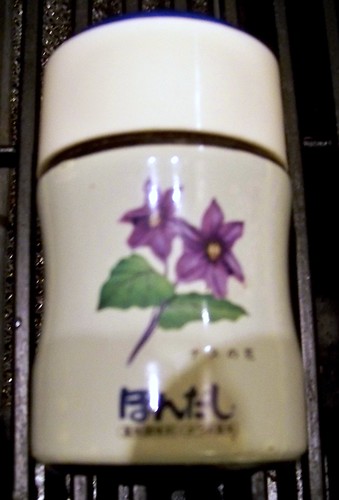
An important ingredient is dashi, a sort of fish powder.  Sorry my picture here is blurry.  Add a couple of shakes of that.

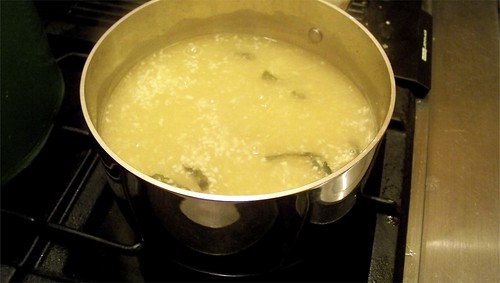
And some seaweed.   It’s amazing, considering what’s in this particular soup, that the Pie drank his all up in a jiffy.

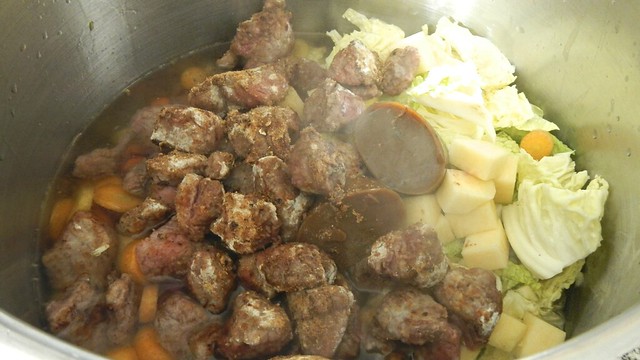
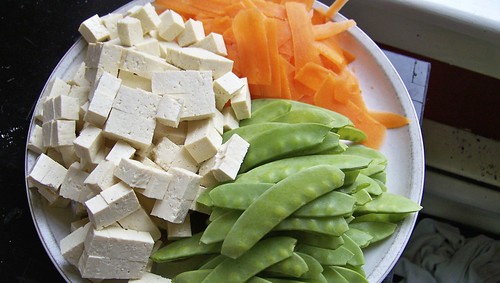
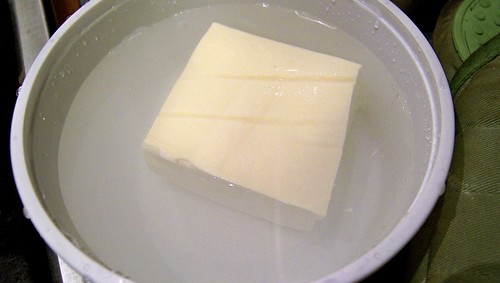
Cube some tofu and add that in as well.

Doodle informs me that you can keep whatever tofu you don’t use right away in your refrigerator, as long as it’s submerged in clean water, which you will need to replace every day.  The more you know.

Keep adding things until it tastes good to you.

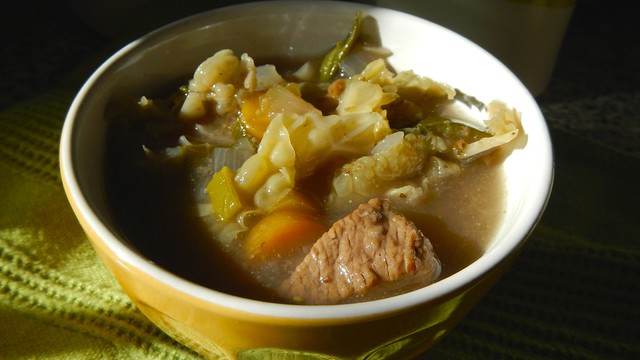
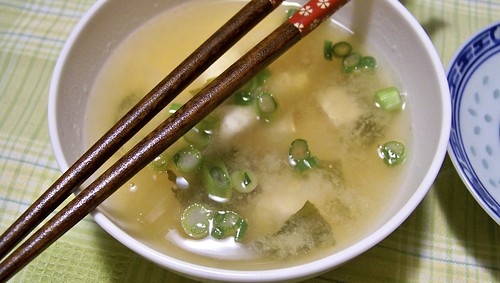
When you are ready to serve, pour your soup into bowls that will fit easily into your hand (miso soup is a good drinking soup) and garnish with chopped green onion.

For the salad:

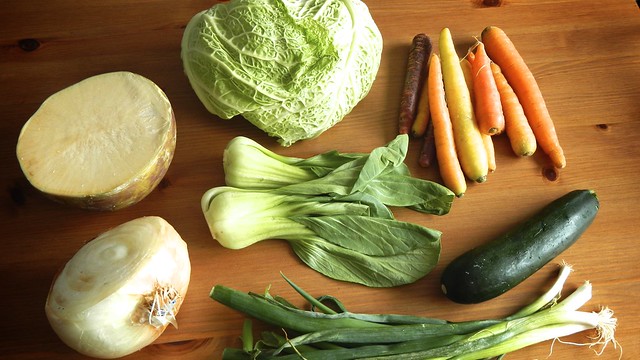
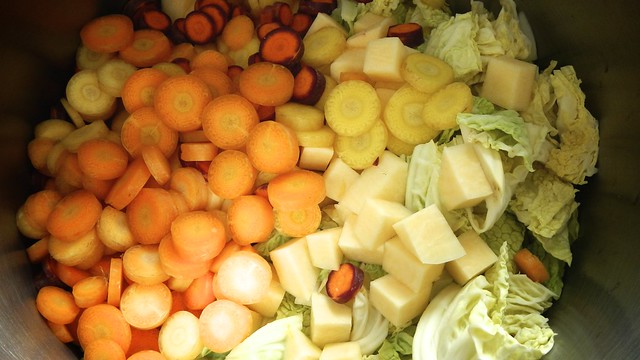
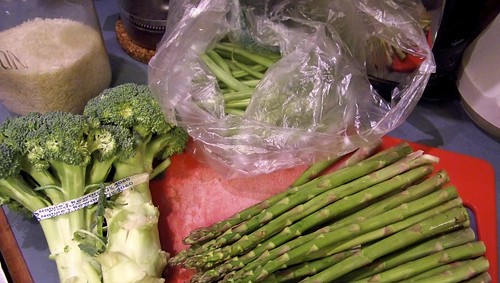
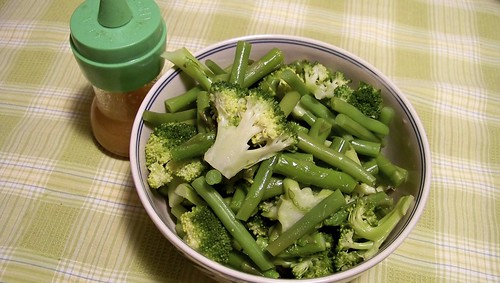
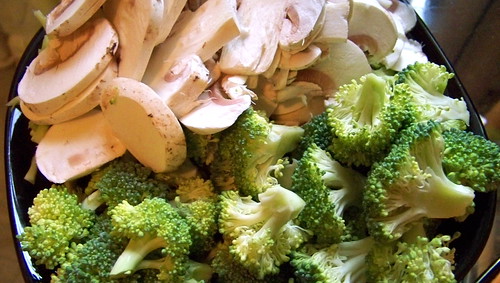
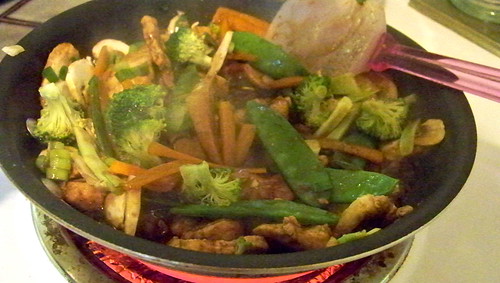
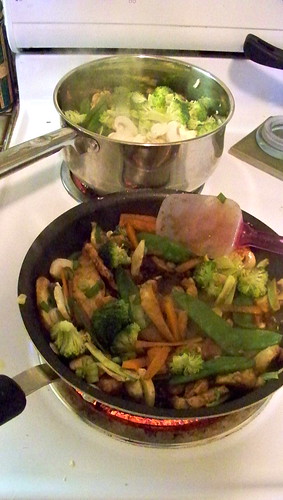
On Doodle’s instructions I gathered equal amounts of broccoli, asparagus, and green beans, and chopped them into pieces manageable by chopstick.

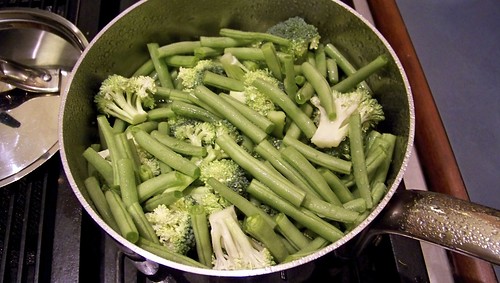
Gently steam your vegetables in a pot of simmering water.

Drain and rinse the vegetables in cold water.

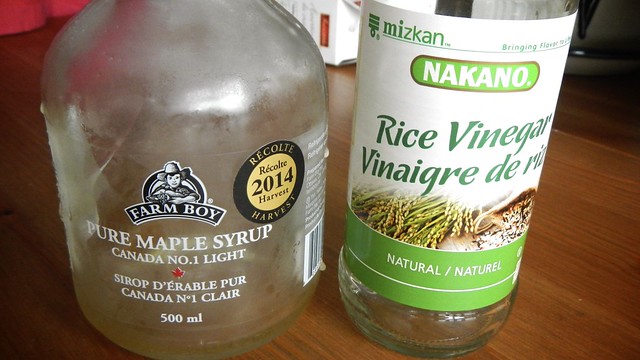
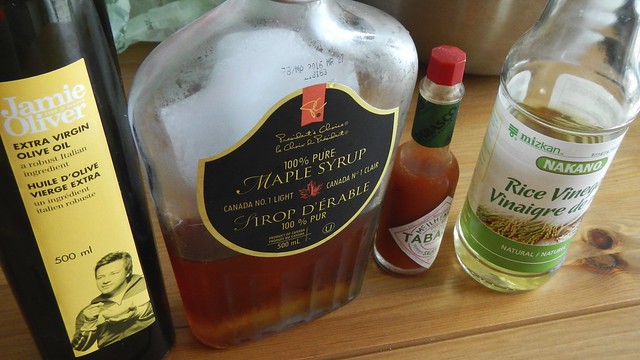
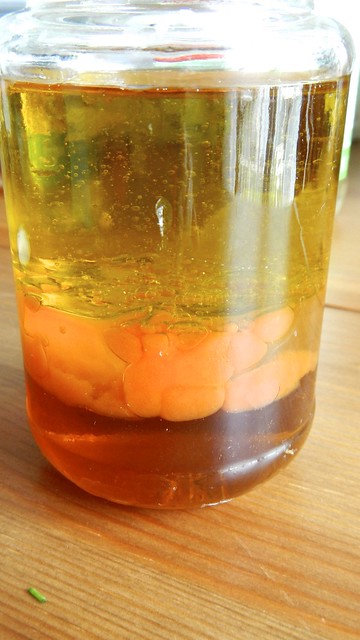
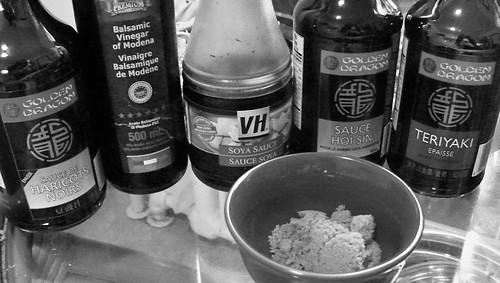
Dress with a mixture of soy sauce (Doodle’s mom prefers the sushi soy sauce for its sweetness), rice vinegar, sesame oil, and garlic powder, to taste.

For the dumplings:

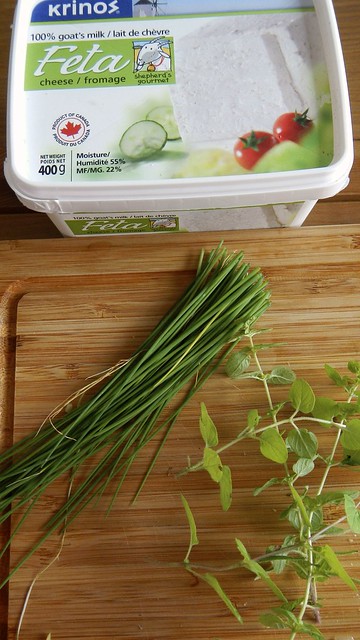
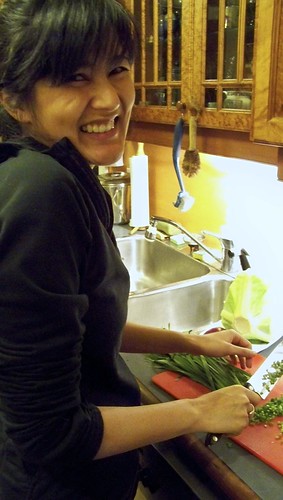
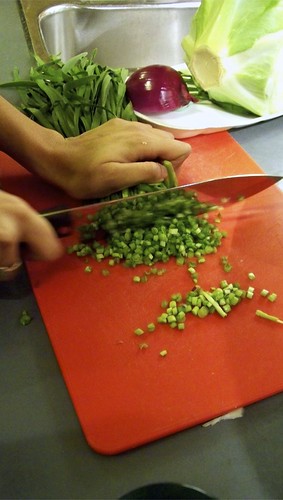
This is Doodle chopping up Asian chives.  I’m sure any kind of chive is good.

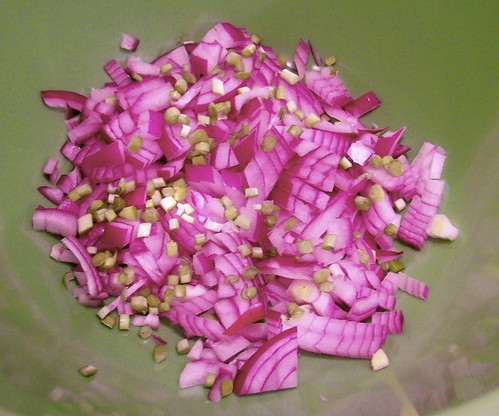
She then added them to about half a red onion, chopped finely, in a bowl.

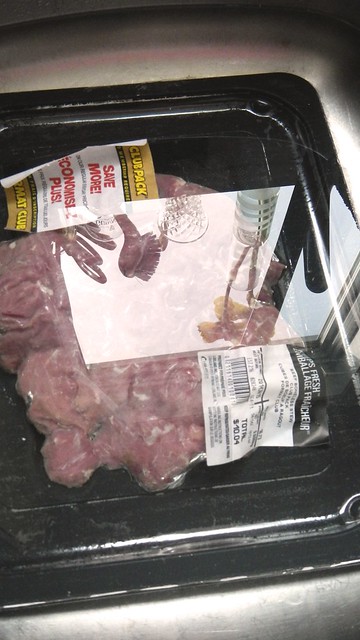
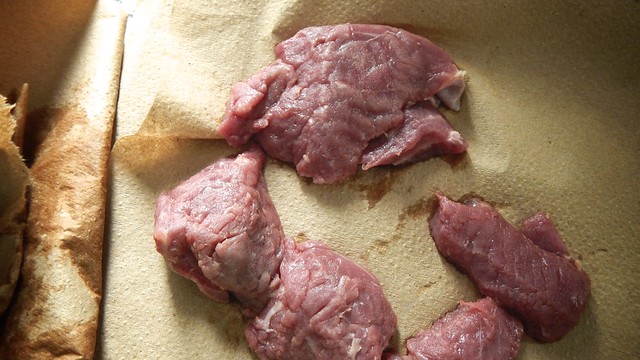
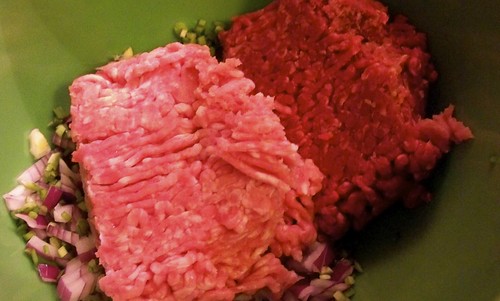
Add to that about a cup each of ground pork and lean ground beef.

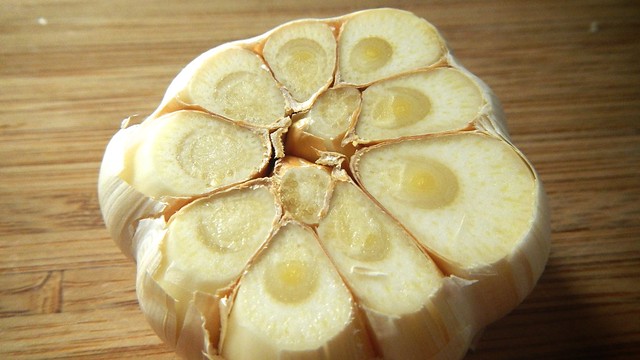
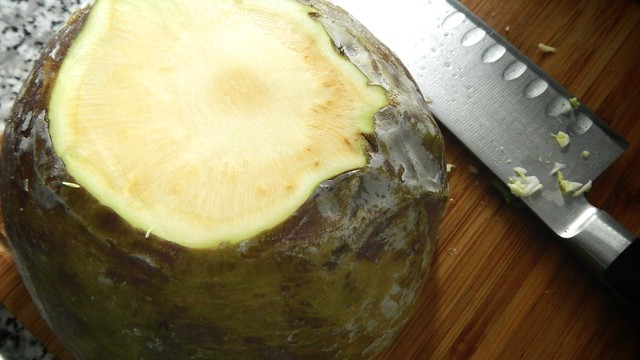
Maybe a spoonful each of minced garlic and minced ginger.

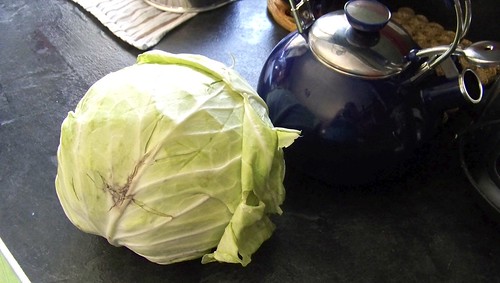
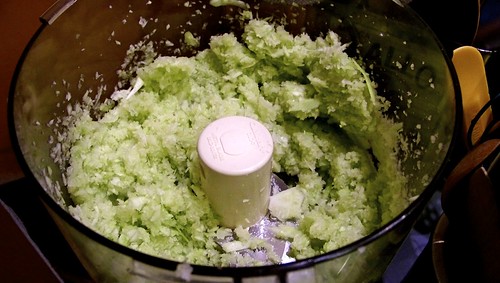
Doodle then chopped up some green cabbage. Then she mulched the cabbage in a food processor.

Adding the cabbage to the meat and onions, she mixed it well with her hands.

Now comes the fun part.

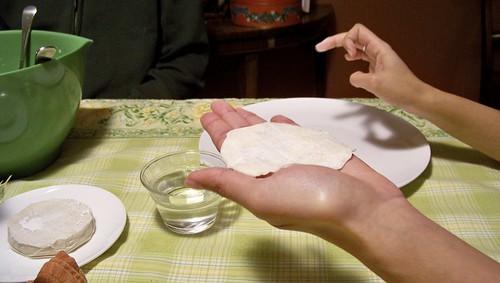
On your workspace, place the bowl with the meat mixture and a spoon for scooping it up, a plate for the finished dumplings, and a small bowl of warm water.

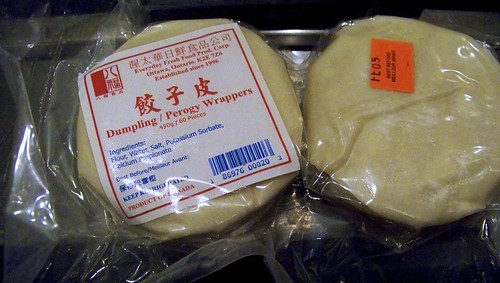
For these dumplings you need the round dumpling wrappers.  Doodle tells me that the square ones don’t work as well, and, also, that the dumplings can be frozen and used later, though they are slightly more sticky when thawed.

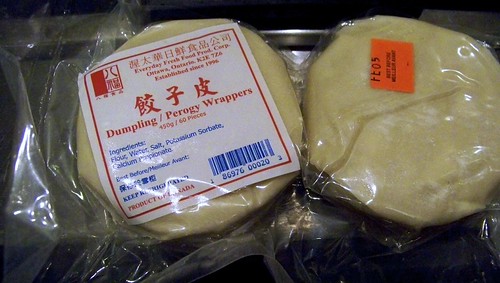
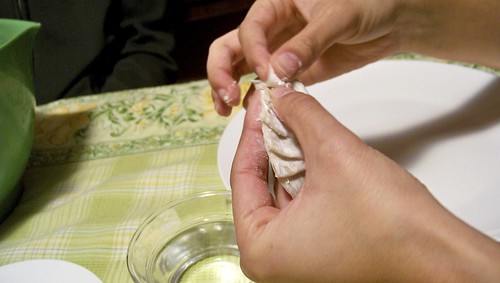
Place a wrapper in the palm of your hand.  

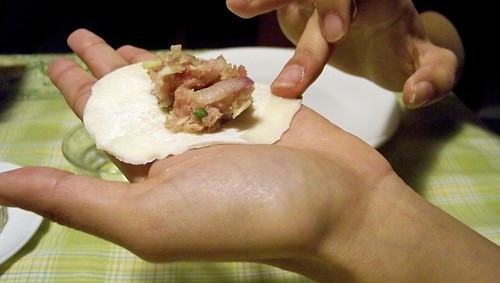
Take a spoonful of meat mixture and place it in the centre of the wrapper.

Dip a finger from your other hand in the water and use it to draw a line around the edge of half the wrapper.

At the edge of the wrapper, where the wet line meets the dry wrapper, pinch the two sides together, just at the edge.  Then pull the rest of the wet side of the wrapper over slightly and pinch it onto the dry side, making a pleat. 

Continue until you reach the end, so that one side of your dumpling edge is smooth and the other is pleated.  This will make sure that the dumplings stay upright when they are cooked.  Make sure to seal the edges well, using more water if you have to, in order to ensure a good seal.

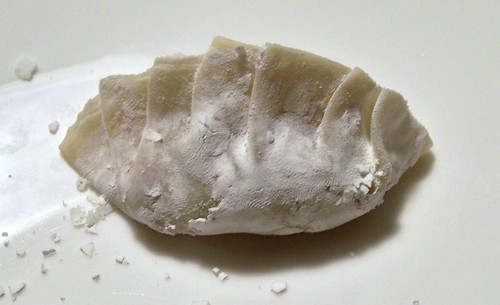
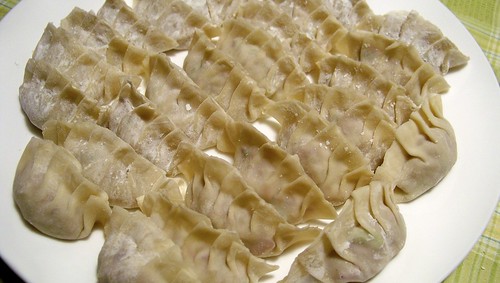
Keep doing this until you either run out of dumpling wrappers or filling material.  You can see that expert Doodle has created a plate of perfect dumplings.

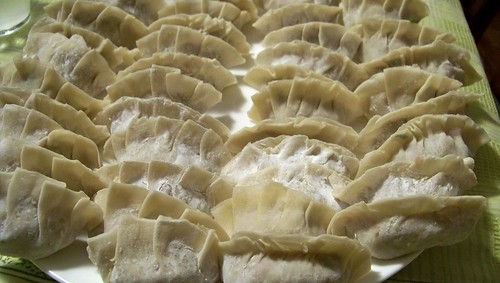
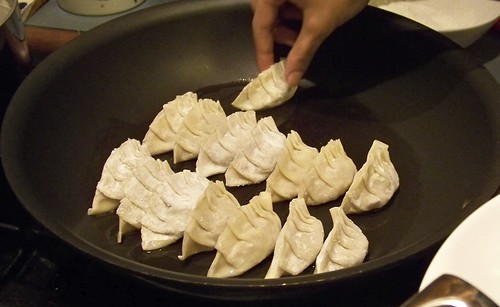
This is the plate that the Pie and I made.  Not quite so perfect.  Of course after they were cooked you couldn’t tell the work of us newbs from that of the professional so it’s all good.

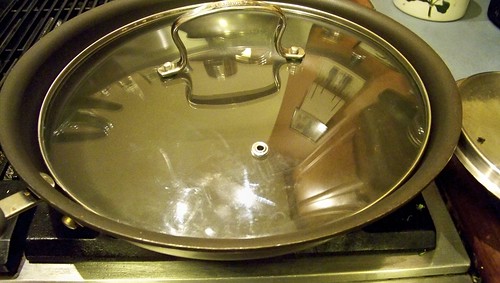
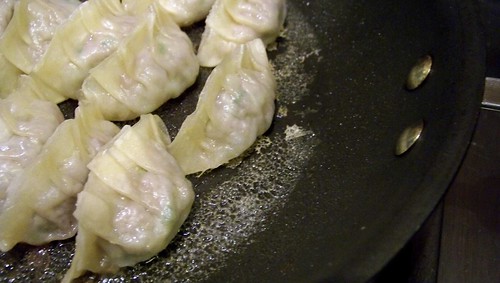
Now take a large non-stick frying pan with a lid that fits.  A wok won’t work because you need the bottom to be flat.

Put a few teaspoons of oil in the pan and heat it to medium-high.  Place your gyoza into the pan so they are all sitting upright and let them sizzle for a few minutes.

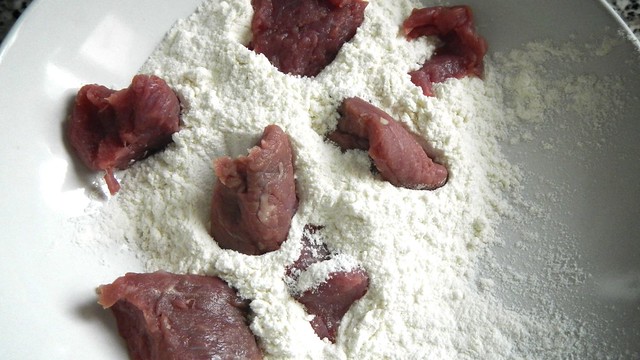
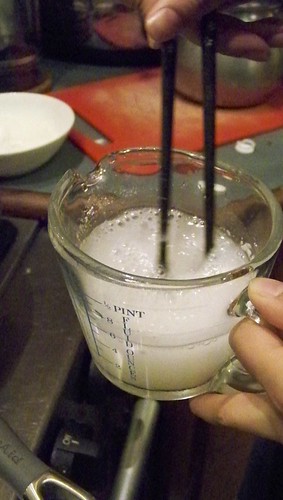
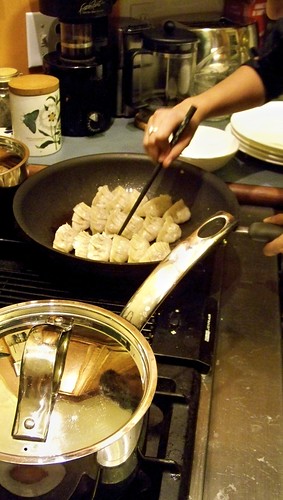
Fill a cup with water and add a teaspoon or two of flour.  Mix it well.

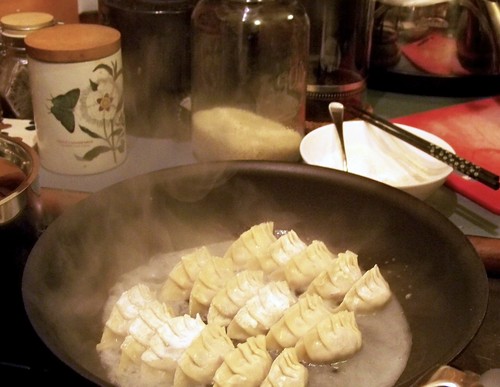
Pour the flour water into the bottom of the pan and cover the pan with the lid.

Let the dumplings cook like that until all the water is gone and the flour has formed a sort of crispy net on the bottom of the pan. 

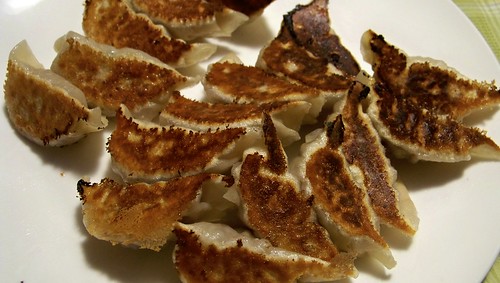
Use chopsticks or a spatula to loosen the dumplings from the pan.

Place a plate on top of the dumplings.

Flip the pan so all the dumplings end up on the plate. Some may still end up in the pan.  Some may end up on your floor.  It’s anyone’s guess.

See how they’re all lovely and crispy brown?

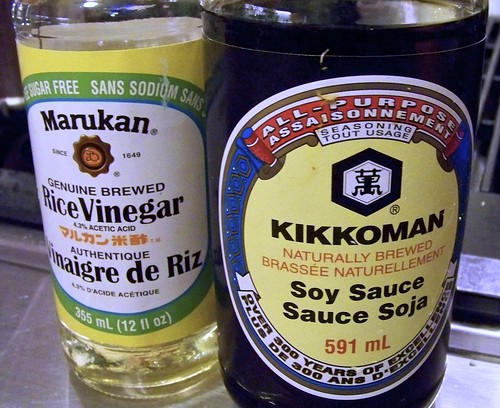
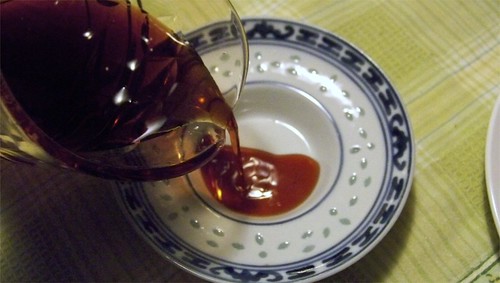
Mix up some soy sauce and rice vinegar.

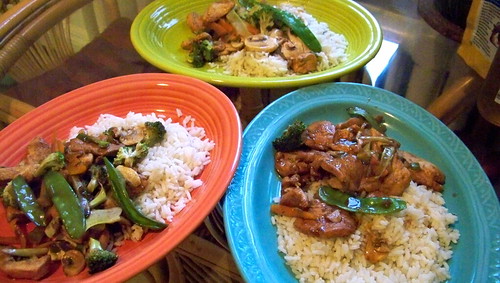
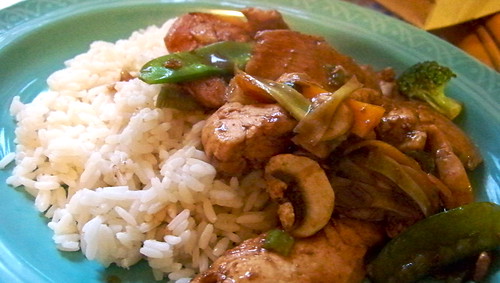
Pour it into a dipping bowl for your dumplings and serve everything with some rice.

Enjoy it thoroughly.

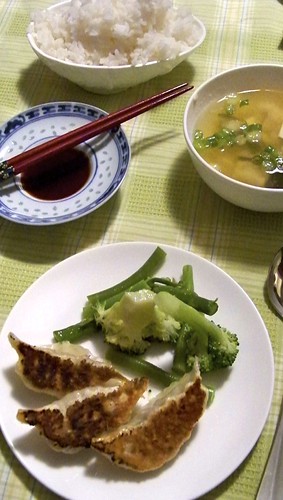
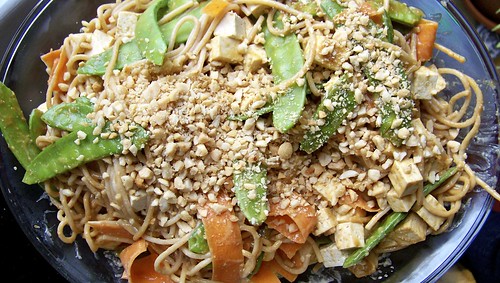
There was nothing left of this lovely repast, as you can see.  I can’t wait to do it again!

Stir-Fry at Cait and iPM’s

Hang in there, those of you facing Hurricane Igor!

The main trick in food photography, I have learned, is to always, always, always use natural light in your photographs.

The problem with living in Canada is that half the year, the sun sets really early and your good afternoon light turns blue.  Unless you want to start cooking your dinner at two in the afternoon, you have to put up with a lot of noise in your now blue-tinged shots.  I apologize in advance.

A downside to cooking in other people’s kitchens is that friends my age often live in quirky apartment buildings and so don’t have the enormous picture window with which I have been blessed in my own kitchen back in St. John’s.  The light quality in these places, therefore, isn’t all that great.  I should really start using my low ISO feature.  Some kitchens don’t even HAVE windows, which is a real shame, both for the sake of my pictures, and for the cooks themselves.  How can you enjoy cooking if you don’t like being in the room where cooking takes place? 

Anyway, tonight I went over to visit Cait and iPM.  You may remember them from their visit to St. John’s in June. Cait is a computer guru and she is in the process of making my laptop able to survive the extra two or three years of service I need it to give me before I can afford to replace it.  Their kitchen is fortunately roomy enough for my purposes, but as it was late in the evening, the light’s not all that great.

In the middle of the produce section of Loblaws, Cait and I decided on a stir-fry, so I picked up some broccoli, mushrooms, green onions, snow peas, and fresh garlic.  Cait already had chicken, carrots, soy sauce, vinegar, and brown sugar, so it was a simple matter of adding hoisin, black bean, and teriyaki to the basket and off we went.

At home, Cait set to haranguing my computer and making it do her bidding and I set to chopping.  Cait owns neither a cutting board nor a non-serrated knife so it was an adventure trying to julienne the carrots and broccoli stalks.  But I did it.

I also sliced up three boneless, skinless chicken breasts as well.  Nice and thin.

Ruby, who is only a puppy, tried to convince me that chicken was the best thing for her and that what we thought was her proper dog food was actually poison.  She failed.  But she’s cute.

In a small bowl, mix together about two tablespoons each of brown sugar, vinegar (I prefer rice vinegar but Cait only had balsamic), hoisin, teriyaki, black bean, and soy sauce.

Slice up about three cloves of garlic and plop them in a pan with olive oil.  Heat that sucker up.

Add the chicken, and stir until just cooked through, between 5 and 10 minutes.

Add the sauce mixture and stir to coat all the chicken.

Plop in your vegetables and stir to get them all coated, too.I ran out of room in the pan and therefore had to transfer half my cooking to a nearby pot.

Let the vegetables cook a little bit, but not too much.  You want them still crisp, but brightly coloured.  Probably you want to cook them for about seven minutes or so.

Serve over rice, and if you have lovely Fiestaware to do it on, all the better. 

iPM went back for seconds so I know it was good.

MAN CHICKEN

I’ve been craving this particular recipe for a while, but good chicken doesn’t come cheap in this town.

My oldest brother Kristopf lived in Japan for about five years.  During that time he was pretty miserly with his money, ate a lot of mayonnaise and rice, and wasn’t too inventive in the kitchen.

One of his staples during this time that did survive his return to North America and subsequent new appreciation for food is something I like to call Man Chicken.  I once cornered him into giving me the recipe, which takes up about two lines in my magic book and has no real exact measurements in it, just ‘some’ and ‘a bit’.  It’s a recipe after my own heart.

With a sharp knife, slice 2 boneless, skinless chicken breasts (or 4 boneless, skinless, chicken thighs) into 1″ strips and remove excess fat and gristle.

Slice into 1" strips.

Put the strips in a bowl and add 2-3 teaspoons minced ginger (comes in jar, just like garlic), 4 tablespoons or so rice vinegar, and 4 tablespoons or so soy sauce.  Kristopf prefers the Japanese brands of these kind of things, but he’s a bit of a snob.  Stir it up, cover it, and put it in the fridge to marinate for a little while.

Toss the contents of your bowl, chicken and marinade, into a pan and sauté until chicken is cooked through.

Serve over rice.  We ate it with steamed baby spinach.  Blamo kablam.