The Molly Cake

Molly Cake 37

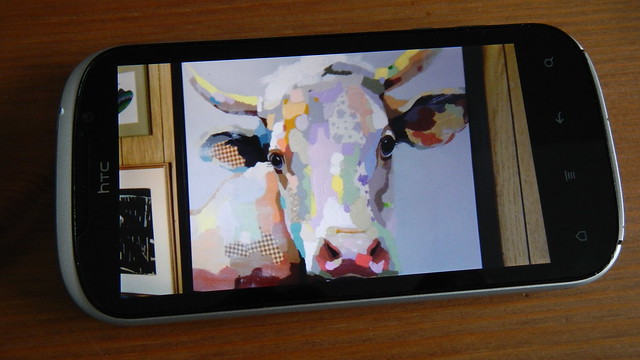
Mrs. Nice’s birthday was back in November and the Pie and I wanted to make her birthday cake a little more personal this year. Papa John and Mrs. Nice now live next to a farm and so their backyard faces a huge field full of very curious cows. At a craft fair recently, Mrs. Nice picked up this gorgeous painting of a cow named Molly, and so the Pie and I tried to re-create at least the sentiment of it as best we could, considering our utter lack of artistic skill.

Molly Cake 23
My frame of reference. NAILED IT.

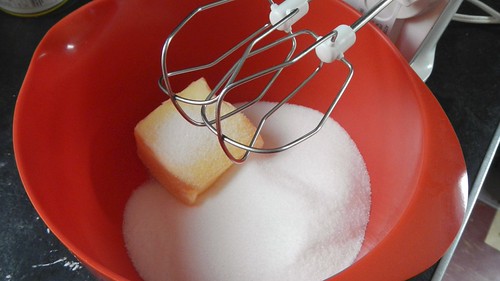
Start at the beginning first. Let’s not get too ahead of ourselves. Bring 3 egg whites to room temperature in a decent-sized bowl. You can drop in 1/4 teaspoon cream of tartar too, while you’re at it. Leave that alone for a while.

Molly Cake 11

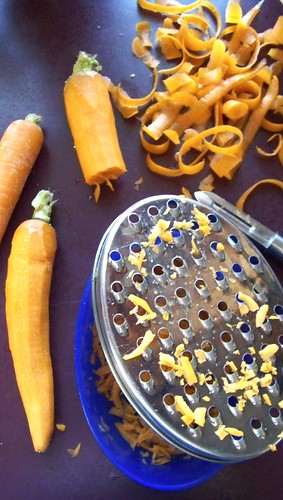
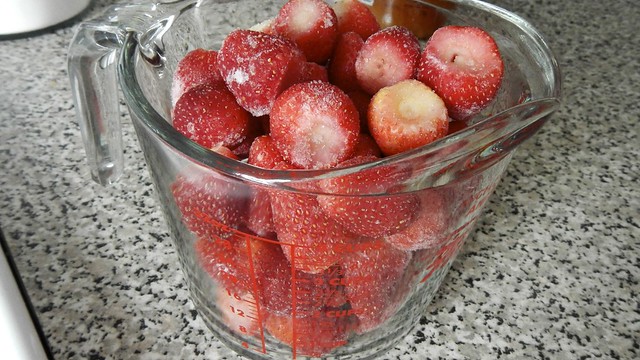
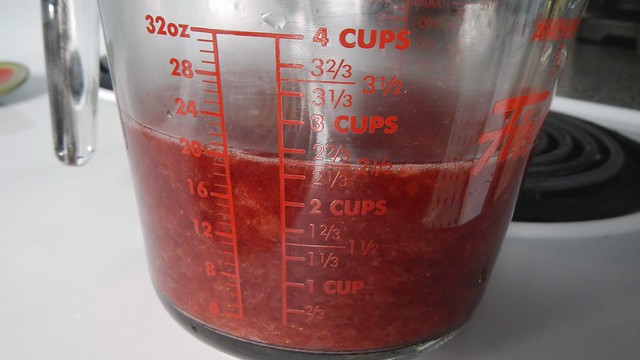
Grab yourself some frozen strawberries. This is from a 1kg package frozen strawberries, which is about 5 cups’ worth.

Molly Cake 1

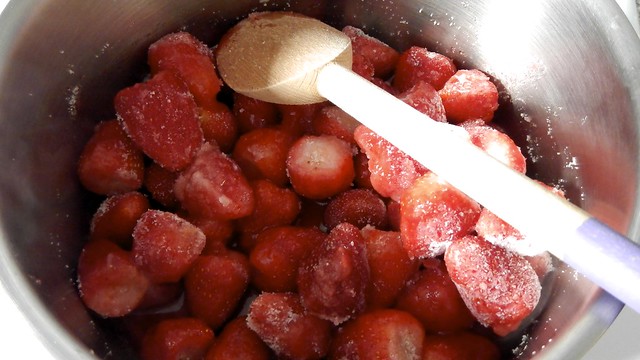
Plop those in a pot with 1/2 cup granulated sugar and stew them over medium heat until they’re all melted and gooey and lovely.

Molly Cake 2

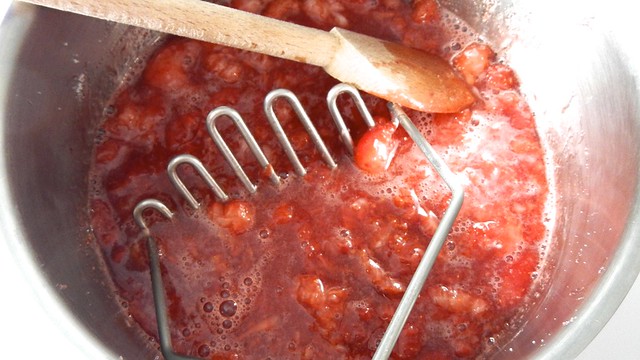
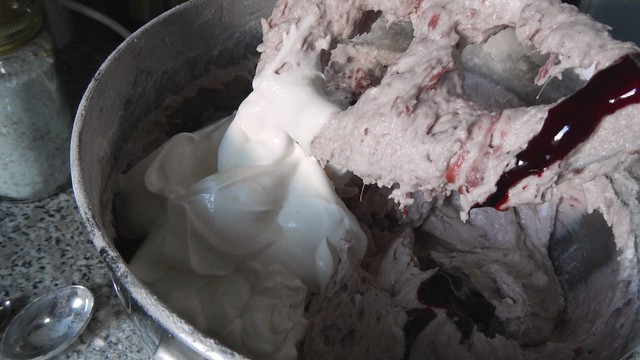
You can purée them at this point if you wish but I wanted some strawberry chunks in the cake batter so I mashed the goo with a potato masher instead.

Molly Cake 3

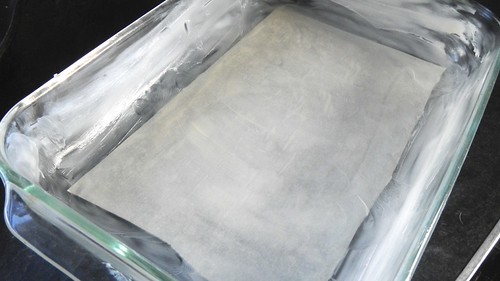
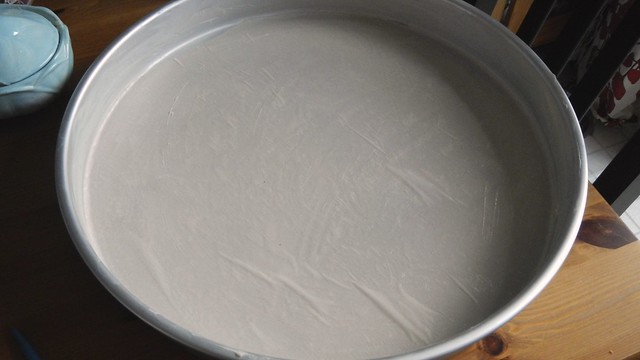
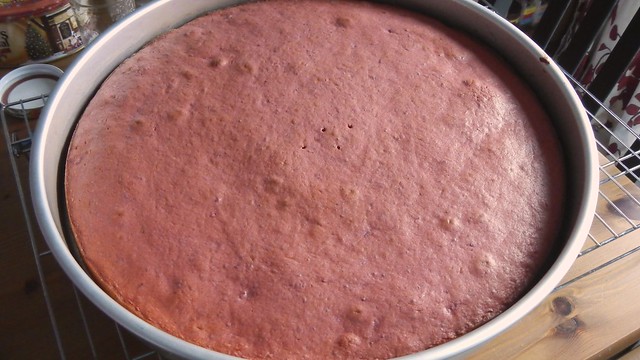
Now you can turn your oven on to 350°F and butter and parchment up your cake pan(s). I used my trusty 17″ round cake pan but there is enough batter here if you wanted to use 3-8″ round pans instead and create a layer cake.

Molly Cake 4

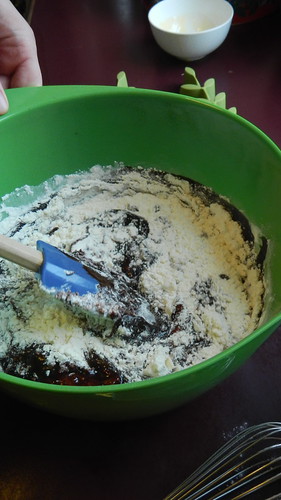
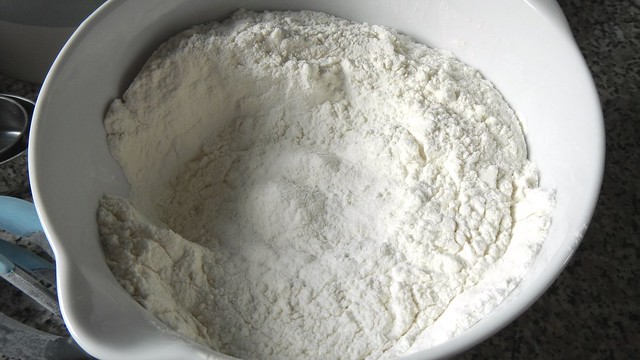
Sift together 3 1/2 cups all-purpose flour, 1 tablespoon baking powder, and 2 teaspoons baking soda and set that aside for a minute.

Molly Cake 6

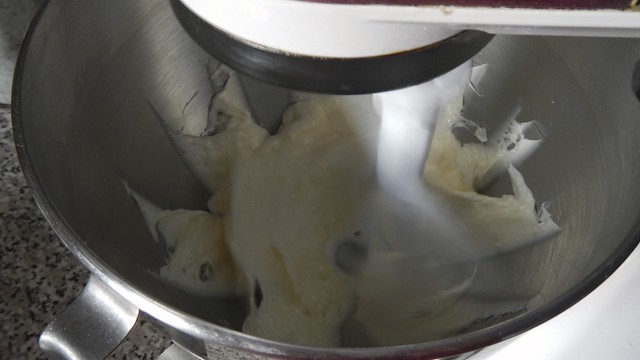
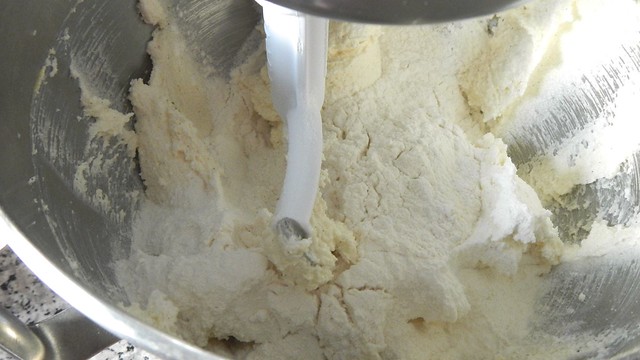
In the bowl of your electric mixer, beat together 1/2 cup butter and 1/2 cup vegetable shortening until fluffy and amazing.

Molly Cake 5

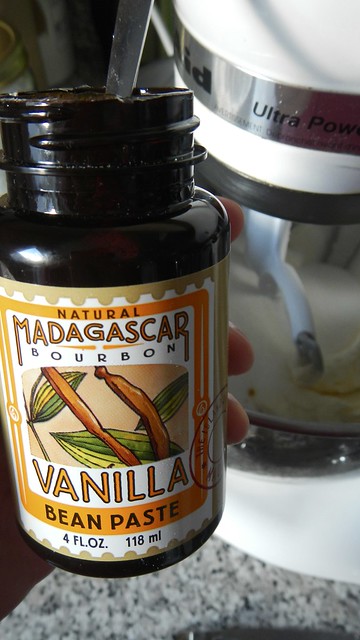
Next, beat in 1 3/4 cup granulated sugar until it’s also fluffy and amazing. Then you can add in 2 teaspoons vanilla (I used vanilla bean paste, my new favourite thing).

Molly Cake 7

Now scrape down the sides of the bowl and plop in 1 egg. Just one. It looks so lonely. Beat it up. Show it who’s boss.

Molly Cake 9

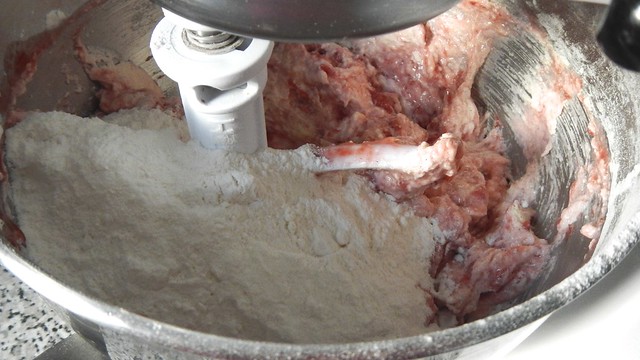
Okay now we put all this jazz together. Take your strawberry goo. And your flour.

Molly Cake 10

Starting with the flour, add about a third of it to your mix and stir to combine.

Molly Cake 13

Add half the strawberries, then another third of the flour (mixing it all in), then the final half of the strawberries, and the last of the flour.

Molly Cake 14

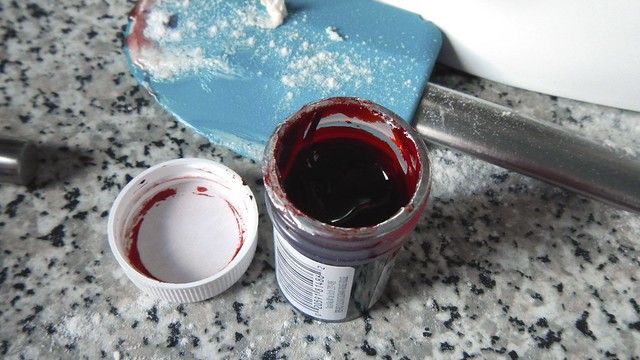
I decided to disobey my normal rules about colouring food and added a bit of red gel paste colouring to the batter to make the strawberries pop.

Molly Cake 15

Then stir in 1 cup sour cream.

Molly Cake 16

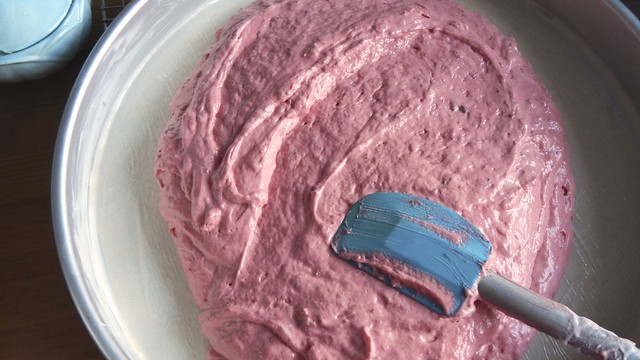
Look at that gorgeousness.

Molly Cake 17

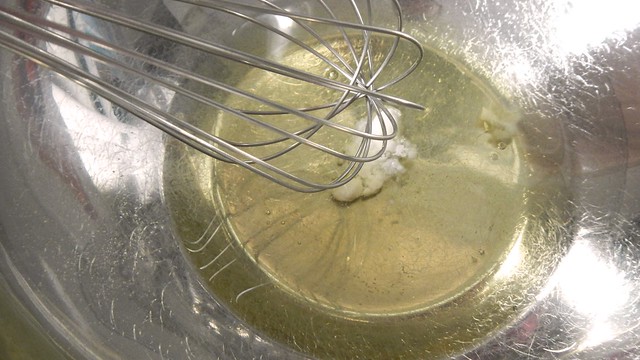
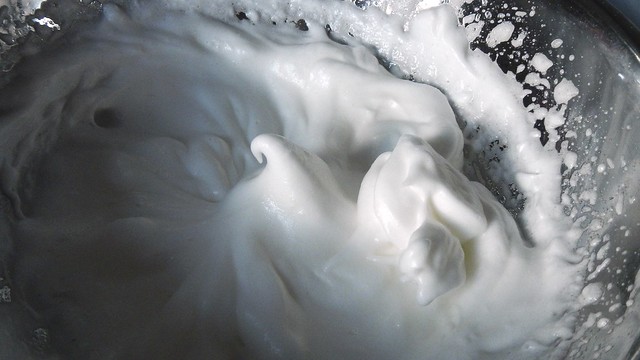
Beat your room temperature egg whites until stiff peaks form. Yay, meringue!

Molly Cake 12

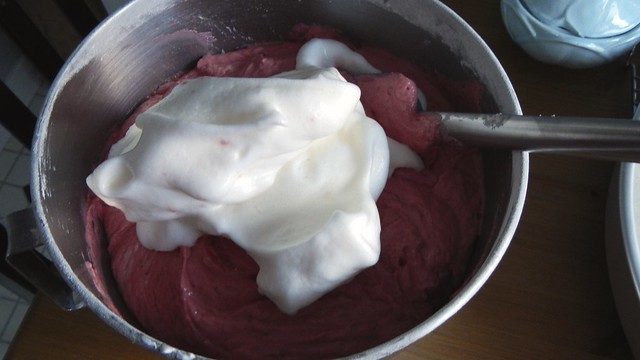
Ever so gently fold those fluffy whites into your batter. This batter is pretty dense and produces a pretty thin cake so you need all the fluff you can get.

Molly Cake 18

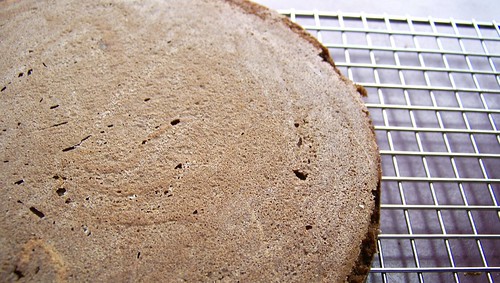
Smooth the batter into your cake pan(s) and bake for about 45 minutes, or until a toothpick inserted into the centre of the pan comes out clean.

Molly Cake 19

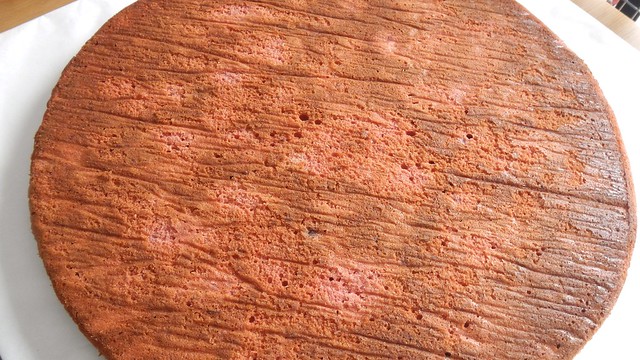
Set the whole shebang on a wire rack to cool completely.

Molly Cake 20

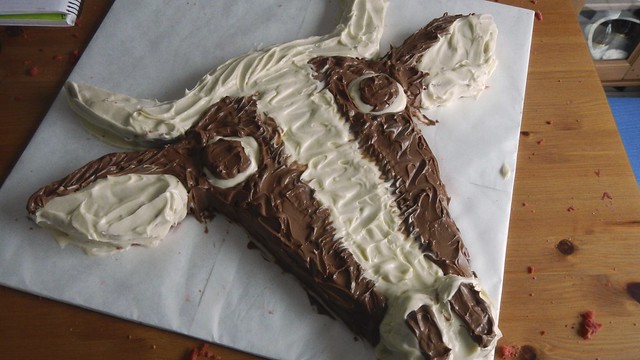
Now, if you’re not making a giant cow out of your cake, you can skip this whole segment. If you are making a giant cow out of your cake, then I hope yours turns out better than mine because you are less terrible at art.

Molly Cake 22

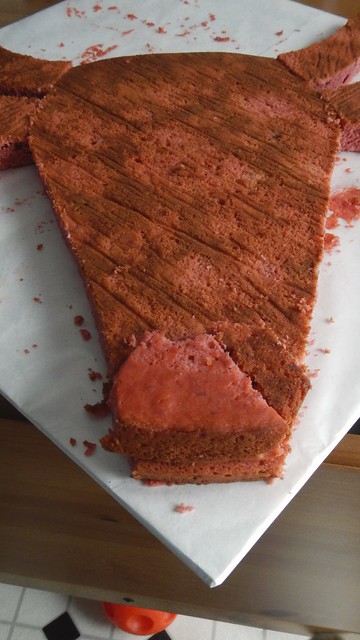
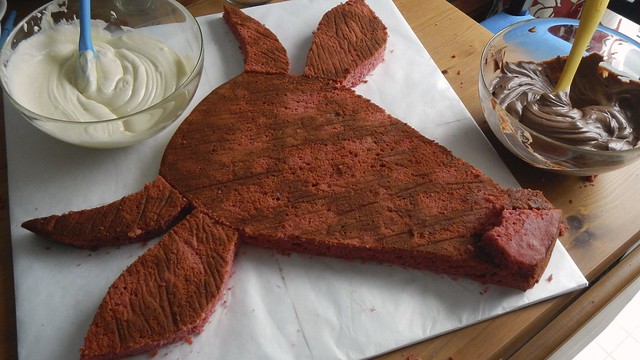
So with the giant cake laid out on a board, I cut out the shape of the cow’s head, and then from what was left I cut out the horns and the ears. It’s all symmetrical.
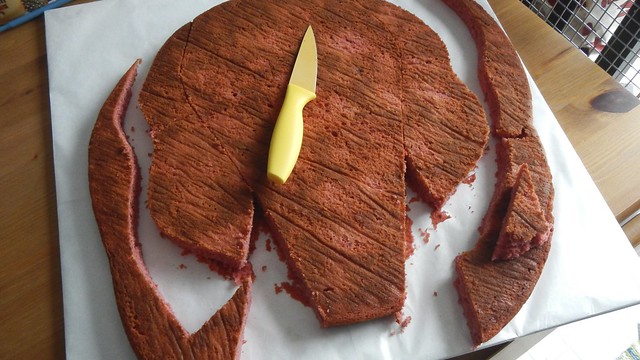
Molly Cake 24

Then I laid it out.

Molly Cake 25

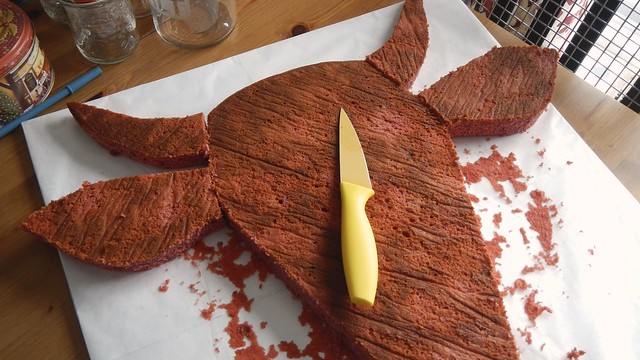
I had to move everything around on the board to get it to fit, and the cake was so sticky it was a hard job to do it without disaster. And now it looks like the Chicago Bulls logo (GREAT GIFT IDEA FOR BULLS FANS FOLKS!).

Molly Cake 26

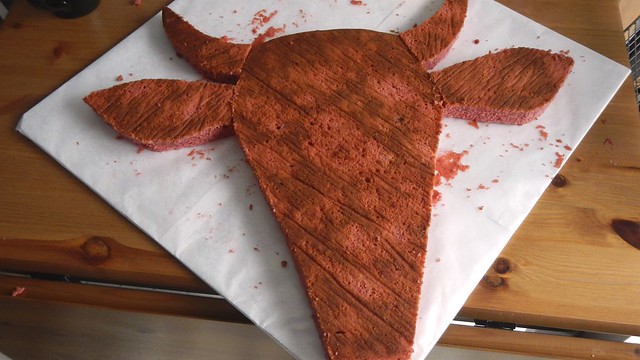
The Pie thought we should add a bit of extra cake at the snout. Now we need some frosting.

Molly Cake 27

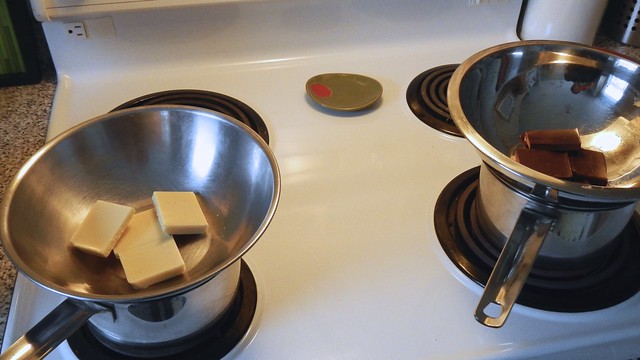
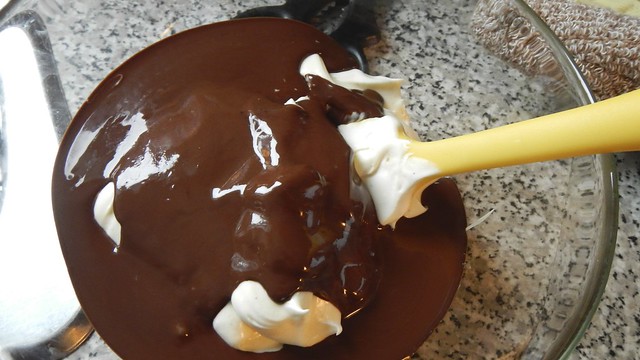
I needed two colours of icing, so in two double boilers I melted 4 oz dark chocolate and 4 oz white chocolate, respectively. If you’re just doing one colour then obviously just use one double boiler and 8 oz chocolate. When that’s all melty and smooth, set it aside to become less horribly hot.

Molly Cake 28

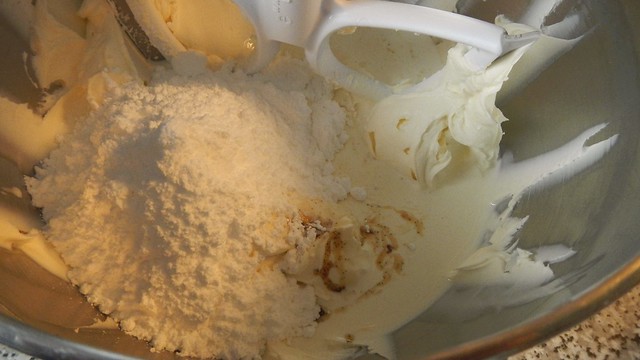
In the bowl of an electric mixer, beat 2-250g packages plain cream cheese (room temperature) until they’re silky smooth. Remember, the warmer your cream cheese is, the less lumpy the frosting will be.

Molly Cake 29

Beat in as well 1 tablespoon vanilla (again I used the paste because I love it), 3/4 cup heavy (whipping) cream, and 3/4 cup icing sugar.

Molly Cake 30

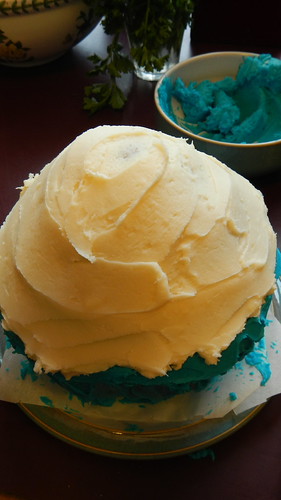
Then I split the frosting between two bowls. Hello, beautiful. Look at those little flecks of vanilla seeds.

Molly Cake 32

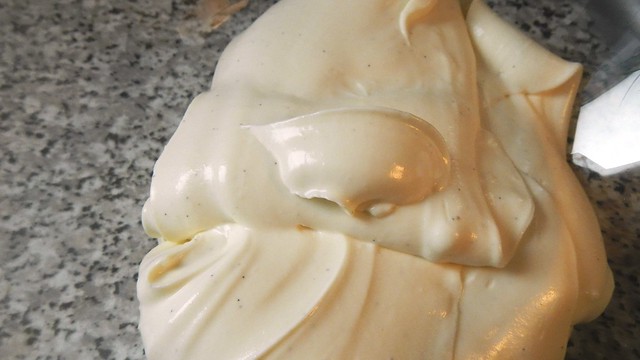
Then I poured the now-cooler white chocolate into one bowl, and the now-cooler dark chocolate into the other and stirred them up.
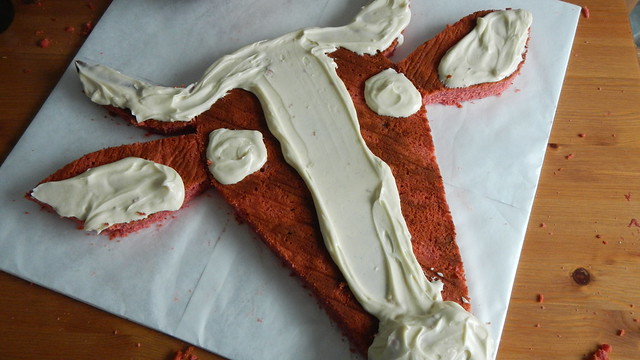
Molly Cake 33

Ready to decorate!

Molly Cake 34

I started with the white, because … well, I just did.

Molly Cake 35

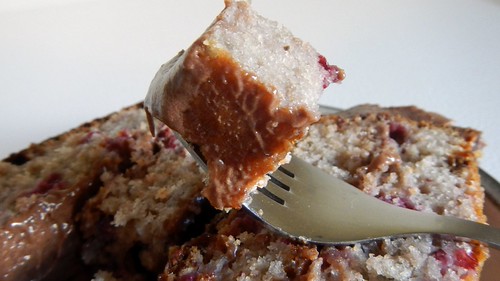
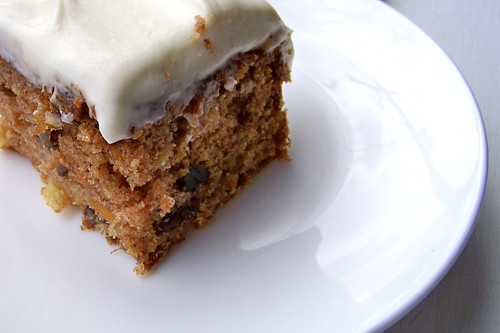
Then I filled it in with the dark chocolate. The nostrils are wonky because I dropped a huge gob of icing accidentally and so that’s just how it had to be. TADA! Not fine art, but highly tasty, and Mrs. Nice loved it.

Molly Cake 36

Pie’s Nerdy Birthday Cake

Nerdy Birthday Cake 33

Yesterday the Pie turned 31, which he wasn’t really looking forward to, because now for the rest of the year he can’t tell everyone who will listen that I’m older than he is (BY FOUR MEASLY MONTHS).  Honestly, the next time someone calls me a “cradle robber” I’m going to punch him or her in the ear.  With my ring hand.

Nerdy Birthday Cake 28

I was originally just going to make him a wee cake (because it’s just the two of us and we’re moving shortly) but then Fussellette, who will use any excuse to have a barbecue, made an occasion of the thing and so a bunch of us went downstairs and ate grilled food and drank beverages and had cake — so obviously I had to make a slightly bigger cake.

Nerdy Birthday Cake 24
Gren also likes Nerds.

The Pie loves all things vanilla, so I decided on a sour cream pound cake, a traditional dish I hadn’t tried before.  I’m used to the regular ol’ normal pound cake.  Now, this recipe will yield two loaf pans’ worth of pound cake, or one ~10″ Bundt or tube pan worth.  I’m going with the loaf pan, so I can freeze the other half of this cake for when we celebrate with my parents in a few weeks (also, I packed my Bundt pans).  As always when making cakes, it’s a good idea to butter your pans and line them with parchment paper (if possible) to ensure that you don’t get anything stuck.  With a Bundt or tube pan it’s good practice to butter the thing and then dust it with flour.  Also, for a nice fluffy cake, allow all your ingredients to come to room temperature before you make this sucker.

So.  Butter and paper and butter your pans and preheat your oven to 325°F.

Nerdy Birthday Cake 3

Sift together 1/4 teaspoon baking soda with 3 cups cake and pastry flour (which I didn’t have, so I substituted 2 tablespoons flour in each cup with 2 tablespoons corn starch).

Nerdy Birthday Cake 1

And actually I didn’t sift this, either, because I packed my sifter.  Anyway, set that aside for now.

Nerdy Birthday Cake 2

Using an electric mixer (or very powerful and fast-moving arms), beat 1 cup butter together with 2 cups granulated sugar until the mixture is pale and fluffy.

Nerdy Birthday Cake 4

Add 6 eggs, one at a time, to the butter/sugar mixture, beating until each one is combined, and scraping down the sides of the bowl as needed. Add in 1 tablespoon vanilla extract.

Nerdy Birthday Cake 6

Now, tip in half your flour mixture and stir that until combined.

Nerdy Birthday Cake 8

Then dump in 1 cup (full fat) sour cream and stir that in, too.

Nerdy Birthday Cake 9

And now the rest of your flour.  Combine that carefully.

Nerdy Birthday Cake 10

Try not to flick batter everywhere.  Evidently, I failed.

Nerdy Birthday Cake 11

Spoon this very thick batter into your pan and smooth the top.  You’re going to want to bake this for at least an hour, probably more if you’ve done it in one pan.  Go for 60 minutes at first, and then check it every 5 minutes after that until a tester inserted in the centre comes out clean.

Nerdy Birthday Cake 12

When the cake is done, let it cool completely on a wire rack before tipping it out of the pan.  Tipping out a hot cake is a good way to get yourself a broken cake.

Nerdy Birthday Cake 17

So there’s your cake.  If you wish, you can leave it at that.  But this is a birthday cake! I took one of them and wrapped it up for freezing.

Nerdy Birthday Cake 20

So we’re going to make some icing.  Our standard cream cheese frosting is a perennial favourite, and it’s very simple.

Beat together 1 cup butter with 1 250g (8oz) package plain cream cheese (room temperature) until fully combined.

Nerdy Birthday Cake 13

Beat in as well 1 tablespoon vanilla (or any other flavouring you wish). Then carefully stir in at least 2 cups icing sugar (you will probably want a bit more to get the consistency you like).

Nerdy Birthday Cake 14

Then I sliced the cake in half horizontally.

Nerdy Birthday Cake 21

I filled the gap with a raspberry jam.

Nerdy Birthday Cake 23

Then I iced it, but only the sides at first.  Why?  Because I was going to do THIS.  But instead of sprinkles, because sprinkles are gross, I’m going to use Nerds.

Nerdy Birthday Cake 30

If you’ve never heard of Nerds, they’re basically small crystals of sugar coated with a sour neon candy crust.  They come in wee rectangular boxes and are a childhood favourite of pretty much everyone in my generation, because you used to be able to buy two boxes for fifty cents at the corner store.

Nerdy Birthday Cake 16

Fortunately for us, in the Super Size Me generation, you can now buy Nerds in giant boxes.  I wasn’t sure how many Nerds I would need for this, so I bought two boxes.  I can always rot my teeth on the other box if it isn’t needed.

So.  Spread your Nerds out in a flat rimmed dish (like a baking sheet or a dinner plate) with enough room to lay your whole cake.

Nerdy Birthday Cake 26

Pick your cake up and hold it by the bottom and the top (the unfrosted ends) and, working one side at a time, press the sides into the Nerds to make them stick to the frosting.

Set the cake back down and frost the top, being careful not to disturb the sides. Now I should have refrigerated my cake between frosting it and nerdifying it, so that’s why it’s all squishy and demented. Make sure you do that. Also, I discovered that my wee hands were no match for the size of this cake, so that may have added to the dementedness.

Nerdy Birthday Cake 31

Sprinkle the top with Nerds until it’s evenly coated.  Press them down a bit to make sure they stick.

Nerdy Birthday Cake 32

Chill the cake until serving. Even slightly demented, it was still mighty tasty!

Nerdy Birthday Cake 35

The Baseball Cake

Baseball Cake
Jealous?

It was Rusty’s birthday, and that man is the biggest Toronto Blue Jays fan that has ever existed.  I received this ridiculous cake pan for Christmas, which would supposedly create a cake in a cupcake shape, so we figured we’d experiment with Rusty’s baseball-themed birthday cake.

Baseball Cake

Now I want you to be prepared for the absolute awesomeness that is about to follow, and hold back your tears of joy when you see our massively amazing cake decorating skills. Just try to contain yourself. We are that good. Yes, it’s true. And that pan aside, we had some awesome tools to work with, like this nifty new whisk/spatula designed specifically for making batter. What could go wrong?

Baseball Cake

Because the Blue Jays’ colours are red, white, and blue, the Pie and I decided to make Rusty a red velvet cake, and we went with Bakerella’s recipe for the same, because it seemed to produce a rich red crumb (we later figured out that this was at the sacrifice of the chocolatey goodness for which red velvet is famous but it was still good nonetheless).

So, first we preheated the oven to 350°F and then buttered and floured our cake pan.

Baseball Cake

In one bowl, we mixed together 2 1/2 cups all-purpose flour, 2 cups sugar, 1 teaspoon salt, 1 teaspoon baking soda, and 1 measly tablespoon cocoa. If you want a more chocolatey-tasting cake (because it is a chocolate cake after all), then feel free to add more cocoa, and maybe some melted chocolate. Mmmm ….). Anyway, whisk that up and set it aside.

Baseball Cake

In another bowl plop 2 eggs.  Without their shells would be good.  They never really specify that in recipes, but you should always crack eggs before you add them to cake batter.  Just a fun fact for your information.

Baseball Cake

Use a nifty whisk to beat ’em up.

Baseball Cake

Add in as well 1 1/2 cups vegetable oil, 1 cup buttermilk, 1 tablespoon vinegar, 2 teaspoons vanilla, and 2oz red food colouring.

Baseball Cake

Add the wet ingredients to the dry ingredients and whisk until well-combined. Holy cow is that ever pink.

Baseball Cake

Pour your batter into your prepared pans, scraping the sides of the bowl, and tap the filled pans on the counter to release any air bubbles.

Baseball Cake

Bake the cakes for about 30 minutes, or until a toothpick inserted in the centre of the cake comes out clean. Ours took a little longer due to the construction of the pan. Remove them from the oven and let them sit for about ten minutes before emptying onto a wire rack to cool completely.

Baseball Cake

While that’s cooling, you can whip up your cream cheese icing. In the bowl of your electric mixer, beat an 8oz package of room temperature cream cheese with 1 cup room temperature butter and 1 teaspoon vanilla until smooth. Slowly beat in 6 cups icing sugar. Then take half of that icing out and set it aside.

Baseball Cake

To the remaining half, add blue food colouring until you achieve your desired colour.

Baseball Cake

So now we have blue icing to frost the “cupcake liner” half, and white for the top, to resemble a baseball.

Baseball Cake

With the design of this cake, you need to “glue” the two halves of the cake together (but you’d have to do that with two layers anyway).

Baseball Cake

Baseball Cake

The bottom half was so heavy and dense it started to crack under its own weight, so I patched it a bit.

Baseball Cake

Then I iced up the bottom. I tried to make it resemble the corrugations of a cupcake liner. You can see that I succeeded in a masterful fashion.

Baseball Cake

Then I did the top. I tried to smooth out some of the natural swirls in the structure of the cake to make it more round, like a ball. As you can see, the results were epic.

Baseball Cake

Then I put the pie to work with a tube of red gel piping to make baseball seams in the cake. Oh man, admire that steady hand.

Baseball Cake

Smooth, even stitches.

Baseball Cake

Crowing in glee at his own mad skills.

Baseball Cake

And our final product, a majestic confection which tasted great, despite not being a chocolate cake, a baseball, or a cupcake.  Rusty loved it.

Baseball Cake

Root Beer Bundt Cake

Potluck
Potluck insanity. Too many tall friends.

Every year during the winter holidays we get together with our Ottawa friends and have a potluck.  We started doing this when we were all students because it was the one day we could guarantee that we were all in town at the same time and we could spend some time together.  We even get fancy with the planning, starting with a Doodle scheduler to pick the right date (if you’ve never used their free software to make an appointment, check it out).  Then we set up a Google spreadsheet to figure out who is bringing what, to ensure that not everyone arrives with chips and dip and that the people who are bringing appetizers don’t show up just as we’re starting dessert.  Inevitably the spreadsheet gets hacked by someone (or everyone) and chaos ensues.  Graphs and pie charts and graffiti abound.  It’s madness.  But fun.  This year the Pie and I decided to host, and as each person brings a dish, this was the Pie’s contribution to the festivities: Baked’s Root Beer Bundt Cake.

Root Beer Bundt Cake

He’s made it before, for my birthday, and it’s always a favourite.  Anything Baked does is a favourite with us.  The problem is that because I was busy doing my own thing and making a superb leek and leftover turkey pie (which I will save as a post until the next turkey-related holiday), I didn’t actually get a chance to photograph the finished product.  So you’ll just have to guess as to what it looked like.  Sorry.

Now, the recipe calls for 2 cups root beer to go into the batter.  Don’t you dare use diet root beer — you’ll regret it enormously.  Use a stronger-tasting brew like Dad’s or Stewart’s or even Barq’s to get the best flavour, and feel free to replace some of the liquid with a root beer schnapps or even a tablespoon or two of root beer extract.  Not having any of these things, however, the Pie decided to make himself a root beer concentrate.

Root Beer Bundt Cake

He started by pouring two cans of root beer into a pot. Then he simmered it for about half an hour to boil off the water and reduce the liquid.

Root Beer Bundt Cake

The resulting fluid is dark and opaque, and we hoped it would enhance the flavour of the cake when added to the regular root beer.

Root Beer Bundt Cake

While you’re doing that, preheat your oven to 325°F.  Generously butter a large bundt cake pan.  Dust the inside with flour and knock out the excess.  If you don’t have a bundt pan you can make this in an angel food pan.  If you have to make it in a pan that doesn’t have a hole in the middle you will need to cook it a bit longer and keep an eye on it so the bottom doesn’t burn.

Root Beer Bundt Cake

In a small saucepan, melt together 2 cups root beer, 1 cup cocoa, and 1/2 cup butter and stir until the mixture is smooth.

Root Beer Bundt Cake

Add in 1 1/4 cups granulated sugar and 1/2 cup firmly packed brown sugar and whisk that until the sugar is dissolved and the mixture is smooth.

Root Beer Bundt Cake

Root Beer Bundt Cake

Remove that from the heat and allow to cool a little bit. You want it to cool a bit (enough that you can poke your finger in it and it will be nice and warm but not hot) because you’re about to add in 2 lightly beaten eggs. And if you add the eggs in while it’s still hot they will cook on their own and that will be super gross.

Root Beer Bundt Cake

Add the eggs in and whisk thoroughly.

Root Beer Bundt Cake

In a big bowl, whisk together 2 cups flour with 1 1/4 teaspoons baking soda.

Root Beer Bundt Cake

Gently pour the chocolate mixture into the flour mixture and fold with a spatula until just combined.

Root Beer Bundt Cake

You don’t want pockets of flour or anything but you want the batter to still be a mite lumpy.

Root Beer Bundt Cake

Pour that into your prepared bundt pan and bake for 35-40 minutes, rotating the pan halfway through, until you can stick a skewer into it and it comes out clean.

Root Beer Bundt Cake

Set that puppy on a rack to cool completely.

Root Beer Bundt Cake

In the meantime, you can make your root beer fudge frosting. In another bowl, whisk together 2oz melted dark chocolate and 1/2 cup room temperature butter. Add in as well 1/4 cup root beer, 2/3 cup cocoa, and 2 1/2 cups confectioner’s (icing) sugar and beat until smooth.

Root Beer Bundt Cake

When you cake is cooled, plaster on that icing in a haphazardly charming manner and eat it all up. Cover what’s left over in plastic wrap and keep up to a week at room temperature.  Sorry again that I have no pictures.  It disappeared! Instead you can have a picture of Gren in the Christmas hat that he hates.

Gren on Couch

WOOO! It’s Ali Does It Herself’s 500th Post! And we’re making CAKE!

500 Cake 26

So on the 15th day of March, 2010, I caved to peer pressure (*ahem*, Kª), and I started this blog.  Ali Does It … Herself.  That sounded about right.  The Pie and I try to be as self-sufficient as possible, and having been raised by very DIY-oriented parents, I figured I might as well start telling the world about my own experiments in grown-up living.  Five hundred (!) posts later, we’re still going strong.  Ali Does It has been featured THREE times on WordPress’s Freshly Pressed page, twice on FoodPress.com, and last year won third place in both the Canadian Weblog Awards and the Canadian Blog Awards competitions.  I’m so grateful for the 1600+ subscribers who visit regularly and for everyone who has come to see and read in the past almost-three years.  If you’re reading this, then thank you so much for coming!

It’s amazing what this blogging experience has taught me to do.  Previously, I cooked, and fixed stuff, and did crafty things, and I was pretty good at it, but I never really tried to venture too far out of my comfort zone.  Now, if someone sends me a message saying, “do you know how to do this?”, my answer is usually “why yes!” (ha. rarely), or “no, but I’ll figure it out.”  And then I do.   It’s very empowering to know that doing stuff on your own is not as scary as you think it is.  The internet (and my parents) are very good teachers.

500 Cake 25

My very first post was about cake — wedding cupcakes, to be specific.  And if you’ll look below, you can see all the other posts I have made about cake and cupcakes since then (not to mention the posts about cookies, and brownies, and knitting, and sewing …).  In commemoration of that, I think I’ll make another cake!

500 Cake 29

I’ve been brainstorming with the Pie and our friends about what to create for this particular occasion, but they’ve been absolutely useless.  They keep suggesting that I make a cake THAT I’VE ALREADY MADE.  What would be the point of that?  Well, it’s not called Ali Does It on the Advice of All the People She Knows, after all, so I started thinking about what *I* wanted.  Something a little bit fun, not too big, not too complicated, but a wee bit different. And something that I have made up all by myself. So here goes.

500 Cake 28

What about a berry cake?  I want something pink.  And I have a temptingly large container of partridgeberries in my freezer, which I picked up from Bidgood’s in the Goulds over the summer. If you know anything about this place, you’ll know that Bidgood’s is where you go to get stuff like this. That same day we picked up moose burgers and a rabbit pie. Both excellent.

500 Cake 1

Now, I’m making this into a layer cake with icing, but you could easily skip the cutting and frosting and have it as a nice coffee cake. It’s a versatile little thing, and it will freeze beautifully, unfrosted. So. Take your favourite 9″ x 13″ baking pan/casserole dish and butter it generously. Plop a sheet of parchment in the middle and butter that, too. It will just make it easier to get the cake out in one piece. Preheat your oven to 375°F while you’re at it.

500 Cake 5

Grab yourself some partridgeberries.  You’ll probably only find them frozen, but if you’re in a part of the world where they come fresh, then more power to you.  If you don’t know what a partridgeberry is, it looks like a small cranberry, but isn’t as tart.  You may know it better as a lingonberry or a cowberry.  You could substitute other berries in this recipe, obviously.  If you go the cranberry route, though, I’d add a bit more sugar.  Anyway, you’ll want about 2 cups partridgeberries for this cake.

DSCN4429

Plop them in a pan with about a tablespoon lemon juice and 1/2 cup granulated sugar, and stew on medium heat, stirring occasionally, until the berries are thawed and juices are running everywhere.  Pop a few with the back of your spoon to increase the juiciness, and remove from the heat so they cool down a bit.

500 Cake 4

In a large bowl, cream together 1 cup butter with 2 cups granulated sugar.

500 Cake 6

Add in 6 eggs, one at a time.

500 Cake 7

Then jump in your stewed berries, along with 1 cup sour cream.

500 Cake 9

Almost ready — now, a little bit at a time, stir in 3 cups all-purpose flour and 1 teaspoon baking soda.

500 Cake 10

Smooth your batter into your prepared pan.  I love that delicate pink colour.  Too bad it never lasts through the baking without artificial boosts — blech.

DSCN4439

Bake your cake on the middle rack for about 45 minutes to an hour, depending on your oven.  Mine took 47 minutes.  Place it on a rack to cool, and when it’s cooled enough to tip out, let it cool completely on a rack before frosting.

500 Cake 12

A note on frosting:

Now, you don’t HAVE to frost your cake.  That is entirely up to you.  But I’m going all out here, and I feel that fruits like this need a bit of cream cheese in the frosting to make me super happy.  If you’re going to layer this cake, make the full amount of frosting I’ve set out here.  If you’re just going to frost the top, then make about 1/3 to 1/2 of the amount laid out below.  And if you want a non-chocolate version (also yummy), substitute vanilla for the Kahlua and leave out the cocoa.

500 Cake 16

In a large bowl, beat together 1 cup butter and 1 250g package plain cream cheese.  Make sure both of them are soft but not melty.

500 Cake 13

Tip in about 5 tablespoons powdered cocoa together with 1 tablespoon Kahlua (or other coffee/chocolate liqueur of your choice) and mix that in thoroughly.  Once you get that in, add about 3 1/2 cups confectioner’s (icing) sugar.  You may need more or less depending on your preference.  Beat that to a pulp.

500 Cake 14

Then pour in 1 cup cream, whipping cream if you’ve got it.  Or leave it out, if you want a frosting that is a bit stiffer.  Lovely.  Chuck that in the fridge to chill while you wait for your cake to cool.

500 Cake 15

Then I simply cut the cake in half down the middle, like so.

DSCN4451

Then cut each half horizontally so I had four slabs of cake.  Slather on some icing between layers, plop the next one on, rinse, repeat.

500 Cake 19

It reminds me of a massive peanut butter and jelly sandwich.

500 Cake 20

I didn’t bother with a crumb coat when doing the outside, and I didn’t really go to too much trouble getting the icing all perfect (because I really don’t roll that way, don’t you know that by now?).

500 Cake 22

I think I have laundry on the brain — I seem to do it often enough.  It’s not quite the celebratory bunting you were expecting, eh? Fitting, though.

500 Cake 21

Thanks for seeing me through 500 posts as I learn to be a grown-up.  Here’s to 500 more!

500 Cake 23

Thirty-Four other posts about CAKE (brownies, bars, and other eatables and noneatables not included, but feel free to use the search function on the sidebar to find whatever you want!):

The Pie’s I’m-Turning-Old Ice Cream Birthday Cake, with Fudge Sauce

Hakan Ice Cream Cake

I will let you in on the worst-kept secret in our family: Saturday was the Pie’s thirtieth birthday.  He’s finally as old as me and will (hopefully) shut up about my aging process.

Hakan Ice Cream Cake
The Pie’s birth flower is the delphinium. That peony just happened to be there.

Now, for me, being born the week before March Break, as a child I often celebrated more than one birthday.  There was my actual birthday, then there was one when my grandparents came to visit the following week, and then maybe one with my friends from school.  Through no fault of my own, this happened consistently through to my adulthood, just little low-key celebrations dotting a week of aging, with maybe a cake at the end of it.  For the Pie it’s a bit different. Because he was born in the summer, all of his friends were out of school and so he generally had one big bash to celebrate his big day.  Needless to say, since we became broke and moved to Newfoundland, his expectations have taken a hit.  Fortunately, Papa John and Mrs. Nice are in town, so we can make it a bit of a party.

Hakan Ice Cream Cake
One of his “big boy” gifts: a sweatshirt designed to look like Optimus Prime. If you zip the hood all the way up it forms Prime’s large blue head, with mesh eyeholes. It wouldn’t zip over the Pie’s rather prominent nose.

As a rule (because we’re broke), we don’t exchange gifts, but on our birthdays, the other makes the celebrant a cake.  Last year, I made the Pie that disastrous leaning tower of chocolate.  This year I thought I would try for something a little more refreshing, given that it is summer, after all: ice cream cake!  Having watched several of the bloggers I read try and fail at this feat last summer (Caroline, I’m thinking of you!), I think I know what NOT to do, so here goes …

Start with a springform pan.  The fact that you can dismantle it means that getting the cake out when you’re done won’t be that hard.

Now you need some ice cream flavours.  One of our favourite restaurants in St. John’s, Get Stuffed, used to have this boozy ice cream cake, where the three layers of ice cream were flavoured with various liqueurs.  It.  Was.  Fabulous.  So I’m going to try to recreate that, but with a little less booze.  Just a little less.

Hakan Ice Cream Cake

I’m using ice creams I made from scratch, but you can use store-bought ice cream that has been softened.  The first layer, at the top of the cake, is raspberry (you can see the recipe here, though this time I used cognac instead of vinegar!).  Simply spoon 2 or 3 cups of softened ice cream into the bottom of the pan and smooth it out.  In retrospect, I should have frozen the empty pan before plopping the ice cream in it, because just-churned ice cream on a hot day has a habit of melting, and this seeped through the edges of the pan a bit before it re-froze.  No big deal, just something to remember for next time.

Hakan Ice Cream Cake

You might also want to scrape down the sides a bit, just so residual ice cream doesn’t interfere with the look of the following layer.

Hakan Ice Cream Cake

This cake took a couple of days to make, because each ice cream mixture needs to sit in the fridge overnight before you churn and freeze it, but that gave each layer ample time to get nice and solid before I added the next one.

Hakan Ice Cream Cake

The middle layer is vanilla, and the Pie loves his vanilla ice cream, so I used the best recipe possible.

Hakan Ice Cream Cake

Because the pan was frozen and the ice cream underneath was frozen, it was an easy job to smooth on this layer.

Hakan Ice Cream Cake

Then a chocolate layer.  Neither the Pie nor I are particularly fond of chocolate ice cream, but I have never seen an ice cream cake, especially one with a fudge layer, without it, so it had to go in.

Hakan Ice Cream Cake

You will be able to see the recipe here on Wednesday.

Hakan Ice Cream Cake

So, with that all frozen, I could work on my chocolate fudge layer, which, in my opinion, was always the best part of the store-bought ice cream cake.  Fudge sauce recipes abound on the internet, but I was looking for something with a bit of substance, something that would take well to freezing, and this one from The Foodess seemed perfect.  She even said it went well in ice cream cakes.

Making it was super easy, too, which I like.  I did it on the stove, but The Foodess recommends working with the microwave, so that should tell you how easy it is.

In a small saucepan with a thick bottom, pour 3/4 cup granulated sugar, 1/2 cup powdered cocoa, and 1/2 cup heavy cream or milk (I used homogenized milk here).

Hakan Ice Cream Cake

Heat, stirring often, until the sugar dissolves, and bring the mixture to a boil, all of which should take about 3 minutes.

Hakan Ice Cream Cake

Add in 4 tablespoons butter and cook for another few minutes, stirring occasionally, until the mixture thickens.  You might want to turn the heat down a little bit, so that the sauce doesn’t burn.

Hakan Ice Cream Cake

Remove the sauce from the heat, add in 1 teaspoon vanilla and a pinch of salt and you’re all done.  Wasn’t that easy?

Hakan Ice Cream Cake

Let that cool before smoothing it onto your final ice cream layer. Mine was in the fridge overnight and so I just stuck it in the microwave for a minute to soften it up a bit.

Hakan Ice Cream Cake

Hakan Ice Cream Cake

It slathered onto the frozen chocolate layer quite nicely.

Hakan Ice Cream Cake

Then you want a crumb crust.  You can use Oreo crumbs, but I also had some leftover pieces from some particularly crumbly gluten-free brownies that were in the freezer, so I pulsed them in the food processor and used them instead, which meant that everything in the cake was made from scratch (you gotta put in the extra effort sometimes).

Hakan Ice Cream Cake


As an aside, I also broke my mini food processor doing this — not because of the density of the brownies, but through my own mishandling of the situation.  Alas.Hakan Ice Cream Cake

Smooth the crumbs over the fudge layer.

Hakan Ice Cream Cake

Right to the edge. Yes, I licked the fudge off my finger later.

Hakan Ice Cream Cake

Press that stuff down and re-freeze for a couple of hours.

Hakan Ice Cream Cake

To serve, run a bit of hot water around the edges of the springform pan and release the cake, flipping it upside down onto a plate (make sure it’s a plate with a lip, otherwise the cake will dribble everywhere as it melts).

Hakan Ice Cream Cake

I used an icing scraper to texturize the sides and scrape away dribbles from other flavours that ruined the effect.

Hakan Ice Cream Cake

Then I used a fondant smoother to get rid of the weird melty marks on the top.

Hakan Ice Cream Cake

You can decorate it any way you want, but the Pie is a huge Street Fighter fan and he plays the character of Hakan, a Turkish oil wrestler.  So I bought some teal and white icing from Sobeys and put a stylized version of his face on the cake, as his skin is almost the same colour as the raspberry ice cream (okay so now not everything is made from scratch. Sue me).

Hakan Ice Cream Cake

Hakan Ice Cream Cake

Cover the cake with plastic wrap or seal in a container and store in the freezer when you’re not eating it.

Gluten-Free Yellow Cake Batter

Gluten-Free Cake Batter

Everybody needs a basic cake batter recipe to work from, even those who have a low tolerance for gluten.  Fussellette was coming for Easter and I wanted to serve a cake for dessert.  So I needed to come up with a cake that she could enjoy along with the rest of our guests.

Gluten-Free Yellow Cake Batter

This recipe is adapted from Martha Stewart’s Easy Cake Batter.  I replaced the flour in the recipe with a gluten-free mix I came up with myself, with a little bit of help from Ellen’s Kitchen.  If you are curious as to the right proportions when combining gluten-free flours, check out her suggestions — they are very useful.

Gluten-Free Yellow Cake Batter

First we want to bring all our liquid ingredients to room temperature: 1 cup butter, 4 large eggs plus 2 large egg yolks, and 1 1/2 cups buttermilk (or soured milk). If you want to warm up your ingredients a little faster, try placing them in a warm water bath.

Gluten-Free Yellow Cake Batter

In a bowl, whisk together 2 cups white rice flour, 2/3 cup almond meal (I find that the coarseness of the almond meal gives the cake crumb a springy, solid texture, with no fear of it falling if handled too roughly), 1/3 cup tapioca starch/flour, and1 tablespoon baking powder.  So the final result of this particular combination tastes like a sweet, more tender version of cornbread — it has a finer texture but that’s the best analogy I can come up with.

Gluten-Free Yellow Cake Batter

In the bowl of an electric mixer, beat together your butter with 1 3/4 cups granulated sugar, until it’s light and fluffy and creamy.  Don’t rush this process.  Let your mixer go on high for about 6 minutes, and you will see the difference between butter and sugar that are just well-combined versus butter and sugar that are well and truly creamed together. This is the just-combined stuff.

Gluten-Free Yellow Cake Batter

This is the truly creamed stuff.  It makes all the difference in a cake, especially one where you need all the help you can get to keep the structure light and fluffy.

Gluten-Free Yellow Cake Batter

Mix in your eggs, one at a time, until they are well-combined.  Again, you add the eggs a bit at a time so that the mixer paddle will have a chance to properly emulsify all of it.

Gluten-Free Yellow Cake Batter

Add in at this point 1 tablespoon vanilla extract.

Flip the mixer to its lowest setting and mix in about a third of your flour mixture.  Pour in half the buttermilk and let that get mixed in as well.  Then another third of your flour, mix that in, and the rest of the buttermilk.  When that’s mixed in, add the last of the flour and mix until just combined.  You may need to scrape down the sides of the bowl. This picture is blurry because I like to cook in motion.

Gluten-Free Yellow Cake Batter

Now you have a basic batter with which you can do pretty much anything.  You can turn it into a layer cake, or mix it with other flavours like chocolate or fruit.  Or you can make it into cupcakes, like I did here (the frosting is a package of cream cheese mixed with a cup of icing sugar and some coconut).

Gluten-Free Cake Batter

This cake here I wrapped up and froze for a future event.

Gluten-Free Cake Batter

For Easter I poured the batter into two pans and then layered the cake with whipped cream mixed with raspberries.  DIVINE.

Espresso Cupcakes with Mocha Buttercream

Espresso Cupcakes

So here I was, trying to come up with a good morning cupcake for my Sweet Treats committee at work.  Everyone at the firm seems to need a bit of a caffeine kick in the morning, so I thought I would modify my espresso brownies into cupcake form.  Then I thought, what about a smooth mocha buttercream icing on top?  Yeah, that sounded good.

Espresso Cupcakes

And then, lo and behold, what did I find on the internet?  The exact recipe I wanted!  And I didn’t even have to make it up myself!  Score one for the lazy part of me and big thanks to Nam for cooking it up and writing it down.

Brew  up a pot of strong coffee and save 1 cup coffee for this recipe.  Do what you like with the rest (preferably drink it, or save it for iced coffee).

Preheat your oven to 350°F and line two muffin pans with cupcake cups.

In a large bowl, sift together 2 1/4 cups flour, 1 1/2 cups cocoa, 1 1/4 teaspoon baking powder, and 2 1/2 teaspoons baking soda and set aside.

Espresso Cupcakes

Dissolve 1 tablespoon instant espresso powder in 1 cup coffee and set that aside.

Espresso Cupcakes

Clear the spider out of your stand mixer.  Apologize profusely to it as you send it on its merry way, but explain that despite its residency of nearly two weeks in your bowl, it does not qualify for squatters’ rights.  Then decide that, as you are doubling the recipe, the batter won’t fit in the mixer anyway, and opt for a larger bowl and a hand mixer.  Sorry, spider.

Espresso Cupcakes

In the bowl of the stand mixer, cream together 2/3 cup canola oil, 2 eggs, 1 1/4 cups buttermilk, and 1 teaspoon vanilla and beat until well combined.  Add in 2 1/2 cups granulated sugar and mix some more.

Espresso Cupcakes

Pour in the coffee and beat for another minute.

Espresso Cupcakes

Scrape down the sides of the bowl and slowly add in the dry ingredients, mixing until all the ingredients are incorporated.

Espresso Cupcakes

Using a spoon, fill the paper cups about two-thirds full.  Bake for 18-20 minutes, or until a toothpick inserted in the centre of the centre cupcake comes out clean.

Espresso Cupcakes

Let the cupcakes rest in the pan for about five minutes before removing them to a rack.  Remember that a super hot dropped cupcake will explode all over your floor, while a cooler cupcake will just bounce a bit.  That’s a handy fact to remember.

Espresso Cupcakes

Now for the luscious buttercream frosting.

In the bowl of an electric mixer fitted with a paddle attachment (you know, like the one you just used), whip 10 tablespoons room temperature butter (which, by the way, is 1/2 cup + 2 tablespoons butter) until it’s fluffy, light, and creamy. Add in 1/2 tablespoon cocoa powder and whip until combined.

Espresso Cupcakes

Slowly add in 3 tablespoons room temperature espresso (you can make this by following the instructions on your bottle of instant espresso powder).  As with most buttercreams, it will look a little curdled and gross at this point, but don’t you worry.

Espresso Cupcakes

A little bit at a time, add in 3-4 cups icing sugar.  You may need more or less, depending on the consistency you want, or the temperature outside, or a bunch of other variables.  Just go with what looks (and tastes) right to you.  Refrigerate the buttercream for at least ten minutes before using.

Espresso Cupcakes

Once the cupcakes have completely cooled and the frosting has chilled out a little, you can frost your cupcakes, or pipe on the frosting, if you wish.

Espresso Cupcakes

Garnish each cupcake with a dusting of cocoa powder (or some shaved chocolate) or a chocolate-covered espresso bean.

Espresso Cupcakes

Your coworkers will be appropriately wowed, especially once the caffeine kicks in.  Good morning to you, too!

Espresso Cupcakes

Carrot Cake for Interviews

Carrot Cake

While the Pie and I were back in Ottawa, I took advantage of our time there to finish off a few more interviews for my work with the local hockey team.  For my very final interview, the person I was interviewing wasn’t a huge sweet fan, so I decided to go with a nice, fresh carrot cake that I pulled off the Canadian Living website.  Plus it was easy peasy and I didn’t have a lot of free time.

Carrot Cake

Preheat your oven to 350°F and then butter and flour a 13 x 9″ metal cake pan (or, as I did in this case, two 9″ square disposable aluminum pans).

Carrot Cake

In a large bowl, whisk together the following:

2 cups flour

2 teaspoons baking powder

2 teaspoons ground cinnamon

1 teaspoon baking soda

1/2 teaspoon nutmeg

I didn’t take a picture of it because it was boring, so you can have a picture of my dog instead.
Gren Learns to Swim

In another bowl, beat together the following until smooth:

3/4 cup granulated sugar

3/4 cup packed brown sugar

3 eggs

3/4 cup vegetable oil

1 teaspoon vanilla
Carrot Cake

Pour the wet mixture over the dry mixture and mix until just moistened.

Carrot Cake

Stir in 2 cups grated carrots, 1 cup drained crushed canned pineapple (basically one 340mL can), and 1/2 cup chopped pecans.

Carrot Cake

Spread into your prepared pan(s) and bake for 40 minutes or until a cake tester inserted in the centre comes out clean.

Carrot Cake

Set the cakes on a rack to cool completely.

Carrot Cake

For the glorious cream cheese icing, beat together the following:
1 8oz (250g) package plain cream cheese, softened
1/4 cup butter, softened
1/2 teaspoon vanilla
1 cup icing sugar

Carrot Cake

I needed a little extra icing and I wanted it to be a bit creamier, so I added in a further 1 cup icing sugar and 1/2 cup whipping cream.

Carrot Cake

So very smooth.

Carrot Cake

Spread the icing over your cooled cake.  Spread it with love.  You can tell that I love it.

Carrot Cake

Either inside the pan or without.

Carrot Cake

And then eat it all.  Because the one I made is totally gone now.

Carrot Cake

Baked’s Sweet and Salty Cake

Sweet & Salty Cake
Not only do the Pie and il Principe share a birthday, but I’ll have you know that Cait’s birthday is only four days later.  And then Jiss’ birthday is only a scant five days after that.  Because we were heading back to Ottawa for a visit at the beginning of the month, we decided to postpone our birthday celebrations until we got there so that Cait  and Jiss could share in the fun.

So, for my husband on his birthday and my best friend on her birthday, and my husband’s friend’s spouse on HER birthday, I made them this fantastic confection, which comes out of our favourite cookbook of all time, Baked.
Sweet & Salty Cake
You can read the recipe online here, here, or here.  But you should really buy the book.  The pictures are glorious and the authors explain everything so well.

This recipe involves caramel, chocolate, and salt.  Yes, SALT.  I rarely use salt in baking but this one made it all worth it.  If you can get your hands on fleur de sel, all the better, but you can use sea salt as a substitute if necessary.  It’s also worth noting that this cake takes many steps, and you can save time by making things like the caramel the day before and putting it in the fridge.
Sweet & Salty Cake

For the Caramel:
Pour 1/4 cup water, 1 cup sugar, and 2 tablespoons light corn syrup into a medium saucepan and stir it around.

Sweet & Salty Cake

Plop a candy thermometer in the pot (making sure it doesn’t touch the bottom) and bring the mixture to a boil, cooking until the temperature reaches 350°F, which will take about 10 minutes.

Sweet & Salty Cake

Keep a close eye on it.  If you cook it any higher than the specified temperature it can burn super quickly.
Meanwhile, in a small saucepan, combine 1/2 cup whipping cream and 1 teaspoon fleur de sel.  Bring that to a boil as well and cook until the salt is dissolved, about 5 minutes.  Remove that from the heat and set aside.

Sweet & Salty Cake

When the sugar has reached 350°F, remove it from the heat and allow it to cool for one minute.  See how it’s browned a little bit? That’s the caramelization of the sugar, but you don’t want it to get too dark.

Sweet & Salty Cake

Carefully (very carefully) add the hot cream to the sugar mixture.  It foams and fizzes quite a bit, so you don’t want that in your face.   Whisk that all up until it’s smooth.

Sweet & Salty Cake

Whisk in 1/4 cup sour cream and let the caramel cool.

Sweet & Salty Cake

For the Cake:
Preheat your oven to 325°F and butter three 8″ round cake pans.  Cut a circle out of parchment paper for the bottom of each one, butter it as well, and dust them all with flour.

Sweet & Salty Cake

You need two decent-sized bowls and the bowl of a mixer for this next part.  In one bowl, whisk together 3/4 cup unsweetened cocoa, 1 1/4 cups hot water, and 2/3 cup sour cream.  Set that aside and let it cool while you do the other things.

Sweet & Salty Cake

In the other non-mixer bowl, sift together 2 2/3 cups all-purpose flour, 2 teaspoons baking powder, 1 teaspoon baking soda, and 1/2 teaspoon salt and set that aside.

Sweet & Salty Cake

Now, in the mixer bowl, beat together 3/4 cup softened butter and 1/2 cup vegetable shortening.  Beat them until they are smooth and kind of stringy when the paddle is spinning around, about 7 minutes.

Sweet & Salty Cake

Beat in 1 1/2 cups granulated sugar and 1 cup dark brown sugar until light and fluffy.

Sweet & Salty Cake

Add in 3 eggs, one at a time.

Sweet & Salty Cake

Add in 1 tablespoon vanilla extract, scrape down the sides of the bowl, and beat for a further 30 seconds or so.

Sweet & Salty Cake

Carefully add in a third of the flour mixture, then half your chocolate mixture, then a third of the flour, the rest of the chocolate, and the rest of the flour.

Sweet & Salty Cake

Divide the batter evenly between the three prepared pans and bake for 18-24 minutes, until a toothpick inserted in the centre of each cake comes out clean.

Sweet & Salty Cake

Allow to cool completely before removing from the pans and peeling off the parchment paper.

Sweet & Salty Cake

For the Caramel Ganache:
First, finely chop 1lb dark chocolate.

Sweet & Salty Cake

Also, cut up 1lb butter into tablespoon-sized pieces.  Make sure they’re soft but still cool.

Sweet & Salty Cake

Now we’re going to make some more caramel, but this time without the salt or the sour cream.
So, in one pot, combine 1/4 cup water, 1 cup sugar, and 2 tablespoons light corn syrup and stir it around.  Bring it to a boil over high heat until a candy thermometer reads 350°F, which will take about ten minutes.  Remember to watch closely.

Sweet & Salty Cake

In the other pot bring 1 1/2 cups heavy cream to a boil, then remove from heat and set aside.
When the caramel has reached 350°F, remove it from the heat and allow it to rest for a minute.

Sweet & Salty Cake

Carefully add the hot cream to the caramel and stir to combine, then let it cool for 5 minutes.

Sweet & Salty Cake

Plop your chopped chocolate in the bowl of a mixer and pour the caramel over the chocolate.  Let that sit for a minute, then stir the chocolate to dissolve it.

Sweet & Salty Cake

Shove your bowl into your mixer with a paddle attachment and mix the chocolate goo on low until the outside of the bowl feels cool to the touch.

Sweet & Salty Cake

Dump in your cut-up butter bits and mix on medium-high until it’s all well-combined and smooth and a little bit whipped, another 2 minutes or so.

Sweet & Salty Cake

To Put It All Together:
Now I followed the instructions up to this point to the letter, and ended up with a slippy-slide-y cake that ended up looking a bit like a giant pile of poop.  When I put my cake layers together, they kept sliding off on the caramel and the weight of the cake pushed all the lovely caramel goo out of its insides and it was altogether rather a disaster.  So I recommend cooling your ganache and your caramel slightly before you do this, just so they’re slightly colder than room temperature and a little easier to handle.

Sweet & Salty Cake

Slice the tops off your cakes to make them level and place one on your cake plate.

Sweet & Salty Cake

If you are concerned about making a mess with your icing (though considering how goopy mine was it didn’t matter anyway) you can place four strips of parchment paper on your cake plate under the cake to catch the excess, and then pull them away later, leaving a nice clean plate.

Sweet & Salty Cake

Take about 1/4 cup of the caramel and spread a thin layer on the cake, allowing it to soak into the cake a bit (which will only happen if your cake or your caramel is warm, and will just make everything quite slippery).

Sweet & Salty Cake

Layer on top of that about 1 cup of the caramel ganache (also, at room temperature, incredibly slippery).

Sweet & Salty Cake

Add another layer of cake.  See what I mean about gravity really being annoying here?

Sweet & Salty Cake

Repeat your caramel and ganache steps and top with your final cake layer.  This is where I tried to remove some of the excess and failed.

Sweet & Salty Cake

Use the remaining ganache (easy to do if it’s cold, if it’s room temperature you’ll use wayyy less) to cover the surface of the cake.  At this point the whole thing started to slide slowly and rather unnervingly to one side.  It was like watching a mudslide in slow motion.  There was much yelling.

Sweet & Salty Cake

Sprinkle the top with fleur de sel and chill for an hour or so before serving, to set the ganache.

Sweet & Salty Cake
At least it tasted good.
Sweet & Salty Cake