Another Slow Cooker Dip Trio – in two parts

This past weekend, we had our housewarming party – finally. Mostly because we finally had enough furniture for people to sit on. And also because it’s hard to warm a house in the middle of the winter. This way, we could use the barbecue.

Dip Trio 1

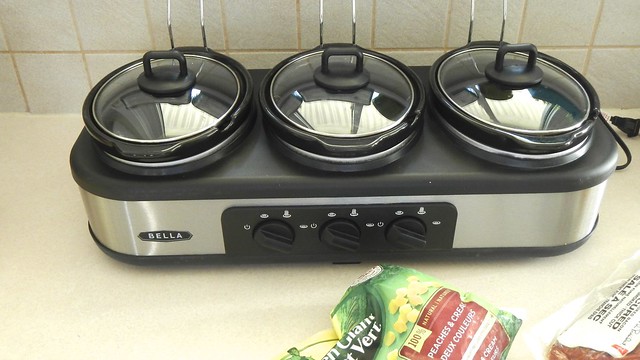
The Pie wanted to make use of our three-pot mini slow cookers and prepare some dips for our guests, so here are two of the ones we came up with. The final one involved a bit of extra prep so it’s a post on its own. The two posted today were made significantly smaller so they’d fit in our tiny pots.

Dip Trio 4

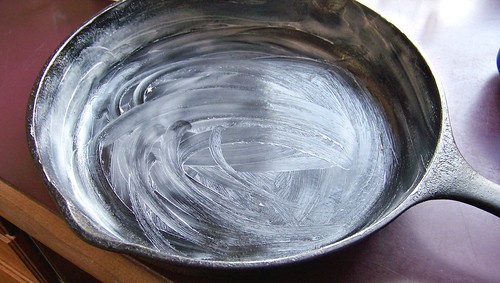
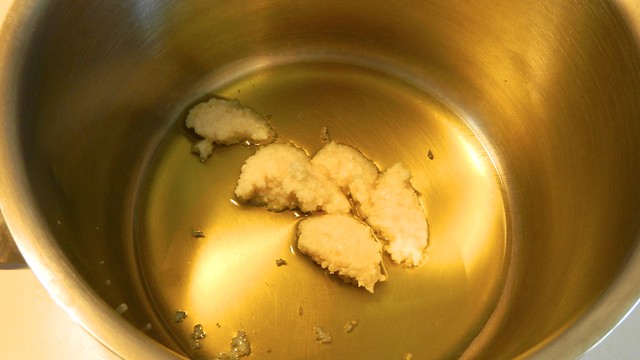
This first one, a garlic white bean dip, doesn’t really require a slow cooker, unless you want it to be served warm (which we did). I also took out some of the prep steps to make the whole thing a one-shot process. Start by glugging 1/4 cup olive oil into a small saucepan, and add in the equivalent of 6 cloves of garlic, thinly sliced. Cook that on low for about 5 minutes, until garlic smells start to fill your whole kitchen.

Dip Trio 3

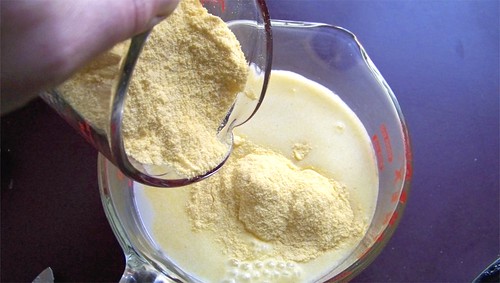
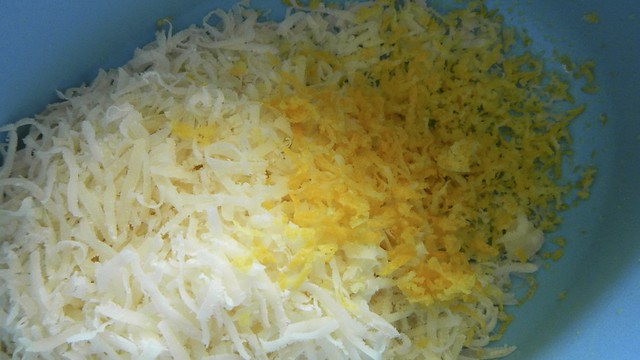
Grate up about 3/4 cup parmesan cheese and the zest from 1 lemon.

Dip Trio 6

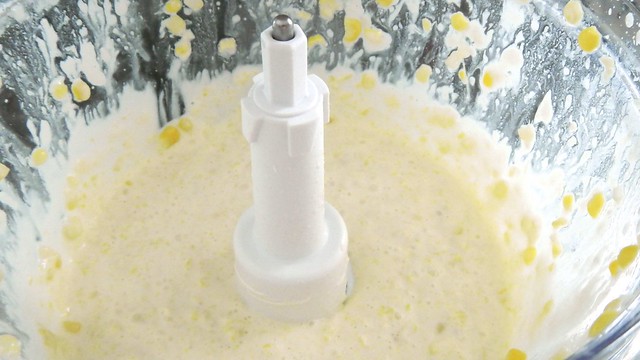
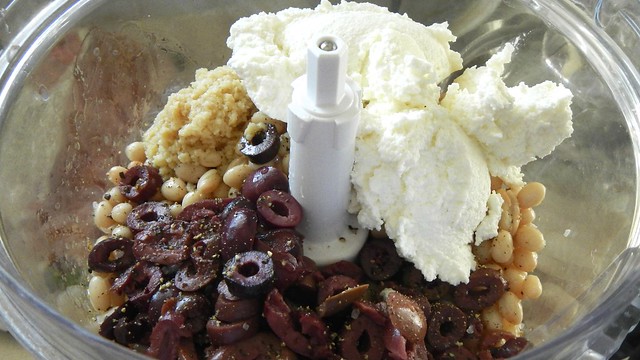
Then, grab your food processor and chuck in 2 cans of cannelini beans, drained and rinsed. I used one can white beans and one can of white navy beans. Tip in as well 1/3 cup water, 1 cup ricotta cheese, your garlic and oil stuff, the parmesan and lemon zest, 1/4 cup pitted kalamata olives, and a generous helping of salt and ground black pepper.

Dip Trio 5

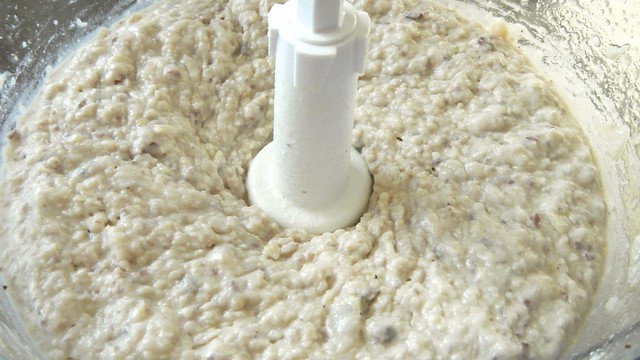
Give that a good whaz until it’s all smooth. Add a bit more olive oil if you think it looks dry (and if you’re going to keep it in the slow cooker all day, add a bit more as it has a tendency to dry out).

Dip Trio 7

Plop that in the slow cooker and leave it on low for about 2 hours to warm through. Enjoy!

Dip Trio 23

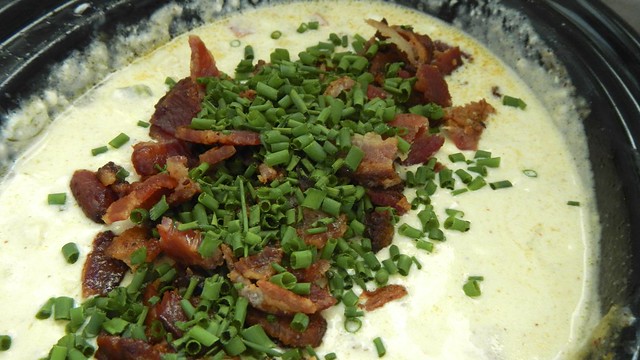
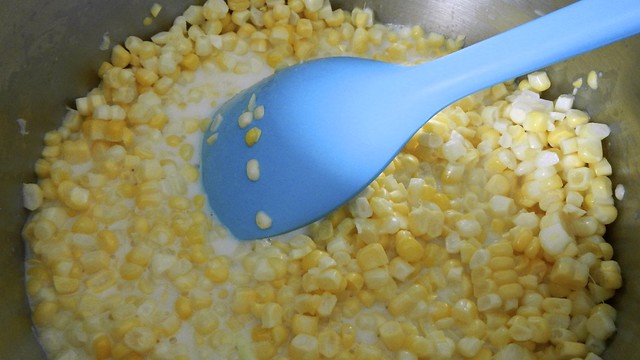
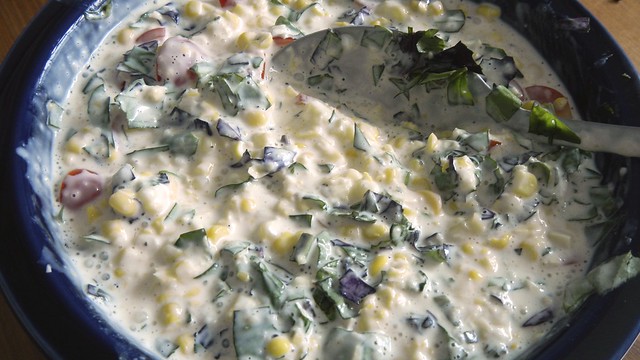
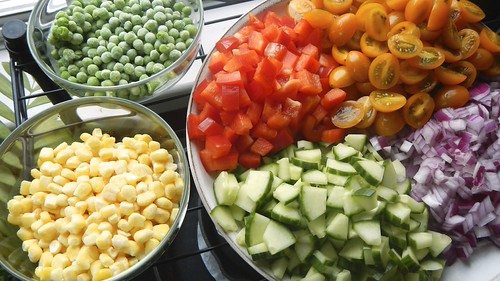
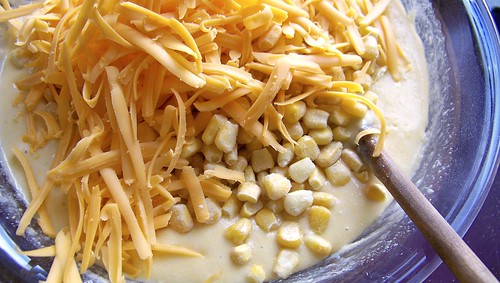
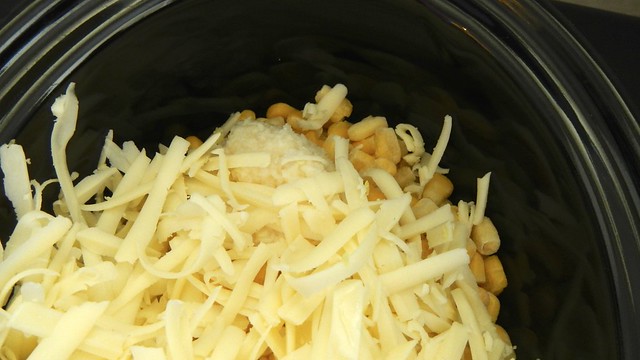
This next one is pretty good, but we actually found it a little bland and might spice it up some more next time. It’s a corn and cheese dip with bacon and pale ale and I think it has plenty of potential for enhancement. Start by tipping 3 1/2 cups frozen corn into your slow cooker. Top that with 2 minced cloves of garlic and 1 1/2 cups grated cheese (we used an extra-old cheddar).

Dip Trio 8

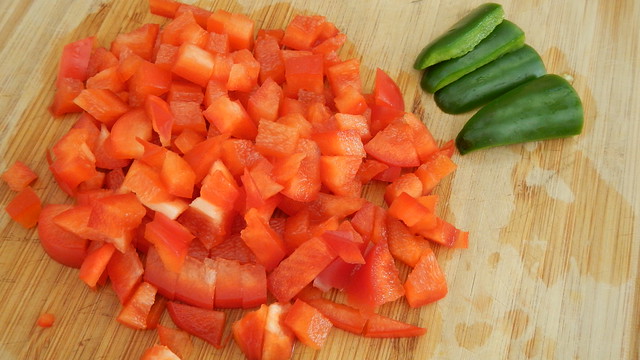
Dice up a red bell pepper and a de-seeded jalapeno.

Dip Trio 9

Chuck those in the pot with 3/4 cup sour cream, 1/2 teaspoon ground cumin, 1/2 teaspoon chili powder, and salt and pepper to taste.

Dip Trio 13

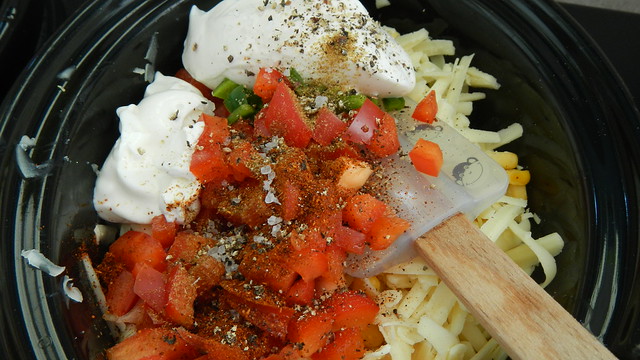
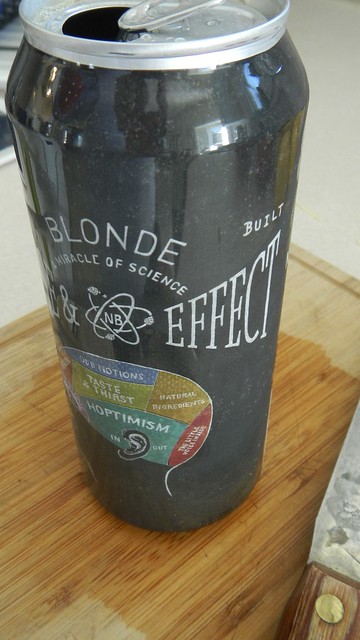
Grab a pale ale as well and tip in about 1/3 to 1/2 cup of it. I think next time I’d use something with a bit more flavour, as neither the Pie nor myself are IPA fans (not that I’m drinking these days anyway).

Dip Trio 12

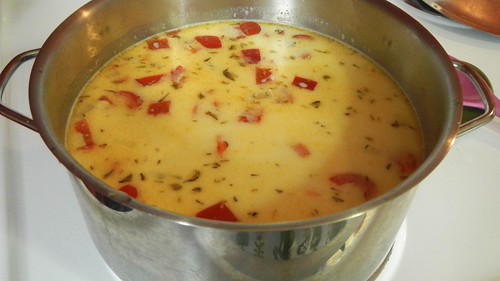
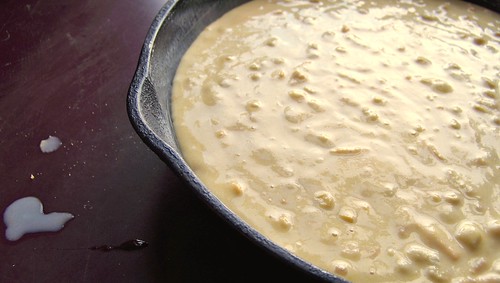
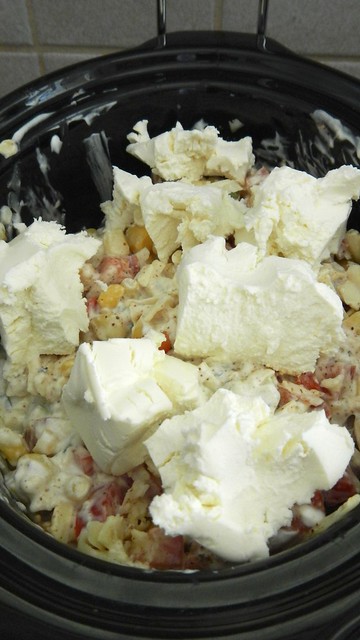
Give that a good stirring to mix things up. Then grab a package of plain cream cheese and break it up into chunks, which you can then spread over the top of the thing. Cover and cook on high for 4 hours.

Dip Trio 14

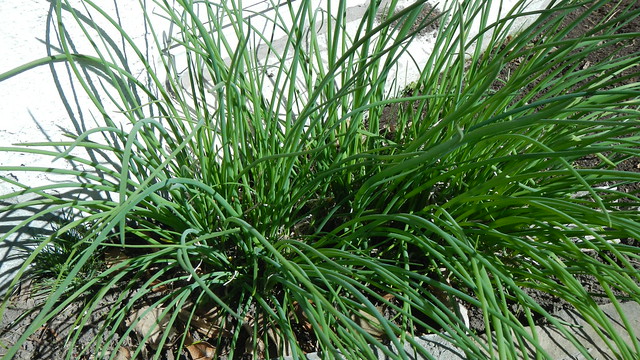
While that’s on the go, cook up about 4 slices of bacon until it’s crispy enough to crumble and let it cool (so you can crumble it). Harvest some fresh chives from your garden (it’s the only thing growing right now). Cut those up in a wee bowl and set the bacon and chives aside until the dip is ready.

Dip Trio 15

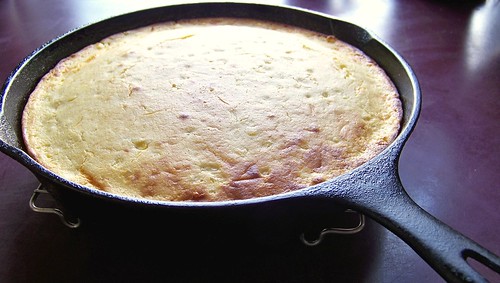
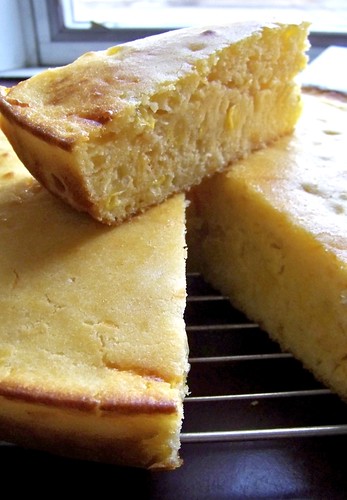
When the dip is hot, stir well to incorporate the cream cheese and then garnish with the chives and bacon. Eat!

Dip Trio 21

Corn and Tomato Dip

Corn and Tomato Dip 15

Another Martha Stewart dip, and I loooooooove this one. The way I made it is totally unhealthy but that’s kind of the point and it’s amazing. I can totally see myself just sitting down on a late summer afternoon with a bag of tortilla chips and just eating the whole thing for a meal. And then having to roll myself away from the table. Or dying. But what a good way to go. I doubled the amounts I found in the original recipe to fit the food I had and used cream cheese instead of silken tofu because silken tofu is gross and hard to find around here. You can use whatever you prefer.

Corn and Tomato Dip 1
Start with some ears of fresh corn. I used five here, bought from the grocery store as our corn season has only just begun in Ontario. Use a knife or a special corn-kernel-scraping tool (whatever they’re called) to get all the kernels off the corn and into a pot.

Corn and Tomato Dip 8

Pour in 1 cup 2% milk and heat over medium-high, stirring occasionally, until the corn is nice and tender. Let that cool for a bit.

Corn and Tomato Dip 9//embedr.flickr.com/assets/client-code.js

Meanwhile, grab a giant bunch of basil (any colour) out of your garden and start slicing that up.

Corn and Tomato Dip 3

Grab as well some cherry tomatoes, about 16, and quarter those.

Corn and Tomato Dip 4

Plop those in a bowl until you’re ready for them.

Corn and Tomato Dip 6

In the bowl of a food processor, plop 1 250g package plain cream cheese, 2 tablespoons fresh lime juice, a few pinches of salt, some pepper, and about 2/3 of your corn-milk mix. Buzz that until it’s mostly smooth and uniform.

Corn and Tomato Dip 12

Transfer the contents of the food processor to a bowl and mix in the rest of the milk-corn stuff, together with the sliced basil and quartered tomatoes. Serve with chips and enjoy!

Corn and Tomato Dip 14>

Cheesy Corn Fritters: In the Woods

Fritters in the woods 8

Seeing as most of our time camping is spent killing time between meals, it behoves me to put a bit of thought into them so they’re not a disappointment. And that means that all the lunches I made for our camping trip were hot ones. Granted, with everything mixed ahead of time, they were a snap to prepare, but I think the little bit of ceremony required in lighting the grill and getting everything ready made them a bit extra special.

Fritters in the woods 1

These quick fritters come from The Camping Cookbook – like most things we made for this trip – and are spectacular.

Fritters in the woods 9

Mix together 3/4 cup all-purpose flour and 1/2 teaspoon baking powder in a bowl.

Fritters in the woods 2

Beat in 1 large egg and 3/4 cup milk.

Fritters in the woods 3

Stir in 75g corn (fresh, frozen, canned, it’s your choice, but make sure it’s well-drained), 1/4 cup shredded cheese, and 1 teaspoon fresh chives).

Fritters in the woods 4

Heat 2 teaspoons oil in a frying pan and drop tablespoons of the batter onto the hot surface. Fry 1-2 minutes each side until crispy and golden brown. This recipe will make about 8-12 small fritters, and we served them with some carrots on the side. Tasty and quick!

Fritters in the woods 5

Fritters in the woods 6

Fritters in the woods 10

A Dilly Dish

Dilly Dish 3

I’m sure you experience this, same as the rest of us: you don’t want to create a fancy side for your weekday meal but you want something slightly more interesting than the merely steamed vegetables sitting on your plate.  Well here is your solution.

One evening I was preparing our evening meal, spiced chicken thighs with frozen corn, frozen peas, and basmati rice on the side.  Rather than serve all those vegetables and grains separate, I had an idea.  Just steps from my parents’ front door are several tall dill plants.

Dilly Dish 4

I cut off some of the leaves, which kind of resemble fennell, and brought them inside.

Dilly Dish 6

I combined the rice, peas, and corn, added some butter and salt and pepper, and stirred in the dill, chopped, and served it hot.  It made a nice little base for the chicken and a slight refresher on what could have been a ho-hum meal.

Dilly Dish 2

Chicken Orzo Salad

Chicken Orzo Salad 10

The Pie’s parents, Mrs. Nice and Papa John, are in town on a visit for the Pie’s graduation (B.Sc. Honours in Geography and Computer Science, booyah), so I get a good number of opportunities to cook new things that I think might appeal to them.  This one I made with Mrs. Nice in mind, and reminds me somewhat of that amazing orzo salad we had at Ferryland a few years ago.

Chicken Orzo Salad 5

Chicken Orzo Salad 2

Prep your vegetables.  Dice up half a large red onion, 1 red pepper, and half a large cucumber (I cut out the seeds).  I also halved 250g grape tomatoes and defrosted 1 cup each frozen corn and frozen peas.

Chicken Orzo Salad 3

Prep your dressing.  In a small jar (or other container with a lid), dump 1 tablespoon minced garlic, 2 teaspoons dried savoury (or basil, or oregano, or whatever you want), 2 tablespoons lemon juice, 2 tablespoons honey, 3 tablespoons rice vinegar, and 3 tablespoons vegetable oil.

Chicken Orzo Salad 7

Close the lid tightly and give that a shake.  Let it sit for a while.

Chicken Orzo Salad 8

Fill a large saucepan with about 4L of water and salt it generously.  Put it on to boil.  When it’s boiling, remove the lid, turn the heat down a bit, and pour in 450g orzo pasta.

Chicken Orzo Salad 6

While that’s on the go, cut up about 3 boneless skinless chicken breasts into small cubes and  pitch those in a frying pan or skillet with a bit of vegetable oil.

Chicken Orzo Salad 9

Sauté those until fully cooked and browned on the outside.  Remove from the heat.

Chicken Orzo Salad 14

Drain your orzo and plop it in a big bowl. This bowl was not big enough.

Chicken Orzo Salad 20

My peas and corn were still a little frozen so I added them to the still-hot chicken pan to let them thaw properly.

Chicken Orzo Salad 17

Then I chucked in the rest of the vegetables and stirred that around.

Chicken Orzo Salad 18

Then you just add your veg to your pasta.  Give that a good stir.

Chicken Orzo Salad 21

Give your dressing another shake and toss that with all the rest of your salad (don’t worry about the amount — it will be absorbed into the pasta) and serve warm or cold.

Chicken Orzo Salad 22

Wingin’ it Wednesday: Oliver’s Stew

Oliver's Stew 16

Sometimes things don’t always work out exactly how you want them to.  But that’s okay, because you can learn from what you’ve done and move on.  So while this recipe was a little bland for my liking, I’m sure with the right combination of spices it would make a great mid-winter slow-cooker bowl of comfort.  I called it “Oliver’s Stew” because it has a gruel-like consistency that reminded me so much of the musical based on Charles Dickens’ novel Oliver Twist, specifically, this song. Nonetheless, I know some of you out there like your stews to be on the mushy side, so maybe this one is for you.

I started with some chicken thighs, and pulled the skin off them. There are only a few people in the world I will handle raw chicken for. The Pie is lucky to be one of them.

Oliver's Stew 1

Then I quickly browned them in a cast iron skillet.

Oliver's Stew 2

Cut up an onion and some garlic.

Oliver's Stew 3

And gathered some herbs: mustard, rosemary, and savoury.

Oliver's Stew 6

A red pepper.

Oliver's Stew 8

Some chick peas.

Oliver's Stew 9

Some rice.

Oliver's Stew 10

And some chicken broth.

Oliver's Stew 11

I hucked that all in the slow cooker with some salt and pepper and let ‘er rip. I ended up adding more liquid later on as it all got sucked into the rice.

Oliver's Stew 12

Shortly before serving I added some frozen corn and peas for colour.

Oliver's Stew 13

And there you have it — the chicken has fallen off the bone and lays in these lovely strips and the peas and corn and pepper add a nice pop of colour.

Oliver's Stew 14

Vegetable Chowder

Vegetable Chowder

I’ve got another Martha Stewart soup for you, and this one is another crowd-pleaser that also goes in the freezer.  How’s that for a hip rhyme?  This chowder is so hearty that you might not even realize it’s vegetarian.  It’s very similar to hodge podge, so feel free to accompany it with Nova Scotia beer bread while you’re at it.

Vegetable Chowder

Start with your chopping.  Dice 2 red bell peppers and 1 large onion and grab 1/2 teaspoon dried thyme.

Vegetable Chowder

Chuck that into a large saucepan with 3 tablespoons butter and cook on medium-high until the vegetables are softened, about five minutes.

Vegetable Chowder
This picture is blurry because I was too excited about chowder to stay still.

While that’s on the go, peel and chop up about 4 medium baking potatoes.  Those go in the pot, too, as well as 3 cups milk and 4-5 cups water.

Vegetable Chowder

Bring that all to a boil and then reduce it to a simmer for about 8 minutes, until the potatoes are almost tender.

Vegetable Chowder

Then you will want to chuck in 4 cups corn.  I used the frozen stuff, but feel free to use fresh if it’s available.  Simmer that for another 3 minutes. Using a slotted spoon (to drain off excess liquid), remove 3 cups’ worth of soup solids.

Vegetable Chowder

Purée those.  Pause to remove bits of puréed vegetables from your face and spectacles.

Vegetable Chowder

Chuck that goo back in the pot and add 6 cups green beans (again, I used frozen ones, but if you’re using fresh, cut them into 1″ pieces).

Vegetable Chowder

Simmer again until the beans are tender, about 5 minutes, and serve.

Vegetable Chowder

When you’re freezing stuff like this, it helps if you portion it out into the containers you’re using one ladleful at a time, distributed equally among the containers.  This means that your containers will get equal amounts of veggies and broth, and you won’t be left with one container holding mostly vegetables and your last container holding mostly broth.

Vegetable Chowder

Cottage Pie

Cottage Pie

This is what we commonly refer to in our house as shepherd’s pie.  However, due to this usage, the Pie is convinced that traditional shepherd’s pie is made with ground beef, regardless of the fact that shepherds are generally focused on sheep, not cows.  There have been several arguments over the years.  He won’t even take Wikipedia as a definitive answer.

So.  Cottage pie.  A good way to use up leftover meat of any kind, and to encourage people to eat lovely potatoes.  This one we’re making with ground beef, and adding a few sweet potatoes to the mix.  The amounts I’ve used below are approximate, but make two good-sized dishes of the pie.

Start with 4 or 5 sweet potatoes.  Peel them, chop them up, and then boil them until they’re soft and mashable.

Cottage Pie

Then of course mash them, with a bit of butter.

Cottage Pie

While that’s on the go, you can finely chop 2 or 3 small onions and toss them into a large saucepan with some minced garlic and cook that until the onions are tender and translucent.

Cottage Pie

Add in about 1lb lean ground beef and stir that around until it’s cooked through.

Cottage Pie

Now, what I’m doing here is sprinkling about 1/4 cup flour onto my beef mixture.  For a gluten-free version, use corn starch.

Cottage Pie

Then use that same cup to scoop some of the cooking water out of your boiling sweet potatoes and add it to moisten the mix.

Cottage Pie

Chop up a few small carrots.

Cottage Pie

Add them, together with some frozen corn and frozen peas, to the meat mixture and stir around until they’re all separated and thawed.

Cottage Pie

Add some rosemary if you’ve got it.

Cottage Pie

Now you’re ready for assembly.  Gren seems to think that he is a viable receptacle for cottage pie.  He could be right. If it wasn’t for the corn and the wheat flour, and the fact that he is allergic to beef.

Cottage Pie

Spoon the meat and vegetables into the bottoms of your casserole dishes, filling about 3/4 of the way up. Then take your mashed sweet potato and smooth that over the tops.

Cottage Pie

Everything in there is cooked, so you will just need to heat it thoroughly when you cook it.  Using a glass casserole makes it easy to see if the mixture is bubbly.  These ones I froze for our parents to eat later.

Cottage Pie

The Perfect Pop

The Perfect Pop

One of my research participants told me about this method of popping corn.  It was a cold night in January and we would both rather be elsewhere — in this particular situation, we would both rather be home in front of the fire, digging into a book we’d both started reading at the same time, and stuffing our faces with popcorn.  She told me about this new/old method she’d re-discovered: the art of cooking popcorn on the stove top.

We’d had an air-popper growing up, which was fun to watch, but noisy, and when you poured the melted butter over the popcorn you often ended up with soggy popcorn in some places and no butter at all in others.  The flavour-distribution method needed work.

Then of course there are the microwave popcorns, which always seem to leave a weird film on my teeth and which all taste (to me) faintly of chemicals.  I’m also not a huge fan of using the microwave, unless it’s to melt butter for baking or heat up my tea.

Everyone has their own method for making popcorn on the stove, and I tried a bunch of them (including the method prescribed by my research participant).  The best and simplest method I came up with was a combination of her recipe, this one, and this one.  You should definitely test out different approaches to see which works best for you, your stove, and your pots and pans.

So.  Take yourself a large saucepan with a lid (the amounts below will give you about 12 cups of popcorn).

Add 1/4 cup vegetable oil to the bottom (anything with a high smoke point will do, like canola, sunflower, peanut, or grapeseed.  I like to use peanut oil because I think it tastes better on the popcorn).  Place over medium heat and let it get nice and toasty.

The Perfect Pop

Plop 3 or 4 kernels of popping corn (my research participant tells me that No-Name brand kernels are terrible for popping this way, so use another brand if you can) into the pan and cover with a lid.  When you hear the kernels pop (you use more than one in case that one is a dud), you know the oil is hot enough for popping.

The Perfect Pop

Pour in 1/2 cup popping corn.  For a sweet treat, add 1/4 cup sugar as well (if you use white sugar it tastes like candy corn, and if you use brown sugar, it’s like caramel corn).  For a salty taste, add in 2 tablespoons salt instead.

The Perfect Pop

Stir it all really well, cover, and remove it from the heat.  Wait for 30 seconds.  This brings all the kernels up to the same, almost-popping temperature.

The Perfect Pop

Put the pan back on the heat.  Very shortly thereafter the corn should start popping like crazy, and all at once.  Keep the pan covered but leave the lid slightly ajar to let the steam escape, and every few seconds, give the pan a shake back and forth on the burner to keep the popped kernels from burning.  When you get to the point where there are about 2-3 seconds between pops, it’s time to take the pan off the heat.

The Perfect Pop

Pour the popped corn into a large bowl.  If you used sugar, allow the corn to cool slightly (so you don’t burn your tongue), and break up the large clumps with a spoon.   Then feel free to gorge yourself silly.  I did find that the sugar version has a slightly smaller yield, and I think that has something to do with the stickiness of the sugar tamping down the explosive properties of the corn.

The Perfect Pop

Some of the kernels got caramelized before they’d reached their full potential.  But perhaps I just didn’t stir it well enough.

The Perfect Pop

Super Moist Corn Bread

I always think of corn bread as being something out of the South (and by that I mean the southern United States), baked on a hoe over a fire after a long day of harvesting sun-drenched fields. Or from Latin America, where indigenous people have been using corn in recipes for ages and ages.

When I was looking for a modern twist on corn bread, however, every single online recipe I found was credited to someone in CANADA.  How strange is that?  Sure, we grow a lot of corn here, but the association just isn’t the same.  In any case, I adapted this particular Canadian recipe from WillowsMom99 at AllRecipes.

Preheat your oven to 400°F and generously butter a large cast-iron skillet.  We’re going to do this the old-fashioned way.  Sort of.  If you don’t have a cast-iron skillet, you should be ashamed of yourself and feel guilty enough to go out and purchase one immediately.  Until you do so, however, you can also use a 9″ x 13″ pan.

In a small bowl, combine 1 1/2 cups cornmeal (not to be confused with grits, corn flour, or masa harina) with 2 1/2 cups milk and let it stand for 5 minutes.

In a large bowl, whisk together 2 cups all-purpose flour, 1 tablespoon baking powder, and 2/3 cup granulated sugar.  I might lower the sugar amount to 1/2 or 1/3 cup, but if you like your corn bread sweet, then go for it.  Mix in the cornmeal mixture and stir well.

Add in 2 eggs and 1/2 cup butter, melted, and stir until smooth.

Here’s where you have a chance to get creative.  I stirred in as well about 1 1/2 cups grated cheddar cheese and 2 cups frozen corn.

Pour the batter into the prepared skillet.

Bake for 30-35 minutes, or until a knife inserted into the centre of the cornbread comes out clean. 

Allow to cool slightly in the skillet on a rack, then tip out and slice into wedges for serving.

Great with chili or just on its own.  Just remember to wrap it up tightly to store it, as it goes stale very quickly.