Slapdash Souvlaki

May was an INTENSE month here at the Ali Does It household. LongJohn went to daycare a month earlier than scheduled and I had a whole four weeks to get all the stuff done on the house I hadn’t had an opportunity to do when we moved in … because of the whole having-a-baby thing. Some of those projects are still in progress but I have SO MUCH to show you when they’re ready to be shown. If May was intense, then June is even more so. I went back to work full time AT A NEW JOB. And on my first day, I had HAND surgery. Today I’m having hand surgery on the OTHER hand. So things are a little nuts, to say the least. Luckily I have a bit of a backlog of posts for you guys. Let’s start with this one for the barbecue, now that we’re officially into grilling season.

Slapdash Souvlaki 26

The Pie is a huge fan of souvlaki. We’re fortunate that some of the best souvlaki in town is only a short drive away. But it’s actually pretty easy to make your own souvlaki at home, provided you have some time to prep. Here’s how you can do it.

Slapdash Souvlaki 1

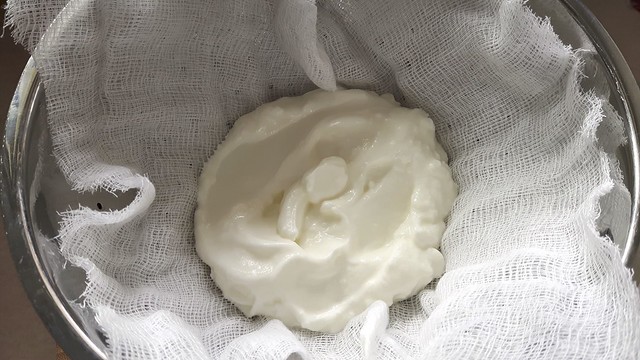
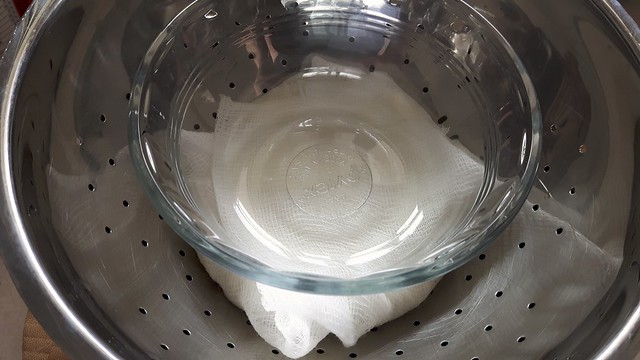
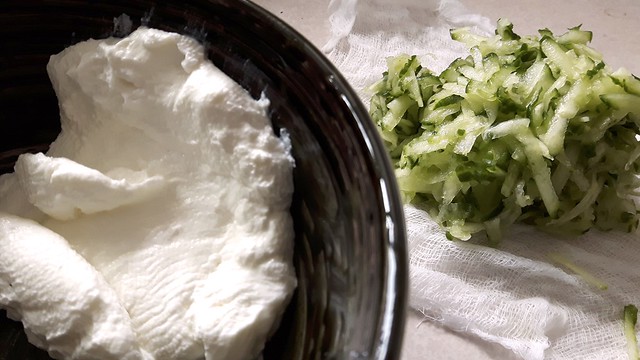
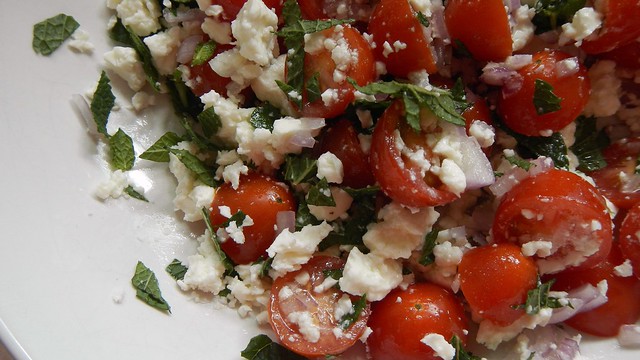
First, let’s start with that most essential of condiments: tzatziki. You can always buy this but it’s easy to make as well. I rarely measure my amounts because I find they vary depending on my mood but here’s an approximation for you. Start off by grabbing about 1/2 cup plain yogurt and plopping it in a few layers of cheesecloth in a colander. Wrap it well and put something with a bit of weight on top. Place the colander over a bowl and shove it in the fridge for a few hours. I use Balkan style yogurt for this, but if you have Greek yogurt you can skip this step.

Slapdash Souvlaki 2

After your yogurt has been pressed and some of the water has drained out, you can unwrap it and give the cheesecloth a bit of a rinse. You’re going to need it in a second.

Slapdash Souvlaki 15

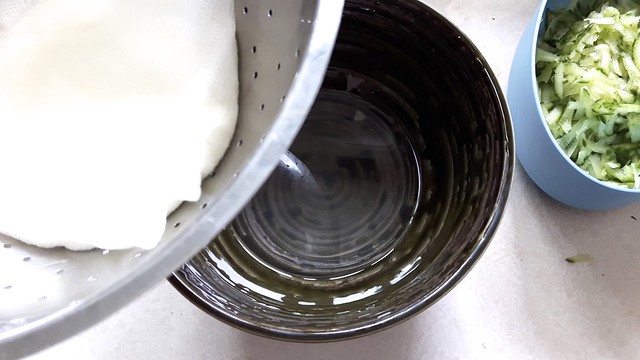
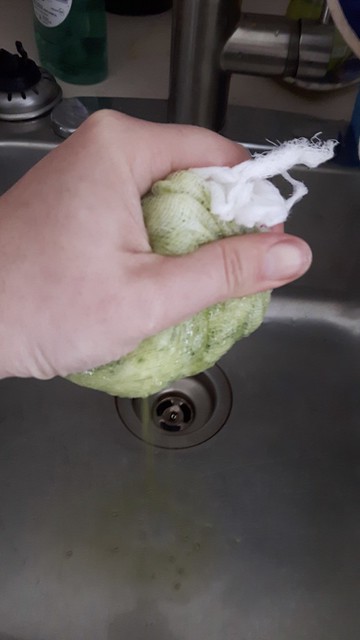
Grate up about half a cucumber. Plop the cucumber bits onto the cheesecloth, wrap it up, and give it a good squeeze over the sink and get rid of excess water.

Slapdash Souvlaki 17

Slapdash Souvlaki 18

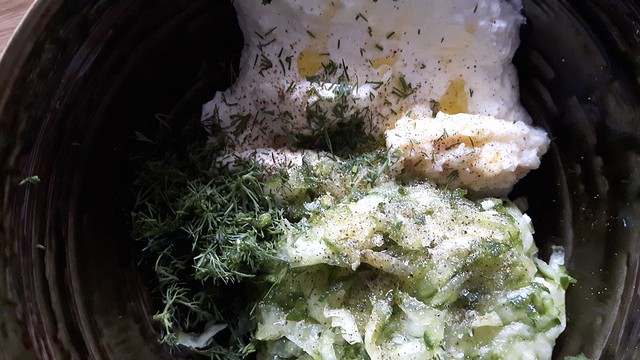
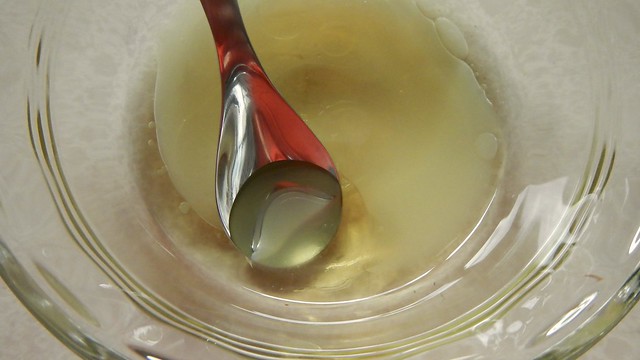
Now, tip that into a bowl together with the yogurt, some minced garlic, chopped fresh dill, salt, pepper, a few drops of lemon juice, and a drizzle of olive oil.

Slapdash Souvlaki 19

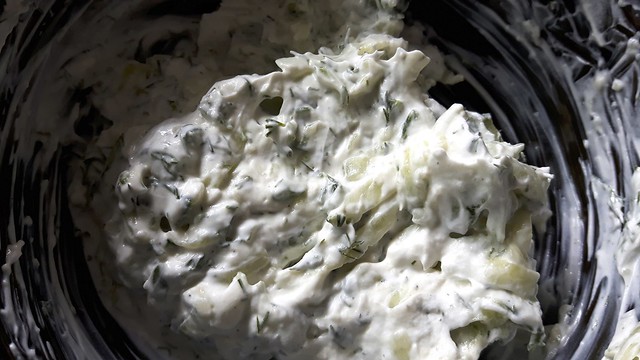
Stir, stir, stir! Shove that back in the fridge for a few hours (preferably overnight) to let the flavours mingle.

Slapdash Souvlaki 20

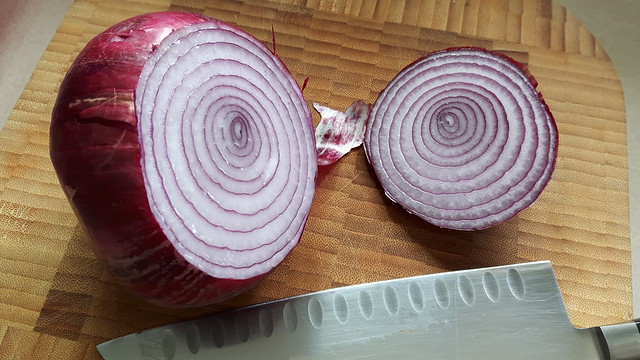
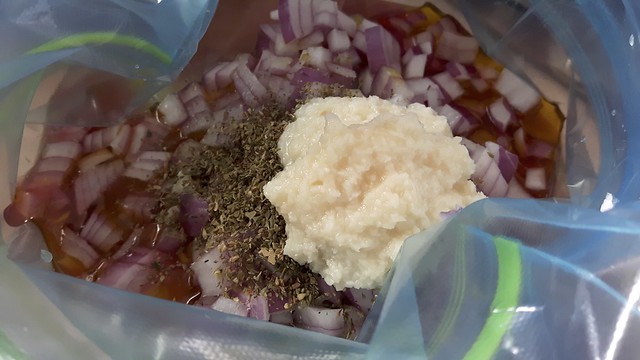
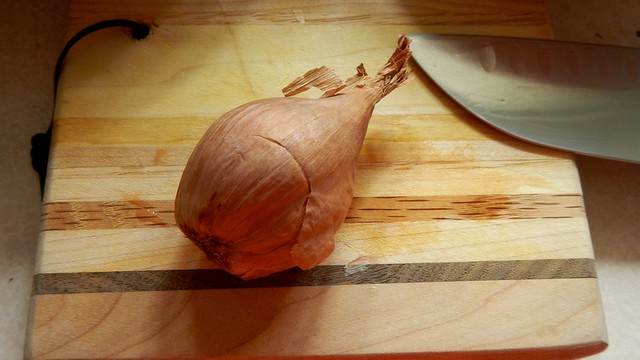
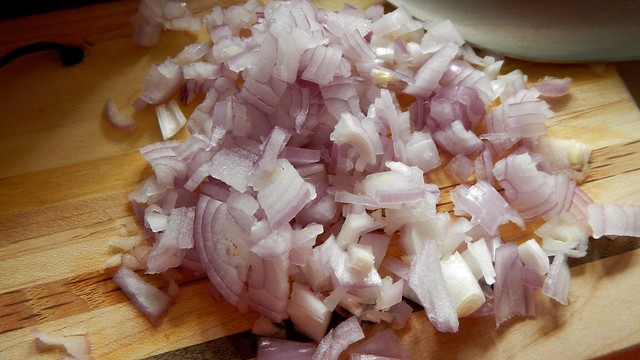
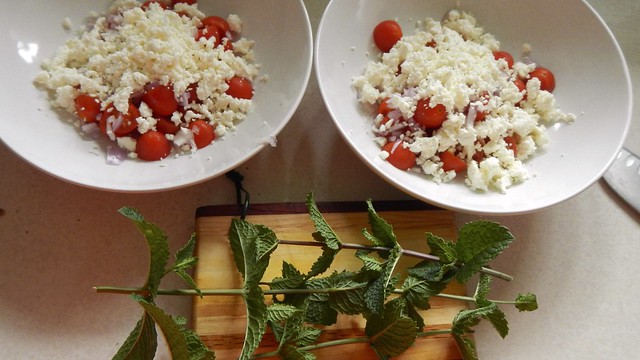
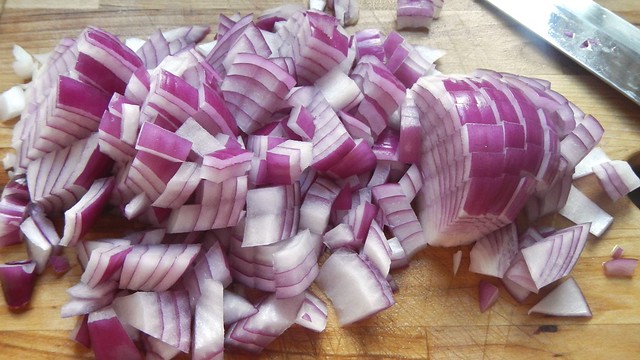
For the souvlaki we’re going to create a marinade. Start by finely chopping up a small red onion. I’m being smart here and using a large red onion because I’m making the recipe twice and chucking half of it in the freezer.

Slapdash Souvlaki 4

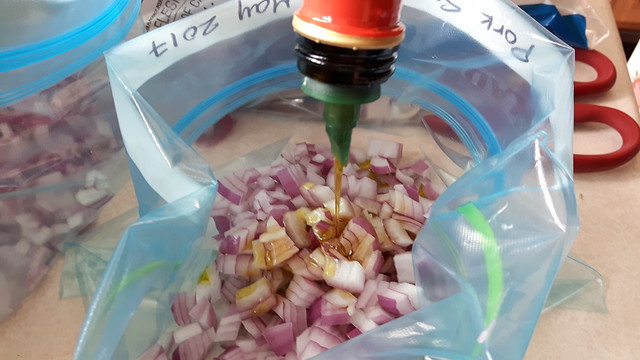
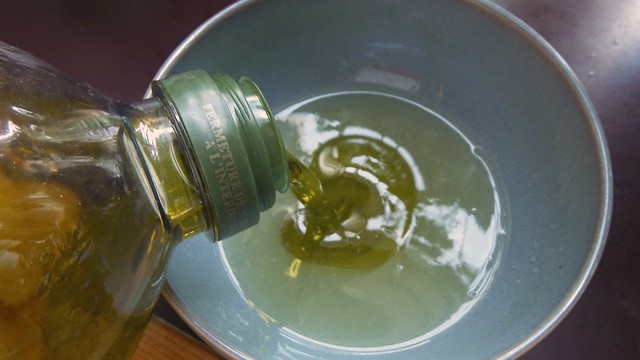
Throw the onion bits in a large Ziploc freezer bag and tip in about 1/2 cup olive oil,

Slapdash Souvlaki 5

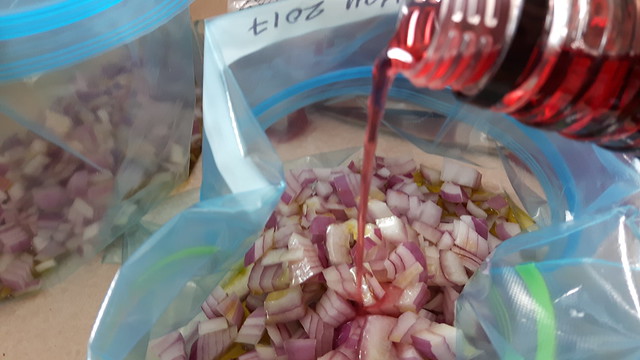
2 tablespoons red wine vinegar,

Slapdash Souvlaki 6

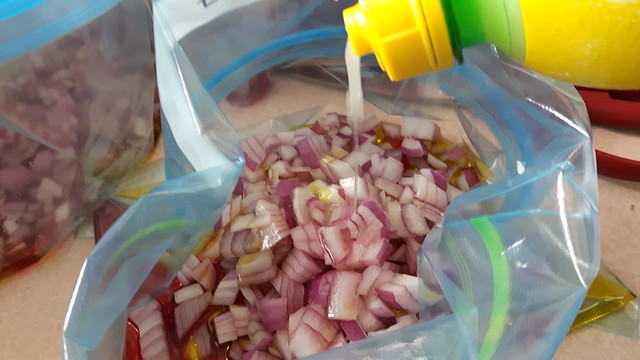
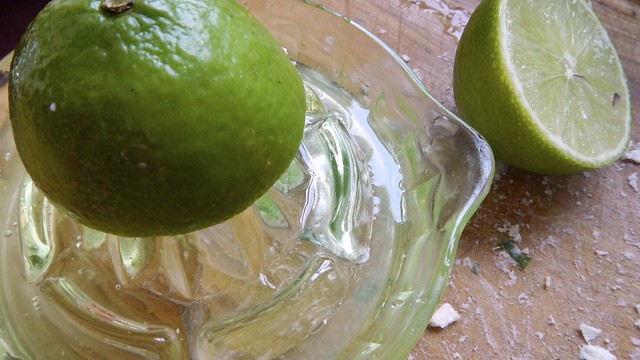
and 4 tablespoons lemon juice.

Slapdash Souvlaki 8

Next plop in about 2 cloves minced garlic, 2 teaspoons dried (or fresh) oregano, and of course salt and pepper to taste.

Slapdash Souvlaki 9

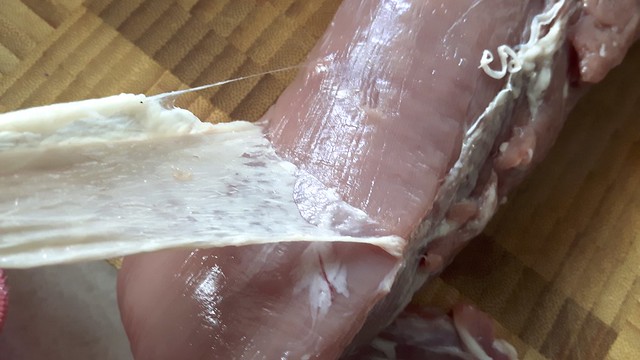
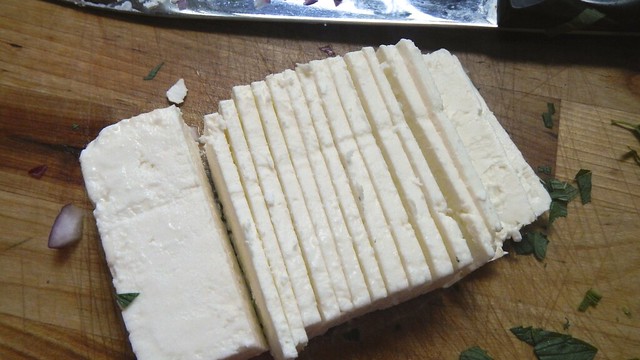
Wrangle yourself a decent-sized pork tenderloin (you can do this with chicken breast too). Don’t be tempted to use a pork shoulder or any other cut for this, as they’ll be too gristly when cubed. Trust me. I did it once when they were on sale and I regretted it. Pull the tough membrane off the tenderloin and trim any excess fat.
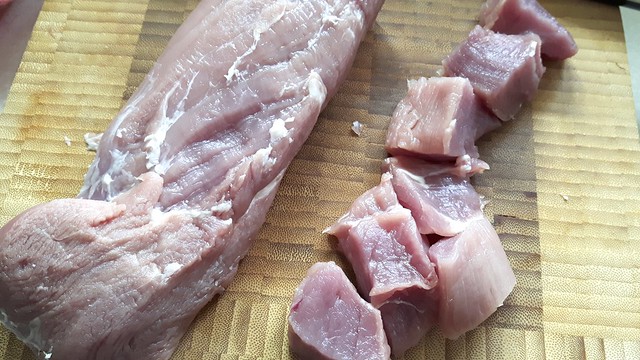
Slapdash Souvlaki 10

Cut it into cubes.

Slapdash Souvlaki 11

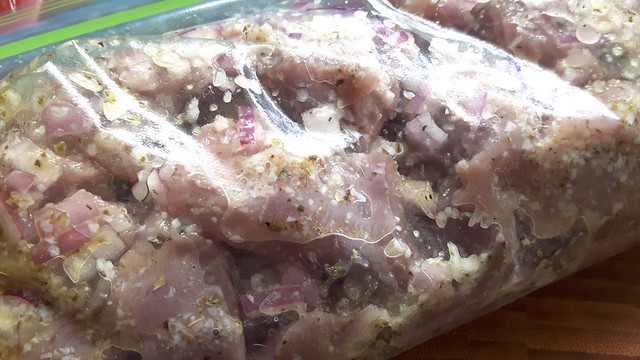
Chuck those cubes into your freezer bag.

Slapdash Souvlaki 12

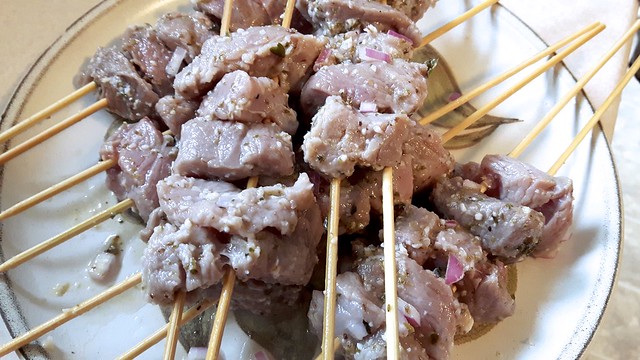
Seal the bag carefully, give it a good smushing together, and bung it in the fridge for several hours. While you’re waiting, grab some wooden skewers and plop them in a tray of water to soak for at least thirty minutes before you grill.

Slapdash Souvlaki 13

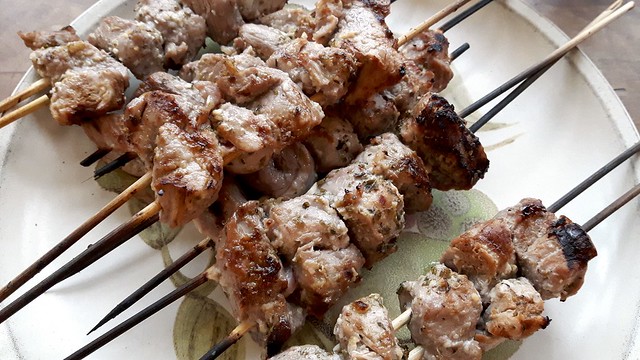
When you’re set to start, shove the cubes of marinated meat onto your skewers (I like to use two skewers per so that they’re easier to flip) and grill until cooked through and at an internal temperature of about 145°F.

Slapdash Souvlaki 23

Slapdash Souvlaki 24

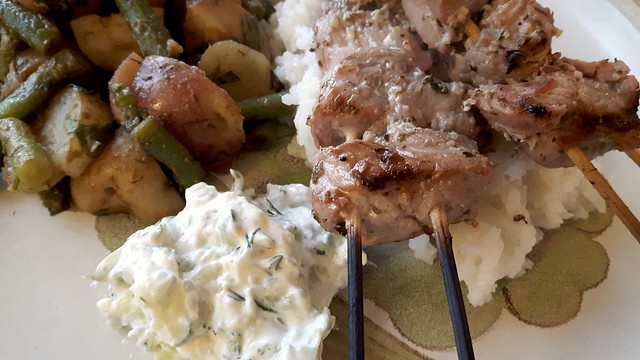
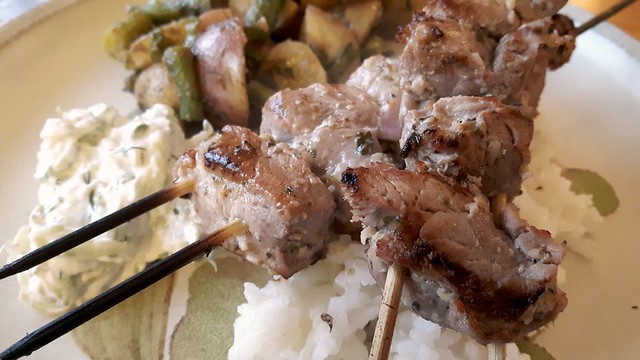
Serve over rice with a hefty side of your fresh tzatziki and enjoy the summer!

Slapdash Souvlaki 25

Wingin’ It Wednesday: Tomato Mint Salad

Tomato Mint Salad 10

LongJohn’s Nana, Mrs. Nice, has been coming into town to spend some time with him once a week so that I can do things that necessitate the use of both hands (in fact, she’s here right now so that I can use both hands to type this post – yay for Mrs. Nice, and grandparents everywhere!).

When she was here last I whipped up this salad of things that were in my fridge: normally when I make a tomato salad with feta I use balsamic vinegar and fresh basil but I didn’t have either of those so I went with a little twist, and I hope you like it.

Start with some tomatoes, naturally. I’m using grape tomatoes here but you can use whatever you have.

Tomato Mint Salad 1

Then, finely chop up an onion. This is a shallot. A red onion would also be nice.

Tomato Mint Salad 2

Nice and small. We want the IDEA of onion rather than holy-wow-there’s-a-lotta-onion-in-this.

Tomato Mint Salad 3

Grab some mint. I grew this monstrosity from three stalks I got out of a box at the grocery store.

Tomato Mint Salad 4

Crumble up some nice firm feta cheese.

Tomato Mint Salad 5

Assemble!

Tomato Mint Salad 6

I made a dressing out of grapeseed oil, honey, and a bit of lemon juice, and drizzled it over the whole shebang.

Tomato Mint Salad 7

It was lovely!

Tomato Mint Salad 8

Watermelon and Feta Salad

Watermelon Salad 15

Mrs. Nice made this delightful dish for us when we were over for lunch last week and it really hit the spot during that blasted heat wave. She learned it from a man at the grocery store who had been setting out samples and she was immediately hooked.  After tasting it, so was I, and so I made it for a further lunch (on my family’s side) the following weekend.

A note in advance: keep all your ingredients chilled and separate until just before serving or everything will go mushy.

Start with a decently-sized seedless watermelon (or mostly seedless, as was the case here).

Watermelon Salad 1

Crack that puppy open by cutting off the ends and paring off the rest of the rind.

Watermelon Salad 2

Watermelon Salad 3

Cut it into slices and then chop those up into cubes and chuck them in a large bowl.

Watermelon Salad 4

Watermelon Salad 5

Chop up as well a large red onion.  That can be pitched into the bowl as well.  You might want to start tossing the ingredients together with your hands so you don’t destroy the watermelon.

Watermelon Salad 6

Grab yourself a bunch of fresh mint.

Watermelon Salad 7

Pull off the leaves and chop those up finely as well.

Watermelon Salad 9

Sprinkle those over your watermelon.

Watermelon Salad 8

Finally, haul over a good-sized hunk of firm feta cheese and cut that up as finely or as coarsely as you like.

Watermelon Salad 10

Dump that in the salad as well and toss to mix it all up.

Watermelon Salad 11

Juice a lime and pour the juice into a bowl.

Watermelon Salad 12

Add in about 1 tablespoon (a glop) olive oil and whisk to emulsify.

Watermelon Salad 13

Drizzle that over your salad and eat it all up!
Watermelon Salad 14

Roasted Tomato and Red Pepper Soup

Roasted Tomato and Red Pepper Soup 17

This warm bowl of rosy goodness reminds me a bit of my winged red soup from ages ago (which I may try to recreate in the future) and it’s just as easy.  I made a heckuva lot of this, mostly to freeze for Krystopf and Atlas for after the baby comes, so feel free to cut this recipe into thirds for more reasonable servings.

Roasted Tomato and Red Pepper Soup 1

You’re going to need 3 heads garlic;

Roasted Tomato and Red Pepper Soup 2

3 red onions;

Roasted Tomato and Red Pepper Soup 4

24 ripe roma tomatoes;

Roasted Tomato and Red Pepper Soup 3

and about 18 large red peppers.

Roasted Tomato and Red Pepper Soup 5

Preheat your oven to 450°F.  Peel the garlic and cut each clove in half.  Chop up the onions as well and chuck them in a roasting pan (I divided them between three roasting pans).

Roasted Tomato and Red Pepper Soup 6

Chop up the tomatoes and red peppers and put them in the pans as well.

Roasted Tomato and Red Pepper Soup 7

Drizzle with olive oil, dust with salt and pepper, and toss to coat.

Roasted Tomato and Red Pepper Soup 8

Roast the vegetables for 25-35 minutes, or until they are soft and starting to char.

Roasted Tomato and Red Pepper Soup 12

Meanwhile, bring a pot with about 2 litres stock (chicken, vegetable, whatever) to a boil.

Roasted Tomato and Red Pepper Soup 10

When the vegetables are ready, chuck them in the broth and give it a good stir.  Add several dashes of Tabasco Sauce and remove it from the heat.

Roasted Tomato and Red Pepper Soup 14

Have a go at it with an immersion blender and then season with salt, pepper, and more Tabasco as desired.  Serve hot (or cold).  The flavour intensifies over a couple of days and it freezes great.

Roasted Tomato and Red Pepper Soup 15

Three Bean Mexi Salad

Three Bean Mexi Salad

This is a quick and colourful summery salad you can serve at any time, as a side dish and as a standalone meal. It’s easy and appetizing and full of flavour. And, as it’s Labour Day, you should take a break, and enjoy this simple salad.

Start with your beans. Crack open a can each of black beans, red kidney beans, and white navy beans. Or whatever beans you like, really.  Drain them and give them a rinse in a colander. Set that aside while you chop up some veg.

Three Bean Mexi Salad

Chop up 2 red peppers into whatever size you think is appropriate for a bean salad.  Who am I to tell you what to do?

Three Bean Mexi Salad

Do the same with 2 jalapeños.  Be careful not to touch your eyes while you’re doing this.  I like to mince mine up super fine.

Three Bean Mexi Salad

Chop up as well 1 red onion.

Three Bean Mexi Salad

And slice up about 4 green onions.

Three Bean Mexi Salad

Huck all those things in a bowl with your beans, and add to that about 1 1/2 cups frozen corn kernels.

Three Bean Mexi Salad

For the dressing, start by mincing up a huge bunch of fresh cilantro.

Three Bean Mexi Salad

Drop that in a bowl with a few cloves minced garlic and the juice and zest of 1 lime.

Three Bean Mexi Salad

Add to that 2 tablespoons granulated sugar, a dash of salt and pepper, another dash of hot pepper sauce, and 1 tablespoon ground cumin.

Three Bean Mexi Salad

Mix that all together, then add in 1/2 cup olive oil and 1/2 cup red wine vinegar.

Three Bean Mexi Salad

Dump that on top of your salad and toss until well combined.

Three Bean Mexi Salad

This salad is best if you cover it and leave it in the fridge overnight to let the flavours mingle.  Serve it cold.

Three Bean Mexi Salad

Chicken Orzo Salad

Chicken Orzo Salad 10

The Pie’s parents, Mrs. Nice and Papa John, are in town on a visit for the Pie’s graduation (B.Sc. Honours in Geography and Computer Science, booyah), so I get a good number of opportunities to cook new things that I think might appeal to them.  This one I made with Mrs. Nice in mind, and reminds me somewhat of that amazing orzo salad we had at Ferryland a few years ago.

Chicken Orzo Salad 5

Chicken Orzo Salad 2

Prep your vegetables.  Dice up half a large red onion, 1 red pepper, and half a large cucumber (I cut out the seeds).  I also halved 250g grape tomatoes and defrosted 1 cup each frozen corn and frozen peas.

Chicken Orzo Salad 3

Prep your dressing.  In a small jar (or other container with a lid), dump 1 tablespoon minced garlic, 2 teaspoons dried savoury (or basil, or oregano, or whatever you want), 2 tablespoons lemon juice, 2 tablespoons honey, 3 tablespoons rice vinegar, and 3 tablespoons vegetable oil.

Chicken Orzo Salad 7

Close the lid tightly and give that a shake.  Let it sit for a while.

Chicken Orzo Salad 8

Fill a large saucepan with about 4L of water and salt it generously.  Put it on to boil.  When it’s boiling, remove the lid, turn the heat down a bit, and pour in 450g orzo pasta.

Chicken Orzo Salad 6

While that’s on the go, cut up about 3 boneless skinless chicken breasts into small cubes and  pitch those in a frying pan or skillet with a bit of vegetable oil.

Chicken Orzo Salad 9

Sauté those until fully cooked and browned on the outside.  Remove from the heat.

Chicken Orzo Salad 14

Drain your orzo and plop it in a big bowl. This bowl was not big enough.

Chicken Orzo Salad 20

My peas and corn were still a little frozen so I added them to the still-hot chicken pan to let them thaw properly.

Chicken Orzo Salad 17

Then I chucked in the rest of the vegetables and stirred that around.

Chicken Orzo Salad 18

Then you just add your veg to your pasta.  Give that a good stir.

Chicken Orzo Salad 21

Give your dressing another shake and toss that with all the rest of your salad (don’t worry about the amount — it will be absorbed into the pasta) and serve warm or cold.

Chicken Orzo Salad 22

The Family Sammy

Family Sammy 10

You may not like this sandwich.  It’s a bit of an acquired taste.  It’s also freaking weird.  But bear with me.  It’s really good once you get past the weirdness.

So this sandwich is actually a family recipe that goes back a few generations, to one set of the great-grands on my mother’s side.  Maybe even back to Scotland.  Hard to say.  Origins shrouded in mystery and all that jazz.

Family Sammy 1

Legend has it that my mother made this sandwich for my father as a token of her love back when they were first together.  She packed it into his lunch and sent him off on his day.  When he discovered this — thing — in his lunch he was absolutely horrified.  My mother was offended that he would be disgusted by such a beautiful sandwich.  Forty years later, it’s one of my dad’s favourites.

(Is any of this making you want to try this yet?  I thought so.)

So first you take some rye bread.  I like the swirly stuff, which is pretty mild but you can get a hint of the rye.  My parents prefer the super dense stuff that slices about a centimetre thick.

Family Sammy 2

On one slice of bread, spread some nice mayonnaise.  On the other slice, some peanut butter.  Crunchy is best, but we have smooth on hand for Papa John so that’s what is on offer.  Don’t worry, it’s gonna get weirder.

Family Sammy 4

Slice up a tomato and slide that onto a slice of rye.  Garnish with salt and pepper.

Family Sammy 5

Add a few pieces of red onion (I usually forego this part but I’m sticking with tradition here, just for you).

Family Sammy 6

Then a few thin slices of cheddar cheese.  The cheese, like the onion, is optional.  The main essence of the sandwich is mayo, peanut butter, and tomato on rye.  But I like it with cheese.

Family Sammy 7

And that’s the sandwich.  I know it seems rather icky, but if you are on the lookout for something a little bit different, I suggest you give it a try.  The combination of tangy mayo with crunchy earthy peanut butter, the burst of flavour from a good tomato on the faint bitterness of rye is actually quite good.  Give it a shot, I dare you.

Family Sammy 8

What’s your favourite weird sandwich?

Mean Slaw

Happy belated birthdays to Thidz and Stef!

Mean Slaw

I have never made coleslaw before in my life.  In fact, I don’t even really like coleslaw.  For this, though, I will make an exception.  And I made all this without even consulting a recipe!  I guess a lifetime of watching my mother cobble together a slaw left a lasting impression.  This particular combination offers a bit of a snappy uptake on the traditional Southern slaw, and I hope you like it. If I do say so myself, I make a mean slaw.  Remember that a slaw is always best the next day, after the flavours have had a chance to intermix.  Also, if you say slaw a lot it starts to sound weird in your head.  Slaw.  Slaw.  Slaw, slaw slaw.  Slaw.  What a weird-looking word.

Before we begin, I would like to introduce you to my cabbage.  This was the smallest one I could find in the produce section, and, to give you a size comparison, that is a two-litre kettle sitting next to it.

Mean Slaw

Cabbage is the basis of every slaw.  I am not too fond of the bitterness of red cabbage, though I know it adds a bit of colour to the salad.  Nevertheless, I’m sticking with the green one.  If you have a food processor, then this salad is a snap to prepare.  I like to do certain things by hand, however, and me and my stupid sharp knife get along real well.  You’ll want to hack off a hunk of your cabbage and then start slicing off bits real nice and thin.

Mean Slaw

If they are too long and dangly for your liking, feel free to cut the little cabbage strips in half before tossing them in a large bowl.

Mean Slaw

I also have some fennel here, which makes for a nice aniseed-y aftertaste in the salad.

Mean Slaw

Don’t worry too much about the green bits — focus on cutting up the white parts really thin and chuck those in with the cabbage.  Don’t add too much, or your slaw will just taste like liquorice.

Mean Slaw

Next, I’m going to grate a large carrot and add that in for sweetness and colour.

Mean Slaw

Some sweet red peppers.

Mean Slaw

Feel free to add ones that are a little spicy, but not too spicy.

Mean Slaw

And some red onion.  Give that a toss.

Mean Slaw

Now you make up your dressing.  I think coleslaw dressings are kind of like curries — they need a lot of ingredients in order to encapsulate all the important flavours a slaw needs.  In this one I have olive oil, rice vinegar, dijon mustard, minced garlic, brown sugar, celery seed, and mustard seed.  You can replace the rice vinegar with white vinegar if you want something a little stronger.  The Pie is not a huge fan of heavy vinegar usage which is why I take the milder rice vinegar more often than not.

Mean Slaw

I poured all that into a plastic container with a lid and gave it a good shake.

Mean Slaw

Now your salad is all ready to be dressed.  Pour on the dressing in stages and toss to coat.  You want enough dressing so you get some pooling at the bottom.  It will be absorbed into the salad while it sits.

Mean Slaw

Seal your tossed and dressed salad in a container and refrigerate overnight.

Mean Slaw

Serve with burgers and fries, or any other summery food you can think of.

Mean Slaw

O Canada: Moose Pizza

Moose Pizza

Gren killed a moose and was kind enough to share it with us.

Big Game Hunter

Just kidding.  Gren is about the size of a moose’s hoof.  If anyone were to be killed and eaten in that situation it would surely be the tender tasty corgi.  Hell, sometimes *I* want to eat him.  He does look pretty delicious.

Moose Pizza

Fusselette’s dad likes to hunt and fish and as a result we have a pile of fresh-frozen cod and moose roast and moose sausages in our freezer.  This can only mean good things for you, my readers.

In any case, I couldn’t continue my Canadian feature month without including a dish made from Newfoundland’s biggest (and I mean that in more ways than one) pest.  On an island where “Nature comes in extra large,” moose are certainly vermin to be reckoned with.  I had some more to say about moose back when Rusty and Mags were in town.

Moose Pizza

So.  Yes.  We have moose.  We are going to eat it.  When we were in Gros Morne this summer, I had the opportunity to try moose pizza for the first time.  I’m going to go out on a limb and say that it’s a Canadian dish, most likely invented right here on the Rock.  Of course, Hawaiian pizza was invented on the Canadian prairies, so who’s to say?

Moose Pizza

First we start with the dough.  For the sake of variety, I’m going to use a different dough recipe than normal.  This one I pulled out of The Joy of Cooking and cut it in half.

Sprinkle 1 1/8 teaspoons active dry yeast on the surface of a small bowl filled with 2/3 cup warm water.  Let it stand for about 5 minutes, or until the yeast is all dissolved; then you can stir it up.

Moose Pizza

In a larger bowl, mix together 1 3/4 cup all-purpose flour, 1 tablespoon olive oil, 2 teaspoons salt and 2 teaspoons sugar.

Moose Pizza

Pour in the yeast and water and stir until all ingredients are completely combined.  Then keep stirring for another minute or so.

Moose Pizza

Turn out onto a floured surface and knead by hand for about 10 minutes.  You will find you have to add quite a bit more flour in to keep the dough from sticking to the surface.  When the dough is smooth and elastic, transfer it to a lightly oiled bowl.  Roll the ball of dough around in the bowl to make sure all the sides are coated.  Cover it with a clean cloth and leave it somewhere warm for about an hour.

Moose Pizza

Preheat your oven to 475°F and start prepping your toppings.  If you are going to use a pizza stone (like we did) then put your stone onto the rack in the oven when you turn it on, so it can preheat too.

I decided that mushrooms and red onion were a good complement to the moose sausage that was sizzling in a pan.

Moose Pizza

I sliced up the sausage as well, and grated some mozzarella cheese while I was at it.

Moose Pizza

When your dough is ready, flatten it into a pan sprinkled with cornmeal, or, if you’re using a stone, onto a peel or surface covered with parchment paper.  I made a circle out of ours, to match the stone.  Make a slight lip at the edges of the dough to keep stuff from spilling off and press your fingers into the dough to make dimples.  This prevents crust from bubbling up.

Moose Pizza

Brush the surface of the dough with olive oil to prevent it from becoming soggy, and sprinkle with some herbs.  We like herbes de provence in our pizza.

Moose Pizza

Crack open a can of pizza sauce.  We generally use half a can for each pizza.  Smooth that sauce on the dough.

Moose Pizza

Add your ingredients.

Moose Pizza

Don’t forget your mounds and mounds of sausage. There might be a bit too much sausage on this pizza, but what’s done is done.

Moose Pizza

And lots of cheese.

Moose Pizza

Bake for about 20-25 minutes, until the crust is golden-brown and the cheese is melted and bubbly.  Slice and serve!

Moose Pizza

Sweet and Sour Pork, Thai Style

This little hummer (to channel my dad) is on page 210 of 400 Recipes: Wok & Stir-Fry edited by Jenni Fleetwood, which I gave the Pie for Christmas years ago.  I also gave him a wok, which has since self-destructed, but enough about that.

We made this recipe precisely because we had exactly those ingredients in our fridge and we needed to use them up.  And I got to use my new scale on this recipe, too, which was a plus.

Slice yourself up 350g/12oz lean pork (about four small boneless porkchops).  If you put the pork into the freezer for about 30-40 minutes beforehand it will be easy to slice it into thin pieces.  I didn’t do this, and that’s why my pork bits are fat.  But they are happy with the way they look, thank you very much.Cut one small red onion into thin slices (we had half, so were content with that).  Seed a red pepper (see my how-to on doing this quickly) and dice it.  Seed half a cucumber (cut it into quarters and slice off the seed part) and cut it into thin strips.  I misread the recipe at this point so mine ended up in chunks.  Pauvre moi.
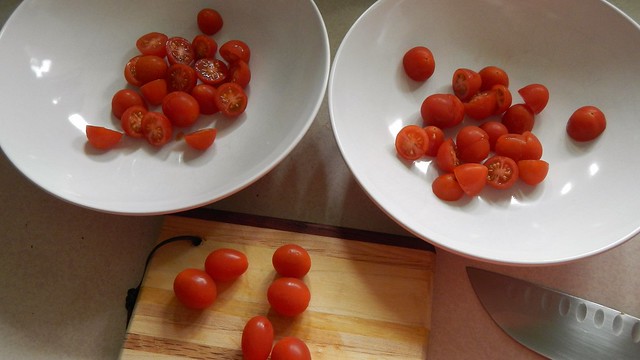
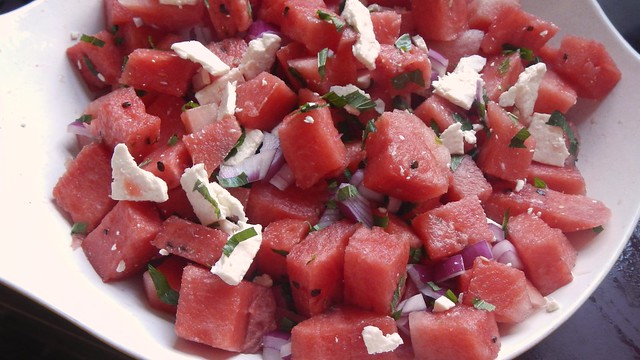
While you’re in the process of seeding, why don’t you take the seeds out of two plum tomatoes (we used roma) and cut them into wedges as well?  As a finishing touch, cut 115g/4oz of pineapple into chunks (more if you like the stuff, see my how-to on coring) and slice 2 spring onions or scallions (we used 4 green onions) into thin strips.  I set all the veggies in a nice mise en place for the Pie so he’d have everything at hand.  In a small bowl, mix together one tablespoon brown sugar with two tablespoons fish sauce and some ground black pepper.Heat two tablespoons oil in a wok or large frying pan.  Drop in four cloves of garlic, thinly sliced (or, if you are us, 4 spoonfuls of garlic in a jar).  Cook over medium heat until golden, then add the pork and stir-fry for four or five minutes.  Slide in the onion slices and toss.

Add your fish sauce mixture and toss over the heat for three or four more minutes.

Drop in your fruits and vegetables and stir-fry for another three to four minutes, until the vegetables are tender.

Spoon into a bowl (we served ours over rice) and garnish with more sliced onions or fresh cilantro if that floats your boat.  Serves four.