Gluten-Free, Dairy-Free, Still Amazing Angel Food Cake

GF DF Angel Food 32

We’ve made this cake before. Many times. But I thought I’d make it again for a dual birthday celebration we had a few weeks ago. This cake was for the Pie’s grandmother, who recently turned NINETY. The next cake on our list I made for Papa John, her son, who turned SEVENTY at the same time. The Pie’s grandmother is a celiac and she’s also lactose-intolerant, so making her a special treat for her birthday was going to be a challenge I looked forward to.

GF DF Angel Food 30

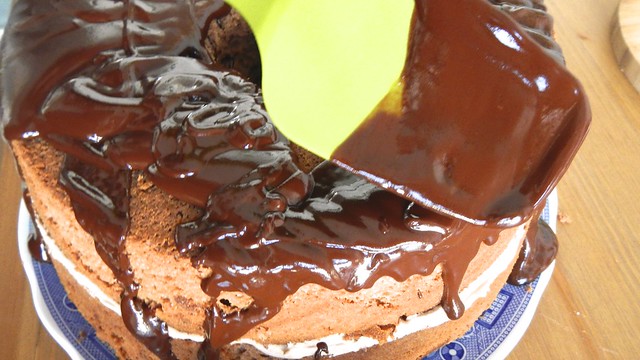
And why not actually go through the old traditional way where you make an angel food cake the same day as a devil’s food cake, so that you can use up all the yolks? So the devil’s food cake will be in my next post – stay tuned!

GF DF Angel Food 1

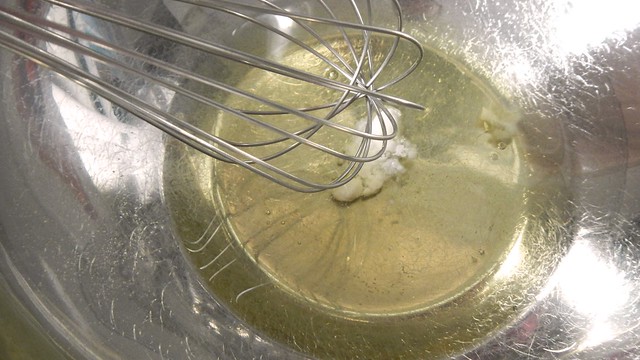
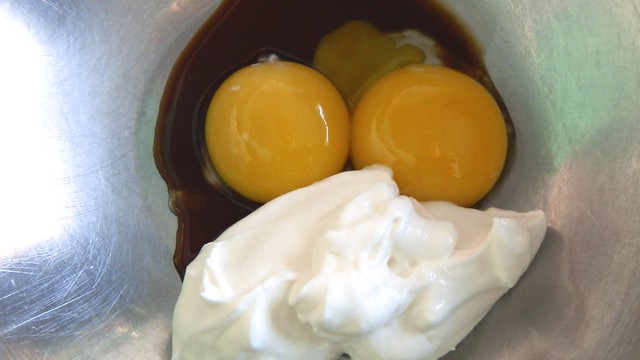
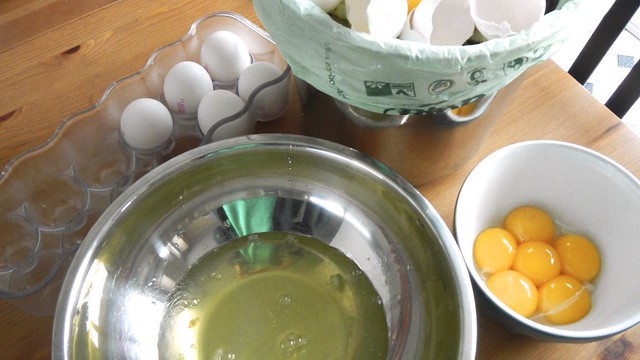
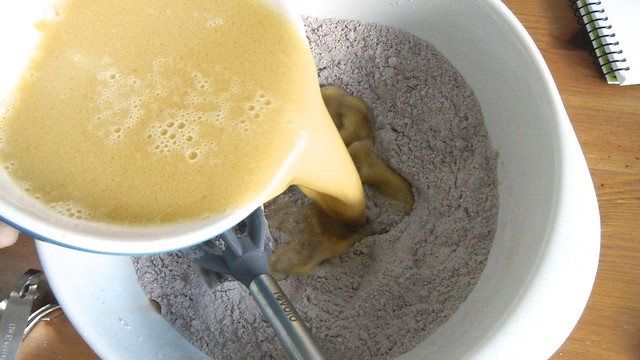
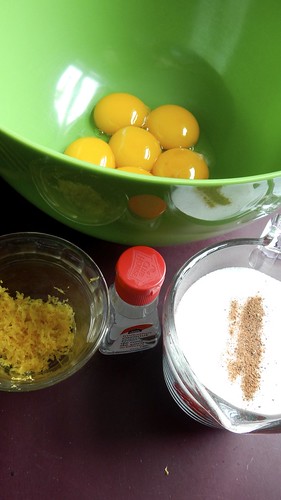
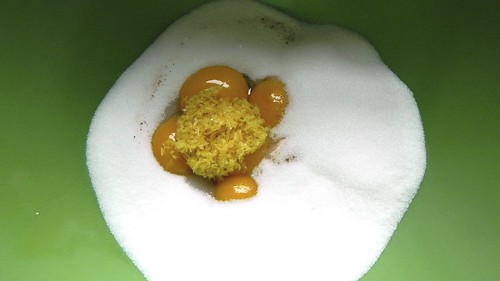
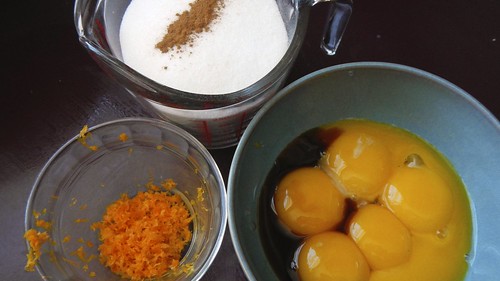
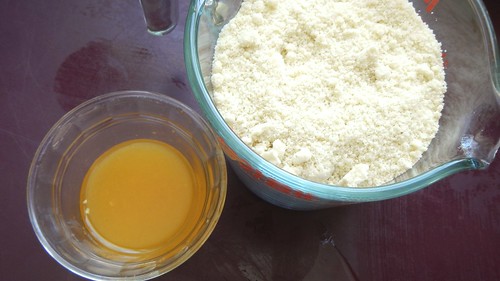
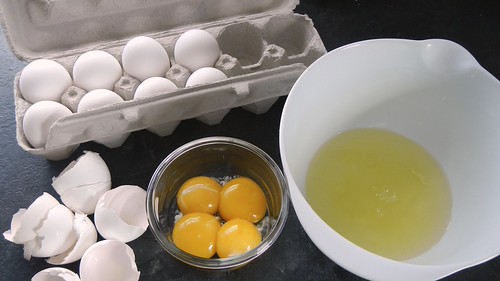
Begin with your egg whites. Separate 12 eggs, saving the yolks for the chocolate cake coming up (you can freeze them), and bring them to room temperature. Normally I do this by leaving the bowl in a patch of sun on my counter but if you’re in a hurry, you can set the bowl in warm water and that’ll do the trick too. Don’t try to use pasteurized egg whites from a carton: they will not whip at all. I’ve tried.

GF DF Angel Food 2

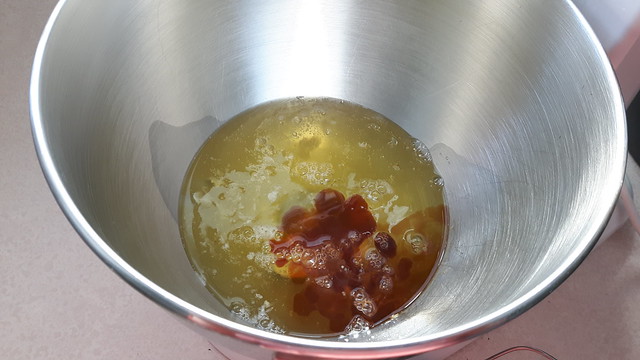
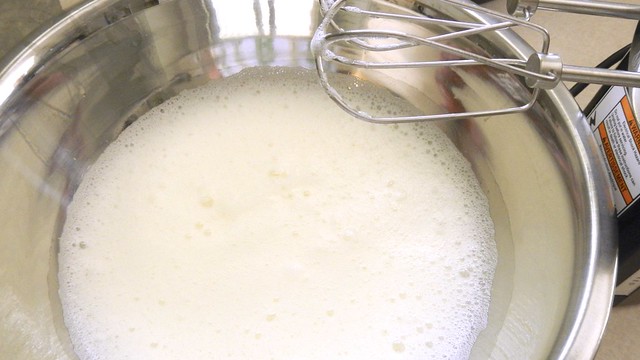
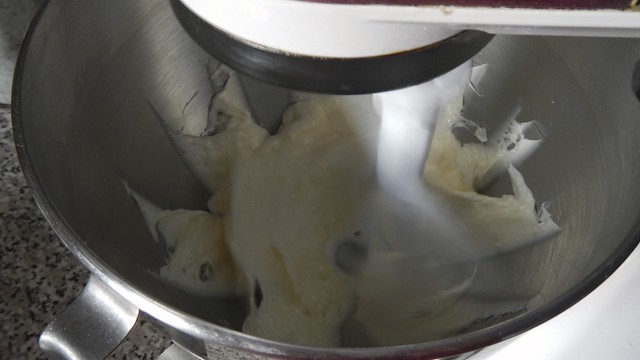
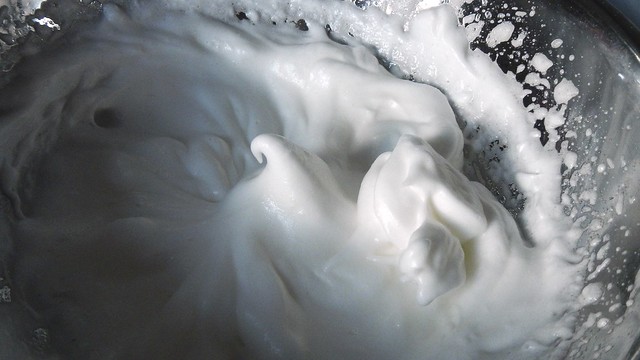
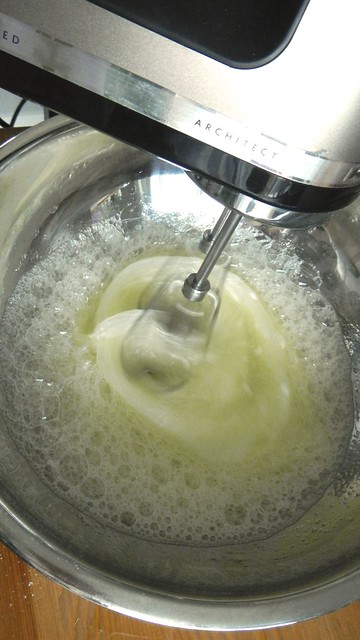
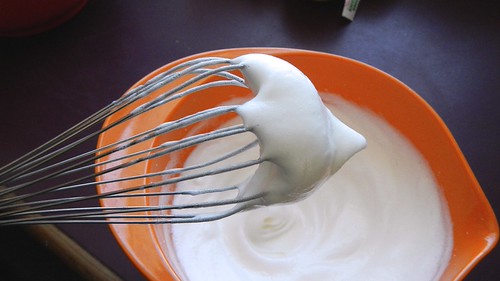
Plop your 12 egg whites in the bowl of your electric mixer with 1 1/2 teaspoons cream of tartar and 2 teaspoons vanilla (or however much a generous dollop is. I never measure vanilla).

GF DF Angel Food 4

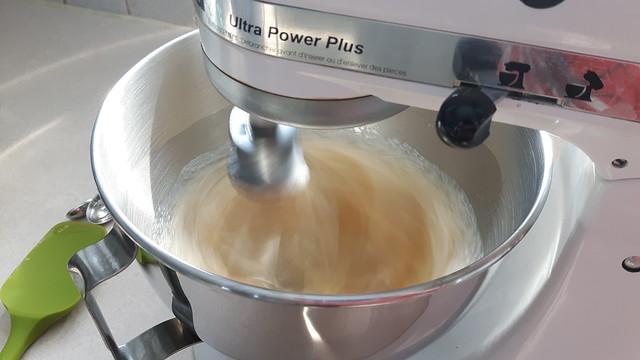
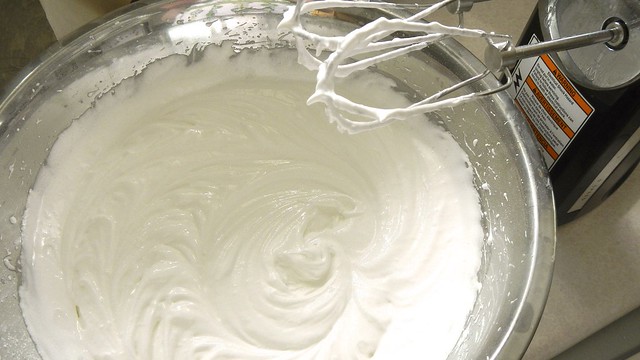
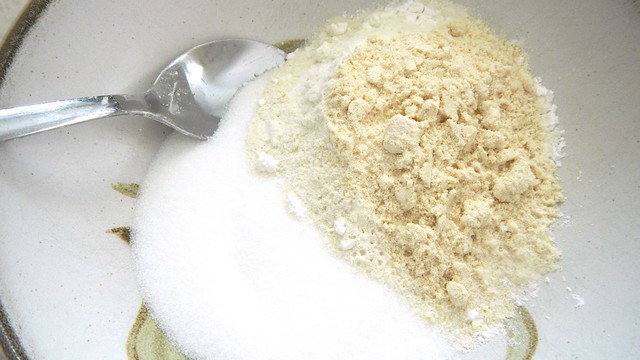
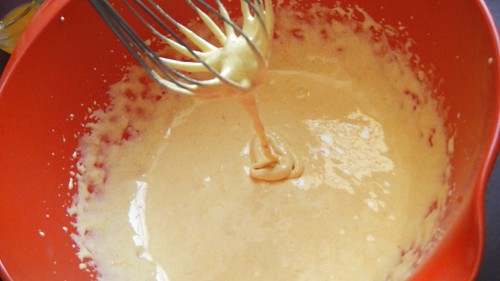
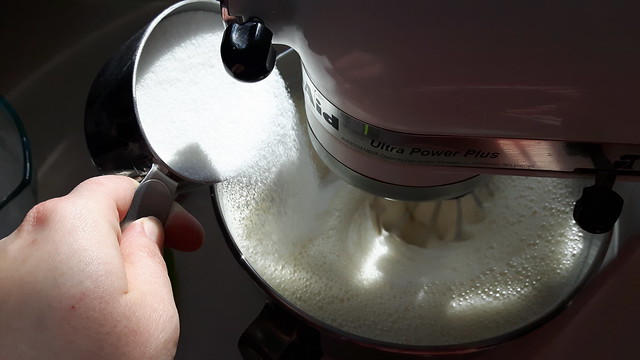
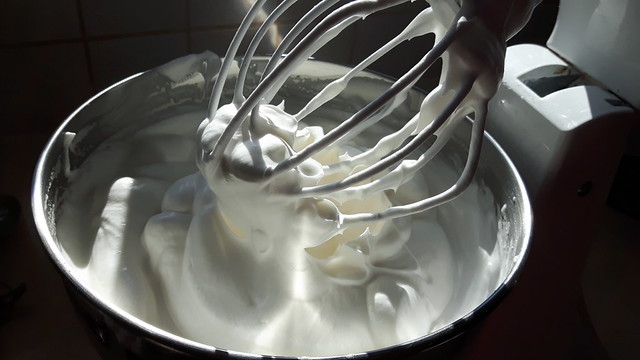
Beat that with the whisk attachment until it’s nice and thick and foamy, and then slowly tip in 1 cup granulated sugar while you beat it some more. It’s the sugar that makes the meringue here stiff and solid, so don’t skimp on it!

GF DF Angel Food 5

GF DF Angel Food 6
The meringue should be stiff enough to support the weight of the beater if you took it off the armature and set it on top.

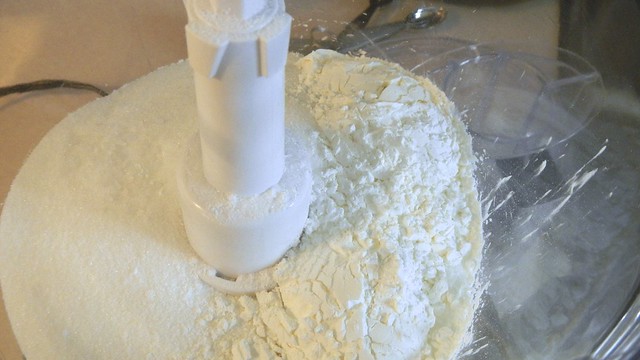
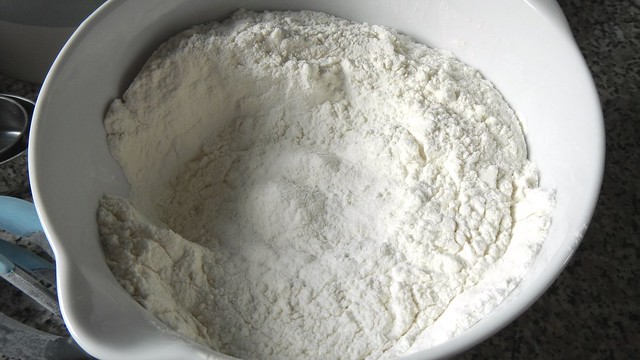
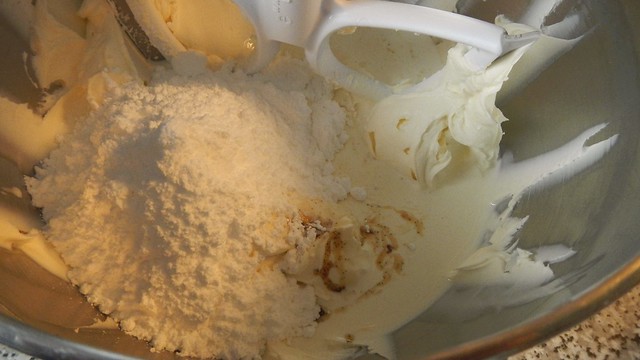
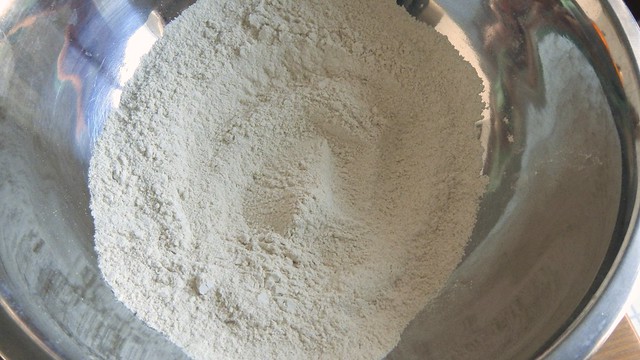
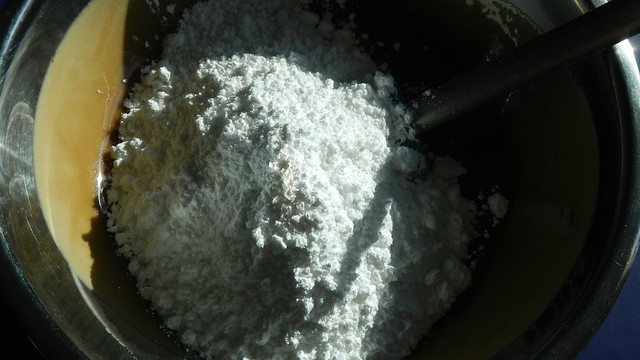
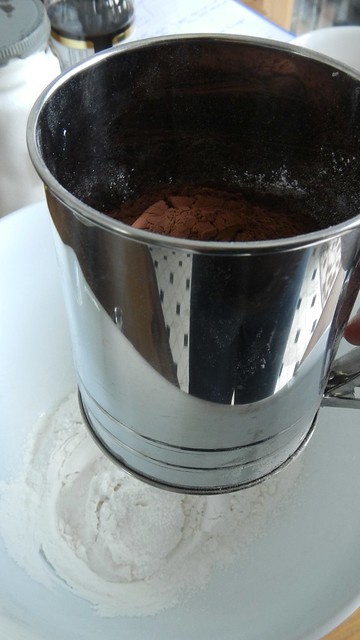
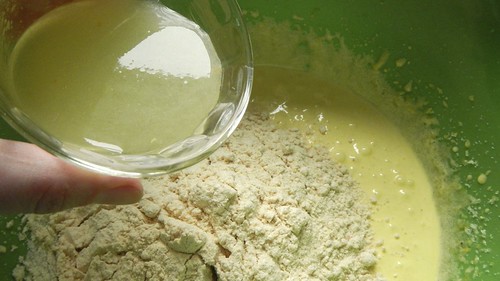
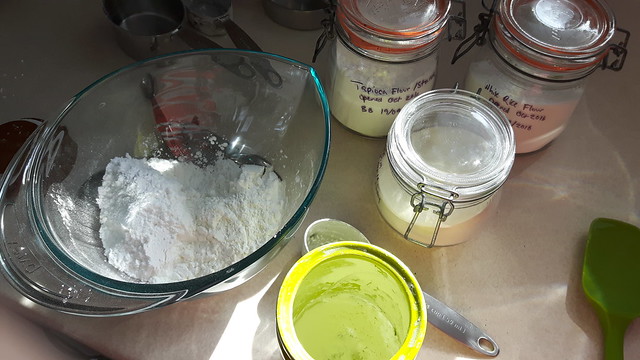
Once that’s ready you can set it aside for the moment and whisk together your “flour.” In this case, our tried-and-true combination for gluten-free gorgeousness is 1 1/3 cups icing sugar, 1/2 cup tapioca flour/starch, 1/4 cup cornstarch, 1/4 cup rice flour, 1 teaspoon xanthan gum, and 1/4 teaspoon (a pinch) fine salt.

GF DF Angel Food 3

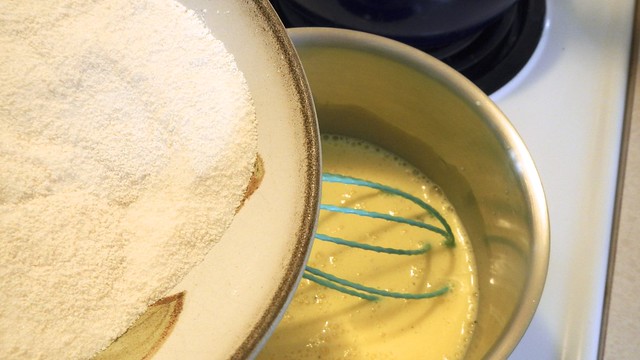
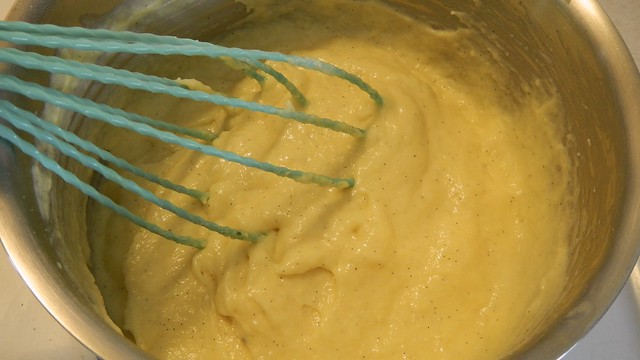
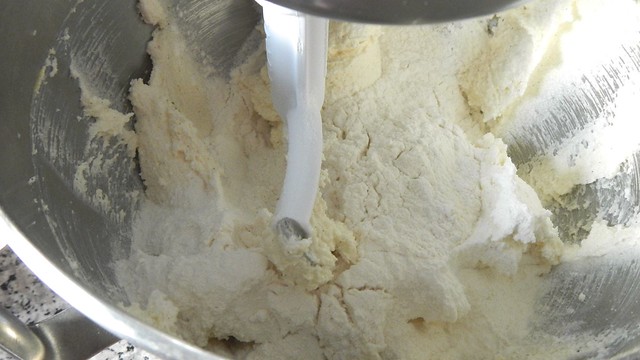
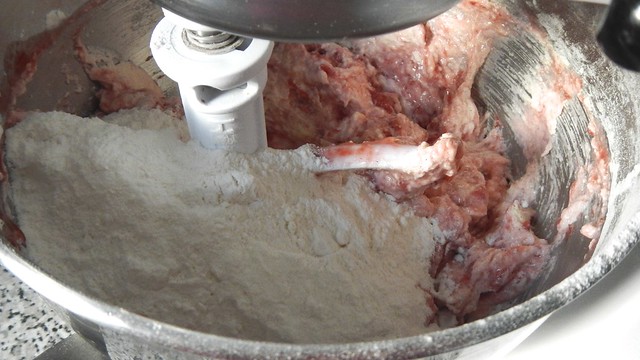
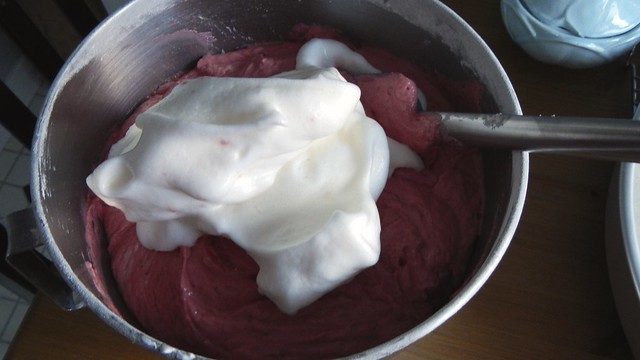
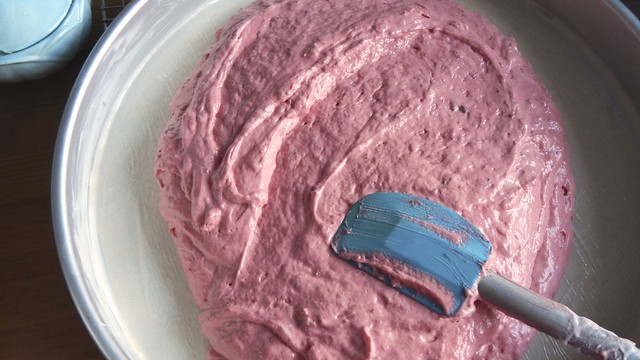
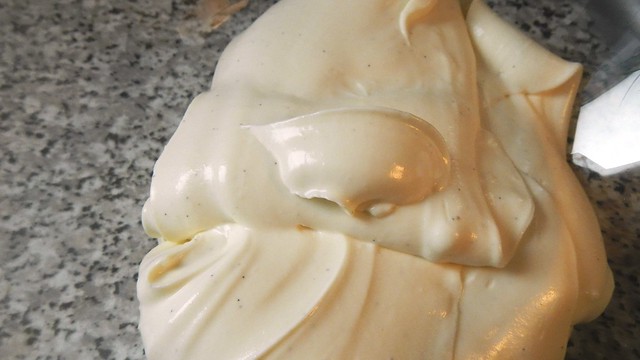
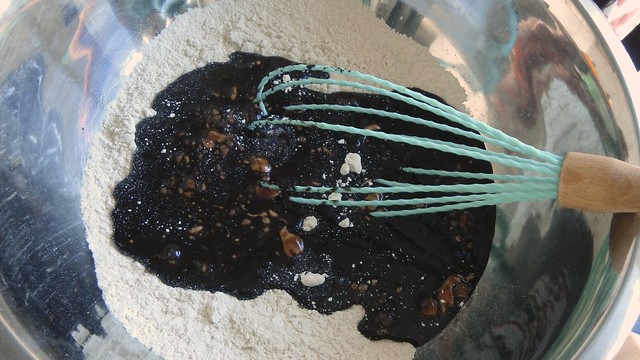
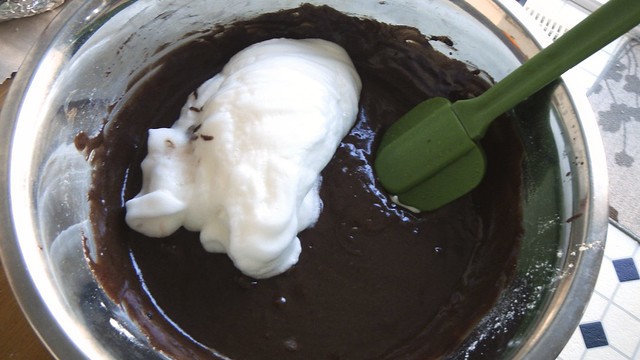
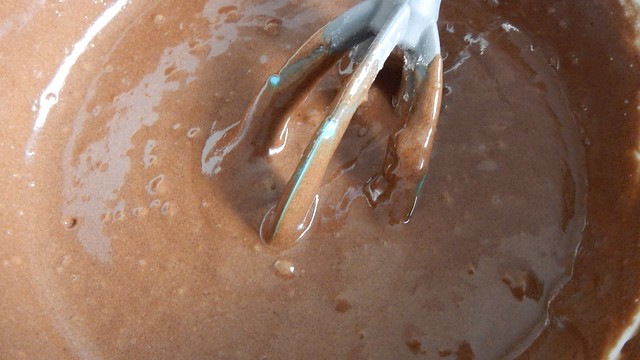
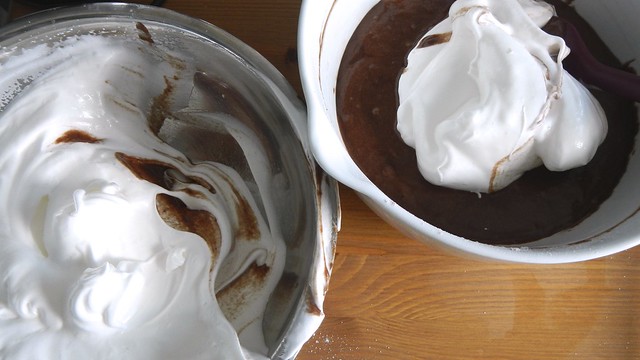
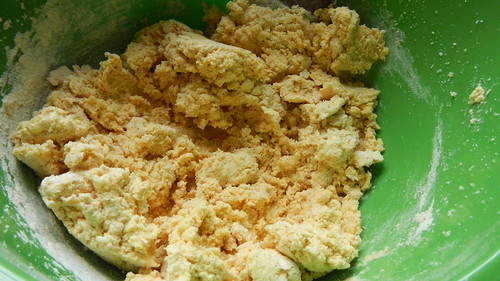
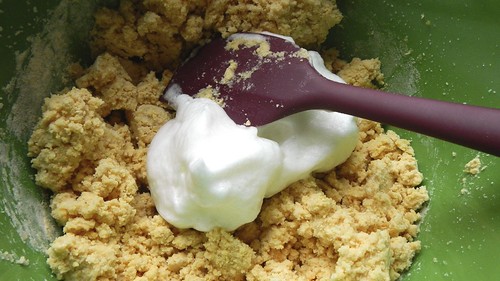
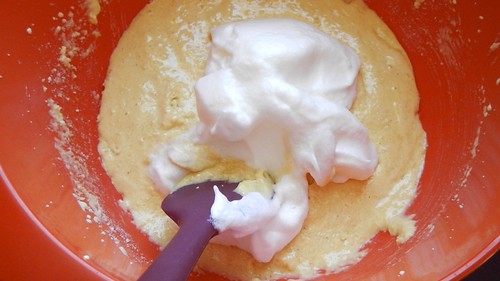
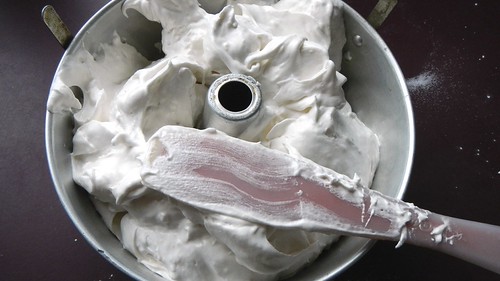
Fold that flour mixture into the meringue mixture very carefully. You have to be gentle enough that you don’t smush the bubbles in the egg white, but thorough enough that you’re not leaving pockets of flour in the batter.
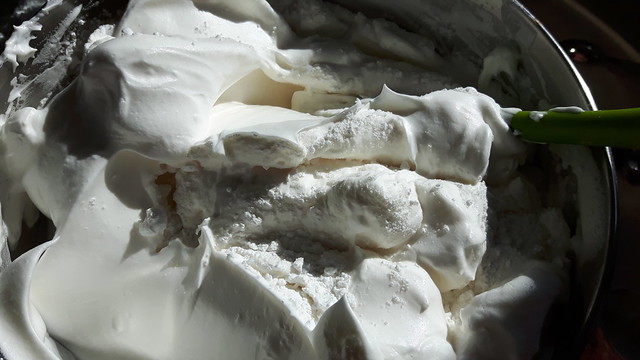
GF DF Angel Food 7

Good enough.

GF DF Angel Food 8

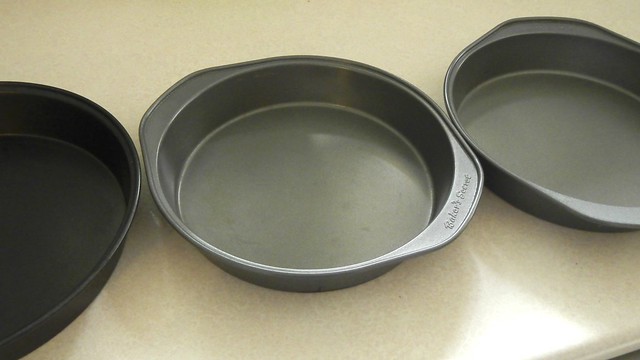
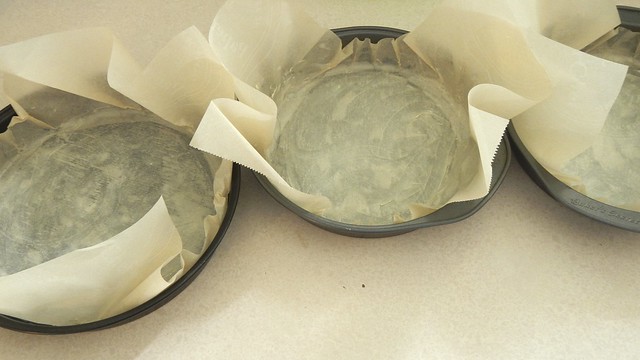
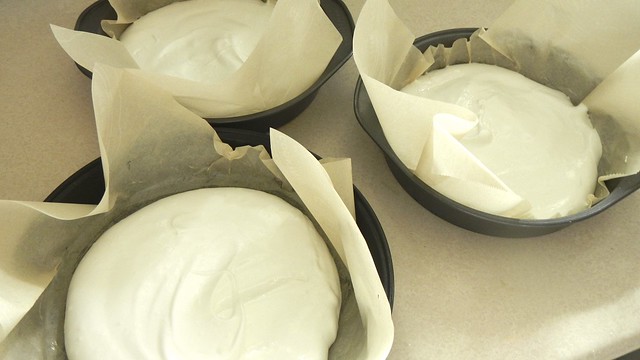
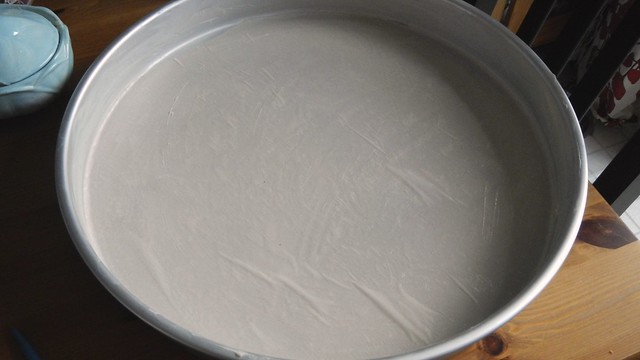
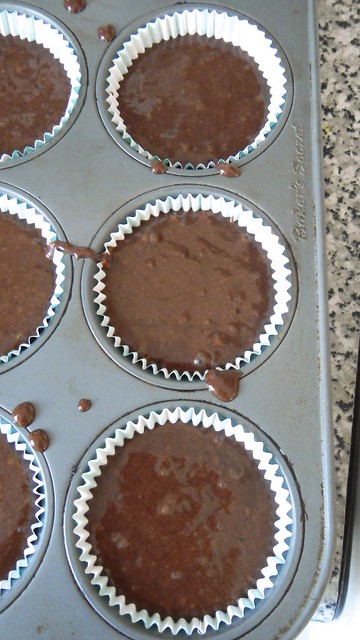
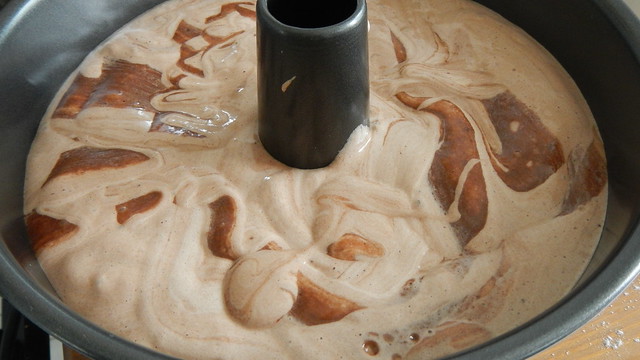
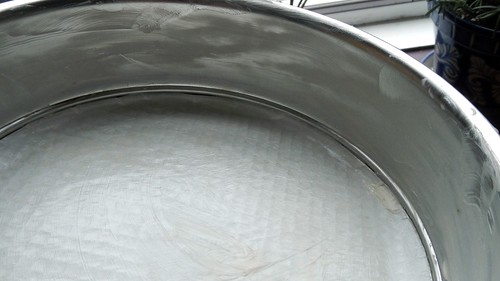
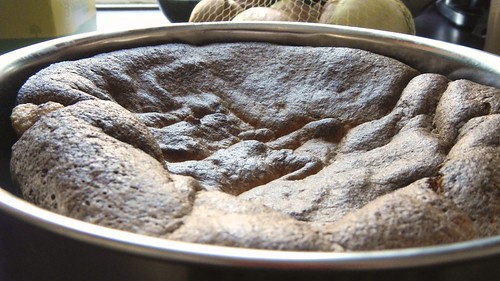
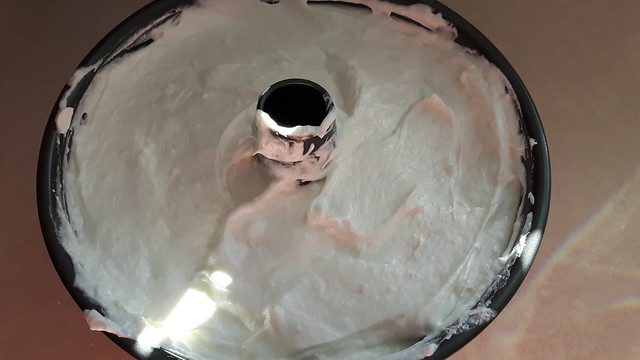
Smooth the batter into an UNGREASED angel food pan (can’t stress that enough, never grease your angel food pan or it will fall out on you).

GF DF Angel Food 11

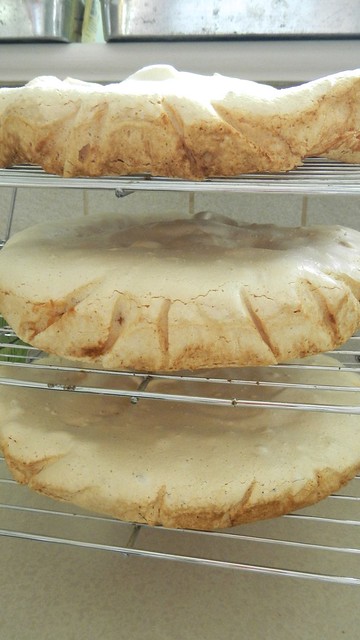
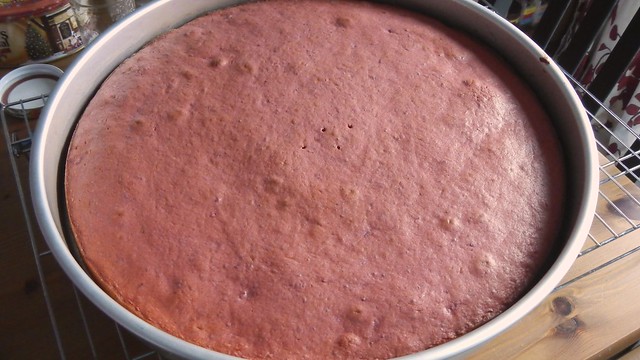
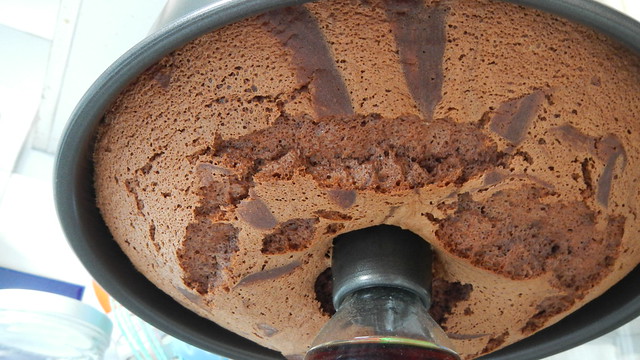
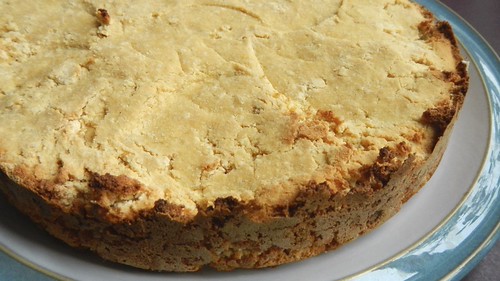
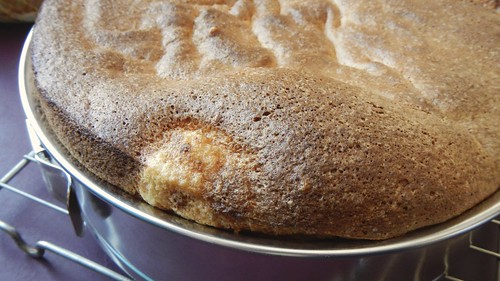
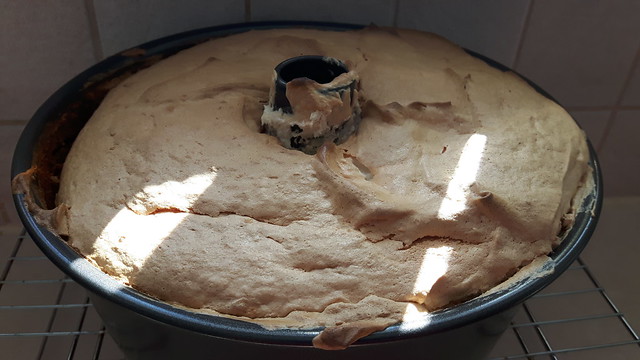
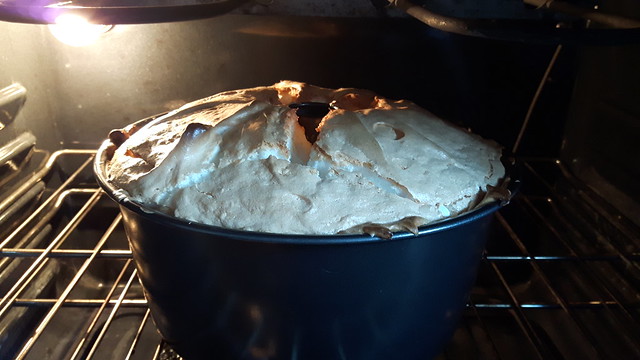
Pop that in the oven for 35 minutes, until the top is golden-brown and dry to the touch. If you see cracks, that’s good.

GF DF Angel Food 12

Fantastic. Now take it out of the oven and invert it over a bottle or if it has feet, stand it on the feet. This keeps the cake from collapsing under its own weight as it cools. Once it cools it’s a lot more firm. The gluten-free version is always way squishier than the gluten-y one so this is very important.

GF DF Angel Food 20

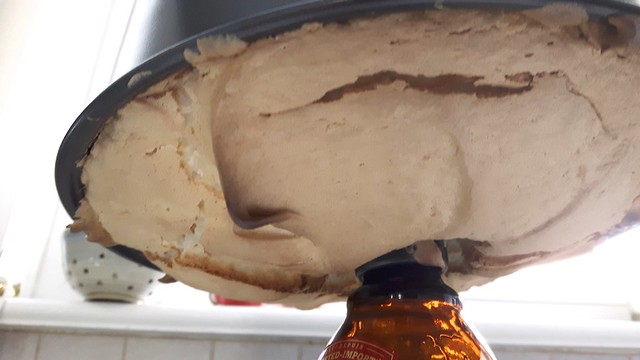
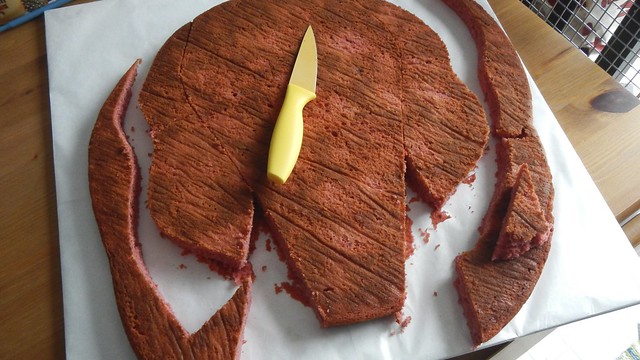
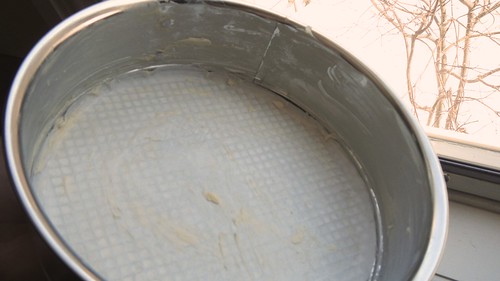
Here’s my issue: my angel food pan is actually NON-STICK. So as I was inverting it, the bottom segment shifted away from the sides and I bobbled the whole thing, dropping it with a clatter. KABOOM.

GF DF Angel Food 16

At precisely that moment and not ten feet away, the Pie had just put his elbow down on LongJohn’s plate, spectacularly spattering his lunch all over the floor and wall. Windows too. That’s the kind of day we were having.

GF DF Angel Food 14

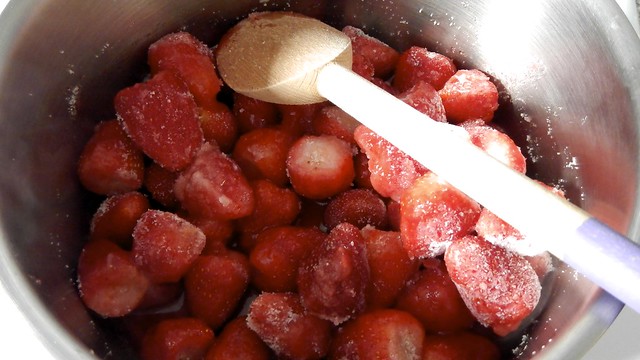
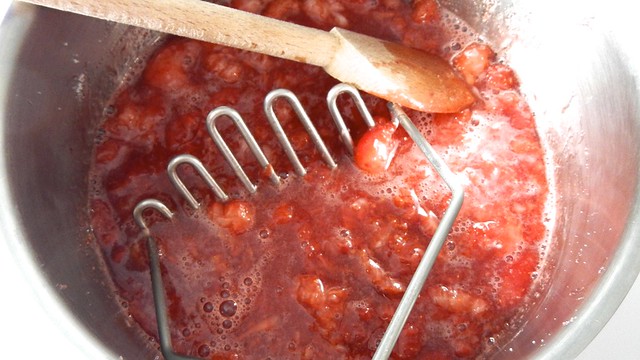
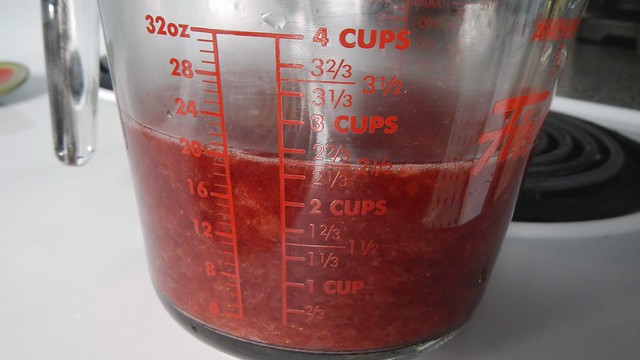
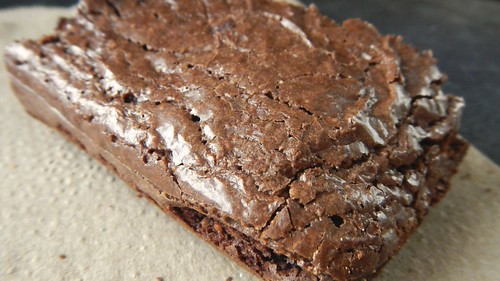
So I made another one. Which meant that we had not just 12, but 24 egg yolks. And a busted cake. “I guess that means we’re having trifle for dessert tonight,” said the Pie as he scrubbed hummus off the wall.

GF DF Angel Food 21

GF DF Angel Food 22

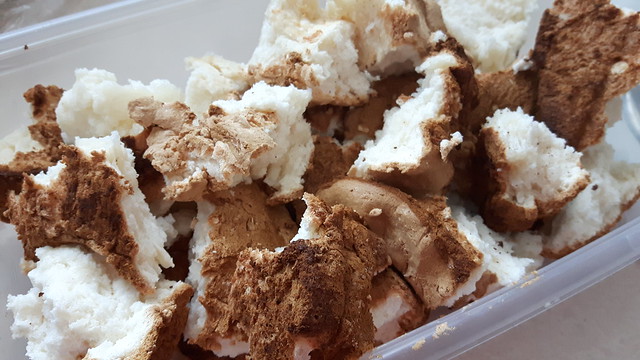
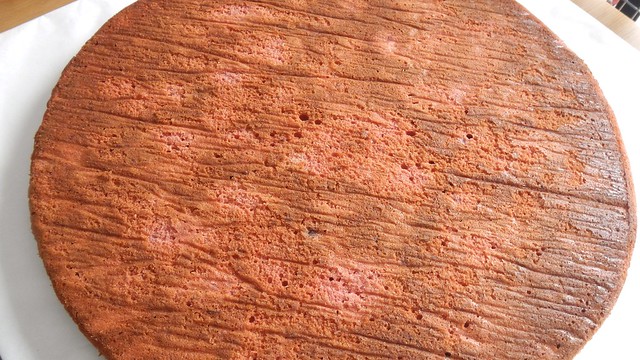
So that’s what we did. But that’s neither here nor there. I made the other cake. And it turned out even better than the previous one.

GF DF Angel Food 17

GF DF Angel Food 18

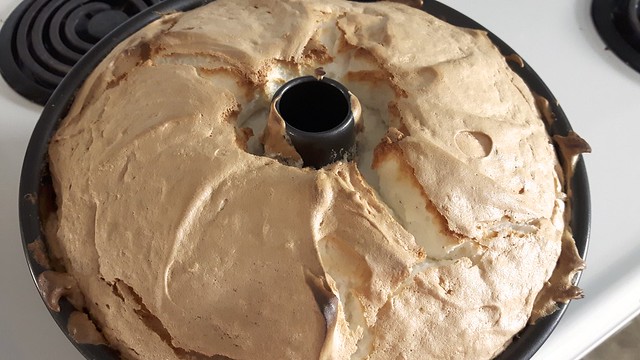
You can see that the pan is trying its best to screw me over by separating. Jerk.

GF DF Angel Food 19

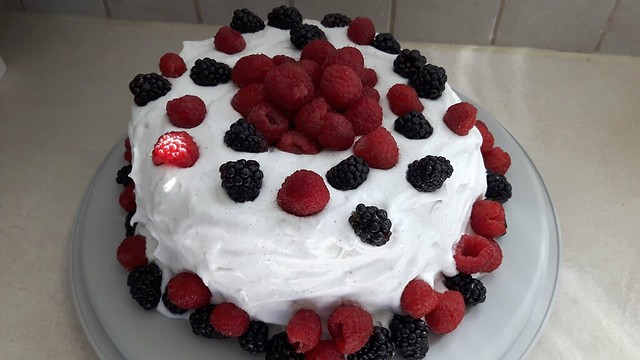
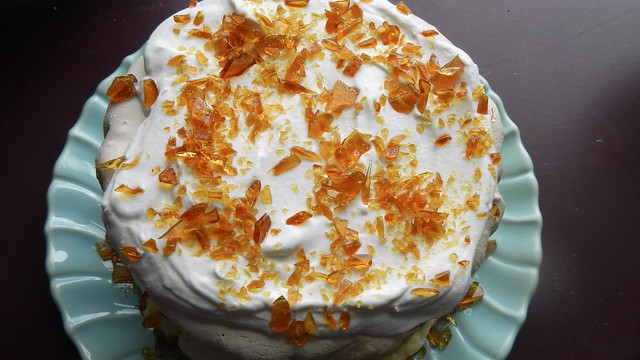
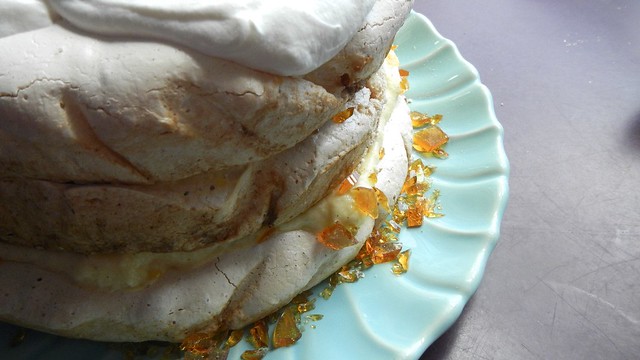
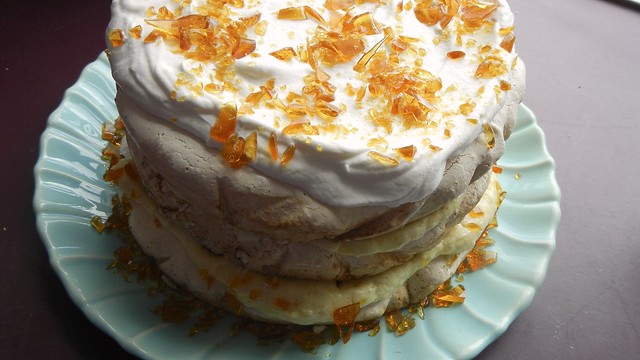
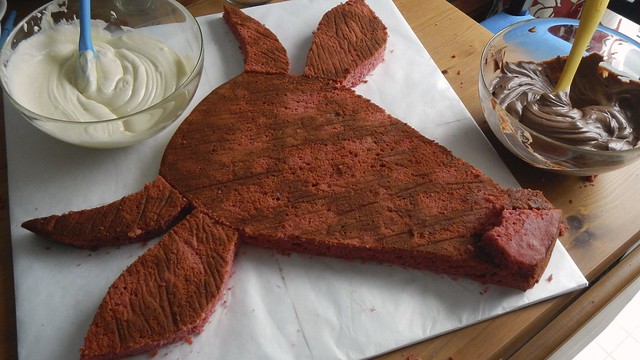
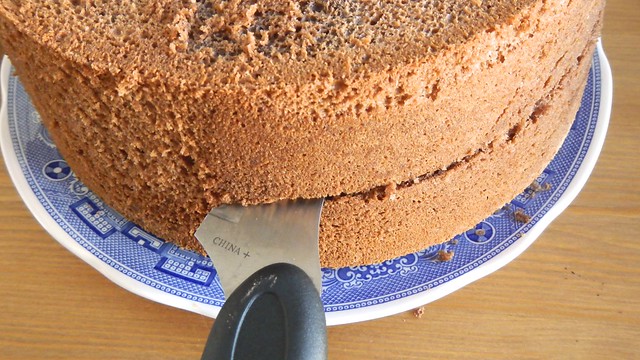
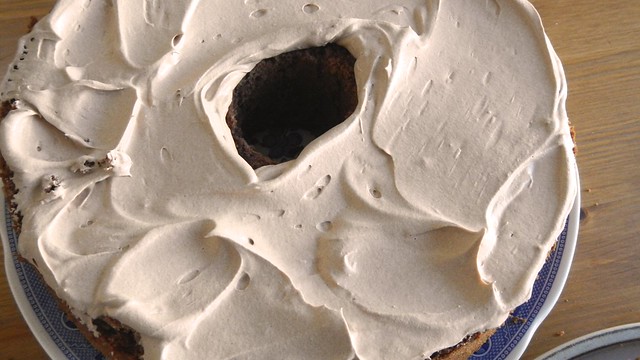
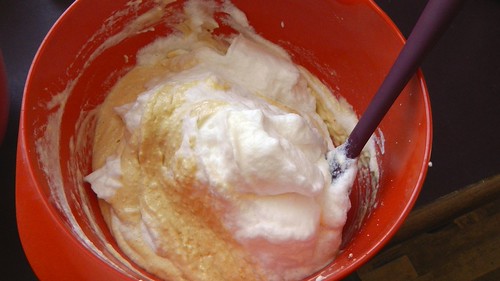
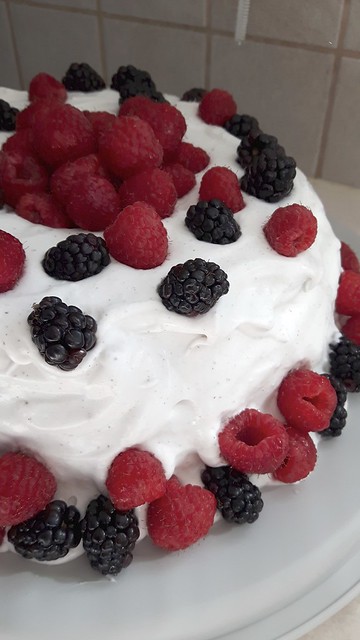
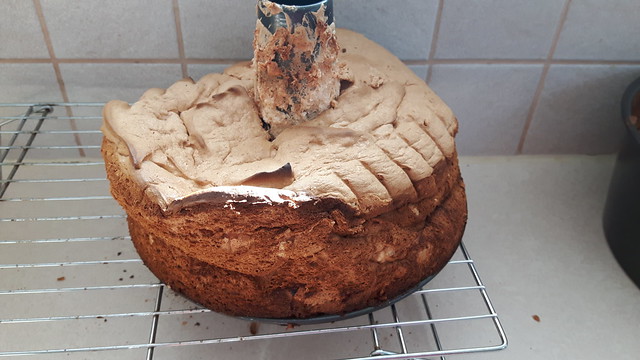
Once the cake has cooled you can decant it from the pan and decorate it as you see fit. I usually whip up some cream and slather it all over with some fresh berries, but the Pie’s grandmother is also lactose intolerant, so I decided to try whipping coconut cream instead.

GF DF Angel Food 26

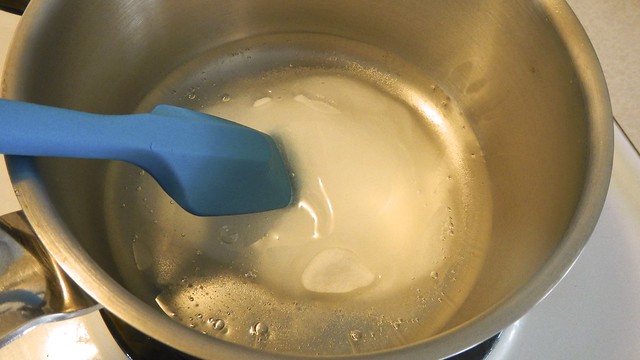
Coconut cream is a bit harder to find in Ottawa than regular coconut milk, but I eventually tracked some down in the local health food store. I was told by the cashier that the trick in getting it good and whippy is to make sure the cream, beaters, and bowl are all extremely cold. So the 2 cans coconut cream went into the fridge overnight and the beaters and the bowl went into the freezer.

GF DF Angel Food 23

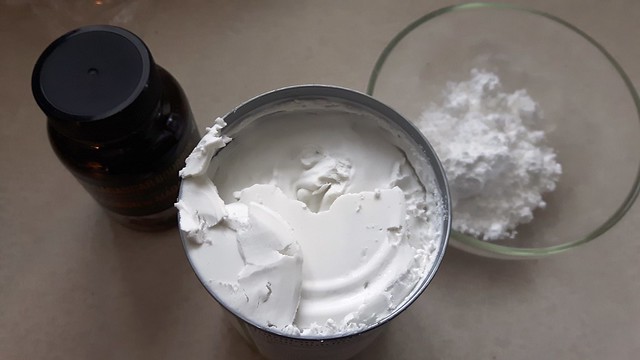
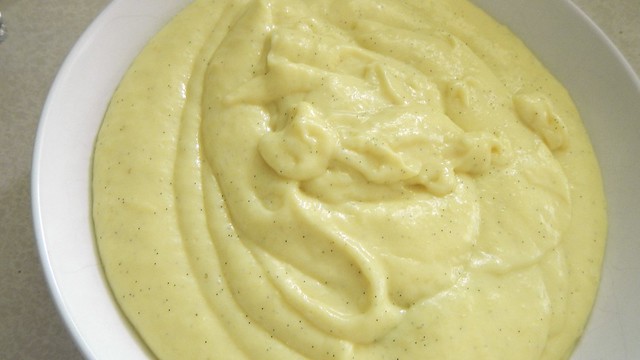
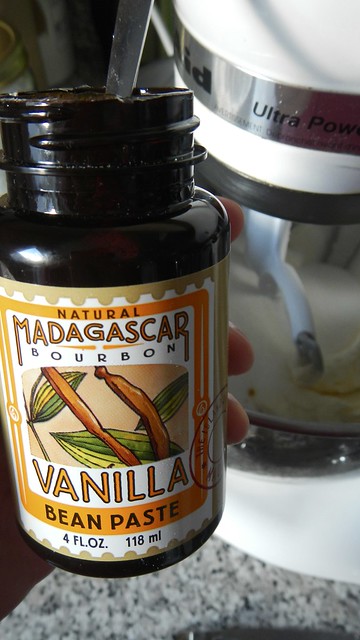
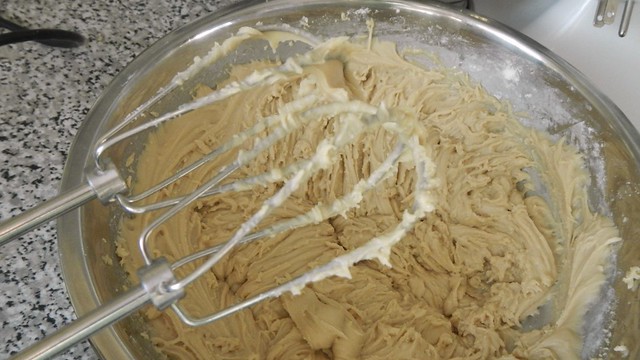
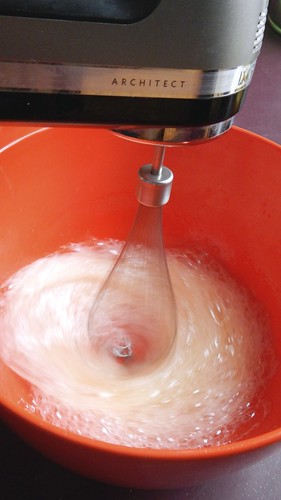
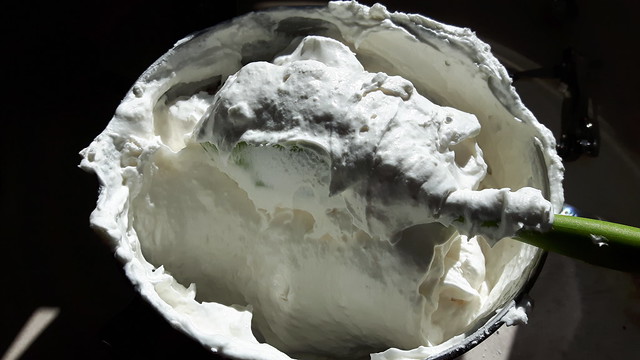
I tipped the cream into the ice cold mixer bowl together with a few tablespoons icing sugar and a dobble or two of vanilla bean paste and gave it a whirl with the whisk attachment.

GF DF Angel Food 27

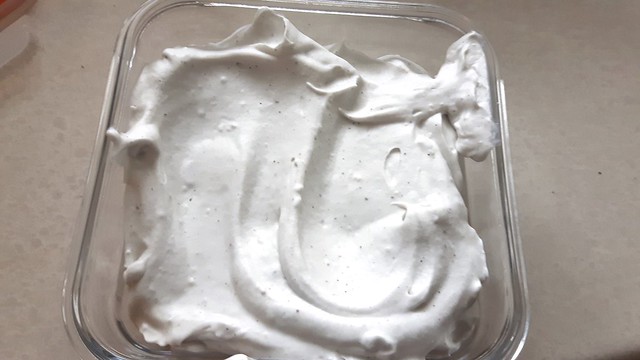
It takes a while, and it doesn’t get as stiff as whipped dairy cream, but it sure tastes good.

GF DF Angel Food 25

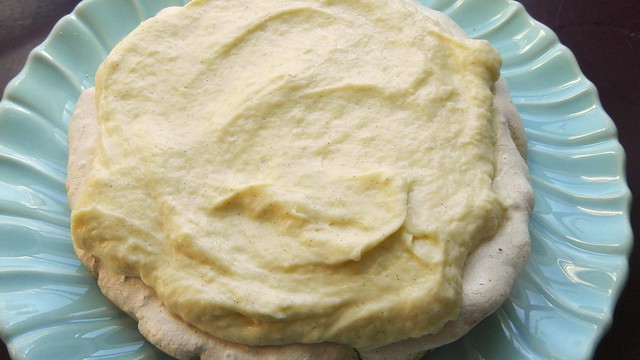
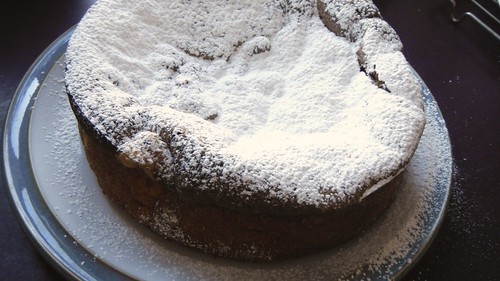
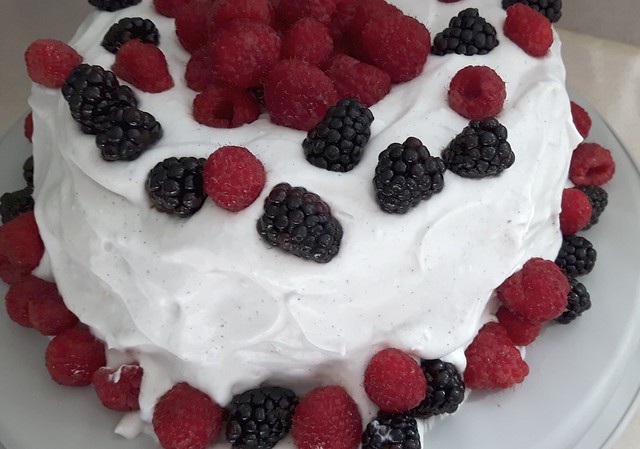
Slather that all over the cake. It’s a bit slippery so make sure to keep it in the fridge until you’re serving. Does anyone know if there’s some kind of stiffening agent you could add to make it stay put?

GF DF Angel Food 28

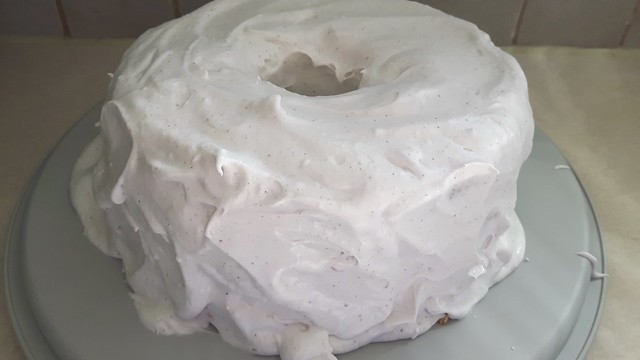
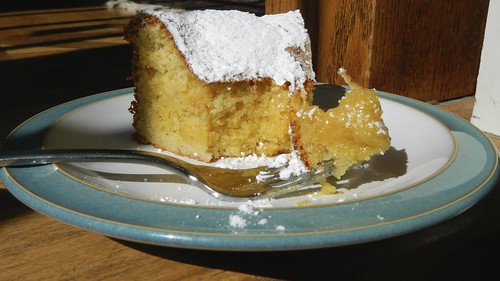
Pop some berries on top and in the hole in the middle and we are good to go!

GF DF Angel Food 29

Cloud Cake

Cloud Cake 28

I made this Martha Stewart recipe for one of our two Mother’s Day celebrations earlier this month, and it was easy to prepare all the pieces the day before and then assemble it with a flourish on the day of. The original recipe is not gluten-free but we had Fussellette staying with us and made one simple adjustment to make it that way – you can do it whichever way you would like.

Cloud Cake 14

Start with the meringue: preheat your oven to 275°F and grab three 8″ round cake pans. I happened to have 2 8″ round cake pans and one 9″, so that’s what I used.

Cloud Cake 1
Butter the pans and then line the bottom and sides with parchment. This is easier said than done as the pans are round and parchment is straight. Get creative with the folding. It’ll just add to the allure of the finished product, I promise. Now butter the parchment as well to make sure it sticks.

Cloud Cake 2

Crack open 6 large eggs and separate the whites from the yolks. Put the yolks in the fridge for now and leave the whites to come to room temperature.

In the bowl of a food processor, pulse together 1 1/2 cups sugar, 3 tablespoons cornstarch, and 1/4 teaspoon coarse salt until smooth and powdery and when you open the lid it kind of wafts out like smoke. Don’t inhale that. You will cough.

Cloud Cake 3

Now grab your 6 egg whites and beat them with a pinch of cream of tartar until soft peaks form.

Cloud Cake 4

Slowly, a little bit at a time, tip in the sugar mixture and keep beating until you get lovely stiff peaks.

Cloud Cake 5

Smooth the meringue amid your three pans and bake for 1 hour.

Cloud Cake 6

Then turn off the oven and wedge the oven door open with a wooden spoon for another hour. Then move the pans to a wire rack to cool completely. If you’re going to assemble the cake the next day, slip each layer of cooled meringue into a separate sealed bag and suck the air out of it.

Cloud Cake 13

Next, let’s work on the custard cream. In a bowl, whisk together 1/3 cup sugar, 1/4 cup flour, and a pinch of coarse salt. We made a gluten-free version of the flour by combining coconut flour, xanthan gum, and corn starch.

Cloud Cake 7

In a small saucepan, combine your leftover 6 egg yolks (original recipe calls for 3 but why waste them?) with 1 1/2 cups buttermilk and a split vanilla bean pod with the seeds scraped out. Stir that over medium heat and slowly add in the flour mixture.

Cloud Cake 10

With ours, because of the nontraditional ingredients, I found the buttermilk reacted with either the cornstarch or the xanthan gum and I pretty much had instant custard. So I stirred it until I was sure the yolks had a chance to cook and then took it off the heat. If you’re using regular flour you may have to work harder at it, so stir until it just comes to a boil and then strain through a fine meshed sieve.

Cloud Cake 11

Pour the custard cream into a bowl, lay a piece of plastic wrap over the surface so it’s completely sealed, and chuck it in the fridge for at least an hour or overnight.

Cloud Cake 15

Now there’s caramel to make too. In the original, Martha used the microwave but we moved ours into the basement and that was too far away. I did this in a small saucepan on the stove. First, spray a baking sheet with cooking spray or line it with parchment.

Cloud Cake 17

Then over medium heat, stir together 1/3 cup sugar and 2 tablespoons corn syrup.

Cloud Cake 16

Cook, stirring often, until the mixture is bubbling and turns a light brown.

Cloud Cake 19

Remove that from the heat and drizzle it over the baking sheet.

Cloud Cake 20

Leave that to cool then chop it up with a knife into little tiny jagged pieces. If you’re assembling the next day, shove the pieces into a resealable bag and squeeze the air out.

Cloud Cake 21

To assemble, start by whipping up some heavy cream to your taste and amount (this is going on the top as garnish so use as much as you like – I think we whipped up about a cup of it). Cream whips better if your bowl and mixers are cold, so chuck them in the freezer for a while if you can.

Plop one of the meringues on a nice plate and smother it with about half the custard cream.

Cloud Cake 22

Sprinkle that with about 1/3 of your caramel pieces.

Cloud Cake 23

Let some fall off artistically to the side. It’s decorative.

Cloud Cake 24

Plop another meringue on and smear with the rest of the custard cream and another 1/3 of the caramel bits. Add the final layer and top that with your whipped cream and the last of the caramel. Serve immediately!

Cloud Cake 27

The Molly Cake

Molly Cake 37

Mrs. Nice’s birthday was back in November and the Pie and I wanted to make her birthday cake a little more personal this year. Papa John and Mrs. Nice now live next to a farm and so their backyard faces a huge field full of very curious cows. At a craft fair recently, Mrs. Nice picked up this gorgeous painting of a cow named Molly, and so the Pie and I tried to re-create at least the sentiment of it as best we could, considering our utter lack of artistic skill.

Molly Cake 23
My frame of reference. NAILED IT.

Start at the beginning first. Let’s not get too ahead of ourselves. Bring 3 egg whites to room temperature in a decent-sized bowl. You can drop in 1/4 teaspoon cream of tartar too, while you’re at it. Leave that alone for a while.

Molly Cake 11

Grab yourself some frozen strawberries. This is from a 1kg package frozen strawberries, which is about 5 cups’ worth.

Molly Cake 1

Plop those in a pot with 1/2 cup granulated sugar and stew them over medium heat until they’re all melted and gooey and lovely.

Molly Cake 2

You can purée them at this point if you wish but I wanted some strawberry chunks in the cake batter so I mashed the goo with a potato masher instead.

Molly Cake 3

Now you can turn your oven on to 350°F and butter and parchment up your cake pan(s). I used my trusty 17″ round cake pan but there is enough batter here if you wanted to use 3-8″ round pans instead and create a layer cake.

Molly Cake 4

Sift together 3 1/2 cups all-purpose flour, 1 tablespoon baking powder, and 2 teaspoons baking soda and set that aside for a minute.

Molly Cake 6

In the bowl of your electric mixer, beat together 1/2 cup butter and 1/2 cup vegetable shortening until fluffy and amazing.

Molly Cake 5

Next, beat in 1 3/4 cup granulated sugar until it’s also fluffy and amazing. Then you can add in 2 teaspoons vanilla (I used vanilla bean paste, my new favourite thing).

Molly Cake 7

Now scrape down the sides of the bowl and plop in 1 egg. Just one. It looks so lonely. Beat it up. Show it who’s boss.

Molly Cake 9

Okay now we put all this jazz together. Take your strawberry goo. And your flour.

Molly Cake 10

Starting with the flour, add about a third of it to your mix and stir to combine.

Molly Cake 13

Add half the strawberries, then another third of the flour (mixing it all in), then the final half of the strawberries, and the last of the flour.

Molly Cake 14

I decided to disobey my normal rules about colouring food and added a bit of red gel paste colouring to the batter to make the strawberries pop.

Molly Cake 15

Then stir in 1 cup sour cream.

Molly Cake 16

Look at that gorgeousness.

Molly Cake 17

Beat your room temperature egg whites until stiff peaks form. Yay, meringue!

Molly Cake 12

Ever so gently fold those fluffy whites into your batter. This batter is pretty dense and produces a pretty thin cake so you need all the fluff you can get.

Molly Cake 18

Smooth the batter into your cake pan(s) and bake for about 45 minutes, or until a toothpick inserted into the centre of the pan comes out clean.

Molly Cake 19

Set the whole shebang on a wire rack to cool completely.

Molly Cake 20

Now, if you’re not making a giant cow out of your cake, you can skip this whole segment. If you are making a giant cow out of your cake, then I hope yours turns out better than mine because you are less terrible at art.

Molly Cake 22

So with the giant cake laid out on a board, I cut out the shape of the cow’s head, and then from what was left I cut out the horns and the ears. It’s all symmetrical.

Molly Cake 24

Then I laid it out.

Molly Cake 25

I had to move everything around on the board to get it to fit, and the cake was so sticky it was a hard job to do it without disaster. And now it looks like the Chicago Bulls logo (GREAT GIFT IDEA FOR BULLS FANS FOLKS!).

Molly Cake 26

The Pie thought we should add a bit of extra cake at the snout. Now we need some frosting.

Molly Cake 27

I needed two colours of icing, so in two double boilers I melted 4 oz dark chocolate and 4 oz white chocolate, respectively. If you’re just doing one colour then obviously just use one double boiler and 8 oz chocolate. When that’s all melty and smooth, set it aside to become less horribly hot.

Molly Cake 28

In the bowl of an electric mixer, beat 2-250g packages plain cream cheese (room temperature) until they’re silky smooth. Remember, the warmer your cream cheese is, the less lumpy the frosting will be.

Molly Cake 29

Beat in as well 1 tablespoon vanilla (again I used the paste because I love it), 3/4 cup heavy (whipping) cream, and 3/4 cup icing sugar.

Molly Cake 30

Then I split the frosting between two bowls. Hello, beautiful. Look at those little flecks of vanilla seeds.

Molly Cake 32

Then I poured the now-cooler white chocolate into one bowl, and the now-cooler dark chocolate into the other and stirred them up.

Molly Cake 33

Ready to decorate!

Molly Cake 34

I started with the white, because … well, I just did.

Molly Cake 35

Then I filled it in with the dark chocolate. The nostrils are wonky because I dropped a huge gob of icing accidentally and so that’s just how it had to be. TADA! Not fine art, but highly tasty, and Mrs. Nice loved it.

Molly Cake 36

Gluten-Free Choco-Fudge Cupcakes with Salted Caramel Frosting

GF Fudge Cakes with DL Icing 20

I hadn’t baked anything since before we left for NYC so I was kind of jonesing for some cupcakes, and these were a perfect match. They actually came straight off the package of Bob’s Red Mill quinoa flour that I was using. As far as gluten-free flours go, quinoa flour is probably one of the closest you can get, consistency-wise, to real wheat flour. When you bake with quinoa flour you end up with lovely fluffy sponge-y cakes. They do, however, taste like quinoa. So if you’re cool with that, then have at her.

GF Fudge Cakes with DL Icing 4

Start by preheating your oven to 375°F and line a muffin tin with cupcake liners.

In a medium pot, melt 1/4 cup butter with 1/2 cup water and bring that to a low boil.

GF Fudge Cakes with DL Icing 10

Whisk in 1/4 cup cocoa and remove it from the heat. Let it cool down from molten temperatures.

GF Fudge Cakes with DL Icing 11

Sift 1 cup sugar, 1 1/4 cup quinoa flour, 1/2 teaspoon baking powder, and 1/2 teaspoon baking soda into a bowl.

GF Fudge Cakes with DL Icing 12

Add in the slightly cooled cocoa mixture and mix that around.

GF Fudge Cakes with DL Icing 14

Separate yourself 2 eggs. Leave the whites to come to room temperature, and mix the yolks together with 1/2 teaspoon vanilla and 1/4 cup sour cream. Mix those into the cocoa mixture (make sure it’s not too hot so you don’t curdle your yolks).

GF Fudge Cakes with DL Icing 13

Now, whip up those egg whites until stiff and foamy and then fold them into the mixture.

GF Fudge Cakes with DL Icing 15

Drop that into your prepared baking cups and bake for  20 minutes, until a toothpick inserted into the centre of the centre cupcake comes out clean. Let those cool completely on a wire rack.

GF Fudge Cakes with DL Icing 16

While that’s baking, why not start with your icing?  I pulled this from Sally’s Baking Addiction.

GF Fudge Cakes with DL Icing 17

Melt 1/2 cup butter in a medium pot over medium heat.

GF Fudge Cakes with DL Icing 1

Add in  1 cup brown sugar and 1/3 cup heavy (whipping) cream and stir until the sugar is dissolved.

GF Fudge Cakes with DL Icing 2

Add in 1/4 teaspoon fine sea salt and stir that in. Stirring occasionally, let the whole thing come to a bubble, and stay at a bubble for about 2 minutes, then remove it from the heat and let it cool enough that you won’t burn yourself on it. Because being burned by hot sugar is bad.

GF Fudge Cakes with DL Icing 3

GF Fudge Cakes with DL Icing 5

Beat in about 2-3 cups icing sugar, a little at a time, until you reach your desired consistency. If you find you’ve added too much, don’t freak out – just add a bit more cream and you’re all set.

GF Fudge Cakes with DL Icing 8

GF Fudge Cakes with DL Icing 9

Slather the icing all over your cupcakes. I tried to pipe mine but it was too thick so I went with slathering, but you can pipe it if you want. Giv’er!

GF Fudge Cakes with DL Icing 18

Krystopf’s Chocolate Chiffon Birthday Cake

Chocolate Chiffon Cake 30

Because we were running around on my birthday, the Pie and I broke with our tradition of making each other birthday cakes from scratch and bought one from a local bakery.  It was lemon chiffon, and we liked it so much we immediately vowed that it would be on our list of things to learn.  It was Krystopf’s birthday on Saturday (my biggest brother is 37, how scary is that?), and he requested something chocolatey for his cake.  So instead of lemon chiffon, we’re making the Joy of Baking’s chocolate chiffon cake.  While the cake has multiple steps, they’re all pretty easy.  It’s also a good cake to make the day before and store in the fridge overnight.

Start by separating 6 eggs (add an extra white to the whites pile so you have 6 egg yolks and 7 egg whites) and let those come to room temperature.

Chocolate Chiffon Cake 1

Now go ahead and preheat your oven to 325°F and grab your favourite tube pan.  Resist the urge to put any grease of any form into it.

Next, seize your sifter and, in a large bowl, sift together 2 cups cake flour with 1/4 cup unsweetened cocoa powder, 3/4 cup granulated sugar, 2 tablespoons baking powder, and 1/4 teaspoon baking soda.

Chocolate Chiffon Cake 2

In a smaller bowl, whisk together 6 egg yolks, 1/2 cup vegetable oil, 3/4 cup room temperature coffee, and 1 1/2 teaspoons vanilla.

Chocolate Chiffon Cake 3

Make a well in your flour mixture and add the egg stuff to it.

Chocolate Chiffon Cake 4

Mix well, scraping down the sides of the bowl, until you get this lovely glossiness.

Chocolate Chiffon Cake 5

Now we can start beating up those 7 egg whites.  Add in 1/2 teaspoon cream of tartar and use an electric mixer to whip them to soft peaks.

Chocolate Chiffon Cake 6

While still beating, slowly add in 3/4 cup granulated sugar and keep whipping those up until you get nice stiff peaks that stand on their own.

Chocolate Chiffon Cake 7

Gently fold the meringue into the rest of the cake batter in three separate additions.

Chocolate Chiffon Cake 8

I found it a bit tricky to get it all properly mixed, so mine is a little marbled.

Chocolate Chiffon Cake 9

Pour the batter into your tube pan and smooth it down.  If you think there are large air bubbles in there, cut through it a few times with a knife to break them.

Chocolate Chiffon Cake 10

Bake the cake for 55-60 minutes, and then immediately invert your tube pan to allow the cake to cool completely without collapsing under its own weight (this is why you don’t grease the pan).

Chocolate Chiffon Cake 11

Use a bottle to prop it up if your pan doesn’t have feet.

Chocolate Chiffon Cake 12

Now that the cake is cool we can work on the glaze and filling.  Chuck a bowl and the wire whisk from your electric mixer into the freezer for about 30 minutes.

Chocolate Chiffon Cake 13

Chop up 6oz semisweet chocolate and heave that into a heatproof bowl (or double boiler) with 1/4 cup butter and 2 tablespoons light corn syrup.

Chocolate Chiffon Cake 14

Heat that over a pot of barely simmering water until it’s all melted and lovely, and then set it aside to cool slightly.

Chocolate Chiffon Cake 19

While it’s cooling down, you can decant your cake.  Use a sharp knife around the edges and tip it upside down onto a plate.

Chocolate Chiffon Cake 15

Use the knife again to remove the bottom part.

Chocolate Chiffon Cake 16

Then cut the whole thing in half horizontally.

Chocolate Chiffon Cake 17

Chocolate Chiffon Cake 18

Haul your frozen whisk and bowl out of the freezer and throw 1/2 teaspoon vanilla, 1/4 cup granulated sugar, 2 teaspoons cocoa, and 1 teaspoon instant coffee into the bowl.

Chocolate Chiffon Cake 20

Pour out 1 cup cold whipping cream and add a few drops of that to the mix in the bowl.  Give it a good stirring, then beat in the rest of the whipping cream until it’s a frothy mocha masterpiece.

Chocolate Chiffon Cake 21

Take about 3/4 cup of the mocha cream and spread it on the cut side of the bottom half of the cake.

Chocolate Chiffon Cake 22

Chocolate Chiffon Cake 23

Put the top half back on and then drizzle the glaze over the top so it runs down the sides.  Spread it smooth with a spatula.

Chocolate Chiffon Cake 24

Chocolate Chiffon Cake 25

Pipe the remaining mocha filling on top.

Chocolate Chiffon Cake 27

I let the cake chill for a bit to set the glaze.

Chocolate Chiffon Cake 28

Oh man it was good!

Chocolate Chiffon Cake 32

Cake Redux: Gluten-Free LEMON COCONUT Snacking Cake

Lemon Gluten-Free Cake 14

Okay let’s try this again.  If you were visiting last week you’ll know I made a neat little gluten-free cake I found in Canadian Living but I wasn’t totally happy with how it came out.  So today I totally changed the two main ingredients (and two less main ingredients, and the cooking time) and we’re doing this for a second time.  If you notice that the text reads pretty much identically to what I wrote last week, well, it’s because it IS what I wrote last week.  I mostly copy-pasted that stuff, but I bolded all the differences.  Deal with it.

Lemon Gluten-Free Cake 11

Preheat your oven to 325°F and grease (with butter) a 9″ springform pan.  Line the bottom with parchment paper.  While you’re at it, separate 6 eggs and put the whites in a mixing bowl.

Lemon Gluten-Free Cake 1

In a large bowl, with an electric mixer, beat together 6 egg yolks1 cup granulated sugar, 2 teaspoons COCONUT EXTRACT2 teaspoons grated LEMON zest, and a pinch of NUTMEG.

Lemon Gluten-Free Cake 2

You are going to want to beat this stuff until it turns the colour of butter and when you lift the (stopped) beater away, you get a lovely long yellow ribbon coming out of the end, about 5 minutes.

Lemon Gluten-Free Cake 3

You need 2 cups COCONUT FLOUR for this, and 2 tablespoons LEMON juice, so you might want to get these ready ahead of time.  I just juiced the lemon I took the zest from. Fold the coconut flour and lemon juice into the yolk mixture.

Lemon Gluten-Free Cake 4

I totally forgot that coconut flour tends to suck up moisture.  If you do this, maybe just add 1 1/2 cups coconut flour.

Lemon Gluten-Free Cake 5

So I added in an additional 1/2 cup of MILK.

Lemon Gluten-Free Cake 7

Now take those 6 egg whites you set aside and start beating them until stiff peaks form.

Lemon Gluten-Free Cake 6

Take a scoop of the whites and stir it into the flour/yolk mix.  This will sort of thin out the mixture in order that it doesn’t crush the rest of your whites in the next step.

Lemon Gluten-Free Cake 8

Once that first scoop is combined, gently fold in the remainder of your egg whites into the flour/yolk mixture until fully combined.  Make sure to scrape up from the very bottom to make sure you got it all. Plop the batter into your prepared pan (or press it in this case) and bake it until the edges pull away from the sides of the pan and the centre is golden and firm to the touch, about 40 minutes.

Lemon Gluten-Free Cake 9

This cake did not fluff up like the previous one.  Let it cool on a rack before popping it out of the springform pan.

Lemon Gluten-Free Cake 10

Dust the cake with icing sugar right before you serve it (or the icing sugar will be absorbed into the moisture of the cake).  A nice lemon glaze (try the juice of one lemon heated to boiling with 4 tablespoons sugar) would also work I think.

Lemon Gluten-Free Cake 16

Gluten-Free Orange Almond Snacking Cake

GF Orange Almond Snacking Cake 20

I came across this recipe in the May 2014 issue of Canadian Living.  I haven’t really felt like doing too much cooking in recent days, but this one looked easy and post-able enough that I figured I’d give it a shot.  This is one of those cakes that is “naturally” gluten-free, meaning that you’re not looking for a flour substitute.  It’s more that the recipe doesn’t require anything flour like in the first place to keep its structure.  It’s also dairy-free too (just don’t use butter to grease the pan), if that’s something you’re interested in.

GF Orange Almond Snacking Cake 16

Preheat your oven to 350°F and grease (with butter) a 9″ springform pan.  Line the bottom with parchment paper.  While you’re at it, separate 6 eggs and put the whites in a mixing bowl.

GF Orange Almond Snacking Cake 1

In a large bowl, with an electric mixer, beat together 6 egg yolks, 1 cup granulated sugar, 2 teaspoons vanilla extract2 teaspoons grated orange zest, and a pinch of cinnamon.

GF Orange Almond Snacking Cake 2

You are going to want to beat this stuff until it turns the colour of butter and when you lift the (stopped) beater away, you get a lovely long yellow ribbon coming out of the end, about 5 minutes.

GF Orange Almond Snacking Cake 4

You need 2 cups ground almonds for this, and 2 tablespoons orange juice, so you might want to get these ready ahead of time.  I used the store-bought almond meal because I’m lazy, and just juiced the orange I took the zest from.

GF Orange Almond Snacking Cake 3

Fold the almonds and orange juice into the yolk mixture.

GF Orange Almond Snacking Cake 6

Now take those 6 egg whites you set aside and start beating them until stiff peaks form.

GF Orange Almond Snacking Cake 7

Take a scoop of the whites and stir it into the almond/yolk mix.  This will sort of thin out the mixture in order that it doesn’t crush the rest of your whites in the next step.

GF Orange Almond Snacking Cake 8

Once that first scoop is combined, gently fold in the remainder of your egg whites into the almond/yolk mixture until fully combined.  Make sure to scrape up from the very bottom to make sure you got it all.

GF Orange Almond Snacking Cake 9

Plop the batter into your prepared pan and bake it until the edges pull away from the sides of the pan and the centre is golden and firm to the touch, about 35 minutes.

GF Orange Almond Snacking Cake 10

If you need to, run a knife around the edge of the pan and leave the cake to cool in the pan on a wire rack.  Mine came right out, but I’m not always this lucky.

GF Orange Almond Snacking Cake 11

Don’t worry — it will sink in the middle.  They always do.

GF Orange Almond Snacking Cake 14

Dust the cake with icing sugar right before you serve it (or the icing sugar will be absorbed into the moisture of the cake).

GF Orange Almond Snacking Cake 15

This cake was pretty good.  I think I’d like to make it again, but this time I would do it with lemon zest, lemon juice, and then coconut flour instead of almond flour for a more tropical cake.  I think I would also bake it differently.  This one you can see was still a little runny in the centre, but the outside was starting to burn.  I think I would bake it for longer, but at a lower temperature, like 325°F. Thoughts?

GF Orange Almond Snacking Cake 19

Gluten-Free Angel Food Cake

Gluten-Free Angel Food Cake 17

I love this cake.  The Pie and I have made it a few times now and it’s always a big hit.  If you like angel food cake, this will be your new favourite incarnation of it.  The gluten-free factor raises this cake to all new levels of melt-in-your-mouth goodness.  I highly recommend it, although you do go through an entire carton of eggs every time you make it.  While you’re trying it, you should also check out the Gluten-Free Homemaker, where I got the recipe.

Gluten-Free Angel Food Cake 1

Preheat your oven to 350°F and grab yourself a nice old tube pan.  The plain aluminum ones are always the best for this kind of stuff.  DO NOT GREASE IT. I’m pretty sure that greasing an angel food cake pan will start the apocalypse, but I’m too afraid to test out that theory.

Gluten-Free Angel Food Cake 2

Separate 12 eggs.  Save the yolks for something awesome (like custard), and plop the whites into the bowl of an electric mixer.

Gluten-Free Angel Food Cake 3

Add to that 1 1/2 teaspoons cream of tartar and 2 teaspoons vanilla and leave that to warm up a little.  Room temperature whites will foam up more than cold ones.

Gluten-Free Angel Food Cake 5

In a small bowl, sift together your flour ingredients.  I adapted mine recipe here a bit just for availability’s sake.  So, put together 1 1/3 cup icing sugar, 1/4 cup cornstarch, 1/2 cup tapioca starch, and 1/4 cup rice flour.  Add to that 1 teaspoon xanthan gum and 1/4 teaspoon salt.  Set that aside for the nonce.

Gluten-Free Angel Food Cake 4

Start your mixer and begin to froth up your egg whites.  When you get to this level of foaminess, you can start adding in, a little bit at a time, 1 cup granulated sugar.

Gluten-Free Angel Food Cake 7

Keep going until the egg foam forms stiff peaks and the stuff can support the weight of the mixer attachment.

Gluten-Free Angel Food Cake 8

Gently fold in the flour mixture a bit at a time. It will not want to mix in. Be patient, and very gentle.

Gluten-Free Angel Food Cake 10

Smooth your batter into your tube pan.

Gluten-Free Angel Food Cake 11

Make sure to level the top as best  you can.

Gluten-Free Angel Food Cake 12

Bake for 35 minutes, until the top is golden brown and dry-looking.  You’ll see some cracks, too — that’s good.  Invert the pan on its legs or on the neck of a sturdy bottle and let that cool completely.

Gluten-Free Angel Food Cake 13

When you’re ready, carefully wiggle the cake out of the pan with the aid of a knife.

Gluten-Free Angel Food Cake 14

The best way (in my opinion) to top an angel food cake is with some vanilla-flavoured whipped cream and fresh berries, which is what you see here.

Gluten-Free Angel Food Cake 15

A few berries became a lot of berries, but the more the merrier!

Gluten-Free Angel Food Cake 16

Bookmark Brownies

Bookmark Brownies 15

This recipe comes from a laminated bookmark I received as part of a promotional package from Chatelaine magazine.  While I was not so struck by this unsolicited mail that I wished to subscribe to the magazine, I kept the bookmark because the brownie recipe on it was gluten free with an interesting twist.  Actually this is a lie.  As soon as I’d typed in the ingredient list into this entry, I threw it out.  And was annoyed that it was unrecyclable.

Bookmark Brownies 17

Below is the original recipe for one pan of brownies.  I tripled this because I was baking for work, so ignore my photos involving massive amounts of baking materials.

First, separate 4 eggs, and bring the whites to room temperature.

Bookmark Brownies 1

Preheat your oven to 350°F and line an 8″ square pan with parchment paper, letting the paper hang over the sides of the pan (you’re going to use these as handles later, see?).

Bookmark Brownies 2

In a large bowl, whisk together 2 1/2 cups icing sugar with 2 cups ground almonds (I used almond meal), 2/3 cup unsweetened cocoa powder, and a pinch of salt.

Bookmark Brownies 3

Add to that your egg whites and 2 teaspoons vanilla and mix well.

Bookmark Brownies 5

Pour that thick loveliness into the prepared pan.  And by thick I mean that this stuff will suck you into oblivion if you’re not careful.

Bookmark Brownies 7

Bookmark Brownies 9

Bake for 40-45 minutes, until the top is shiny and crusty and a cake tester inserted into the centre comes out mostly clean.

Bookmark Brownies 10

Use the parchment handles to carefully lift the brownie out of the pan (you don’t want it to suddenly sag and break in half, for instance) and set the brownies on a rack to cool completely.

Bookmark Brownies 12

What this recipe doesn’t tell you (because I guess the bookmark was too small) is that these things are next to impossible to cut cleanly.  I thought mine weren’t cooked enough and ended up putting them back in the oven for another fifteen minutes and they were still ridiculous, sticking to the knife and crumbling everywhere.  Warm, cold, didn’t matter.  Crumbles all over the place.

Bookmark Brownies 14

But they tasted like brownies.  So that’s that.

Bookmark Brownies 16

Lemon Cloud with Strawberries and Mint

Lemon Cloud 25

Fussellette asked me to make “something light” for dessert following our Easter meal of a traditional Jiggs dinner.  What is lighter than a cloud?  Not much.  This sharp lemon foam is a great palette-cleanser and went smashingly with some post-prandial tea.  And, as most things gluten-free tend to be (with the exception of doughy things of course), it was easy and quick to make.  I made it the day before to allow the flavours to really concentrate themselves.

Lemon Cloud 3

Start with some fresh strawberries, 2 cups.  Wash them, cut the tops off, and slice them into quarters.  Drop them in a bowl.

Lemon Cloud 2

Sprinkle 2 tablespoons sugar over top.

Lemon Cloud 4

Grab yourself some fresh mint, 2 tablespoons.  Chop that up and drop it on top of the strawberries.

Lemon Cloud 5

Give that a stir, then chuck it in the fridge to chill.

Lemon Cloud 6

Preheat your oven to 350°F.  Spray a 1 1/2 quart soufflé dish (I didn’t have one, so I used this steep-sided oval bowl) with cooking spray and dust with 2 tablespoons sugar.  The recipe said to shake out the excess but I left mine in the bottom in the hopes it would get all crusty and lovely, and I was right.  Set the dish on top of a baking sheet.

Lemon Cloud 7

Separate 4 eggs and bring the whites to room temperature.  You’ll only need two of the yolks.  I had three whites left over from eggs Benny so in actual fact this recipe used 5 whites.

Lemon Cloud 8

Grate the zest of 2 lemons and squeeze out their juice as well.  You want to end up with 2 tablespoons lemon zest and 6 tablespoons lemon juice.

Lemon Cloud 10

In a small saucepan, whisk together 1/2 cup sugar and 1 tablespoon corn starch.

Lemon Cloud 9

Add in the lemon juice, zest, and the 2 egg yolks and stir until smooth.

Lemon Cloud 11

Heat on medium, stirring constantly, until thick enough to coat the back of a wooden spoon.  Transfer to a large glass bowl and allow to cool to room temperature.

Lemon Cloud 12

Take your 4 egg whites and plop them in a bowl with a pinch of salt.  Whisk until foamy.

Lemon Cloud 14

Gradually add, a little bit at a time, 1/4 cup sugar, and continue to beat until stiff peaks form.

Lemon Cloud 15

Take about 1/4 of the egg whites and fold it into the lemon curd in the glass bowl.

Lemon Cloud 16

When that is fully incorporated you can fold in the rest of the whites.

Lemon Cloud 17

Transfer the mixture to the soufflé dish and smooth the top.

Lemon Cloud 18

Bung that in the oven for 25 minutes, or until the eggy mess is puffy and slightly browned on top.  Haul it out and put it on a wire rack to cool.

Lemon Cloud 19

Now watch it fall.  Don’t fret — it’s supposed to fall.

Lemon Cloud 21

Lemon Cloud 23

When it’s cool cover it with plastic wrap and chuck that in the fridge as well to get chilly. When you’re ready to eat, take it out. Or you could sit in your fridge and eat it. Whatever works for you. Scoop some out, top with your strawberry compote, and you’re golden.

Lemon Cloud 26