Chewy Molasses Squares

Molasses Squares 12

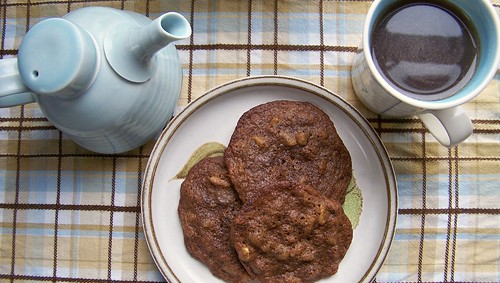
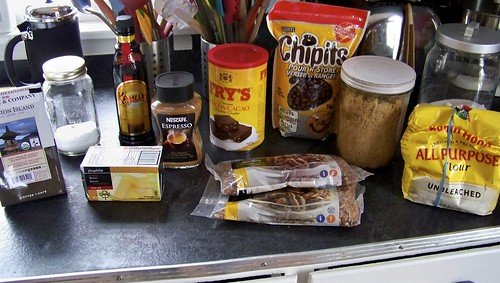
These were a consolation prize the Pie found after the disastrous experiment with s’mores cookies last week.  And they turned out to be an excellent way of depleting our more esoteric baking supplies.

Molasses Squares 14

Preheat your oven to 350°F and butter an 8″ baking dish.  I went with the extra precaution of lining it with parchment and buttering that, too.  Now I doubled my recipe and plopped it in a 9″ x 13″ baking dish because the recipe got its math wrong and there is no way that an 8″ square pan leaves you with forty 1 1/2″ squares.  It just ain’t so.  I only ended up with twenty-four, and that’s in the bigger pan.

Molasses Squares 2

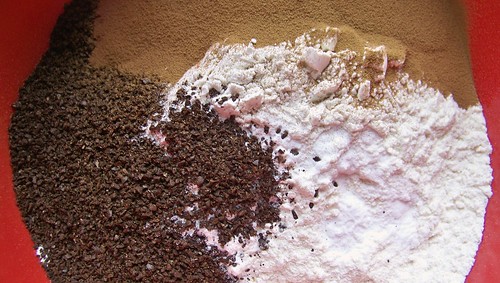
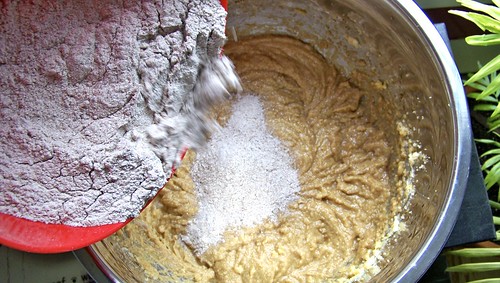
Anyway.  Don’t fret about the math for now, and whisk together 1 3/4 cups all purpose flour, 1/4 teaspoon baking soda, and 1/4 teaspoon salt and set that aside for now.

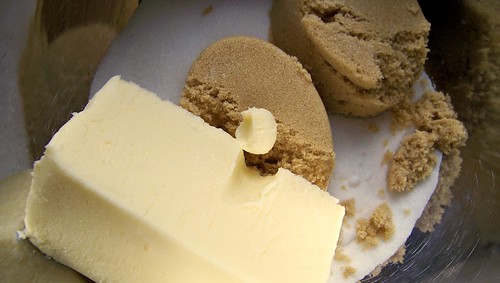
In the bowl of an electric mixer, beat together 1/3 cup unsalted butter (room temperature) and 3/4 cup granulated sugar until they’re pale and fluffy, a couple minutes.  I used half white and half brown sugar here because I ran out of molasses so  I needed to boost the flavour a bit.

Molasses Squares 4

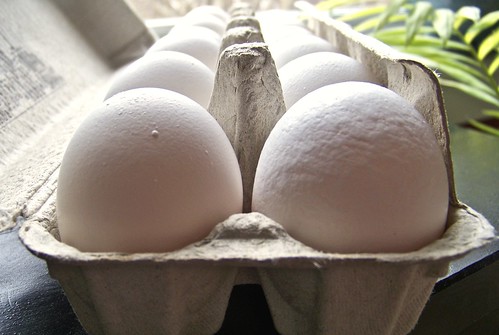
Separate out 4 egg whites and use the yolks for something else.  I’m sure you could get away with tossing them into this mix, but it would make for a much denser cake.  I might try it next time.  Huck those into the mixer and beat to combine.

Molasses Squares 1

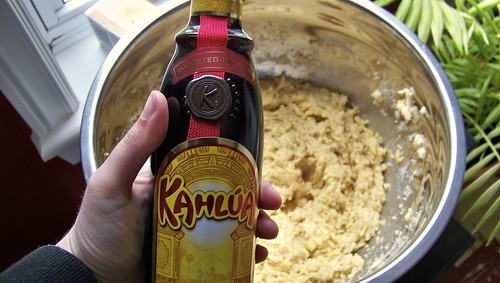
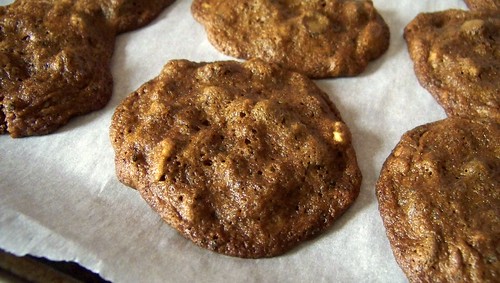
Grab yourself 1 cup molasses.  I ran out of molasses halfway through and discovered that my Golden Syrup had corroded the tin it was in, so my only recourse was lily white corn syrup, which made my squares quite a bit more pale than they were supposed to be.  Your squares will be much darker.

Molasses Squares 3

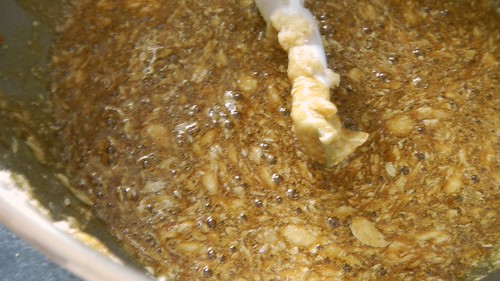
Anyway, pour that in as well and give it a stir until it’s all combined.

Molasses Squares 5

At this point, the Pie remarked that this was one of the grosser-looking things I had ever made, with maybe the exception of banana bread.  He has no appreciation for the science of things.  Then of course I added in the flour mixture and whipped that around and he was all like, “ooooh, it’s so pretty and smooth!”  Figures.

Molasses Squares 6

Anyway, smooth that lovely pretty substance into your prepared pan and chuck it in the oven for 40 minutes, or until a toothpick inserted in the centre of it comes out clean.  For the doubled recipe, this took about an hour.

Molasses Squares 7

Allow the cake to cool completely in the pan on a wire rack, then tip it out and cut it into as many squares as you like.

Molasses Squares 9

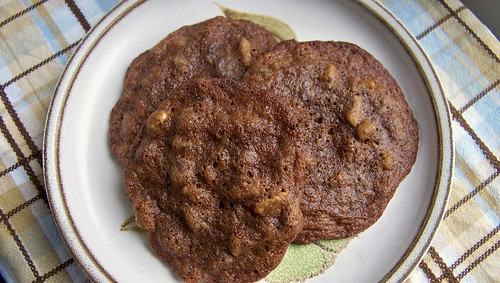
Grab a bowl and dump in about 1/2 cup icing sugar, and roll each square in that just before serving (if you do it in advance then the icing sugar will be absorbed into the square and it won’t look as pretty).

Molasses Squares 10

Then you eat them!

Molasses Squares 11

Blueberry Ricotta Pancakes

Blueberry Ricotta Pancakes 12

Remember when I made that lovely rigatoni casserole and I forgot the ricotta?  Well I still have it, and so I’m trying to figure out what to do with it, other than slap together the regular ol’ lasagna or cannelloni.  How about something sweeter?  How about breakfast?  Sold!  This recipe is adapted from Canadian Living.

Blueberry Ricotta Pancakes 2

So.  In a large bowl, whisk together 1 1/2 cups flour, 3 tablespoons granulated sugar, 1 teaspoon baking soda, and 1/4 teaspoon baking powder.

Blueberry Ricotta Pancakes 1

Melt 1/4 cup butter, and chuck that in a smaller bowl together with 1 egg, 1 cup milk, 3 tablespoons lemon juice, and 3/4 cup extra smooth ricotta cheese.  The recipe also called for lemon rind, but we don’t have such fancy things here in Newfoundland. Well, we do — I just don’t have any at the moment.

Blueberry Ricotta Pancakes 3

Pour the wet ingredients over the dry ingredients and stir it up.

Blueberry Ricotta Pancakes 4

Stir in 1 cup fresh blueberries.  If you use frozen ones (I did), just keep in mind that the the ice is going to make your pancakes a little runnier.

Blueberry Ricotta Pancakes 5

Heat a frying pan on medium and dollop in some pancake batter.  Because the pan is still heating our first pancakes never come out as well as we planned so we always make them a bit on the small side.

Blueberry Ricotta Pancakes 6

Cook your pancake until the bubbles that form on the top pop but don’t disappear, leaving little craters in your batter.

Blueberry Ricotta Pancakes 7

Then flip and cook for another minute or so.  Not long.

Blueberry Ricotta Pancakes 8

And that’s it, really.  Serve with whatever you like.  We kept it simple with butter and maple syrup, and that was good.

Blueberry Ricotta Pancakes 11

Toothpaste for your Furbaby

Office Gren 2

We do our best to brush Gren’s teeth almost every day.  Granted, it’s a two-person operation: one person has to put the dog in a headlock and the other risks getting covered in paste and dog saliva on “scrubby duty,” but we do it because we love our little fiend.

I finally came to the end of the supply of dog toothpaste (vanilla flavoured, if you must know) that came with the latest doggy toothbrush (which I have since abandoned for a soft people toothbrush).  As I was about to go out and get some more, I chanced to look at the “all-natural” ingredients list.   Sorbitol?  I don’t even know what that is, but it’s the second ingredient.  And why does it need to be sweetened with stevia?  Since when do dogs need sugar?

Dog Toothpaste 1
I’ve since learned that tea tree oil should not be ingested. And after several reminders from you dear readers I edited the post, so although you see it in this picture I no longer use it in my recipe.

So I’m going to make my own.  And there’s a ton of recipes on the internet.  Many of them require you to use glycerin, which I guess is the sticky-togethery ingredient that actually makes the paste into a pasty substance.  But that sounds like a pain in the ass, so I’m going to go with a version that uses coconut oil instead (used in small quantities coconut oil is beneficial to your pet’s health), and modify it a wee bit.

Dog Toothpaste 2

Start with a bouillon cube, and dissolve that in 1 tablespoon water.  Or, in my case, use this gel-like one instead.  This is mostly for flavour, so use something your dog will like.  Gren has issues with chicken and beef so I would use pork or vegetable.

Dog Toothpaste 3

Add in 2 tablespoons baking soda (a deodorizing abrasive), and 1 teaspoon cinnamon (a fragrant abrasive).

Dog Toothpaste 4

I also ground up about 1 teaspoon dried parsley (for fresh breath) and added a pinch of ground cloves (an anti-parasitic).

Dog Toothpaste 5

Looks tasty!  Actually it didn’t smell as awful as I thought it might: just like vegetable soup with too much cinnamon added.  Not bad in the end.

Dog Toothpaste 7

Then you need to work in about 1/2 cup coconut oil.  If you have trouble mixing everything up you can soften the oil or melt it, but you want it to be solid in the end.

Dog Toothpaste 8

You can store this mixture at room temperature in a sealed container for several weeks.  Brush often!

Dog Toothpaste 9

Many sites actually recommend using your finger and a clean washcloth instead of a toothbrush for maximum efficacy, so we might try that at some point.  Fortunately, Gren seems to like the taste of this stuff better than what we were using before, so he struggles a lot less.

Dog Toothpaste 10

Immediately after we brush his teeth Grenadier goes and gets his Tricky Treat Ball, which we fill with the other half of his dinner.  Trundling around with the ball, he will snarf up the kibble that falls out of the hole, and in gulping it down he will produce more saliva to further aid in cleaning his teeth.  When he’s done he usually drinks a whole whack of water too, to wash everything down. And then he goes to sleep.

Lazy

Pretzels Are My Kryptonite

Soft Pretzels 27

There’s a certain fast food establishment at the mall to which I am inevitably drawn, every time.  And they make glorious sweet and salty pretzels, fresh all day.  The fact that if you buy three you get one free does not help.

Soft Pretzels 31

A few years ago, before I started this blog, I tried my hand at recreating the pretzel I knew and loved.  The result was rather a disaster, but, undaunted, I figured I’d try again, seeing as it’s too cold to walk to the mall at present.

Soft Pretzels 13

So I did my research, and the results below are a combination of about four or five different internet sources.  In addition to that, the amount I made was half what I will present to you now, because most batches make twelve pretzels and it was a huge feat for the Pie and myself to eat three each.

Soft Pretzels 1

This is the recipe for 12 soft pretzels.  BEWARE: results may be habit-forming.

Soft Pretzels 30

Start with a wee bowl, and plop in 1 1/4 cups warm water (I use the hot water from my tap, which is pretty hot, and it seems to serve me well, especially in a frigid kitchen where everything cools down mighty fast. Plus yeast is a much more forgiving organism than many realize). Dissolve into that 1 teaspoon granulated sugar.  Sprinkle over that 4 teaspoons active dry yeast, give it a stir, and leave it for 10 minutes to get all foamy.

Soft Pretzels 2

At one point mine started trying to be the Thing from the Black Lagoon and went all BLOOP!  BLOOP!  BLOOP!  I tried to get a picture but it didn’t work out.

Soft Pretzels 4

Nevertheless it’s fun to watch science (biology!) in action.

Soft Pretzels 5

In a larger bowl, stir together 5 cups all-purpose flour, 1/2 cup granulated sugar (more if you like your pretzels sweet, less if you like ’em saltier), and 2 teaspoons salt (again with the more or less business, but reversed — though don’t go too crazy).

Soft Pretzels 3

Make a well in that flour and pour in 1 tablespoon vegetable oil, followed by all the yeasty water.

Soft Pretzels 6

Stir and stir and stir until you form a rough, shaggy dough and most of the flour is incorporated into this stuff.

Soft Pretzels 7

I find that when you halve bread recipes, for some reason the moisture amount never turns out quite right.  So if your dough is too dry and refuses to stick to itself, like this:

Soft Pretzels 8

Then simply add a few tablespoons of warm water until it gets to the desired consistency.

If your dough ends up too sticky, like this:

Soft Pretzels 9

Then it’s a simple matter to add more flour by kneading it in on a clean and lightly floured work surface.

Soft Pretzels 10

Do your kneading for about 8 minutes, until you have a sturdy little ball.  It will feel quite dense.

Soft Pretzels 11

Soft Pretzels 12

Oil a bowl and plop the ball of dough into it, turning it once to coat the whole surface of the ball in oil.  Cover that loosely with plastic wrap and set it somewhere warm for about an hour, until it’s doubled in size.

Soft Pretzels 14

When it’s all ready to rock and roll, preheat your oven to 450°F, line several baking sheets with parchment paper, and set a pot on the stove.  Into that pot pour 4 cups water and 4 tablespoons baking soda and bring it to a low boil.

Boiling the pretzel is key to the browning process, or so the internet told me.  The last time I did this, I ended up with pretzels that tasted so heavily of baking soda that they were inedible.  So this time I used a relatively small amount of the stuff.  Some of the sources I read suggested adding sugar to the boiling water as well, and I think that might countermand some of the saltiness of the baking soda, though it would definitely make the pretzels a little stickier.  I will have to try it next time.

Cut your dough into a dozen separate pieces (mine is six, remember, because I halved it).

Soft Pretzels 15

Using no flour this time, roll out each section into a snake measuring about 24 inches.

Soft Pretzels 16

Form the snake into a pretzel by bringing the ends together, twisting twice, and smooshing the tips into the body of the pretzel.  The Pie and I tried to do it the fancy lift-and-twist-and-magically-it-all-works-out but obviously that didn’t work.  Amateurs.

Soft Pretzels 17

Working one or two at a time,  slide your formed pretzels into the boiling water and submerge them for about 30 seconds.

Soft Pretzels 18

Soft Pretzels 19

It was kind of hard to remove them with tongs, so we plopped each one on this deep-frying spoon and did it that way and it was way easier.

Soft Pretzels 20

Soft Pretzels 21

Let those pretzels drip a bit before laying them on the parchment-lined baking sheets.

Soft Pretzels 22

For a taste comparison, I left one of my six pretzels unboiled, just to see what would happen.  It’s the one on the left in both of these shots.

Soft Pretzels 23

Bake for 8-10 minutes, until golden brown, but still soft to the touch.

Soft Pretzels 26

You can see that the unboiled one didn’t brown at all.  It still tasted just fine.  You could always do an egg wash on the unbaked pretzels if you’re not keen on the distinctive pretzel-y taste that the boiling in baking soda brings.

Soft Pretzels 25

Soft Pretzels 33

Transfer to a wire rack to cool slightly, and then make sure to eat them all while they’re still warm.

Soft Pretzels 24

You can put whatever kind of stuff you like on your pretzels.  People seem to like mustard (blech) and barbecue sauce (blech), but our favourite is a brush of melted butter

Soft Pretzels 28

… and a sprinkling of sea salt.

Soft Pretzels 29

Now if you’ll excuse me, I need to go lie down.  I might be dying.  Or at least gravely weakened.

Soft Pretzels 32

Espresso Cupcakes with Mocha Buttercream

Espresso Cupcakes

So here I was, trying to come up with a good morning cupcake for my Sweet Treats committee at work.  Everyone at the firm seems to need a bit of a caffeine kick in the morning, so I thought I would modify my espresso brownies into cupcake form.  Then I thought, what about a smooth mocha buttercream icing on top?  Yeah, that sounded good.

Espresso Cupcakes

And then, lo and behold, what did I find on the internet?  The exact recipe I wanted!  And I didn’t even have to make it up myself!  Score one for the lazy part of me and big thanks to Nam for cooking it up and writing it down.

Brew  up a pot of strong coffee and save 1 cup coffee for this recipe.  Do what you like with the rest (preferably drink it, or save it for iced coffee).

Preheat your oven to 350°F and line two muffin pans with cupcake cups.

In a large bowl, sift together 2 1/4 cups flour, 1 1/2 cups cocoa, 1 1/4 teaspoon baking powder, and 2 1/2 teaspoons baking soda and set aside.

Espresso Cupcakes

Dissolve 1 tablespoon instant espresso powder in 1 cup coffee and set that aside.

Espresso Cupcakes

Clear the spider out of your stand mixer.  Apologize profusely to it as you send it on its merry way, but explain that despite its residency of nearly two weeks in your bowl, it does not qualify for squatters’ rights.  Then decide that, as you are doubling the recipe, the batter won’t fit in the mixer anyway, and opt for a larger bowl and a hand mixer.  Sorry, spider.

Espresso Cupcakes

In the bowl of the stand mixer, cream together 2/3 cup canola oil, 2 eggs, 1 1/4 cups buttermilk, and 1 teaspoon vanilla and beat until well combined.  Add in 2 1/2 cups granulated sugar and mix some more.

Espresso Cupcakes

Pour in the coffee and beat for another minute.

Espresso Cupcakes

Scrape down the sides of the bowl and slowly add in the dry ingredients, mixing until all the ingredients are incorporated.

Espresso Cupcakes

Using a spoon, fill the paper cups about two-thirds full.  Bake for 18-20 minutes, or until a toothpick inserted in the centre of the centre cupcake comes out clean.

Espresso Cupcakes

Let the cupcakes rest in the pan for about five minutes before removing them to a rack.  Remember that a super hot dropped cupcake will explode all over your floor, while a cooler cupcake will just bounce a bit.  That’s a handy fact to remember.

Espresso Cupcakes

Now for the luscious buttercream frosting.

In the bowl of an electric mixer fitted with a paddle attachment (you know, like the one you just used), whip 10 tablespoons room temperature butter (which, by the way, is 1/2 cup + 2 tablespoons butter) until it’s fluffy, light, and creamy. Add in 1/2 tablespoon cocoa powder and whip until combined.

Espresso Cupcakes

Slowly add in 3 tablespoons room temperature espresso (you can make this by following the instructions on your bottle of instant espresso powder).  As with most buttercreams, it will look a little curdled and gross at this point, but don’t you worry.

Espresso Cupcakes

A little bit at a time, add in 3-4 cups icing sugar.  You may need more or less, depending on the consistency you want, or the temperature outside, or a bunch of other variables.  Just go with what looks (and tastes) right to you.  Refrigerate the buttercream for at least ten minutes before using.

Espresso Cupcakes

Once the cupcakes have completely cooled and the frosting has chilled out a little, you can frost your cupcakes, or pipe on the frosting, if you wish.

Espresso Cupcakes

Garnish each cupcake with a dusting of cocoa powder (or some shaved chocolate) or a chocolate-covered espresso bean.

Espresso Cupcakes

Your coworkers will be appropriately wowed, especially once the caffeine kicks in.  Good morning to you, too!

Espresso Cupcakes

Espresso Cookies

Miss Awesome and P-with-an-E served these to us with tea after one of those long Sunday lunches that you don’t think about leaving until it’s nearly dark and you have to figure out how you’re going to eat dinner.

Yes, I know, we’ve done the whole espresso deal with our espresso brownies, but who says you can’t make a cookie out of everything?  I had to modify the recipe a bit as it involved using a pre-mixed chocolate chip cookie dough as a base, but I think the result is quite good.  And I will pass on Miss Awesome’s warning: DO NOT EAT AT BEDTIME!

Preheat your oven to 375°F and cover a baking sheet with parchment paper.

Whisk together in a medium-sized bowl:

1 cup plus 2 tablespoons all purpose flour

1/2 teaspoon baking soda

3 tablespoons instant espresso powder

1 tablespoon ground coffee

What I like about mixing dark powders with light powders is that I can easily see how well I’ve mixed the coffee in, so the logic is that if the coffee is well blended then so is the stuff I can’t see, like the baking soda.  Of course, if you shoot it in macro, you can see EVERYTHING.

In a large bowl, cream together

1/2 cup butter, softened (That divot is because I stuck my finger in it to check if it was soft.  It was.)

1/2 cup brown sugar

1/2 cup granulated sugar

Crack in and blend well

1 large egg

Stir into that

1/4 cup Kahlua

Stir the flour mixture into the butter mixture and blend well.

Add in

3/4 cup chopped pecans

1 cup chocolate chips

And because we need a chocolate chip extreme closeup:

Use a tablespoon to plop your dough onto the baking sheet.  Space them out as best you can because they will spread quite a bit.

Bake the cookies for 9-12 minutes and leave them on the pan for another five minutes before removing them to a wire rack to cool completely.Then you can eat them.  Or just look at them.  Or whatever.

Cocoa-Caramel-Pecan Cookies

At the end of October I dog-sat for one of my neighbours, KDB.  She has two Scottie dogs, Hamish and Flora.

I wanted to leave her something nice to come home to, and to take advantage of the fun that is her kitchen.  It’s blue.  All of it.  And whatever isn’t blue tends to have the image of a Scottie on it.

Kristopf came over to help me make cookies (but in reality to use my computer).This is a recipe that I kind of invented myself, adapted from the basic Tollhouse Chocolate Chip Cookie recipe.  I hope you like it.

Preheat your oven to 375°F.

Soften 2 cups butter and plop it in a large bowl.Cream it together with 1 1/2 cups granulated sugar and 1 1/2 cups brown sugar.Crack 4 eggs into a bowl and whisk them silly.

Add the eggs to the butter stuff and mix well.

In a separate bowl, mix together 4 1/2 cups flour, 1 teaspoon baking soda, and 6 to 8 tablespoons unsweetened cocoa.  Add this to the goo mixture a little at a time and stir well.

Now, stirring the whole time (you may need to use your hands at this point as the dough gets hard to handle), add in 2 1/2 cups pecan pieces, 2 cups butterscotch chips, and 2 cups chocolate chips.Drop spoonfuls of the dough on ungreased baking sheets.

Bake for 9 to 11 minutes, rotating halfway through for even baking.  After removing them from the oven, leave the cookies on the sheets for a few minutes, then remove them to a rack to cool completely.

They are super good with your afternoon tea.

Try not to eat them all at once.