Fakin’ It

I’ve been to some of those houses where the whole place gets decorated for the season. You know, the ones where the hand towels get replaced with ones that have snowflakes on them, the soaps and candles waft peppermint everywhere and you can’t avoid the reindeer cushions. If I’m describing your house, then what are you doing reading my crap blog? Go be awesome somewhere else.

I DO decorate for the holidays, but I don’t have the storage space or the money (or the inclination, really) to have separate household accents for each season.

But the other day I was staring at two paper snowflakes I had cut out for a project that didn’t end up happening. I had tossed them on the tray on our coffee table and they’d gotten tangled in the leaves of my jade plant terrarium. I was staring at them while I absent-mindedly picked part of a label off my water glass. The label piece had gotten stuck to the glass when I put an empty jar in the dishwasher.

EUREKA? Paper. Water. Glass. Adhesion.

So I wet the snowflakes and applied them directly to the glass itself, making myself a little snowy vase. It’s not a permanent thing. Once it’s dry you can nudge it off. But it sticks if you don’t disturb it. Tissue paper works even better.

I can see myself wetting tissue paper with LongJohn in future years and creating a winter snowscape on our front window …

A Simple Guest Book

Guestbook 21We’re having a bit of a shindig in a couple weeks to celebrate my parents’ 40th wedding anniversary and Atlas recommended that we set up a guest book for attendees to reminisce in written form. The problem is that most guest books you find in stores are like fifty bucks and they also contain about four hundred more pages than you really need. Then the people who receive the book don’t know what to do with this half-empty journal they have. Guestbook 2

So I thought I’d make a smaller version by hand for the occasion, just a couple dozen large pages for people to scrawl their congratulations, and then it will be a slim little volume that can be tucked away with the wedding album once the day is over.

I started with some basic supplies: coloured cardstock for the interior pages and patterned cardstock for the exterior, a paper cutter, hole punch, ribbon, washi tape, and a decorative punch for the corners. Obligatory corgi butt in photo as well.

Guestbook 1The pastel cardstock I had was already 8″ x 8″ so I left that as is. Guestbook 3

After I’d gotten everything sorted the way I wanted it, Gren came over to take a closer look.

Guestbook 4Then he got tired so he had to lie down. Guestbook 5

Then I told him to move because he was lying on my stuff.

Guestbook 6So he flattened out further. Because he’s kind of a jerk. Guestbook 7

In the end, *I* moved and started punching holes in the pastel cardstock.

Guestbook 8Then I decided on a cover (conveniently this paper is double-sided so the opposite page has a complementary pattern as well). Guestbook 9

I wove the interior pages together with a piece of ribbon and tied it off in the centre.

Guestbook 10Added my cover pages, which were cut slightly larger than the interior, and a spine made of the opposite page of the cover. Guestbook 11

Then I started taping everything together with the washi tape. I chose the tape because it was partly transparent, but with enough colour so you’d notice it.

Guestbook 13I folded back the pages of the interior just to get them more flexible for use. Guestbook 14

And then shoved the interior pages into the exterior cover. I made a hole in the spine for the ends of my ribbon, which I tied in a bow on the outside.

Guestbook 15Then I continued my taping. Guestbook 16

It looks a little messier on the inside but it did the trick.

Guestbook 17Guestbook 18

Guestbook 19I punched the corners of all the pages to make them pretty. Guestbook 22

And added a few rubber stamped flowers to match the theme of the party.

Guestbook 23Tada. Guestbook 20

Fun with BLEACH

Bleach Tees 29

Well, that’s certainly a title that’ll get your attention, eh? This is a quick and easy way to personalize cotton t-shirts just the way you like them – it’s not screenprinting, but the results are just as satisfactory and the whole process is way faster. Plus it’s something that even kids can do (if you trust them to use bleach). And I’m going to show you two ways to do it.

Bleach Tees 2

First, you need some spray bottles that produce a fine mist (the squirty ones won’t do you any good here), and some bleach. Make a solution of about half bleach and half water (or maybe 3/4 bleach and 1/4 water if you trust yourself) and pour that in the bottle.

Bleach Tees 1

Now you need a cotton (or mostly cotton) t-shirt in a dark or bright, saturated colour (you can use pastel colours but the results won’t be as contrasty). Wash and dry the shirt to remove any sizing from the manufacturer that may interfere with the bleach.

Bleach Tees 18

Grab yourself some adhesive vinyl or Con-Tact paper.

Bleach Tees 5

Cut your vinyl into the desired shape you want. You can either use the shapes to mask off an area that you will bleach around, or the vinyl can act as a shield to the rest of the shirt and only your design will be bleachy – that’s up to you.

Make sure to press the vinyl firmly into the fabric of the shirt.

Bleach Tees 7

Slide some waxed paper or plastic inside the shirt to prevent the bleach from leaking through to the other side.

Bleach Tees 11

Spray your design lightly and evenly with bleach.

Bleach Tees 8

Just a light misting.

Bleach Tees 9

Use a rag to dab away any beads of bleach that might drip onto your shirt (unless you want them to drip).

Bleach Tees 10

Wait a few minutes and then carefully peel off your vinyl.

Bleach Tees 13

Watch as the design emerges. When you get the right level of bleachiness that you like, rinse the shirt under cold water to stop the bleach process. Then chuck the shirt in the wash and run it through a cycle with soap to get out all the bleach.

Bleach Tees 17

When your shirt is dry, you will be the coolest person out there.

Bleach Tees 19

Another method, if you don’t have adhesive vinyl on hand is to use paper stencils and a glue stick. So you just cut out your design and slather it with glue from the glue stick. Make sure to go right to the edge.

Bleach Tees 20

Flatten it firmly on your shirt.

Bleach Tees 21

Spritz on your bleach, dab, and remove the paper before it gets too saturated with liquid (because that will soak through). Don’t worry if there’s a bit of paper left – that will come off in the wash. On this design (Serenity!), we added a few extra drops of bleach here and there to make it look like the ship was traveling through a nebula in space.

Bleach Tees 22

Tada.

Bleach Tees 24

On this shirt we did a similar negative image with a Rebel Alliance symbol from Star Wars, and then on the back we did the Galactic Empire symbol, so good on the front and evil on the back!

Bleach Tees 25

Bleach Tees 26

Here we did a positive image, where the paper served as a shield for the rest of the shirt. You may recognize the Autobots symbol from Transformers.

Bleach Tees 27

Another positive image, this one of a stylized Joker’s face from the Dark Knight film series.

More Bleach Tees 2

Because the pupils were hard to glue in place I used a fabric marker to add them back in. The shininess will go away the first time the shirt is washed.

More Bleach Tees 1

On this design the stencil I used was too thin and the bleach soaked around the edges. Not to worry!

More Bleach Tees 5

I simply used some more fabric markers to trace the proper outline and I really like the finished result.

More Bleach Tees 6

Hakan-Themed Gel Transfer

Hakan Gel Transfer 28

I’ve been sitting on this project for what feels like FOREVER.  I made it for the Pie’s birthday and despite it being a first attempt I’m nevertheless pretty stoked about how it turned out.

I’ve seen a few blog posts on the internet where people take photos or photocopies and use a medium to transfer them to canvas or wood for a folksy sort of artistic-like thing.  And I wanted to do that.  So I did.  But a bit differently.  You’ll have to forgive the photo quality, as I did most of this at night while the Pie was out.  Playing Street Fighter.

First I took this image, which is Hakan, the Pie’s character of choice in Super Street Fighter 4.  You may remember him from a birthday cake I made a few years back.

From http://streetfighter.wikia.com/wiki/Hakan

Then I ran it through Rasterbator.  Because I like dots.

Hakan Gel Transfer 2

Then I printed it out. Trimmed it.

Hakan Gel Transfer 3

Assembled it with tape.  If I did this again I would skip the tape part and just assemble it in situ.

Hakan Gel Transfer 4

Then I cut it into four pieces and hid them in the closet where the fuse box is and worked on my canvas.

Hakan Gel Transfer 5

These are four 20″ x 16″ canvases I got at DeSerres.

Hakan Gel Transfer 1

Hakan’s colours are sort of maroon-y purple and turquoise, so I vaguely mixed some craft paint together in a dish and smeared it across the four canvases.

Hakan Gel Transfer 7

I’m quite pleased with the effect.

Hakan Gel Transfer 9

Hakan Gel Transfer 10

Once it was dry I grabbed my gel medium.

Hakan Gel Transfer 13

I smeared that generously across the whole surface of each canvas.

Hakan Gel Transfer 14

I then used my screen printing squeegee to smooth the printout pieces face down onto the gel medium.  It’s important to note here that your image will be reversed from how you originally printed it out.

Hakan Gel Transfer 15

Then I hid it back in the fuse box closet to dry overnight.

To remove the paper, spray it with water and get it nice and soaked.  Then you can just peel off the other ply of the paper, leaving the ply with the design on it stuck to the medium.

Hakan Gel Transfer 18

You can use your fingers or a soft towel.  If you pull up some of the design, don’t freak out — this is supposed to look a little weathered.

Hakan Gel Transfer 20

I used a gentle scrubby for it as well.

Hakan Gel Transfer 21

This takes for-freaking-EVER, FYI.  And it’s messy.  Paper bits get everywhere.  This is blurry but you can see the scrubbed side versus the non-scrubbed side.

Hakan Gel Transfer 29

And then once it dries you can still see some white leftover.  So I went over mine a few times.

Hakan Gel Transfer 23

Eventually I had to give up and just leave it as-is.  It’s not supposed to be perfect, in any case.

Hakan Gel Transfer 27

Some of my dots are missing.

Hakan Gel Transfer 26

But the rest looks pretty badass.

Hakan Gel Transfer 30

Look now neat that is!  I did fill in a few spots with black craft paint where I thought it was necessary.

To get rid of some of the whiteness, I coated the whole thing with glossy polyurethane top coat a few times.

Hakan Gel Transfer 32

Nice and shiny.

Hakan Gel Transfer 35

The finished piece, assembled on the floor.

Hakan Gel Transfer 33

Now to make it hang-able.  Gren stood watch for me while I did this in secret.

Hakan Gel Transfer 36

You can get little hanging hardware kits from department stores, grocery stores, and hardware stores.  In each kit will be a bunch of these little loops with screw ends.  Measure down from the top of your canvas an equal length on both sides and screw them in.

Hakan Gel Transfer 37

Then you have this wire stuff.

Hakan Gel Transfer 38

Cut a length and loop it between the two screwed in hooks.

Hakan Gel Transfer 39

Pull it tight and wrap the ends around the wire to keep it secure.

Hakan Gel Transfer 40

Hakan Gel Transfer 41

Make sure if you’re using multiple canvases that the length of the wire and where it’s situated on the canvas are consistent across the board.

Also make sure when you’re putting in hanging hardware that you can hang the picture without the hook pushing into the surface of the canvas.

Hakan Gel Transfer 42

Conversation Bunnies Place Markers

Conversation Bunnies 10

I saw these on Oh Happy Day a little while back and thought they’d make a neat place marker.  So in the midst of running out apartment hunting (yay, moving again!), I churned out nine of these for our Easter dinner.

I picked up some wee hollow chocolate animals.  Hollow is key.

Conversation Bunnies 5

Then I cut out conversation bubbles from two pieces of scrap book paper and grabbed a stencil to do the names.

Conversation Bunnies 2

I also used some foil stars I had leftover from being a professor (no matter the age, all students love a sticker for good work!).

Conversation Bunnies 4

Then you need some glue and some floral wire.

Conversation Bunnies 6

Cut the wire so it will fit all the way through your chocolate animal — it will need to stabilize itself at the bottom — and all the way through your conversation bubble.

Conversation Bunnies 7

Conversation Bunnies 8

Glue your two conversation bubbles together over the wire and jam it into your animal’s head.

Conversation Bunnies 9

You may need to move the wire around a bit to get it steady but you’ll find the right spot. I stored mine in a plastic container until I was ready to use them as place markers.

Conversation Bunnies 11

Pre-Spring Paper Tree

Paper Tree 23

It may be spring where you are.  Here in St. John’s, however, we don’t put away our snow shovels until after the Victoria Day long weekend at the end of May.  It’s kind of the rule.

Paper Tree 21

So in the absence of spring, I’ve decided to make my own.

Paper Tree 25
Interfering a bit with my marine mobile while it’s at it.

This branch fell victim to yet another of our vicious wind storms last night and managed to scare the crap out of the dog by moving along the sidewalk just as he was about to sniff it this morning.  In retribution we captured it and will torture it into submission.

Paper Tree 1

In actual fact one of the major branches on it was broken.  This branch was walking wounded.

Paper Tree 3

So I fixed that up with some floral tape.

Paper Tree 4

For this project you will need some paper.  It can be scrap booking paper, origami, magazine paper, whatever you want.  I picked a spring-themed magazine because I thought I could get the best colours from it.  I should have really cut out the paper in the shapes of leaves, but I’m super lazy so I used my 2″ circle punch instead.

Paper Tree 2

Some floral wire, a pair of scissors, a paint brush, and some glue would also be handy.

Paper Tree 8

So you start by cutting out your shapes. Whatever they’re gonna be. Us lazy people like our circles. It’s “modern”. Deal with it.

Paper Tree 5

Then you put some glue on one side of a shape. Then you take a leaf-stem length of floral wire, bend it a bit so it won’t just slide right out again, and slap it on there, with another shape on top. BAM.

Paper Tree 9

And then you do that a bunch more times. Until you run out of shapes. Or until you get bored and don’t want to make any more shapes.

Paper Tree 14

Then you take your branch and anchor it in a sturdy vase.

Paper Tree 11

And then you start winding the shapes onto the branches, following the line of the branch, bending them a little bit for depth. It ain’t that hard.

Paper Tree 12

And you keep going.

Paper Tree 15

Make sure to spread them out as you add them so that when you run out of shapes and don’t want to make any more you don’t end up with bare branches.

Paper Tree 16

And then you put it somewhere and admire your handiwork!

Paper Tree 17

Here it is on my mantle.

Paper Tree 27

Travel Document Holder from Old Maps

Travel Document Holder

My brother Krystopf travels frequently for his job.  Most of the time it’s to Brussels, where he has fully exhausted the entertainment value of the city and now dreads going.  He’s also a bit of a disorganized traveler, and there are few countries on this planet that don’t have a little piece of something that he has left behind.  Actually, both my brothers are pretty good at this, so maybe Ando will get one of these some time in the future …

Travel Document Holder

This is a travel document holder that I designed myself.  It’s made out of a mining resources map of Newfoundland I inherited from the Geography department at MUN, and dates from 1969, so it’s quite old in terms of relevance.  I actually inherited three of them, plus a few more resource maps, so I’m sure you’ll be seeing more map-related projects in the future.

Travel Document Holder

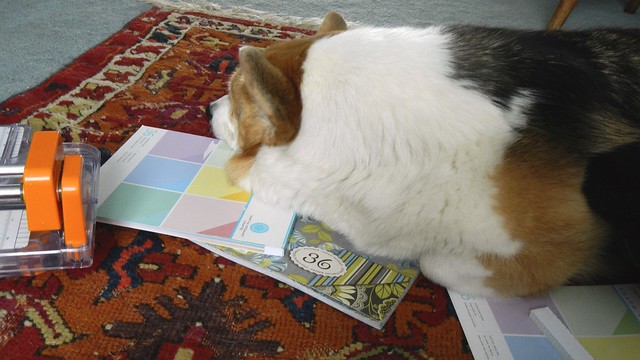
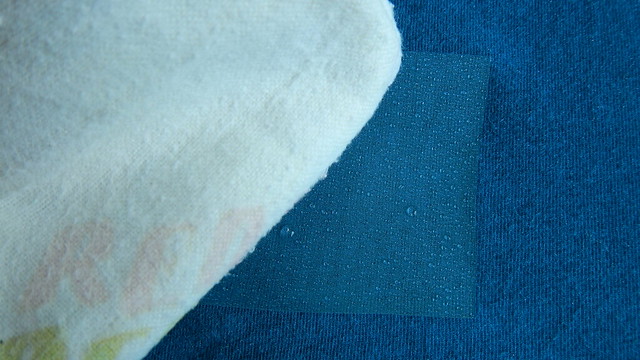
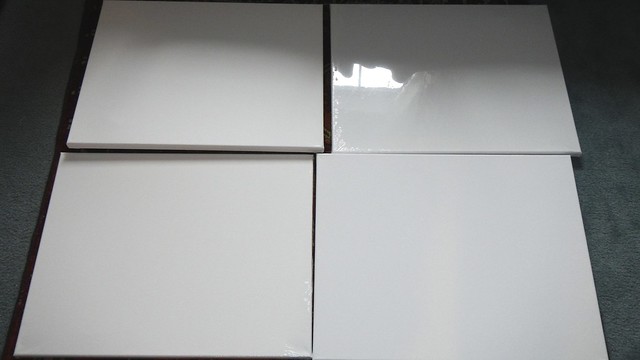
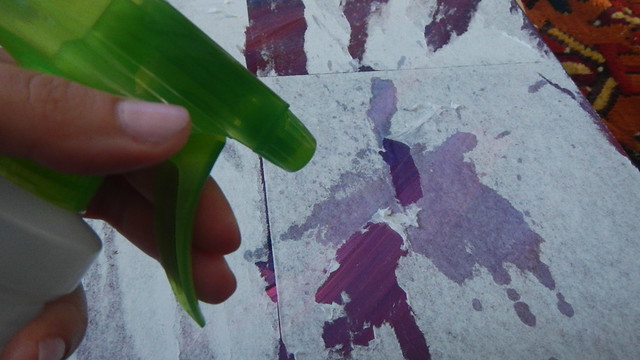
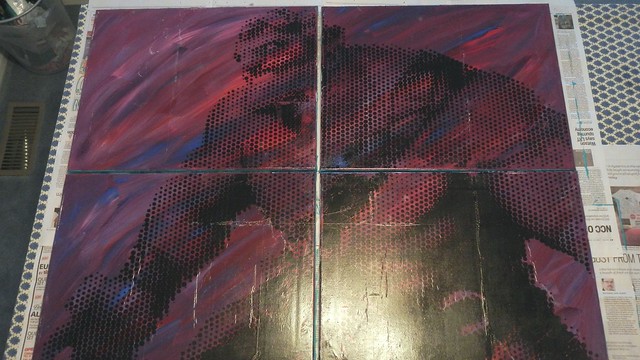
My first step in this project was to “antique” the map, using a technique I learned from the good folks at Design*Sponge.  So you lay out your map (or whatever it is that you are antiquing), on a workable surface.  My map was too big for the table, so I laid it out on some dog towels on the floor.

Travel Document Holder 5

Brew up a cup of dark coffee and let that cool.  You will also need a cup of plain water and a handful of coarse salt.  I used the stuff you put in your grinder.  And a paintbrush.

Travel Document Holder 2

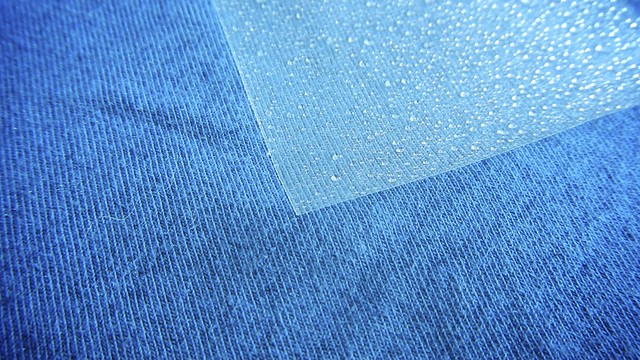
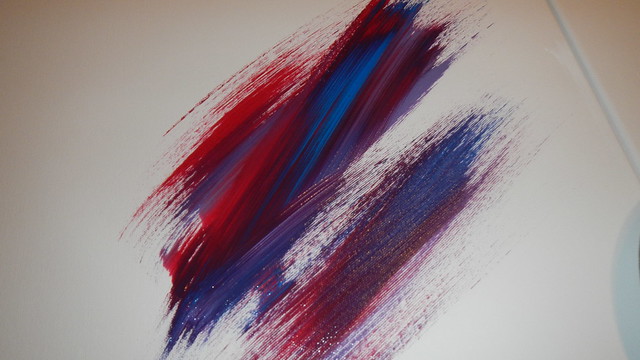
When the coffee has cooled sufficiently, dip in your paintbrush and paint a swath of coffee onto your map.  Follow that with a dip into the fresh water, just to dilute it a bit.  Paint at random, and allow some puddling.

Travel Document Holder 6

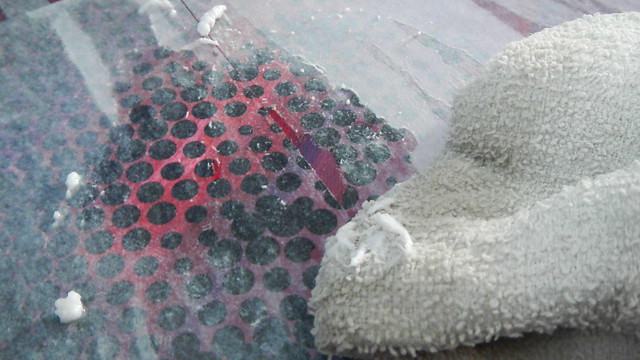
Now, while that area is still wet, sprinkle a few grains of salt into the wet areas.  The salt will help to dry up the puddles.

Travel Document Holder 7

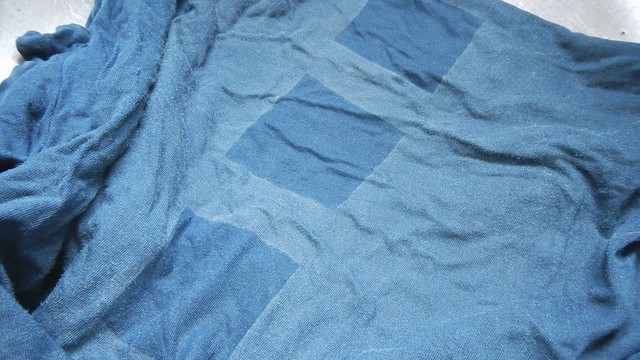
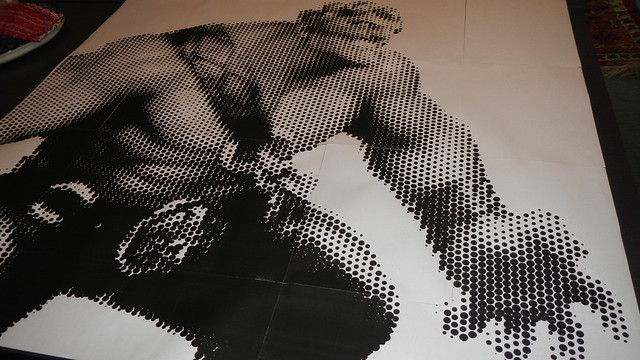
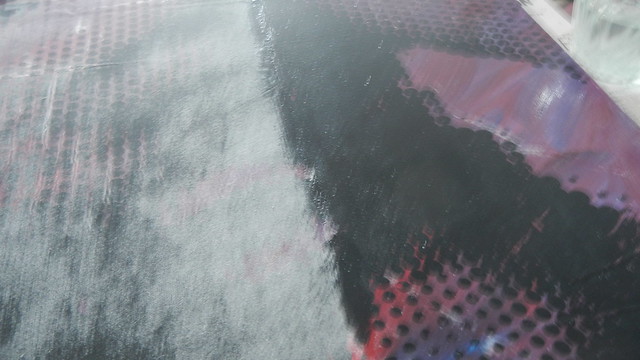
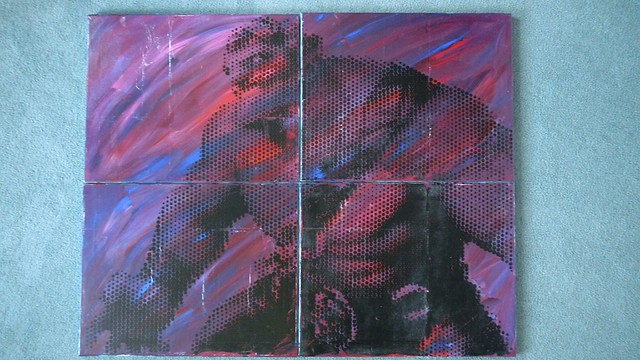
Continue this way, randomly swiping your paintbrush wherever you like, sprinkling salt as you go, until you’ve got something you like.  Leave that to dry overnight.

Travel Document Holder 9

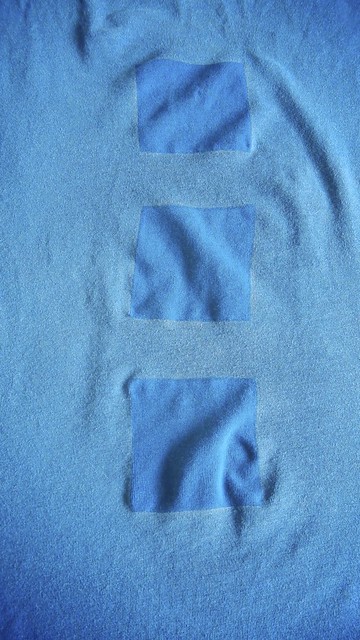
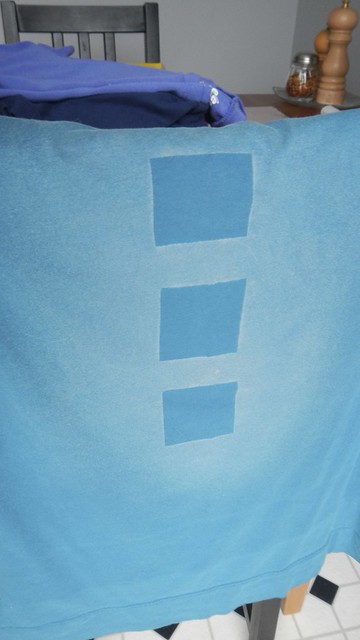
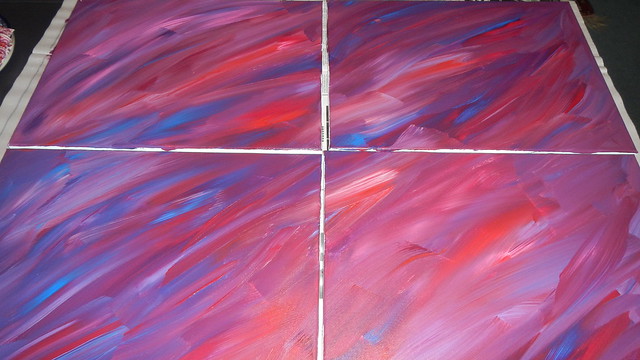
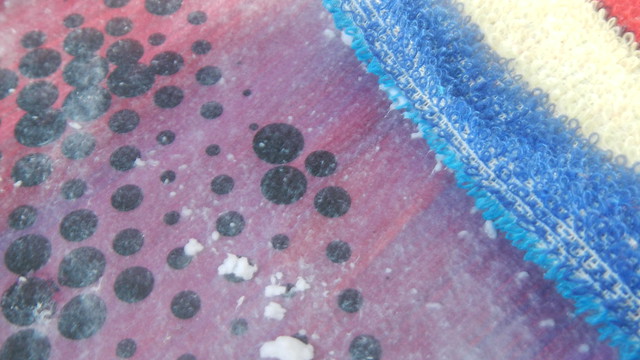
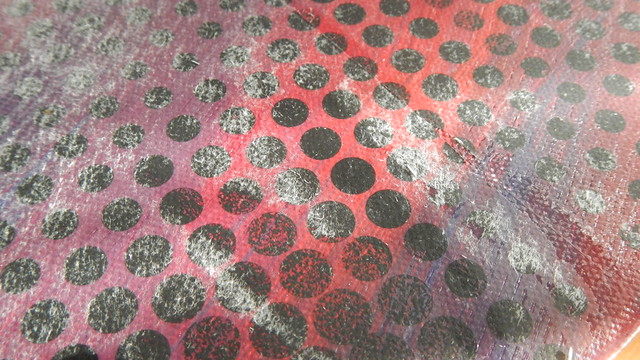
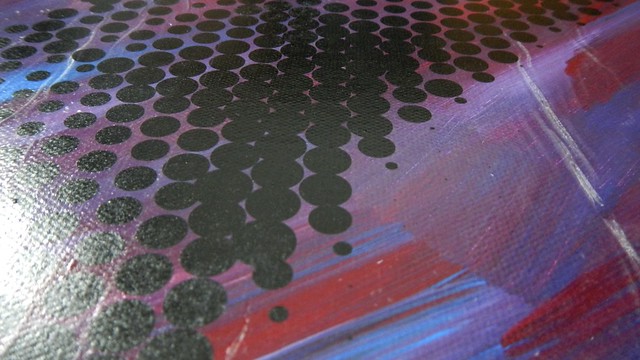
Now brush off all the particles of salt.  You may find that it’s crystallized in the darker spots, and you can brush that away as well if you use a stiff brush.  Or you can keep it that way, it’s up to you. I think the little perfect squares of salt look kind of neat, but they won’t adhere well to my contact paper so I gotta get rid of them.

Travel Document Holder 11

Travel Document Holder 13

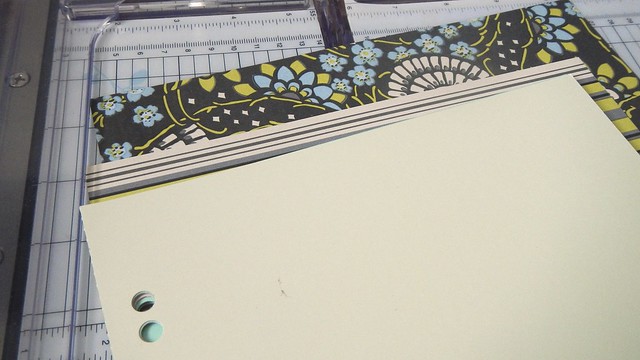
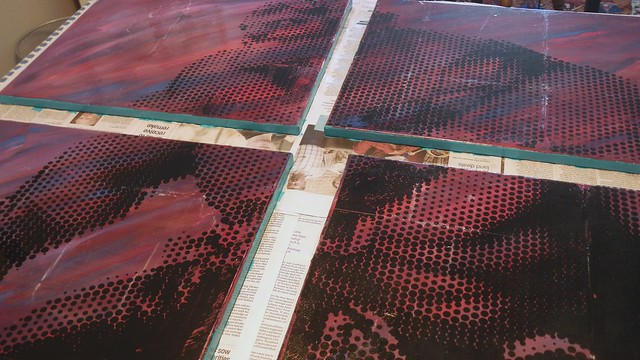
Now we’re going to measure out our pieces.  A pencil and a ruler might help, obviously.  I have a plan as to how this is going to happen.  When I make plans for stuff I usually construct a mockup on scrap paper, writing in all the measurements and such, and notes as to where I’m putting what.

Travel Document Holder 14

On the inside we have a passport pocket, a notepad, and a wee pouch for small things that folds over itself to keep everything in place.

Travel Document Holder 15

On the other side of that pocket are a series of slots for odds and ends.

Travel Document Holder 16

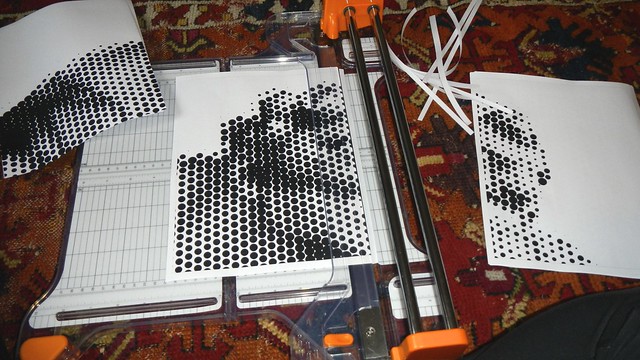
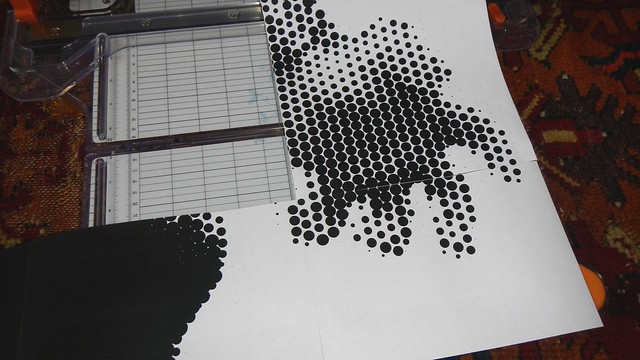
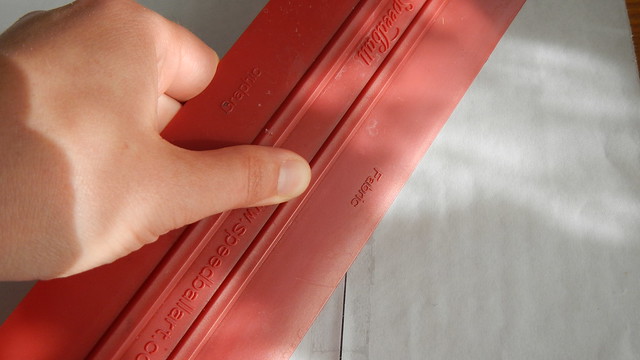
So now we’re ready for cutting. I used my rotary cutter and cutting mat for this but you can use scissors or whatever works for you. Cut two pieces out of the map that are 18″ x 9 1/2″ (or whatever works for you).  These are the inside and outside of the document holder, and will be folded in half.  Remember that one end folds over itself and fastens with velcro. That fold-over flap is 3″, making the folder 7 1/2″ wide by 9 1/2″ tall, the perfect size to slip into a laptop or even a netbook or tablet sleeve.

Travel Document Holder 18

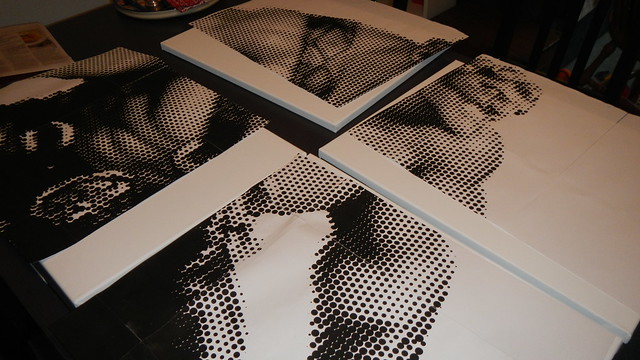
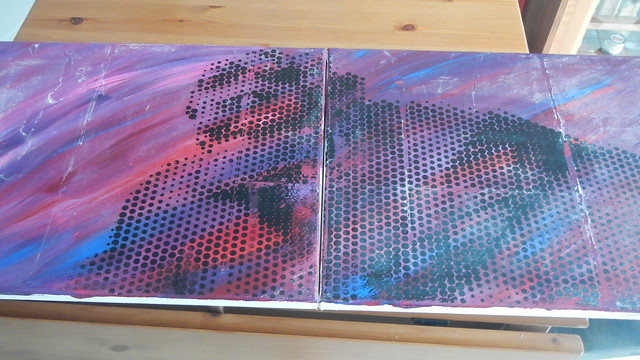
This is the two pieces folded together. You may need to trim the inside piece a bit to get the edges to match up, simply due to the bulk of the mapping paper.

Travel Document Holder 19

Here is the piece I cut out for the inside pocket. It is 8 1/2″ tall and 16″ wide. Then I folded it in half with the map facing outwards and folded in the open edges by one inch, and then over itself again by another inch. That double fold will ensure that the contents of the pocket won’t slide out.

Travel Document Holder 20

So the folded pocket is 8 1/2″ tall and 6″ wide, a good fit for the inside of the folder.

Travel Document Holder 21

On the inside left cover we are going to have a space to store a passport, as well as a stash of scrap note paper for writing things down.

Travel Document Holder 22

I cut the scrap paper to be all the same size and a proportional fit for the folder, 3″ x 5″.  A passport is 3 1/2″ x 5″, so the lengths matched.

Travel Document Holder 23

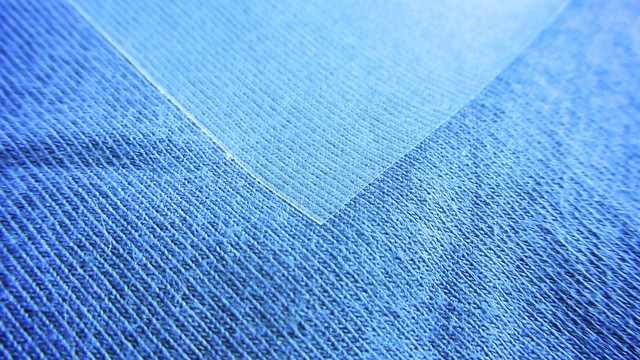
Originally, I was going to construct all these slots and pockets by cutting slits in the structure of the folder cover and inserting paper pockets inside. But then I changed my mind. I decided it would cut down on bulk, streamline and strengthen the design, and make things easier to see if I used the contact paper itself to make the pockets I needed. Then the clear nature of the plastic would mean you could see your stuff, as well as the details of the map underneath it. It makes things a little trickier to put together but I think the end result is less bulky and complicated.

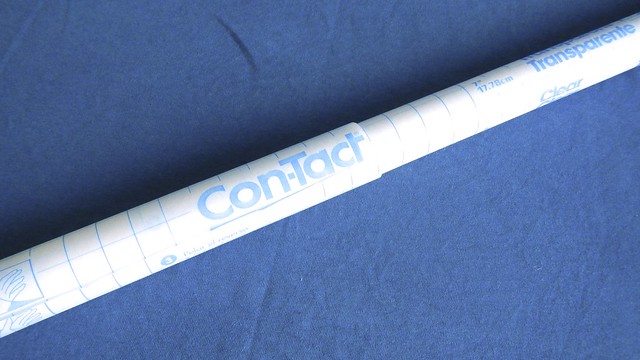
Now for the contact paper.  This is the stuff they use to cover shelves and things.  You can pick it up at any hardware store.  Because I don’t have a car and Newfoundlanders don’t like their contact paper to be clear, I had to get mine online.  But it’s a common thing.

First we do the inside cover.  Cut a piece of contact paper the exact size of the inside cover (18″ x 9 1/2″).  Before you take off the adhesive backing, we’re going to plan out where all our slots go and how we’re going to put them together.  Please note here that I totally planned out my design backwards, and in the end had to change the way that the document folder opened.  So make sure you remember that the design you put on your contact paper will be reversed when you stick it down onto the map.

Travel Document Holder

For the inside left cover, with the note pages and the passport, …

Travel Document Holder

For the inside right cover, with the slots for receipts and such, we’re going to do more or less the same thing, except these slots are going to overlap, so sticking things gets a little complicated …

Travel Document Holder

So then I cut slashes in the contact paper where I wanted documents to stick through.

Travel Document Holder

Then I carefully cut through just the backing paper to peel away areas I wanted exposed.

Travel Document Holder

Then I cut another piece of contact paper to fit on that exposed piece.

Travel Document Holder

And stuck it down.

Travel Document Holder

Now that’s going to form the basis of your pocket. But we need another piece of contact paper on the inside, to go against the map. So I cut out a bit more of the contact backing sheet, then cut a larger piece of contact paper and placed it, sticky side up, on top of that, so when I laid it all out it would adhere to the map.

Travel Document Holder

The slots were a bit trickier, because I had to go through the same process as for the above pockets, but I also had to remember that they overlapped, which meant I had to start with the bottom one first.

Travel Document Holder

It took a while. You can’t really see all the individual layers here, but just know that it’s four separate pockets.

Travel Document Holder

Then I oh-so-carefully stuck it down on the inside cover. You can see it here, with pieces of paper in the little slots, to show you how it goes. And yes, it’s totally backwards.

Travel Document Holder

Onward.  Let’s put together the inside pouch.

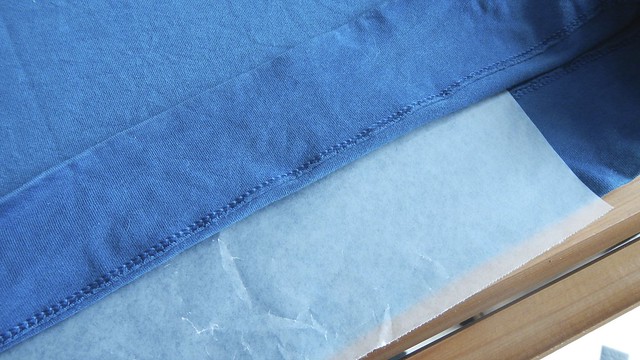
Cut the contact paper to be  8 3/4″ wide and  18″ long.  The extra 1/8″ on the width will leave the contact paper adhering to itself.  The extra 1″ on either side will fold over the top edges of the pouch, protecting them.

Travel Document Holder

Carefully adhere the contact paper to the pouch, making sure the edges line up and fold down the ends over the opening to protect the paper inside.

Travel Document Holder

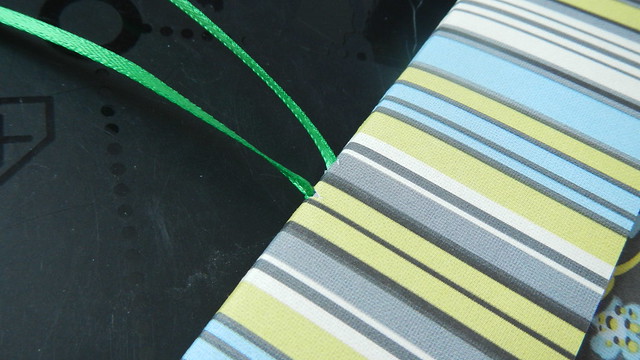
I used red embroidery floss, which I waxed, to sew up the outside edges of the pouch.  I liked the colour contrast with the blue of the water.

Travel Document Holder

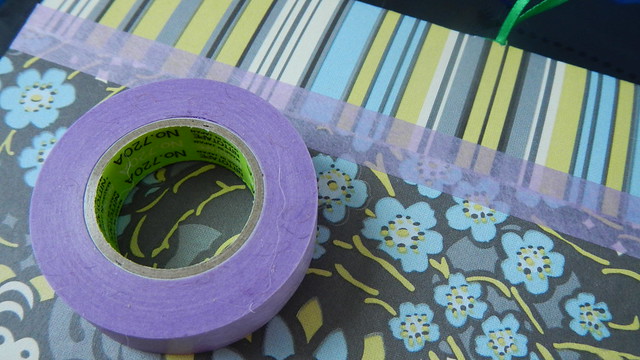
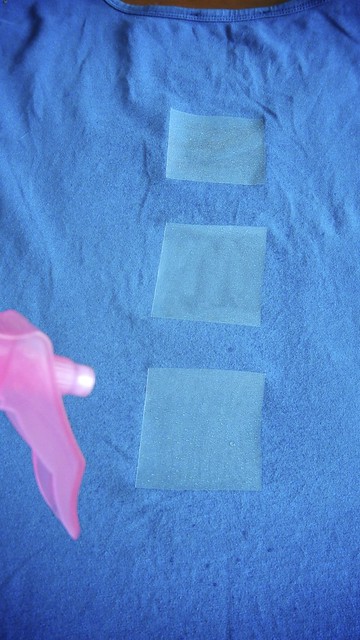
I cut some squares out of adhesive velcro and stuck them to the second fold of the pouch so it would stay closed.

Travel Document Holder

Travel Document Holder

Then I sewed the pouch onto the inside of the cover.  You could leave this until last, but I didn’t want my stitches to show on the outside.

Travel Document Holder

Travel Document Holder

That means that our next step is to stick the two cover pieces together. You don’t really need glue, or a lot of it, just something to stick them together so they’re not sliding all over the place while you’re applying contact paper to the whole thing.  I used a few pieces of double-sided tape, to avoid wrinkles.  The thing is wrinkly enough.

Travel Document Holder

Cut the outside contact sheet larger on all sides by 1/2″ (so, 19″ x 10 1/2″). Lay the cover piece in the centre of the contact sheet. Mitre and trim the corners as you fold it over to protect the edges.  My original plan was to border the edges with bias binding and sew it all around but I changed my mind.  I like the clear fold-over of the contact paper better. Then you just have to stick on some more velcro pieces to keep the folder closed and you’re all set.

Travel Document Holder

Travel Document Holder

Adding Festivity, the Lazy Way: Paper Wreath

Lazy Festivity 17

Seeing as we’re in Ottawa and not St. John’s for the majority of the holiday season, the Pie and I rarely trouble ourselves to decorate Elizabeth for Christmas.  But this little thing was so easy, and so quick, and the days here in St. John’s have been so very gray, I needed a little festivity … but I was too lazy to do anything too complicated.

So I have here some rolls of wrapping paper that I picked up from IKEA about seven years ago, and which I rarely use (seeing as I still have a chunk left).  The nice thing is that the wrapping paper, since it came on a roll, has a natural curve to it that I used to my advantage.  I also have a large paper plate with an extremely ugly design on it.  I don’t even know how I came to own these things, but I was cleaning out a cupboard and there they were … You will also need a pair of decent scissors and some tape.  Any kind, really, as you won’t see it.  A ribbon is optimal but also optional.

Lazy Festivity 1

First, we need to make a wreath form out of the paper plate.  If you want something bigger (or less ugly), you can make your own ring out of cardboard or whatever is handy.  With the paper plate all I had to do was cut out the middle section.

Lazy Festivity 2

Then I cut about a 5″ wide strip from the roll of wrapping paper.  I folded it in half lengthwise, so it was then about 2.5″ thick, and then folded it across itself widthwise a couple times, until I had a small rectangle about 2.5″ x 5″.  Or whatever works for you.  This just makes it easier to cut a bunch of leaves at once. This is where having a nice sharp, strong pair of scissors comes in handy.

Lazy Festivity 3

Then I cut a leaf shape out of the rectangle, leaving the bottom a little flattened (for optimal tape-age), and ended up with a handful of little leaves.  I did this twice for each colour of wrapping paper I used, so six times in total. I have no idea how many leaves it was, but it was exactly enough for the size of my project, which was pretty convenient — almost like I had a plan.

Lazy Festivity 4

Lazy Festivity 5

Lazy Festivity 6

Then I started taping them onto the plate, putting a wee bit of tape at the flattened end of the leaf, and making them kind of flow around the circle.  Don’t worry about making them arrow straight, and try to pick up different colours at random.

Lazy Festivity 7

When you put on the next haphazard row, it overlaps the first and hides the tape (this is called imbrication – like the layering of scales or roofing shingles).

Lazy Festivity 9

Imbrication … (I learned the word today so it’s rather convenient that I have this project for you)

Lazy Festivity 13

When you come full circle (and I don’t mean that metaphorically this time), just fold up the leaves already there and tuck the new ones into the space to fill the gap.

Lazy Festivity 11

So that’s the whole thing.

Lazy Festivity 12

I had a scrap of blanket binding leftover from the baby blanket I made for the Incredibly Little Hulk way back when, so I tied that on as ribbon.

Lazy Festivity 15

Then I added another ribbon to hang it on my door.

Lazy Festivity 19

This took me half an hour, from start to finish.  Change the colours of the paper leaves and I’m sure you could apply this wreath to any season (black and orange for Hallowe’en, purple and green for spring …).  Easy peasy, blamo kablam, it’s done!

Lazy Festivity 20
Imbricaaaaaaaation: an overlapping of edges as in tiles or scales.

Wee Origami Dishes

Origami Dishes

I made these little dishes out of Super Sculpey and baked them according to the directions.  I know.  I suck at sculpting.  But this was my first time using Sculpey in well over twenty years.

Origami Dishes

BUT THEN.  I thought I would use découpage techniques (which I’ve never done before) and experiment with Mod Podge (which I have never used before) and paste some torn up bits of origami paper over top, make ’em look like they’re papier mâché or something.

Origami Dishes

So it was pretty simple.  I started with laying one untorn sheet on the bottom of the dish, as a base, and then I tore up other sheets in colours I liked for the rest of it.

Origami Dishes

Some Mod Podge and a brush later, I’m sticking away.

Origami Dishes

On this one I put a cutout of a key, to imply that perhaps you could keep your keys in this dish.

Origami Dishes

Then I just coated it all with a layer of Mod Podge and let it all dry.

Origami Dishes

Tada.

Origami Dishes

Simple but fun.

Origami Dishes

Fast, Fun, Free “Fine” Art

This is probably the most awesome thing you can do with a printer in five minutes, for free.

Fast Fun Free Fine Art

Do you know what this is?  Probably not.  But don’t worry, you will soon figure it out.

I found out about this through Creature Comforts, and I loved it.

So you go to this site and you can use their online application, called The Rasterbator (gross, I know), or you can download it and use it on your computer.

Just follow their instructions to upload a photo of yours or to link to another photo on the internet.  Select the size you want and how you want to crop it, then get the program to rasterize the image.  Your computer will download a multi-page PDF document that you can then print out and assemble.

Fast Fun Free Fine Art

Of course the pages are in order, but they’re not as easy as you think to put together.  But you can figure it out.

Use a paper cutter or scissors to carefully cut out the excess border and then stick them all together.

Fast Fun Free Fine Art

Is this … ?

Fast Fun Free Fine Art

Yes, it’s Grenadier!

Fast Fun Free Fine Art

I used this photo here:

Gren Learns to Swim

Now, it’s not a perfect job by any means — you can see the tape and the edges of the paper.  But for something this simple, it’s hella cool.

Fast Fun Free Fine Art

And now it’s up in our kitchen, the only place with any free wall space.

Fast Fun Free Fine Art

I can see these shellacked to a board for more permanence, or used as decoration at a party — the picture is the guest of honour, perhaps.  Or you could print one and give it, unassembled, to a friend for them to put together.  What a lovely surprise!

Fast Fun Free Fine Art