Ten Dollar, Ten Minute Wreath

Ten Dollar Wreath 17

As you may know, I like making wreaths. Most of ’em tend to be of the ephemeral type, not lasting more than a season so that I have justification in making new ones later on. Somehow though I have ended up with a few in storage … not that this will stop me from making yet another one. It’s officially December, so I think it’s time.

Ten Dollar Wreath 7

Ten Dollar Wreath 6

The one for this year is inspired by the super 1980s brass trim on my front door, and by what I snagged from Value Village on Senior’s Day a while back. I found a totally plain grape wreath for $1.99, a bag of gold bead garland for $1.99, and a box of glass balls in gold and copper for $3.99.

Ten Dollar Wreath 3

The only other thing I used for this was some fishing line I had on hand so I made the whole thing for less than ten bucks (including tax), and it only took me about ten minutes!

Ten Dollar Wreath 2

First I had to untangle the giant bag of beaded garland. That may have taken longer than ten minutes …

Ten Dollar Wreath 5

Ten Dollar Wreath 8

Ten Dollar Wreath 9

But then I wrapped a section around the wreath. Easy peasy. It didn’t go all the way but that was fine because I had a plan.

Ten Dollar Wreath 10

Then I tied the balls on with fishing line.

Ten Dollar Wreath 11

LongJohn helped. I can now do things by myself provided that I’m sitting three feet from him in his Jolly Jumper.

Ten Dollar Wreath 13

Ten Dollar Wreath 16

That’s it!

Ten Dollar Wreath 18

Fall Leaf Wreath

Fall Leaf Wreath 6

I’m not sure how it came about, but making wreaths from scratch has become one of my favourite DIYs in recent years. I love coming up with an idea  and seeing it come to fruition – sometimes better than I’d planned.

Fall Leaf Wreath 1

I spent about 20 minutes gathering these leaves from the local park. They all came from the same tree, so they were the same general shape, but they had a good variance of colour, which I liked. I divided my pile in half, and set one half aside.

Fall Leaf Wreath 2

Then I got out my craft paint and paint brushes.

Fall Leaf Wreath 3

Then I started painting the other half of the leaves. Nothing too elaborate or detailed – just something to make the leaf still interesting to look at once it’s shriveled and turned brown.

Fall Leaf Wreath 4

I did this for a while.

Fall Leaf Wreath 8

Like, an hour or so.

Fall Leaf Wreath 11

My favourites are the ones I painted with glitter paint, so the leaf colour shines through but then the light catches on the glitter and they’re just lovely.

Fall Leaf Wreath 13

Then I cut out a half-assed circle from some scrap cardboard. Yep, that’s freehand. No sense in being perfect on something that doesn’t need to be perfect.

Fall Leaf Wreath 15

While the painted leaves were drying, I took my hot glue gun and started attaching the unpainted leaves to the cardboard ring.

Fall Leaf Wreath 16

I tried to line it up mostly along the edges, with the larger leaves on the outside and smaller ones on the inside.

Fall Leaf Wreath 17

Then I filled in the centre a bit, because I knew the leaves would get wrinkly as they dried up over time.

Fall Leaf Wreath 18

Then I started inserting the painted leaves under and over and around.

Fall Leaf Wreath 19

Finally got every single one on there.

Fall Leaf Wreath 21

The whole thing, in poor lighting.

Fall Leaf Wreath 26

A snippet of one side, for the detail.

Fall Leaf Wreath 22

I tacked it to my front door, which is sheltered from the elements. I’m interested to see how it’s going to look in a week or two once the leaves go brown – you can see that just after one day they’re starting to curl already. I’ll add a photo when it gets there.

Fall Leaf Wreath 31


***EDIT***

And here it is, fully shriveled. I like how it turned out!

Fall Leaf Wreath 37

Fall Leaf Wreath 36

Rainbow Heart Wreath

Valentine's Wreath 17

So, half the reason I’m having people for dinner on Friday is to spend the night with friends and all that mushy crap.  The other half is so that I can go all out on decorations so that I have bloggable activities for you.  So I hope you’re happy.

I’m actually not super happy with how this turned out, so I might try to do it again soon.  But it was super easy, so it’s not like it’s going to be hard.

Valentine's Wreath 15

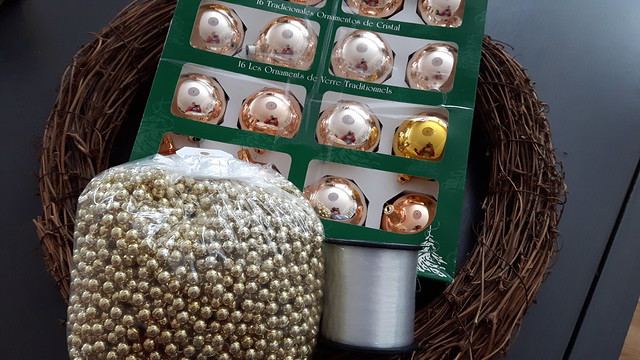
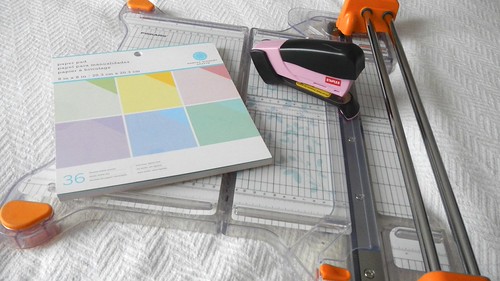
I happened to be in possession of a few pads of pastel rainbow coloured scrapbook paper (a thin cardstock thickness).  And I am not a scrapbooker.  That is a little intense even for me.  I also have this fancy schmancy new paper cutter that I got for Christmas, because neither the Pie nor my parents will trust me with a guillotine paper cutter (which, I must point out, is ridiculous, because I used to use one for a living and never cut myself, but anyway …).  I also have a stapler.  Nothing fancy about it, save perhaps that it is pink.  I’d tell you that it belongs to the Pie but that would be a falsehood.  It’s mine.  My pink stapler.  SURPRISE.

Valentine's Wreath 1

*Ahem* Anyway.  Each sheet of paper was 8″ square so that made my life easy.

Valentine's Wreath 2

I sliced it into 1″ wide strips — see how the sheet is double-sided with two different colours?  I like that.

Valentine's Wreath 3

Anyway, fold each strip in half, like so.

Valentine's Wreath 4

Then bring the ends in towards each other.  You can just fasten the ends and the heart looks a little bit more pretty, but it’s not as structurally strong.

Valentine's Wreath 5

So I brought the ends all the way into the fold, gave it a pinch …

Valentine's Wreath 6

… and stapled it all together.

Valentine's Wreath 7

And did that a bunch of times.

Valentine's Wreath 9

While Grenadier ignored me.

Valentine's Wreath 8

Or pretended to ignore me.

Valentine's Wreath 10

I did it with a few more pieces of paper, 8 hearts per colour.  Gren subtly got closer and closer.

Valentine's Wreath 11

Until, like the secret cat he actually is, he was lying on my hearts.  Well, he’s always got my heart in any case.

Valentine's Wreath 12

By the time I’d finished with all the colours, he’d gotten bored and gone away again.

Valentine's Wreath 18

So now I had these hearts, 48 in total.

Valentine's Wreath 20

Can I make a wreath with 48 hearts?  Yes, but it looks terrible. And is gigantic.

Valentine's Wreath 21

So I started putting them together in chains, like this.  I used plain clear adhesive tape for this.

Valentine's Wreath 24

Very festive.  I didn’t pay attention to which inside-outside hearts were where and I like the non-pattern-ness of it.  Is that a word?

Valentine's Wreath 23

This is how I wanted it to look originally, and this is all taped together in a lovely fashion.

Valentine's Wreath 26

However as soon as I lifted it, it immediately collapsed under its own weight. Quel dommage!

Valentine's Wreath 27

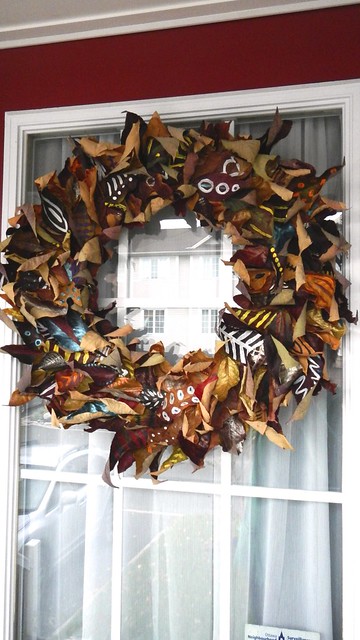
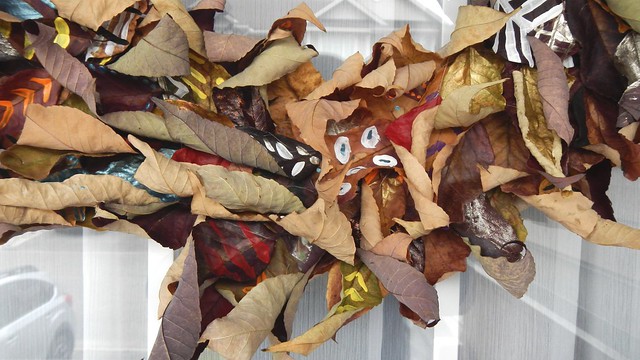
So I did a more compact version that mirrored the shape of the wee paper hearts themselves.  And taped the crap out of it so it would stay in the shape I wanted it to.

Valentine's Wreath 28

I think there’s a little bit too much tape showing pretty much everywhere and the wreath bears a strong resemblance to a pretzel but it’s a start.

Valentine's Wreath 33

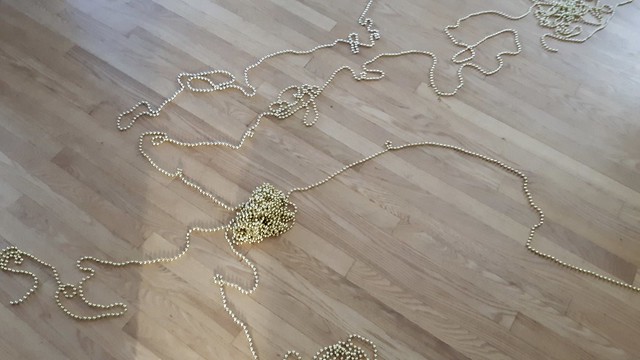
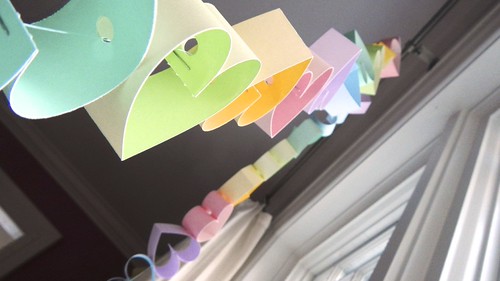
***EDIT: So I tried again, with the same number of hearts, but this time I stapled them so they looked more conventional.  Then I used a hole punch to make a way to string them onto fishing twine.

Heart Garland 1

Heart Garland 2

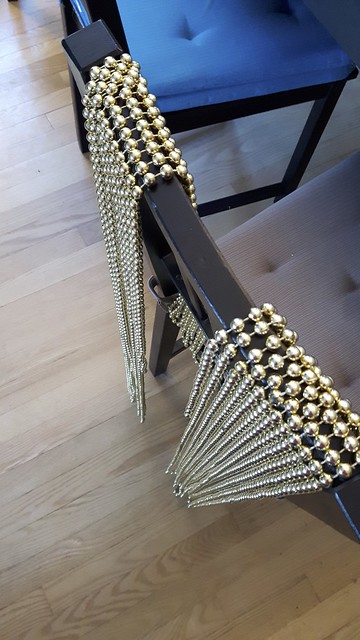
And now I have a garland.  I kind of like it.

Heart Garland 3

Heart Garland 4

Forgive the pictures. The dining room is the darkest room in the house.

Bay Leaf Wreath

Bay Leaf Wreath 26

It’s getting to be that sort of holiday season, isn’t it?  I have a post coming up for you about some decorations on the cheap that I did last year, but in the interim, if you’ve got a bit more time, why don’t you make yourself a new wreath?

For some reason, at some point my mother bought an enormous bag of bulk bay leaves.  And she has used probably three of them in the past five years.  And even dried bay leaves don’t hold their flavour for five years.  Rather than throw them out, however, I thought I would make a seasonally-appropriate wreath with them instead.

Bay Leaf Wreath 3

Normally when I’m making a wreath I buy a cheap ugly pre-made one from a second-hand store and then I take it apart. This time I bought a styrofoam wreath form from Michaels instead. I was SHOCKED at how expensive they are! This 11″ one cost me a whopping TWELVE DOLLARS. For a piece of styrofoam. Next time I’ll cut my own out of computer packaging or something, thank you very much … Fortunately I also found a bag of assorted jingle bells at Value Village for two dollars so that saved me. And of course I had my trusty glue gun on hand.

Bay Leaf Wreath 1

The first thing I did was spray the wreath form all over silver with spray paint. Which was when I learned that even craft spray paint will dissolve styrofoam a little bit. Yikes.  I did this just in case there were any gaps in my leaves.  I wanted the whole thing to be silver.

Bay Leaf Wreath 8

I wanted my jingle bells to stand in as pseudo-berries, so I wanted to spray them red. However, I wanted them to be a frosty red, so I only sprayed one side of each one with red spray paint. If you wanted to spray all sides of each jingle bell I would recommend threading them on a long string so you can get all sides evenly.

Bay Leaf Wreath 7

Next I sorted out my bay leaves (pitching the broken ones) and sketched out a rough plan.

Bay Leaf Wreath 9

Then I started gluing. I used smaller leaves on the outside and inside edges of the wreath, so they would fit better.

Bay Leaf Wreath 11

Once I finished gluing on the leaves in the centre of the wreath, I started shoving random leaves in here and there, to fill in gaps but also to make the whole thing look a little less perfect.

Bay Leaf Wreath 12

So that’s with all the leaves glued on. If my bay leaves had been fresher I would have left this as-is for a nice festive green, but of course mine were past their prime and thus looked a little sickly.

Bay Leaf Wreath 13

This is my idea for how the bells were going to fit on. I was just going to group them in little batches and glue them on.

Bay Leaf Wreath 14

So after I sprayed the wreath silver again to cover up all the green bits, I got my bells ready to go.

Bay Leaf Wreath 15

To my dismay, however, I discovered that hot glue doesn’t stick to spray-painted bay leaves.

Bay Leaf Wreath 17

In fact it just peels the paint right off.

Bay Leaf Wreath 19

New plan. I grabbed my old spool of fishing twine and got to work with it.

Bay Leaf Wreath 20

I strung a handful of assorted bells on a loop of twine and tied the twine in a knot to keep them tight.

Bay Leaf Wreath 21

Then I simply tied the twine around the wreath form, weaving it under what leaves I could to hide it for the most part.

Bay Leaf Wreath 22

Then on the back I added a spot of glue to each twine loop to hold it in place.

Bay Leaf Wreath 23

And glued a nice blue ribbon on the top.

Bay Leaf Wreath 18

And then I hung it up. TADA!

Bay Leaf Wreath 27

Adding Festivity, the Lazy Way: Paper Wreath

Lazy Festivity 17

Seeing as we’re in Ottawa and not St. John’s for the majority of the holiday season, the Pie and I rarely trouble ourselves to decorate Elizabeth for Christmas.  But this little thing was so easy, and so quick, and the days here in St. John’s have been so very gray, I needed a little festivity … but I was too lazy to do anything too complicated.

So I have here some rolls of wrapping paper that I picked up from IKEA about seven years ago, and which I rarely use (seeing as I still have a chunk left).  The nice thing is that the wrapping paper, since it came on a roll, has a natural curve to it that I used to my advantage.  I also have a large paper plate with an extremely ugly design on it.  I don’t even know how I came to own these things, but I was cleaning out a cupboard and there they were … You will also need a pair of decent scissors and some tape.  Any kind, really, as you won’t see it.  A ribbon is optimal but also optional.

Lazy Festivity 1

First, we need to make a wreath form out of the paper plate.  If you want something bigger (or less ugly), you can make your own ring out of cardboard or whatever is handy.  With the paper plate all I had to do was cut out the middle section.

Lazy Festivity 2

Then I cut about a 5″ wide strip from the roll of wrapping paper.  I folded it in half lengthwise, so it was then about 2.5″ thick, and then folded it across itself widthwise a couple times, until I had a small rectangle about 2.5″ x 5″.  Or whatever works for you.  This just makes it easier to cut a bunch of leaves at once. This is where having a nice sharp, strong pair of scissors comes in handy.

Lazy Festivity 3

Then I cut a leaf shape out of the rectangle, leaving the bottom a little flattened (for optimal tape-age), and ended up with a handful of little leaves.  I did this twice for each colour of wrapping paper I used, so six times in total. I have no idea how many leaves it was, but it was exactly enough for the size of my project, which was pretty convenient — almost like I had a plan.

Lazy Festivity 4

Lazy Festivity 5

Lazy Festivity 6

Then I started taping them onto the plate, putting a wee bit of tape at the flattened end of the leaf, and making them kind of flow around the circle.  Don’t worry about making them arrow straight, and try to pick up different colours at random.

Lazy Festivity 7

When you put on the next haphazard row, it overlaps the first and hides the tape (this is called imbrication – like the layering of scales or roofing shingles).

Lazy Festivity 9

Imbrication … (I learned the word today so it’s rather convenient that I have this project for you)

Lazy Festivity 13

When you come full circle (and I don’t mean that metaphorically this time), just fold up the leaves already there and tuck the new ones into the space to fill the gap.

Lazy Festivity 11

So that’s the whole thing.

Lazy Festivity 12

I had a scrap of blanket binding leftover from the baby blanket I made for the Incredibly Little Hulk way back when, so I tied that on as ribbon.

Lazy Festivity 15

Then I added another ribbon to hang it on my door.

Lazy Festivity 19

This took me half an hour, from start to finish.  Change the colours of the paper leaves and I’m sure you could apply this wreath to any season (black and orange for Hallowe’en, purple and green for spring …).  Easy peasy, blamo kablam, it’s done!

Lazy Festivity 20
Imbricaaaaaaaation: an overlapping of edges as in tiles or scales.