Cloud Cake

Cloud Cake 28

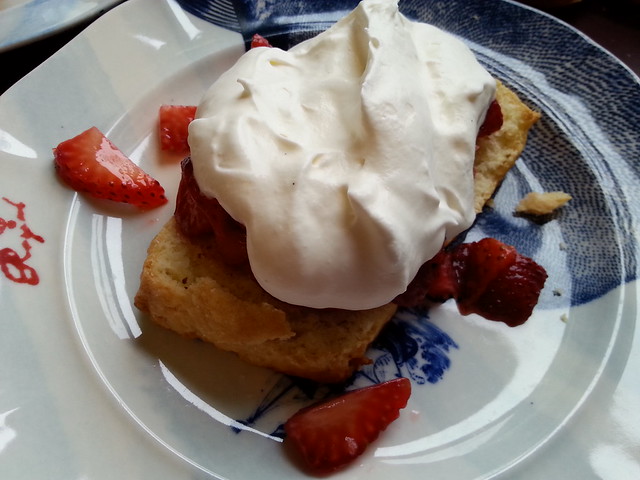
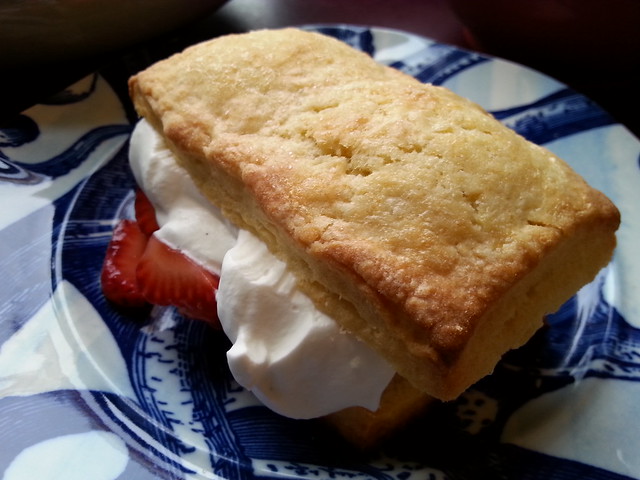
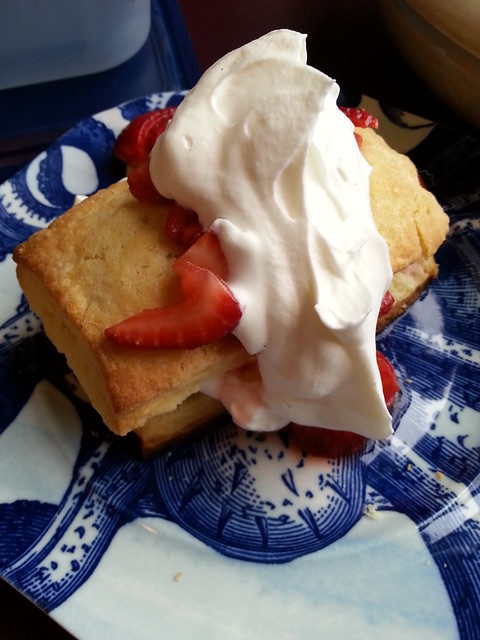
I made this Martha Stewart recipe for one of our two Mother’s Day celebrations earlier this month, and it was easy to prepare all the pieces the day before and then assemble it with a flourish on the day of. The original recipe is not gluten-free but we had Fussellette staying with us and made one simple adjustment to make it that way – you can do it whichever way you would like.

Cloud Cake 14

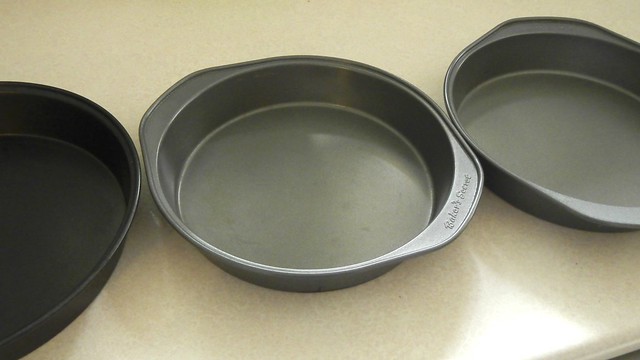
Start with the meringue: preheat your oven to 275°F and grab three 8″ round cake pans. I happened to have 2 8″ round cake pans and one 9″, so that’s what I used.

Cloud Cake 1
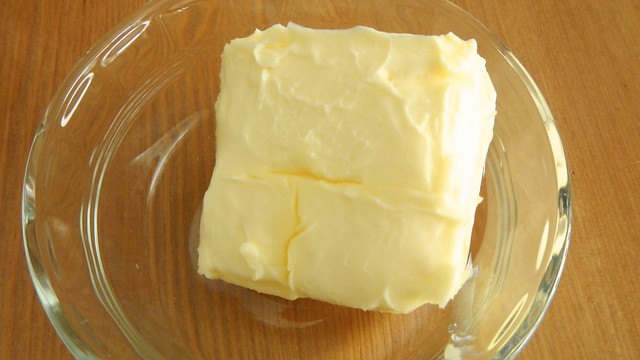
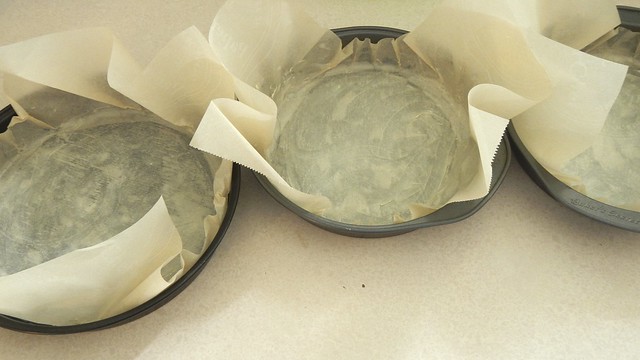
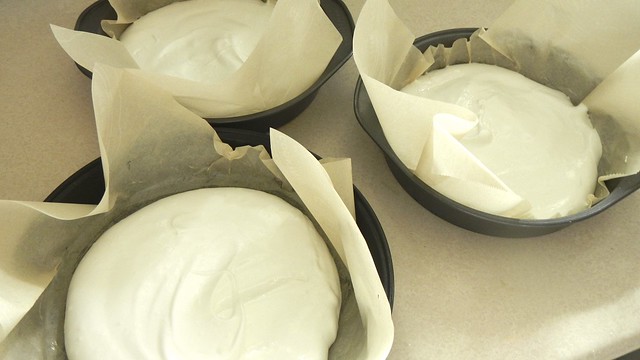
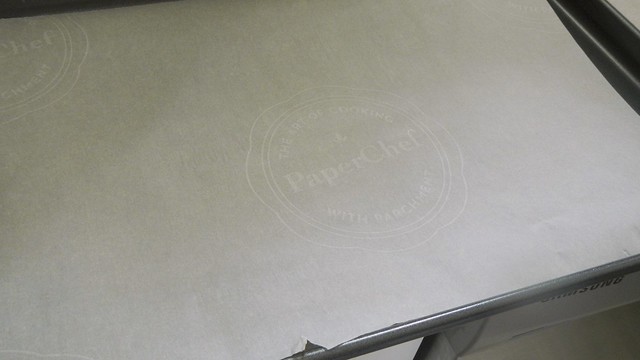
Butter the pans and then line the bottom and sides with parchment. This is easier said than done as the pans are round and parchment is straight. Get creative with the folding. It’ll just add to the allure of the finished product, I promise. Now butter the parchment as well to make sure it sticks.

Cloud Cake 2

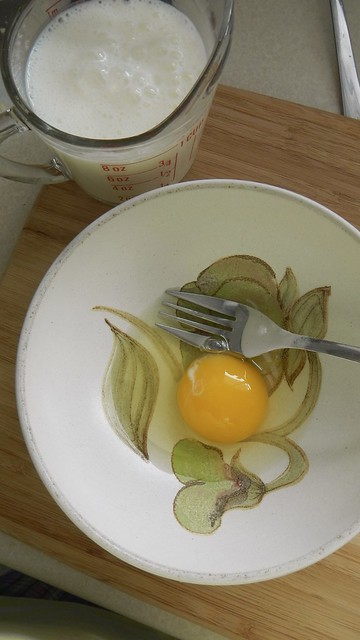
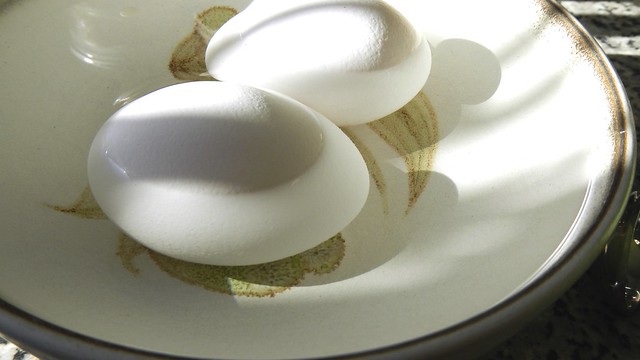
Crack open 6 large eggs and separate the whites from the yolks. Put the yolks in the fridge for now and leave the whites to come to room temperature.

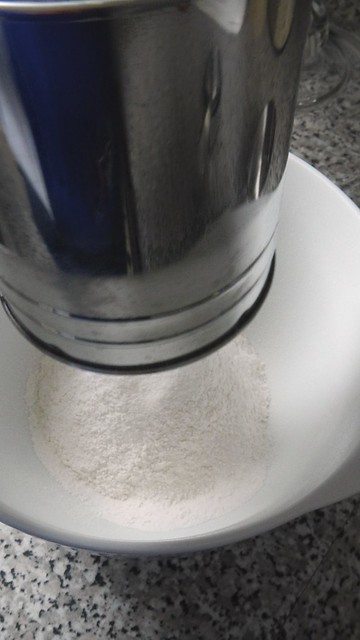
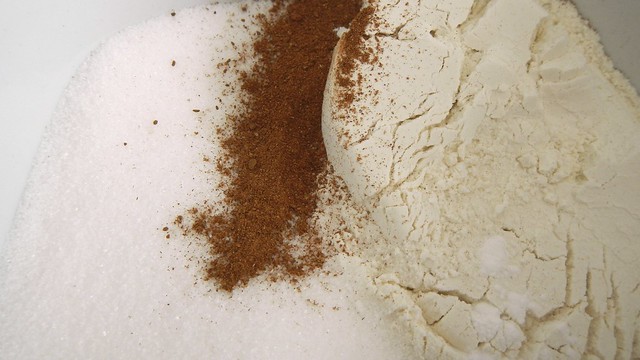
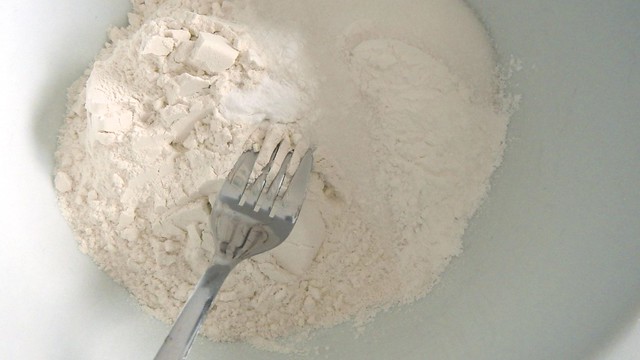
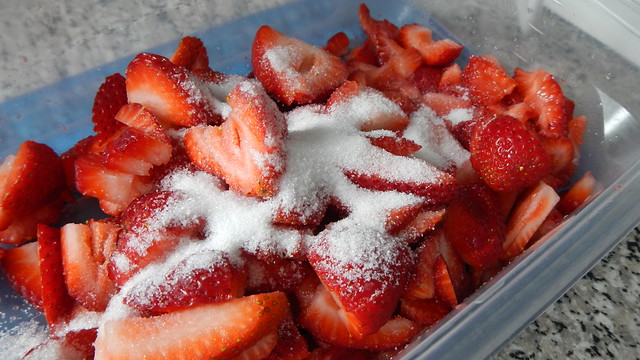
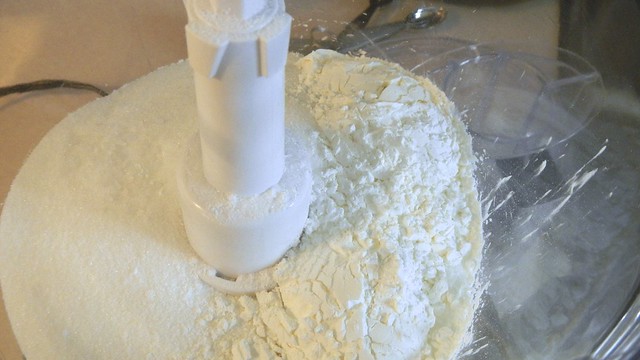
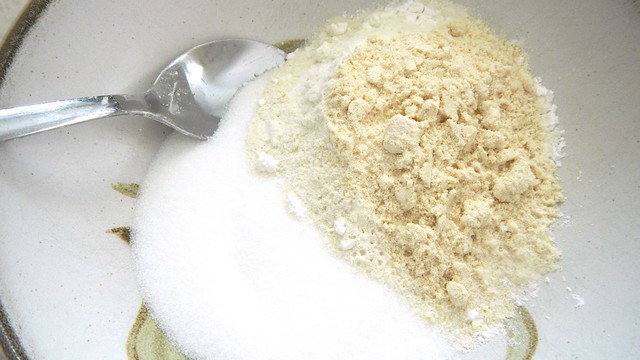
In the bowl of a food processor, pulse together 1 1/2 cups sugar, 3 tablespoons cornstarch, and 1/4 teaspoon coarse salt until smooth and powdery and when you open the lid it kind of wafts out like smoke. Don’t inhale that. You will cough.

Cloud Cake 3

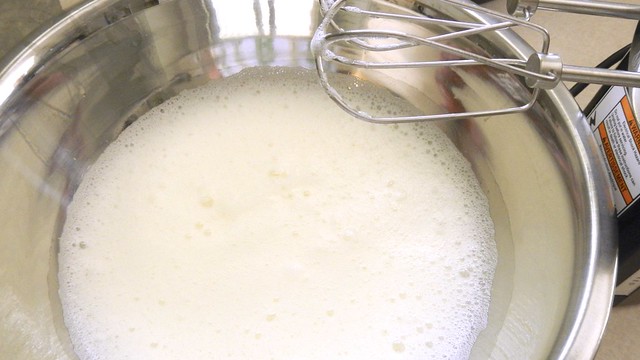
Now grab your 6 egg whites and beat them with a pinch of cream of tartar until soft peaks form.

Cloud Cake 4

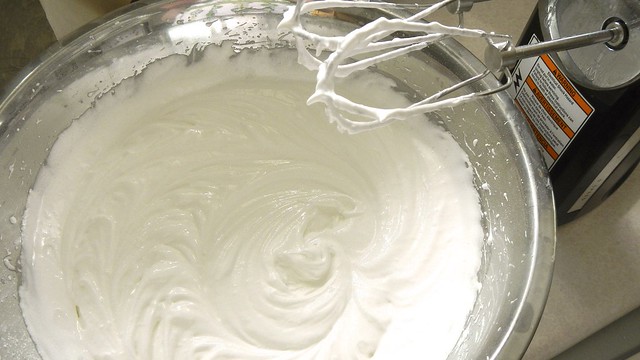
Slowly, a little bit at a time, tip in the sugar mixture and keep beating until you get lovely stiff peaks.

Cloud Cake 5

Smooth the meringue amid your three pans and bake for 1 hour.

Cloud Cake 6

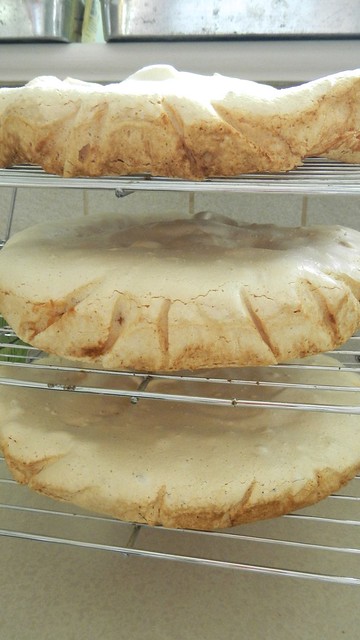
Then turn off the oven and wedge the oven door open with a wooden spoon for another hour. Then move the pans to a wire rack to cool completely. If you’re going to assemble the cake the next day, slip each layer of cooled meringue into a separate sealed bag and suck the air out of it.

Cloud Cake 13

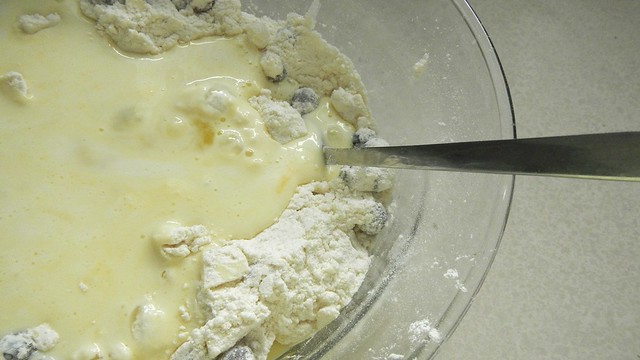
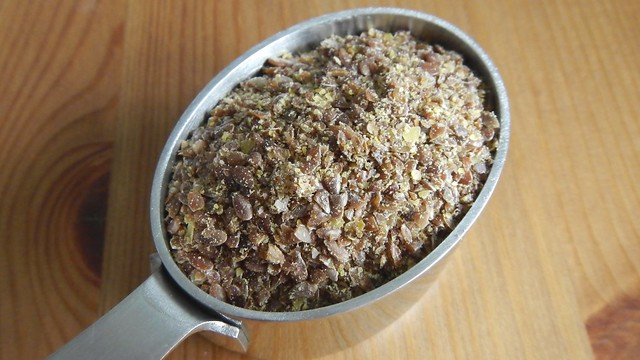
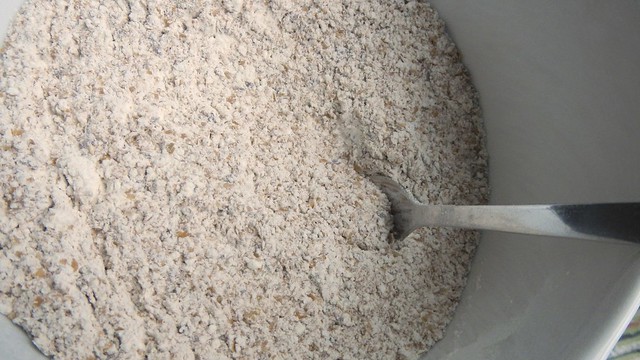
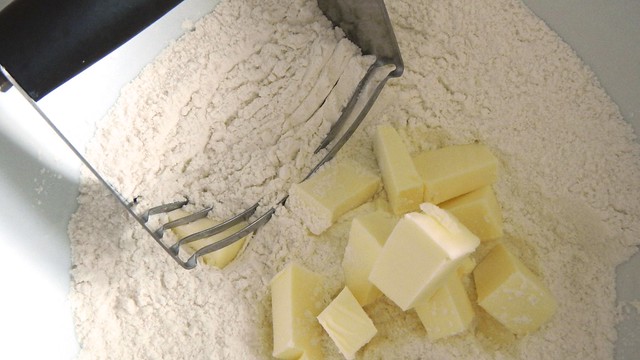
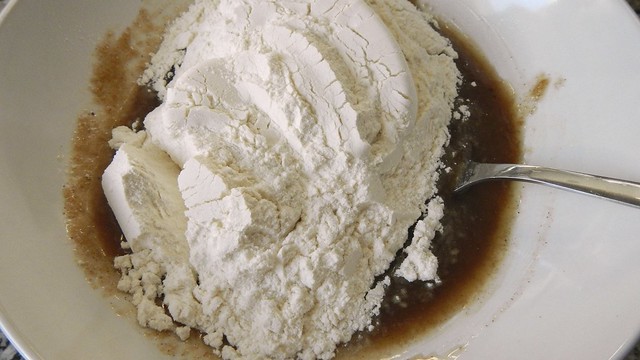
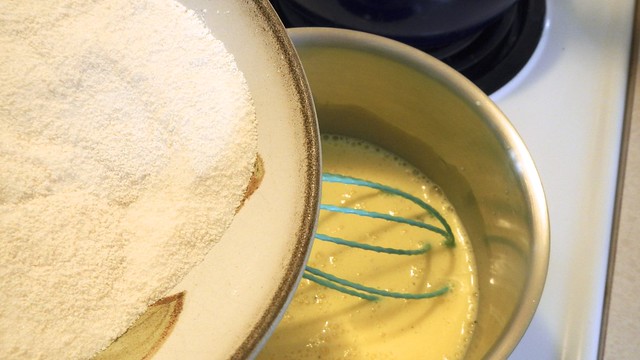
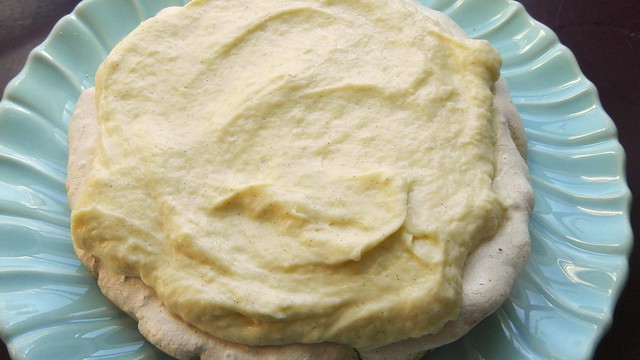
Next, let’s work on the custard cream. In a bowl, whisk together 1/3 cup sugar, 1/4 cup flour, and a pinch of coarse salt. We made a gluten-free version of the flour by combining coconut flour, xanthan gum, and corn starch.

Cloud Cake 7

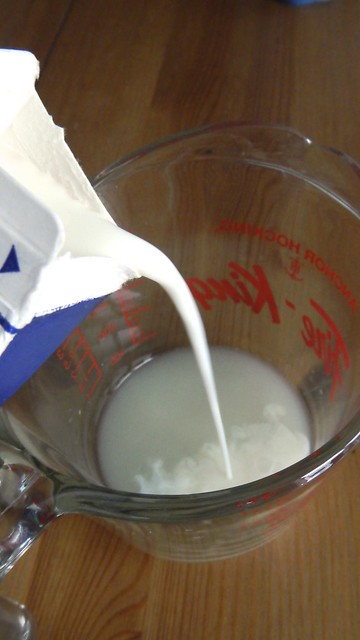
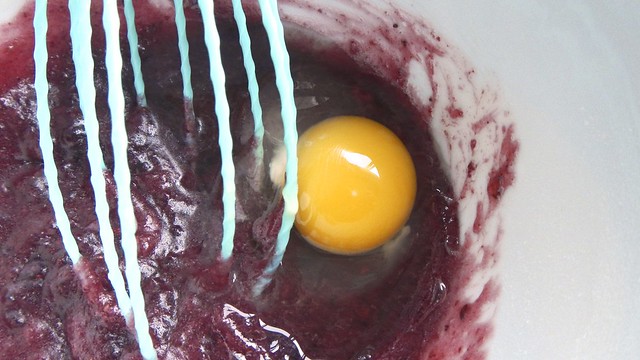
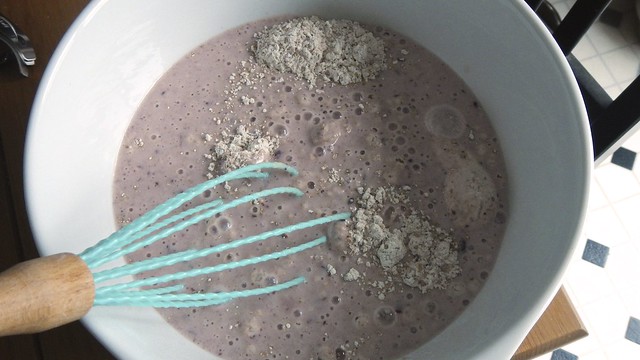
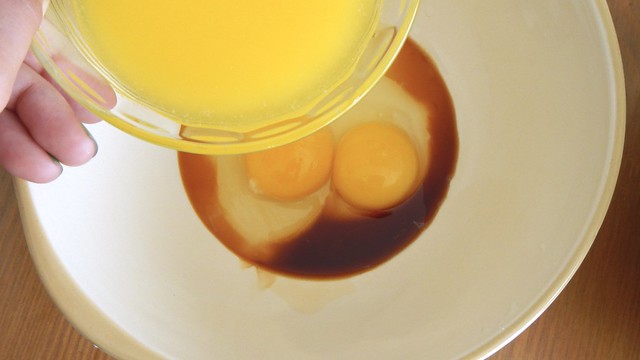
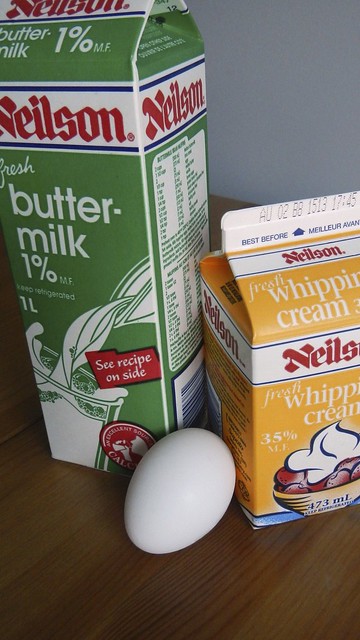
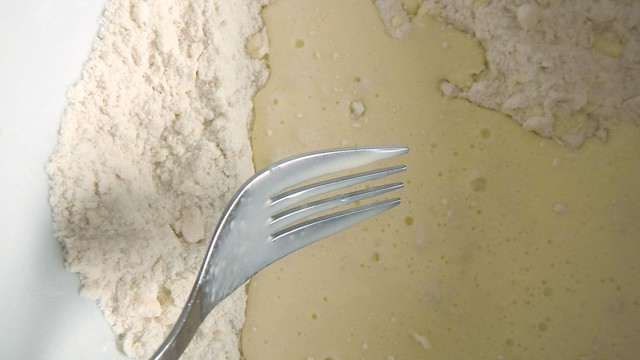
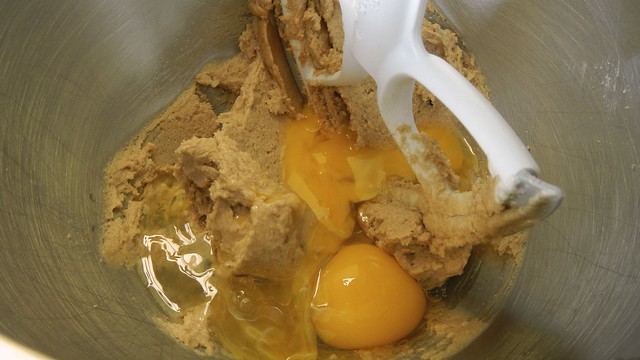
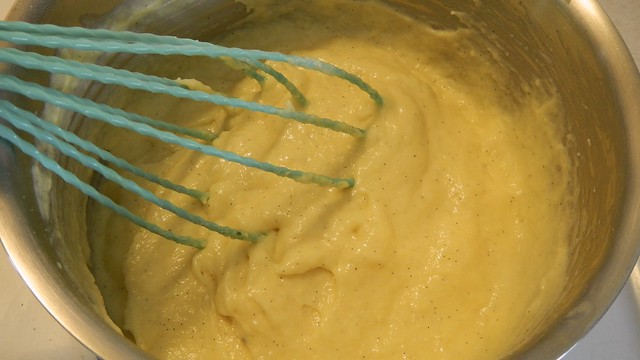
In a small saucepan, combine your leftover 6 egg yolks (original recipe calls for 3 but why waste them?) with 1 1/2 cups buttermilk and a split vanilla bean pod with the seeds scraped out. Stir that over medium heat and slowly add in the flour mixture.

Cloud Cake 10

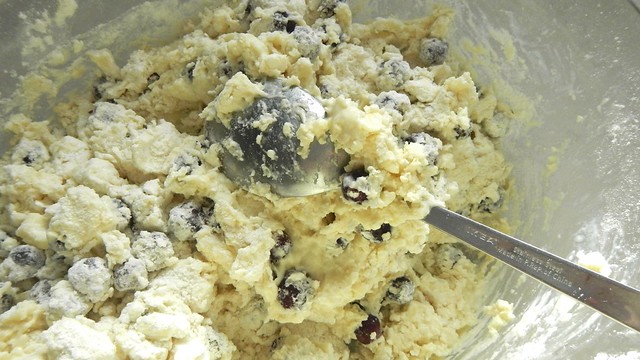
With ours, because of the nontraditional ingredients, I found the buttermilk reacted with either the cornstarch or the xanthan gum and I pretty much had instant custard. So I stirred it until I was sure the yolks had a chance to cook and then took it off the heat. If you’re using regular flour you may have to work harder at it, so stir until it just comes to a boil and then strain through a fine meshed sieve.

Cloud Cake 11

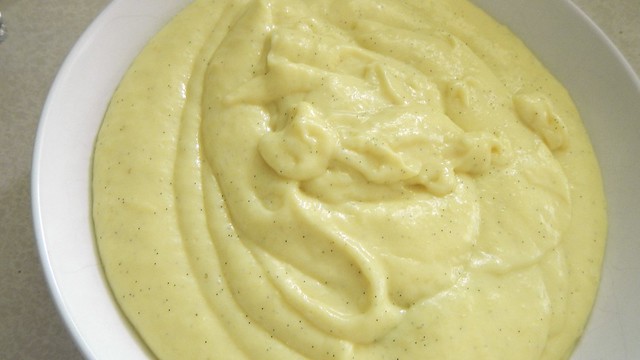
Pour the custard cream into a bowl, lay a piece of plastic wrap over the surface so it’s completely sealed, and chuck it in the fridge for at least an hour or overnight.

Cloud Cake 15

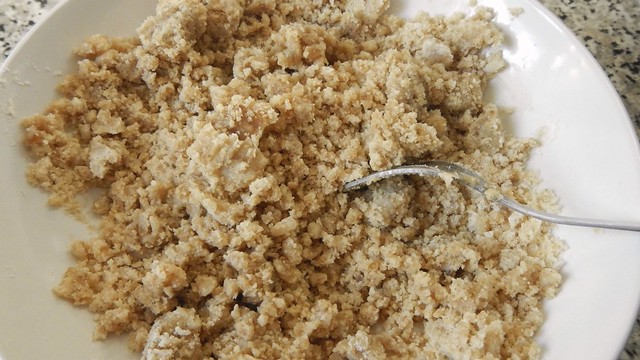
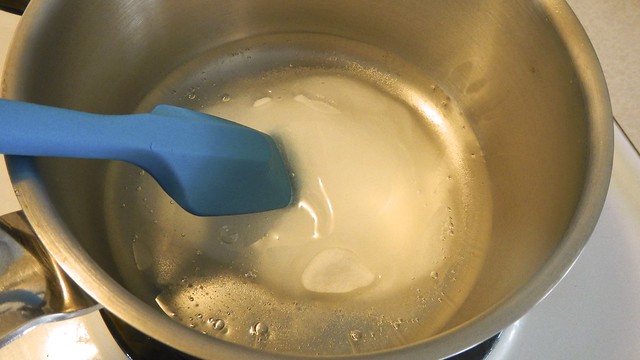
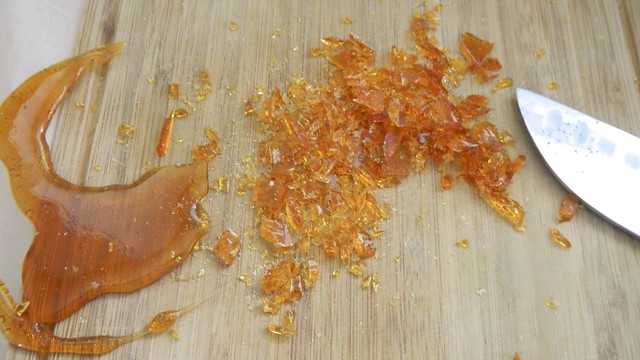
Now there’s caramel to make too. In the original, Martha used the microwave but we moved ours into the basement and that was too far away. I did this in a small saucepan on the stove. First, spray a baking sheet with cooking spray or line it with parchment.

Cloud Cake 17

Then over medium heat, stir together 1/3 cup sugar and 2 tablespoons corn syrup.

Cloud Cake 16

Cook, stirring often, until the mixture is bubbling and turns a light brown.

Cloud Cake 19

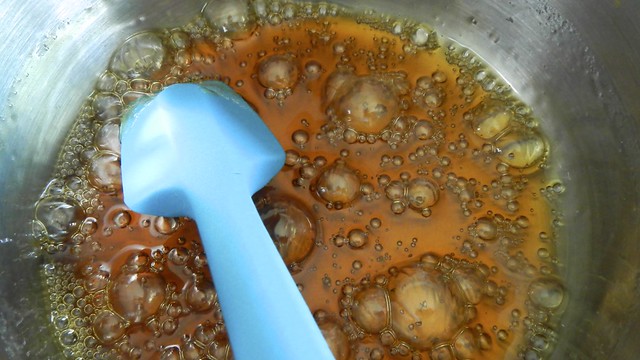
Remove that from the heat and drizzle it over the baking sheet.

Cloud Cake 20

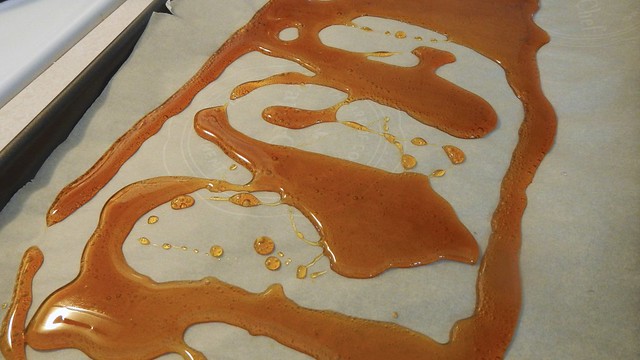
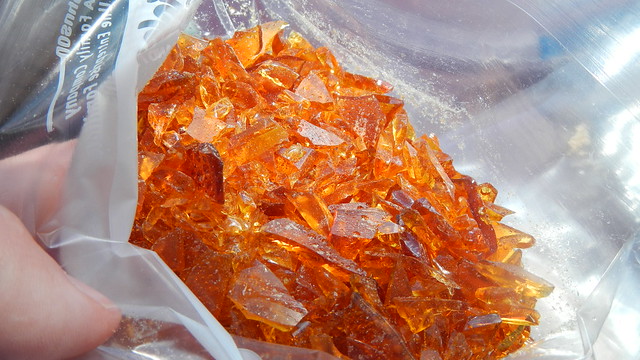
Leave that to cool then chop it up with a knife into little tiny jagged pieces. If you’re assembling the next day, shove the pieces into a resealable bag and squeeze the air out.

Cloud Cake 21

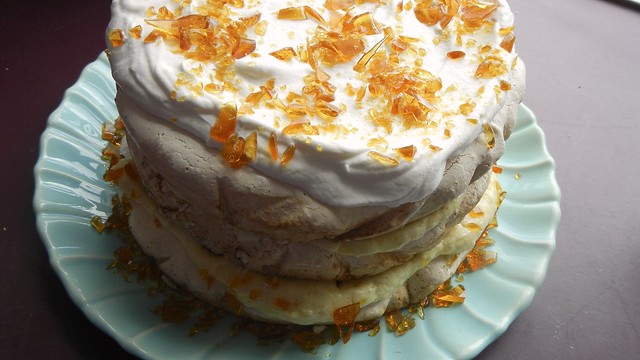
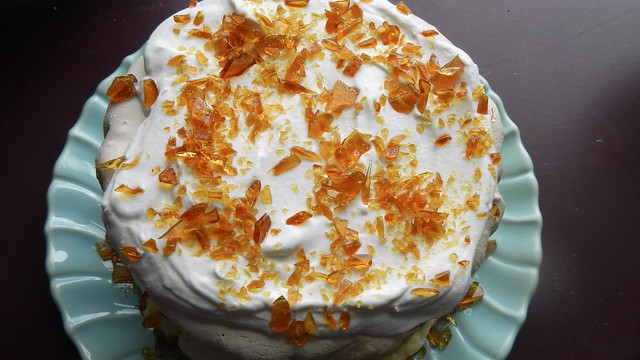
To assemble, start by whipping up some heavy cream to your taste and amount (this is going on the top as garnish so use as much as you like – I think we whipped up about a cup of it). Cream whips better if your bowl and mixers are cold, so chuck them in the freezer for a while if you can.

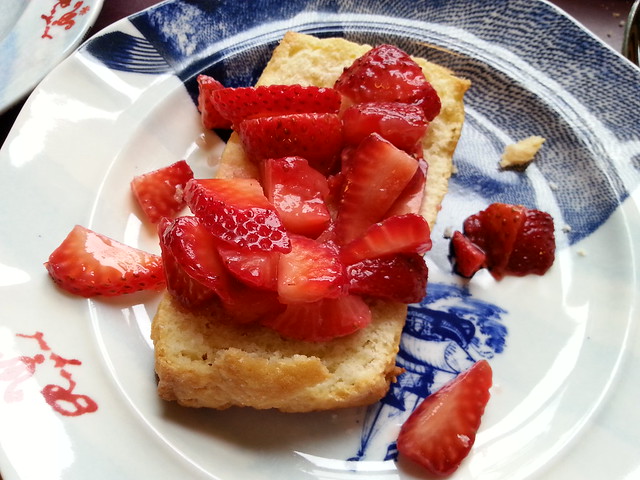
Plop one of the meringues on a nice plate and smother it with about half the custard cream.

Cloud Cake 22

Sprinkle that with about 1/3 of your caramel pieces.

Cloud Cake 23

Let some fall off artistically to the side. It’s decorative.

Cloud Cake 24

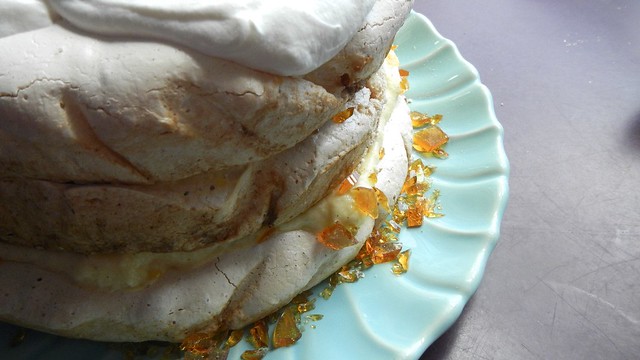
Plop another meringue on and smear with the rest of the custard cream and another 1/3 of the caramel bits. Add the final layer and top that with your whipped cream and the last of the caramel. Serve immediately!

Cloud Cake 27

Berry White Chocolate Scones

Berry White Chocolate Scones 21

Every once in a while, I get a craving for scones, and they’re so easy to whip up that there’s really no point in NOT making them. I like to use this base recipe from Canadian Living for versions where I’m adding in buttermilk, and then I just kind of wing it from there. Today we’re adding white chocolate chunks and some frozen service berries.

Berry White Chocolate Scones 1

Preheat your oven to 400°F and line a baking sheet with parchment paper. Grab your chocolate and roughly chop up a few ounces. Here I used 6 ounces white chocolate.

Berry White Chocolate Scones 5

In a bowl, dump about 2 1/2 cups all-purpose flour, 2 1/2 teaspoons baking powder and 2 tablespoons granulated sugar. Give that a good stir.

Berry White Chocolate Scones 2

Cube up 1/2 cup cold butter and tip that in as well. Use a pastry blender or two knives to cut the butter up into coarse crumbs.

Berry White Chocolate Scones 3

Now tip in 1 cup frozen berries. If you’re using big berries I recommend a rough chop first. You can add in your chocolate chunks too at this point.

Berry White Chocolate Scones 6

Give them a stir until everything is coated in flour.

Berry White Chocolate Scones 7

Whisk together 1 cup buttermilk and 1 large egg.

Berry White Chocolate Scones 4

Tip that into the mix and stir until just combined.

Berry White Chocolate Scones 8

It will be sticky and gross.

Berry White Chocolate Scones 9

Form it into a rough ball and tip it out onto a floured surface.

Berry White Chocolate Scones 10

Dust your hands with flour and pat the dough into a flattened cylinder that is about 1-1 1/2 inches thick.

Berry White Chocolate Scones 11

Slice that sucker into as many pieces as you want. Twelve is always a good number.

Berry White Chocolate Scones 13

Line ’em up on your baking sheet – if they’re sticky then flour the parchment as well.

Berry White Chocolate Scones 14

Bake for about 18-20 minutes, until the scones are dry to the touch and slightly browned. If you are using extra frozen fruit, you may want to add a few extra minutes to the baking time.

Berry White Chocolate Scones 16

Serve immediately for breakfast, lunch, or dessert – or just a snack!

Berry White Chocolate Scones 19

Age of Decadence Birthday Cupcakes

Age of Decadence Cupcakes 26

Yesterday was my brand new  minion’s respected co-worker’s birthday, and I wanted to celebrate her first month on the job (and a milestone birthday she wasn’t really looking forward to) with her favourite treat: a dark, rich chocolate cake. Cake’s a bit hard to transport around the office, however, so I went with the cupcake version instead, and I made someone else do all the hard work for me in choosing the best recipe. I picked Sally’s Baking Addiction’s tried and tested Death by Chocolate Cupcakes and doubled the recipe (as I am wont to do). An entire bar of this lovely dark chocolate went into the process and I think it was entirely worth it.

Age of Decadence Cupcakes 30

Like all good cupcakes, you start with butter and chocolate, and melting things. In the bowl of a double boiler (or in your microwave, but I no longer own one of those), melt together 1 cup unsalted butter and 4 ounces chocolate (the recipe calls for semi-sweet but I say use whatever is your favourite).

Age of Decadence Cupcakes 1

Once that’s all smooth and sassy, set it aside to cool a little bit. Line two muffin tins with cupcake liners and preheat your oven to 350°F.

Age of Decadence Cupcakes 3

In a smallish bowl, whisk together 1 cup unsweetened cocoa powder and 1 1/2 cups all-purpose flour with 1 teaspoon baking soda and 1 1/2 teaspoons baking powder and 1/2 teaspoon salt. Leave that alone and do the next thing.

Age of Decadence Cupcakes 2

In a largish bowl, crack 4 large room temperature eggs,  then tip in 1 cup granulated sugar, 1/2 cup packed brown sugar and 2 teaspoons vanilla. Whisk-y, whisk-y, whisk-y.

Age of Decadence Cupcakes 4
I kind of miss whiskey …

Pour the melted butter and chocolate into the egg/sugar stuff and mix until smooth.

Age of Decadence Cupcakes 5

Grab yourself 1 cup buttermilk (if you don’t have buttermilk, tip 2 teaspoons white vinegar or lemon juice into a cup and top it up with milk. Give it a stir and leave it about five minutes until it’s curdled and thick. It’s not *quite* the same, though, and the Pie likes having buttermilk for pancakes, so I am using the real deal).  Alternate pouring some buttermilk into the chocolatey goo with adding the flour mixture, and stir until just combined. You don’t want to overmix this or the batter will bake up flat.

Age of Decadence Cupcakes 7

And this batter is going to be THICK. Sally says it’s thick like pudding. I think it’s even thicker than that.

Age of Decadence Cupcakes 8
Thick, like dog poo thick. But in a delicious way.

Spoon the batter into your cupcake cups and bake for 18 minutes, rotating halfway through, until a toothpick inserted in the centre cupcake comes out clean.

Age of Decadence Cupcakes 10

Set those aside to cool completely and get started on your icing. Actually, before you do that, break up another couple ounces of that lovely dark chocolate and set them to melt in your double boiler. Once it’s all liquid, set it aside to cool almost to room temperature.

Age of Decadence Cupcakes 11

Beat up about 1 cup room temperature unsalted butter in the bowl of your mixer until it’s pale and fluffy. Sift together (to avoid lumps) 5 1/2 cups icing sugar and 1 1/3 cups unsweetened cocoa powder in a separate bowl.

Age of Decadence Cupcakes 12

Add 2 teaspoons vanilla extract to the fluffy butter and then tip in some of your icing sugar mix. Drizzle in, alternating with the icing sugar mix, 1 cup heavy cream.  Because I don’t remember where I put my mixer shield, this happened of course.

Age of Decadence Cupcakes 13
This one’s for you, Eli.

And because none of my aprons fit me anymore, this happened as well. Baby bellies are cooking hazards, it seems.

Age of Decadence Cupcakes 14
The Pie thought it necessary to remind me that I don’t own very many maternity clothes and should probably take better care of the ones I’ve got. I may have said a few bad words to him in reply.

But when you’re done you’ll get this lovely soft icing that’s pretty much exactly halfway between a ganâche and a buttercream. It’s very delightful. Use that and a wide tip to ice your cooled cupcakes.

Age of Decadence Cupcakes 15


Age of Decadence Cupcakes 19

Age of Decadence Cupcakes 20And because age is just a number, I made little number signs out of that melted chocolate (poured on waxed paper and allowed to cool) and shoved them in the top.

Age of Decadence Cupcakes 16


Age of Decadence Cupcakes 23

As I was making these, I remarked to the Pie that my youngest teammate, who is 23, was going to ask why there were “hashtags” all over the cupcakes, and he laughed. Then the next morning, the first thing she did when she walked into the room was go, “what’s with all the hashtags?” I so called it. Kids these days … 🙂

Age of Decadence Cupcakes 27

Jammy Bran Muffins

These muffins are a little bit different from your usually brown bran muffins. As you may know, I have a love/hate relationship with bran, so I’m always looking for new ways to ingest fibre without feeling like I’m eating sawdust. It’s a never-ending challenge. The additional challenge of these is that for some reason I have four jars of jam in my fridge and neither the Pie nor I is eating a lot of toast at the moment. So I decided to use it as my sweetener in this shindig.

Jammy Bran Muffins 2

Start by setting your oven to preheat at 350°F and spray a muffin tin or rub it with butter. If you don’t have any buttermilk on hand, feel free to sour some milk by adding 1 tablespoon lemon juice to every cup of regular milk. Give that a stir and leave it for 5 minutes.

Jammy Bran Muffins 1

In a large bowl, whisk together 2 cups all-purpose flour, 1 1/4 cup bran, 1/4 cup ground flax (because it’s good for you – make sure it’s partially ground before you add it in), and 1 1/4 teaspoons baking soda.

Jammy Bran Muffins 3

Jammy Bran Muffins 4

In a smaller bowl, scramble together 4 tablespoons melted butter3/4 cup of your favourite jam (this one is serviceberry), 1 large egg, and 2 cups buttermilk (or alternative).

Jammy Bran Muffins 6

Now pour the liquids into the solids and gently whisk until only just combined.

Jammy Bran Muffins 7

Dump in 1 cup raisins (or not, if you’re not a fan of raisins) and whisk until just combined again – never over-mix muffins. If you do they end up flat. And that’s lame.

Jammy Bran Muffins 8

Divide the batter in your tin. Bake those puppies for 20-25 minutes, until the centre muffin tests clean when stabbed with a toothpick.

Jammy Bran Muffins 9

Leave them in the pan for about 5 minutes to cool a little bit before digging them out and eating them or letting them cool completely.

Jammy Bran Muffins 11

We always like our muffins hot, with butter. Because, well, butter.

Jammy Bran Muffins 14

Yet Another Spider-Man Cake

The Pie’s crowning achievement in life (in his mind) is having gotten the General addicted to Spider-Man (or “Pydermun” as the General says). So when Atlas asked me to make a cake for the General’s second birthday party, we all knew what the theme would be. I made a cake for the Pie a year back with an arachnid theme so I was pretty confident I could replicate my awesomeness. The resulting decoration, due to some recalcitrant icing, was a little underwhelming but boy the cake was good – it disappeared within about twenty minutes!

Spider-Man Strawberry Cake

The cake itself is pretty easy. I adapted a simple yellow cake out of the Joy of Cooking and decided to tip in a bunch of strawberries, too.

Spider-Man Strawberry Cake 1

So I washed and cut up about a pint of the little red gems, and made sure that they were in decently small pieces.

Spider-Man Strawberry Cake 3

Then I buttered and lined a 9″ x 13″ baking pan with parchment paper. This cake is very moist and fragile so you need some help tipping it out of the pan and the paper helps. You can preheat your oven to 350°F as well while you’re at it.

Spider-Man Strawberry Cake 4

If you don’t have any buttermilk on hand, then whip up this quick substitute: add 1 tablespoon lemon or lime juice to a 1 cup measuring cup and fill the rest with milk. Stir and leave for 5 minutes. Set that aside for now.

In a bowl, sift together 2 1/3 cups flour with 1 1/2 teaspoons baking powder and 1/2 teaspoon baking soda. Set that aside and grab your mixer.

Spider-Man Strawberry Cake 2

In the bowl of your mixer, dump 3/4 cup softened butter and whip that into a pale fluffy frenzy for like three minutes.

Spider-Man Strawberry Cake 5

Now tip in 1 1/3 cup sugar and beat again until you have a fluffy amazing pile of salty sweet buttery goodness.

Spider-Man Strawberry Cake 6

Now add in 3 large eggs, one at a time, as well as 2 teaspoons vanilla extract, and beat until fully combined and smooth.

Spider-Man Strawberry Cake 7

Grab your flour mixture and your 1 cup buttermilk (or substitute) and alternate adding them to the mix, stirring each time. Start with the flour, so you have three additions of flour and two of buttermilk, and go until it’s all smooth and batter-y.

Spider-Man Strawberry Cake 8

Dump in your 1 pint chopped strawberries and stir those in well.

Spider-Man Strawberry Cake 9

Spider-Man Strawberry Cake 10

Smooth the batter into the pan and bake for about 45 minutes, until a toothpick inserted in the centre comes out clean. Set that on a rack in the pan to cool completely.

Spider-Man Strawberry Cake 11

Spider-Man Strawberry Cake 12

Make yourself some icing – your choice, but I prefer the standby cream cheese recipe of 1 cup butter:1 package cream cheese:3-4 cups icing sugar. I tipped in some almond extract to boost the strawberry flavour, and then dyed it appropriately with gel paste food colouring.

Spider-Man Strawberry Cake 13

Spider-Man Strawberry Cake 14

Spider-Man Strawberry Cake 15

I actually ran out of red colour so the background ended up a wee bit pink.

Spider-Man Strawberry Cake 16

And the black stuff got super wobby when I was piping it so it didn’t look so hot. However I did manage to get the floppy cake onto the lid of a tupperware container before decorating so it was a simple matter to simply jam the bottom on top for easy transport!

Spider-Man Strawberry Cake 17

Cinnamon Rhubarb Muffins

Rhubarb Muffins 15

My mother foisted off some of her bumper crop of rhubarb on me so today’s and Monday’s recipes are both going to be rhubarb-related, and I think you’re going to like both of them if you are a fan of the sour stalks of not-fruit-not-vegetable. This recipe comes from Fine Cooking and the original recipe involves a streusel topping but I decided to skip it this time around. You can do what you like. But before you do, position a rack in the centre of your oven and preheat it to 400°F. Grease a muffin tin or line it with cupcake cups.

Rhubarb Muffins 1

Chop up 1 1/2 cups’ worth of fresh rhubarb into 1/4″ pieces. Set that aside for a few minutes.

Rhubarb Muffins 2

In a large bowl, whisk together 2 cups flour, 3/4 cup granulated sugar, 2 1/2 teaspoons baking powder, 1 teaspoon ground cinnamon, and 1/2 teaspoon baking soda.

Rhubarb Muffins 5

In a small heatsafe bowl, melt 1/2 cup butter and then let that cool slightly.

Rhubarb Muffins 4

In another bowl, whisk together 2 large eggs, 1 cup sour cream (I replaced this with 1 cup buttermilk), and 1 teaspoon vanilla extract. Add in the slightly cooled butter and mix that well.

Rhubarb Muffins 6

Make a well in the centre of your flour mixture and pour in the liquids.

Rhubarb Muffins 8

Stir that with a fork until just combined. Let it be lumpy.

Rhubarb Muffins 9

Tip in your rhubarb and stir that in, again, until just combined.

Rhubarb Muffins 10

Scoop the muffin batter into the prepared tin until each cup is full, then bake for 18-22 minutes, until a toothpick inserted in the centre of the centre muffin comes out clean.

Rhubarb Muffins 12

Let the muffins cool in the pan on a rack for about 5-10 minutes before scooping them out and eating them still warm with a little bit of butter.

Rhubarb Muffins 16

Oh my!

Strawberry Shortcake

20150614_184641

As you may have figured out by now, my birthday gifts to my friends and family members usually end up being the birthday cake of their choice – no cake too elaborate, no tower of layers too high. We have had a few memorable ones over the years, but this one sticks out because when I asked Atlas which cake she’d like for her birthday a couple weeks ago, she said she wanted a strawberry shortcake. And I realized that I had never actually ever made this classical and simple dessert delight. So I decided to go right back to the cake’s roots and make it as classic as possible, following this recipe from Fine Cooking.

Strawberry shortcake, in its traditional form, is not really a cake at all. It’s more of a sweet sandwich in a biscuit (“short” cake indicating that the cake isn’t really made with any leavening agents and ends up pretty dense and flat). This recipe also doesn’t really lend itself well to making ahead, as it must be assembled immediately before cooking, but it’s simple enough that this is not a huge deal.

Strawberry Shortcake 13

Let’s start with our dough, shall we? I did make the dough ahead of time, and kept it in the fridge, wrapped in plastic, until I was ready to bake it.  Grab 2 cups unbleached all-purpose flour, 1/3 cup plus 1 tablespoon granulated sugar, 2 1/2 teaspoons  baking powder,  and 1/4 teaspoon baking soda (leavening agents, I know, but give me a break). Whisk those around in a bowl until they’re nice and mixed.

Strawberry Shortcake 3

Now grab yourself 1/2 cup cold butter and cut it into little cubes. Tip the butter into the flour and use a pastry cutter to blend it all up until you have a mess of coarse-looking flour with pea-sized bits of butter throughout.

Strawberry Shortcake 4

In another bowl, mix together 1/4 cup whipping cream, 1/4 cup buttermilk (why oh why don’t they sell buttermilk in smaller cartons?), and 1 large egg.

Strawberry Shortcake 1

Make a well in the centre of your flour/butter mixture and pour in the wet ingredients.

Strawberry Shortcake 5

Stir that around with a fork until you get a shaggy dough.

Strawberry Shortcake 6

Then knead it a little bit with your hand until it all comes together.

Strawberry Shortcake 7

At this point I wrapped it tight in plastic wrap and shoved it in the fridge overnight, but if you want to bake it right away you totally can.

Strawberry Shortcake 8

Ideally the biscuits are made so that they’re still slightly warm when you assemble them with the strawberries, but you can make them up to four hours ahead of when you need them. Just make sure to col them completely and then shove them in an airtight container until they’re needed. So when you’re ready to bake,  preheat your oven to 425°F, line a baking sheet with parchment paper, and lightly flour a nice surface to work on. Grab your rolling pin as well.

Strawberry Shortcake 9

Roll the dough out into a rough rectangle about 3/4″ thick. The original recipe calls for making six biscuits from this dough but those seemed absolutely ginormous so I cut the rectangle into eight biscuits instead and even then they were pretty big.

Strawberry Shortcake 10

Lay the cut biscuits on your baking sheet and brush with a tablespoon of whipping cream and sprinkle with a bit more sugar.

Strawberry Shortcake 11

Bake those for 10-15 minutes, until golden brown.

Strawberry Shortcake 12

While they’re baking and cooling slightly, you can do your strawberries. You can prepare the strawberries a couple hours ahead of time as well, because they need to macerate (i.e. sit cut up in sugar) for at least 30 minutes. The recipe calls for 1lb fresh strawberries, but I probably used about 1 1/2lbs, and we all agreed later that I could have used the whole 2lbs that I bought. You can never have too many strawberries in strawberry shortcake.

Strawberry Shortcake 14

Anyway, wash and hull the berries, and then take about one third of them and use a potato masher or pastry cutter to mush them up in the bottom of a bowl.

Strawberry Shortcake 15

Strawberry Shortcake 16

Slice the rest of the berries and plop them in the bowl with the strawberry mush.

Strawberry Shortcake 17

Tip in 2 tablespoons granulated sugar and give that a stir. Leave that to sit at room temperature for at least 30 minutes. At this time you might as well also chuck a bowl for whipping cream into the freezer, along with whatever beater you are going to use. Cold utensils make for a better whipped cream.

Strawberry Shortcake 18

Now you’ve finished your lunch or dinner and it’s time to assemble the cakes. Grab your bowl and beaters out of the freezer and pour in 1 1/2 cups whipping cream. Add vanilla and sugar to taste. I don’t have any photos of this because the Pie did it while I was doing other things.

20150614_183555

Use a serrated knife to cut all the biscuits in half horizontally and set the bottoms of the biscuits on your serving plates.

20150614_184051

Spoon on a generous amount of strawberry goo. It’s okay if it spills off the edges – it looks all artistic that way.

20150614_184321

Add a generous dollop of whipped cream to the mix.

20150614_184425

Then plop the biscuit top on.

20150614_184503

Add another scoop of strawberry goo, followed by more whipped cream.

20150614_184644

Admire your handiwork.

20150614_184653

Then serve immediately! Yum!

Banana Oatmeal Bran Muffins

Banana Oat Bran Muffins 15

I’m not a huge fan of bran muffins, to tell the truth. I mean, the older I get the more I appreciate their functionality in my diet, but they’re still not a favourite. The Pie absolutely LOVES them, though. I swear he’s actually seventy. So I thought I’d play around with the mixture a bit and see if I could come up with something that still had all the benefits of bran with a bit more of a flavour, and these not-too-sweet muffins did the trick.

Banana Oat Bran Muffins 12

These can also be frozen in their unbaked form for cooking up later, which is handy for me as I am yet again filling up friends’ freezers in anticipation of future little ones. All you do is scoop the mixed batter into cupcake liners, freeze them, and then add five minutes to the baking time when you bake them from frozen. Easy peasy.

Banana Oat Bran Muffins 9

But of course you want to try some of these puppies right away. So preheat your oven to 350°F and line some muffin tins with liners (or give them a good spraying or buttering, whatever suits). I doubled this recipe (so I could freeze some) so don’t be alarmed at the massive amounts in the pictures. Deep breaths.

Banana Oat Bran Muffins 1

In a bowl, whisk together 2 cups all-purpose or whole wheat flour, 1 cup oats (rolled, not steel cut), 1 cup bran, 2 tablespoons sugar, and 1 1/4 teaspoon baking soda. That’s your dry bowl.

Banana Oat Bran Muffins 3

For your liquids you’ll likely need a bit more preparation. First, I had some bananas in the freezer that needed thawing out, but when they were good and squishy I went ahead and mushed up 3 ripe bananas.

Banana Oat Bran Muffins 4

You’ll also need some buttermilk. If you don’t have buttermilk you can simply sour regular milk by adding 1 tablespoon lemon/lime juice or vinegar to every cup of milk you use and letting that sit for about 5 minutes. For this recipe you’ll need 2 cups buttermilk/soured milk. I also opted to switch out the traditional molasses used in bran muffins for 1/2 cup honey. In addition to that in your liquid bowl you’ll need 1 large egg and 4 tablespoons melted butter.

Banana Oat Bran Muffins 5

Mix both the liquids and the dry stuff well, but SEPARATELY. The whole trick with muffins is not mixing them too much. I think in this case with me trying to incorporate the bananas I ended up overmixing but you should try not to do that.

Banana Oat Bran Muffins 6

Your batter should still be pretty lumpy when you tip in 1 cup raisins or nuts (optional).

Banana Oat Bran Muffins 7

Scoop your batter into your prepared tins and either freeze them or bake them for about 25 minutes, until a toothpick inserted in the centre muffin comes out clean.

Banana Oat Bran Muffins 8

Let those cool in the pan about 5 minutes before scooping out to a wire rack to cool completely.

Banana Oat Bran Muffins 10

I like eating them still-hot with a wee bit of butter. So good!

Banana Oat Bran Muffins 17

Sunday Scones

Sunday Scones 25

Yes, yes, I know it’s WEDNESDAY. But I made these on a Sunday and I like my alliteration, okay? These are a great addition to a Sunday brunch (I know this because that’s what I made them for). I used turkey bacon in this recipe but feel free to use any bacon-like product you can think of.

Sunday Scones 6

Start with 2 1/2 cups all-purpose flour and mix it in a bowl with 2 tablespoons granulated sugar, 1 tablespoon baking powder, and 1 teaspoon salt.

Sunday Scones 7

Grab 1/2 cup COLD butter and use a pastry cutter or two knives to cut the butter into the flour mixture. You can use a food processor for this if you really want, but we are going for a non-uniform texture here, so irregular chunks of butter are a plus in this situation.

Sunday Scones 8

Normally I use buttermilk when I make scones because it makes them nice and fluffy. But I never have buttermilk on hand because in Canada you can only buy it in 1L cartons and seeing as I don’t drink it for its own sake that’s a lot of buttermilk to have to use up. So generally I just sour my own milk. 1 tablespoon of lemon juice or white vinegar to 1 cup of milk, give it a stir, and leave it for five minutes. Good enough. Here I only needed 2/3 cup soured milk so I adjusted accordingly. You can do the math. Anyway, mix the milk with 2 slightly beaten eggs.

Sunday Scones 9

What you also need here is about 5 slices of cooked bacon, any kind.

Sunday Scones 1

Slice and dice that into wee pieces. You need about 1/2 cup chopped bacon at this point. You should probably do this first before all the other stuff with the flour and butter so that the bacon has time to cool down before you cut it up. Otherwise, there might be bad things that happen.

Sunday Scones 4

Harvest some green onions as well. Dice them up until you have about 1/4 cup chopped green onion.

Sunday Scones 2

Then grate some cheese. Any kind you like, but you need about 2/3 cup grated cheese and then add to that about 1/4 cup grated parmesan cheese as well.

Sunday Scones 3

Okay so now you’ve got all your bits and pieces. Add the buttermilk/eggs mixture to the flour mixture and stir until just combined.

Sunday Scones 11

Add the cheese, onions, and bacon to the bowl as well and continue to stir until it’s all incorporated.

Sunday Scones 12

Turn the mix out onto a lightly floured surface and knead gently just until all the bits and pieces are together and it’s a cohesive mass. You just want things all barely sticking together. When in doubt, under-mix.

Sunday Scones 13

Shape it into a disk about 1″ thick. Wrap the dough up tightly and put it in the freezer for at least 30 minutes or in the fridge overnight.

Sunday Scones 14

Scones cook really well from frozen, did you know that? So if you wanted to do that, cut the scones before chilling, wrap them up really well, and then chuck them in the freezer for scone-y goodness any time you want. Frozen scones make great gifts, you know.

Sunday Scones 15

If you’re not freezing them, unwrap your chilled dough and slice it into wedges. I aimed for 10 wedges here. You can also flatten your dough into a rectangle and cut out squares or triangles or whatever you want. Wedges are easiest for me. Preheat your oven to 375°F.

Sunday Scones 16

Plop the wedges on some baking sheets lined with parchment and brush them with about 2 tablespoons half and half or light cream.

Sunday Scones 18

Sprinkle them with a little sea salt and shove them in the oven for 15-20 minutes, until they’re puffy and golden.

Sunday Scones 21

Let cool only very slightly before serving warm with a dollop of butter!

Sunday Scones 22

Apple Streusel Muffins

Apple Streusel Muffins 25

A couple weeks ago, in the beginning stages of November, I had a strong hankering for apple muffins. I was reading a book where one of the main characters kept making them and I just couldn’t resist the temptation anymore. I found this recipe from Sally’s Baking Addiction and the rest is really history.

Apple Streusel Muffins 9

Let’s start with the streusel crumb topping, shall we? It’s what elevates these simple muffins into items of historic greatness. Melt 1/4 cup butter in a bowl, then dump in 1/3 cup brown sugar, 1 tablespoon granulated sugar, and 1 teaspoon ground cinnamon. Give that a good stirring.

Apple Streusel Muffins 1

Then add in 2/3 cup all-purpose flour and mix it up with a fork or your hands.

Apple Streusel Muffins 2

You’re going to get a lovely crumbly mix. Set that aside for a minute.

Apple Streusel Muffins 3

Now, preheat your oven to 425°F. I know that seems high, but don’t worry, we’ve got a plan. You might want to grease or butter a muffin tin while you’re at it. I also set 2 large eggs in a bowl of warm water to bring them to room temperature. Because I didn’t plan ahead.

Apple Streusel Muffins 4

In the bowl of your mixer, cream 1/2 cup room temperature butter until all fluffy and amazing. Then add in 1/2 cup brown sugar and 1/4 cup granulated sugar and beat that up again.

Apple Streusel Muffins 5
Why yes – that granulated sugar IS pink. It’s a long story.

Then add in your 2 large eggs and beat until fully combined. Don’t forget to scrape down the sides of the bowl.

Apple Streusel Muffins 8

Now add in 2 teaspoons vanilla extract, and 1/2 cup yogurt (any flavour). You can use sour cream if you have no yogurt. I had neither sour cream nor yogurt, so I used buttermilk. Well, I had no buttermilk either, so I used milk that I had soured with lemon juice.

Apple Streusel Muffins 12

Now, peel and chop up 2 medium apples – you want about 1 1/2 cups diced apples for this. Can you peel your apple all in one piece? It’s one of my special skills.

Apple Streusel Muffins 10

In another large bowl, whisk together 1 3/4 cup all-purpose flour with 1 teaspoon baking powder, and 1 teaspoon ground cinnamon. The original recipe also calls for a teaspoon of baking soda but I found I could really taste it in the muffin so I would leave it out.

Apple Streusel Muffins 7

Add your wet ingredients to your dry ingredients and mix until just combined.

Apple Streusel Muffins 13

Plop in your apples and 1/4 cup milk (any kind) and mix that up again.

Apple Streusel Muffins 14

Scoop that glorious stuff into your prepared muffin tin, filling the whole cup.

Apple Streusel Muffins 15

Sprinkle generously with the streusel topping and shove that in the oven. Bake for 5 minutes at 425°F, then reduce the heat to 350°F and bake for a further 15 minutes, until a toothpick inserted in the centre of the centre muffin comes out clean.

Apple Streusel Muffins 16

While the muffins were baking, I glanced out the window and the bright sunny day had suddenly become a blizzard.

Apple Streusel Muffins 17

And then the sun came out again. Though the snow kept falling.

Apple Streusel Muffins 20

Set the hot muffins on a wire rack to cool down and start on your glaze.

Apple Streusel Muffins 23

Whisk together 1 cup icing sugar with 3 tablespoons heavy cream and 1/2 teaspoon vanilla extract.

Apple Streusel Muffins 21

Drizzle that insanity over your still warm muffins.

Apple Streusel Muffins 26

Eat these glorious gems within a couple days, as they will tend to get soggy over time.

Apple Streusel Muffins 28