Quick and Dirty Sewing Needle Case

Why do I keep doing sewing projects? I HATE sewing! I promise you that the boxfish floor cushion is coming soon. LongJohn has been remarkably uncooperative these past two weeks so I’ve had to pick and choose my grown-up activities carefully.

Sewing Needle Case 39

In the meantime, here’s a sewing needle case I made out of stuff I already had and was already using. As a needle case. Like, I had a box I was keeping sewing needles in already. And now I’m just keeping MORE needles in it. But it’s, like, organized and stuff.

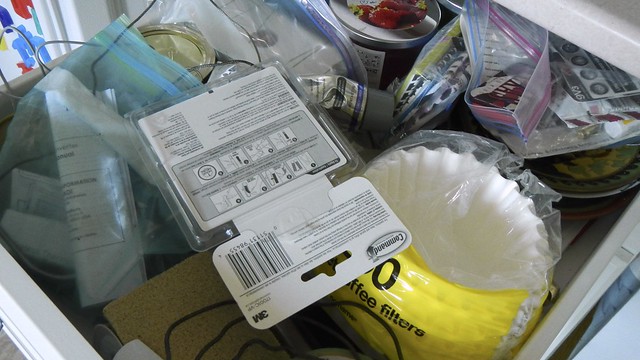
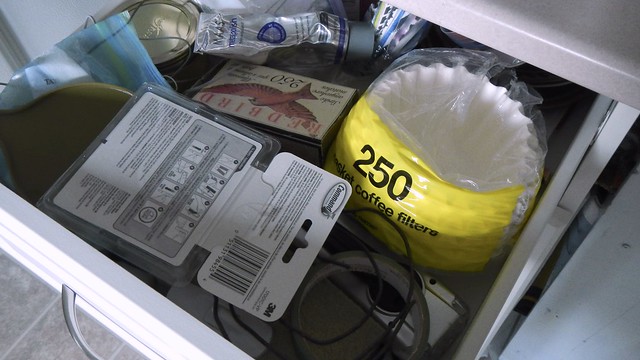
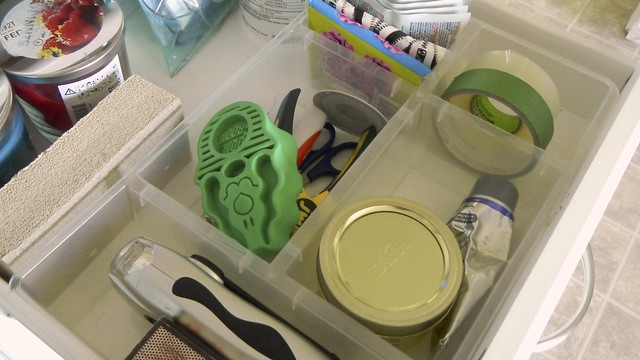
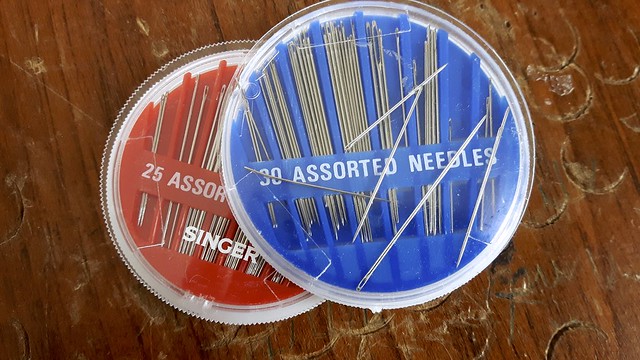
Because, you see, I have this to currently stash my sewing needles.

Sewing Needle Case 1

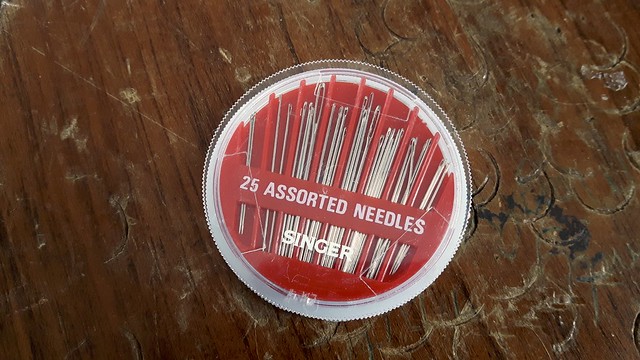
And because I’m me, this happens to the needles that I put in there. And that causes all kinds of problems, like making the wheel stick and having needles randomly stab me. So that’s terrible.

Sewing Needle Case 2

This is my Altoids tin that I’ve had since probably high school.

Sewing Needle Case 4

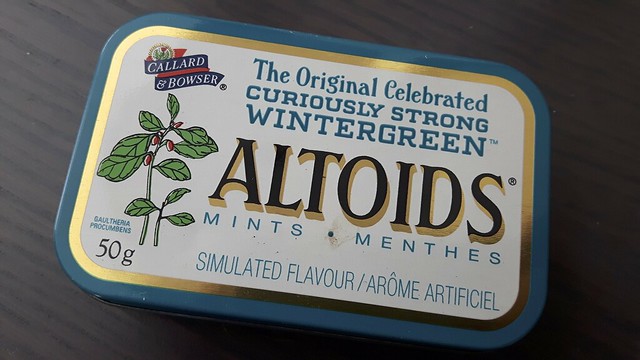
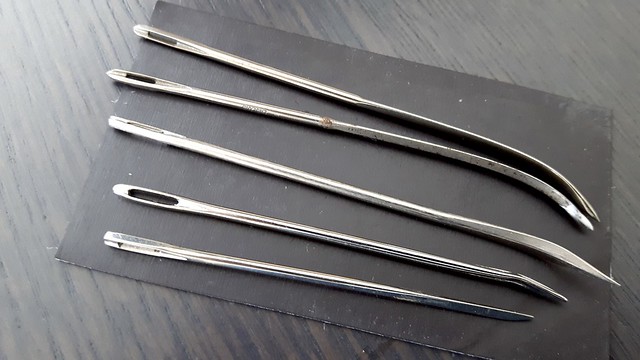
It currently holds my weird sewing needles and a bunch of other sewing stuff like stitch rippers.

Sewing Needle Case 3

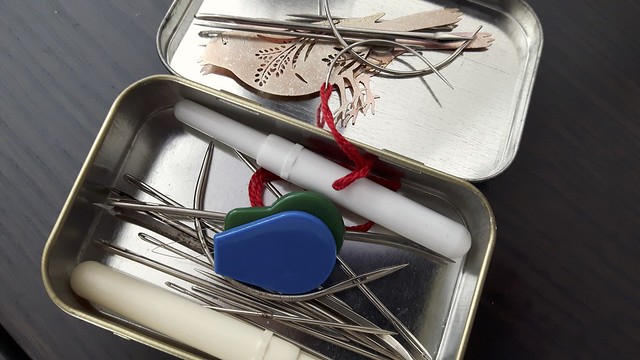
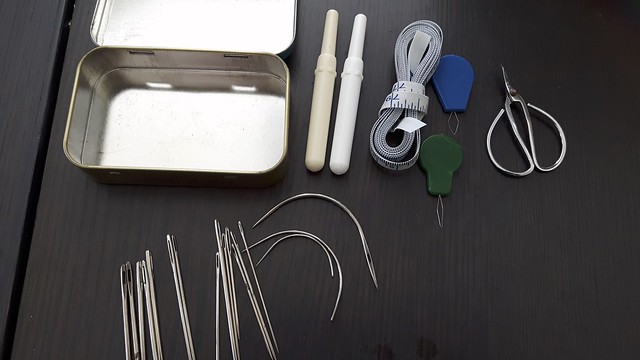
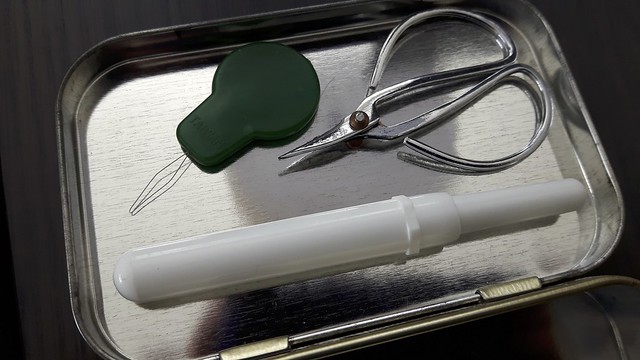
Ideally I’d like it to hold all my weird needles, a stitch ripper, a needle threader, and a wee pair of scissors. If the measuring tape fits, then even better.

Sewing Needle Case 5

This is a magnet from my dentist. It’ll work to hold the big needles in place.

Sewing Needle Case 15

Sewing Needle Case 10

I want something to hold the little tools onto the lid, but something that will allow me to change up the tools as events warrant.
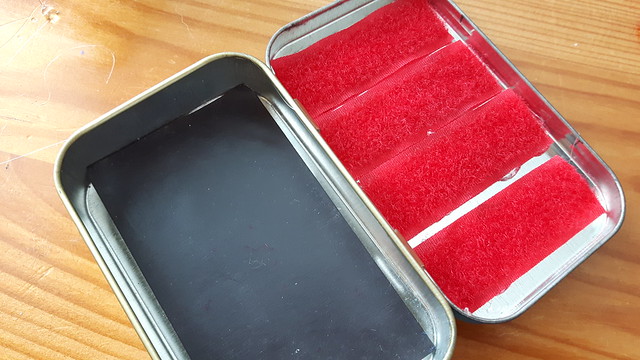
Sewing Needle Case 11

Hello, velcro!

Sewing Needle Case 12

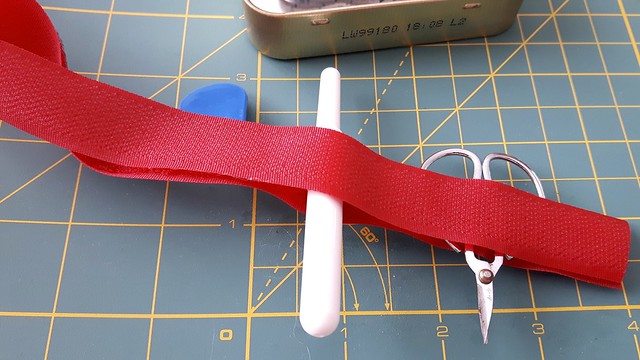
A little hot glue later …

Sewing Needle Case 15

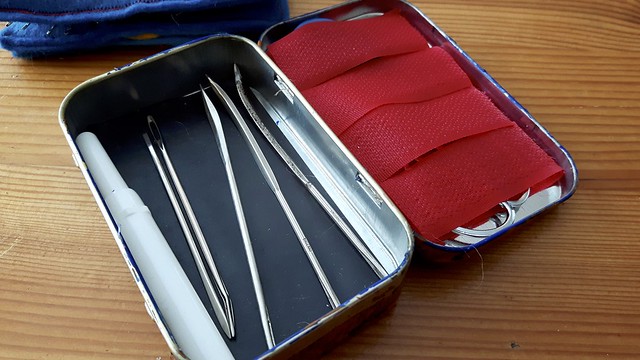
The velcro tabs allow me the flexibility of sticking whatever it is I want to the inside of the lid. It may not look pretty, but it works.

Sewing Needle Case 17

Traditional needle books are basically just felt books all sewn up – but that doesn’t prevent the needles from being stabby if you hold the book wrong. So that’s where the metal tin comes into play.

Sewing Needle Case 7

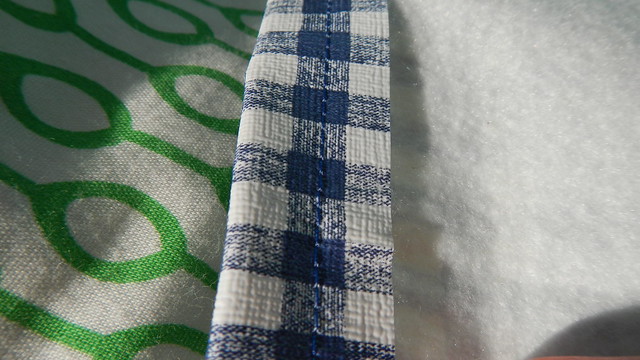
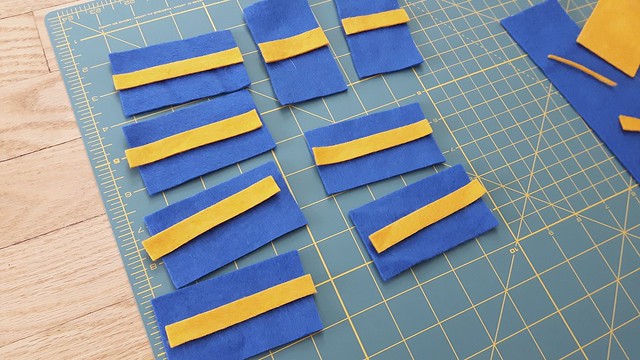
I cut out eight felt “pages” for my book the size of a business card (2″ x 3″). In the end I used only six of the eight because otherwise the lid wouldn’t have closed on the box.

Sewing Needle Case 8

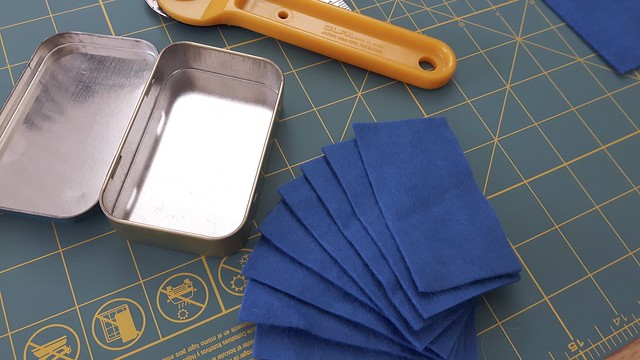
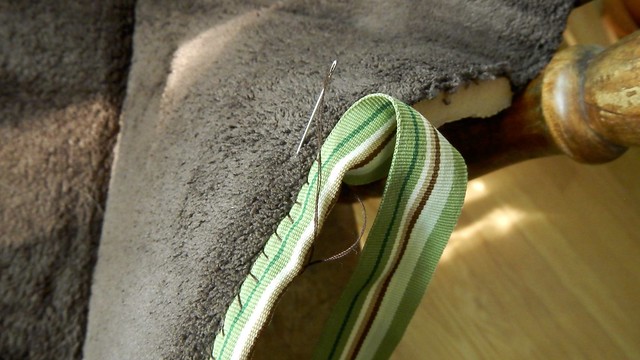
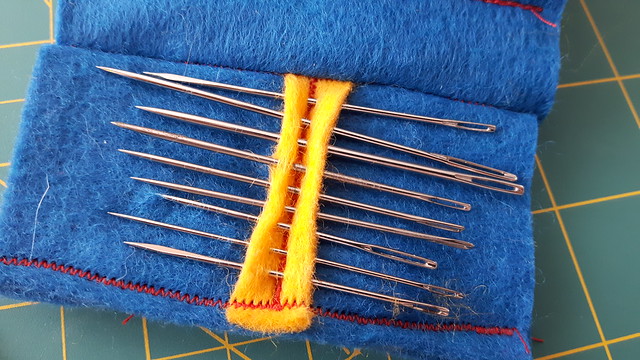
Then I cut out wee tabs to sew across each page to hold the needles. You can put the needles straight through the page if you like but it increases the risk of stabbiness.

Sewing Needle Case 9

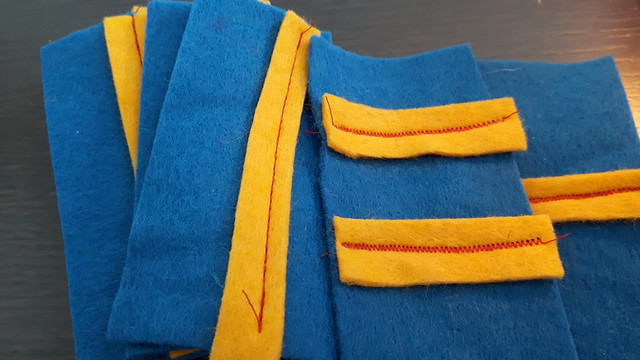
Then I sewed them on. The page with the two tabs is for my weird needles. Nobody ever said I could sew in the straight line.

Sewing Needle Case 20

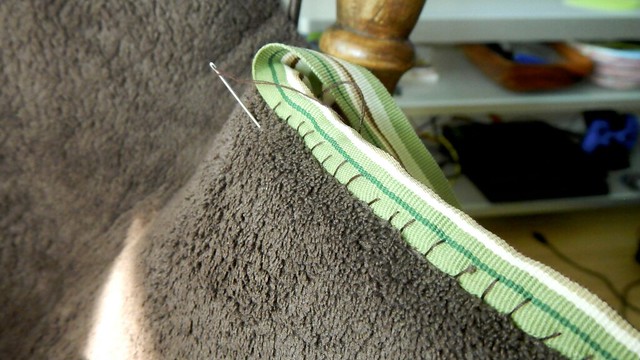
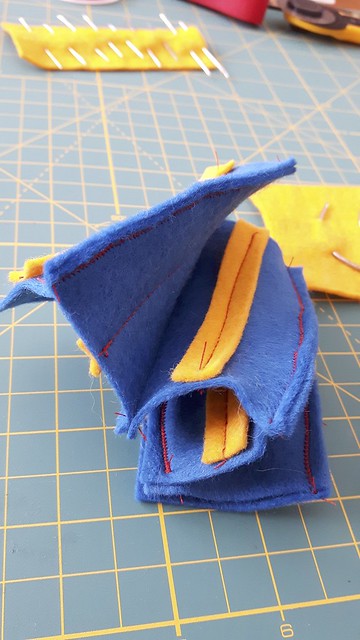
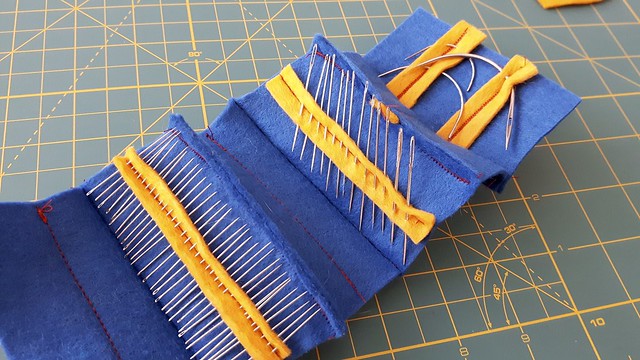
Then I sewed the pages together like an accordion, to make the pages sit flatter inside the tin than they would have if I’d sewn all one side like a book.

Sewing Needle Case 22

Then we stick in our needles, weird ones first:

Sewing Needle Case 23

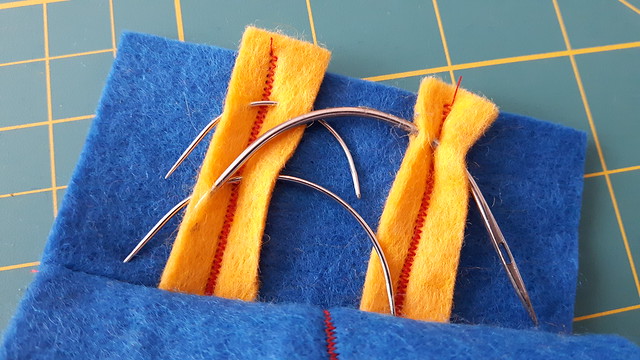
Then the big huge ones …

Sewing Needle Case 24

… then I had the monumental task of SORTING all the little ones I had. Ugh. This is super not easy when you have severe carpal tunnel …
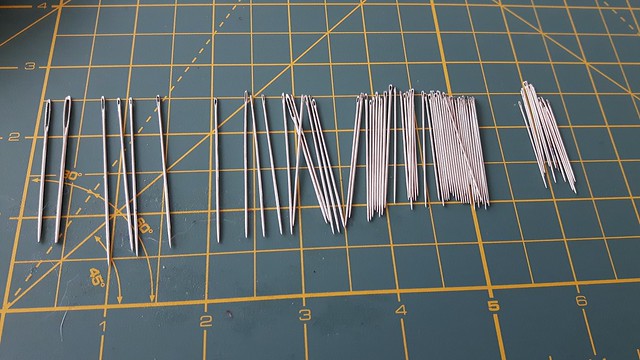
Sewing Needle Case 25

In they go.

Sewing Needle Case 26

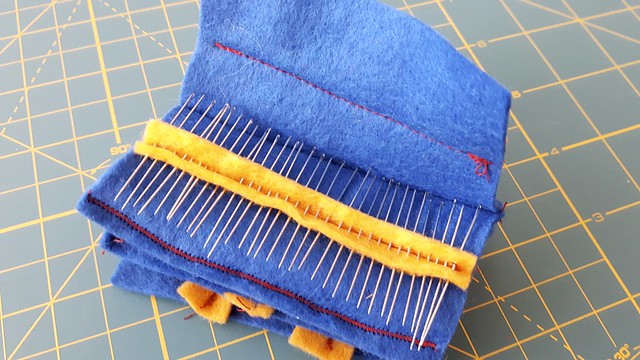
The finished “book,” from one side,

Sewing Needle Case 27and from the other.

Sewing Needle Case 28

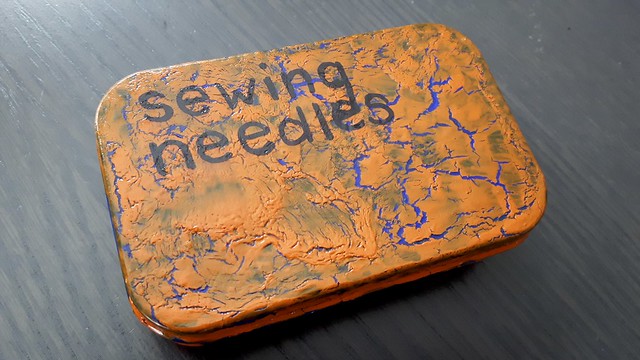
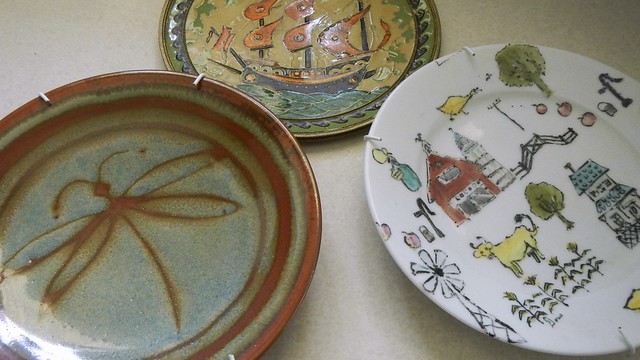
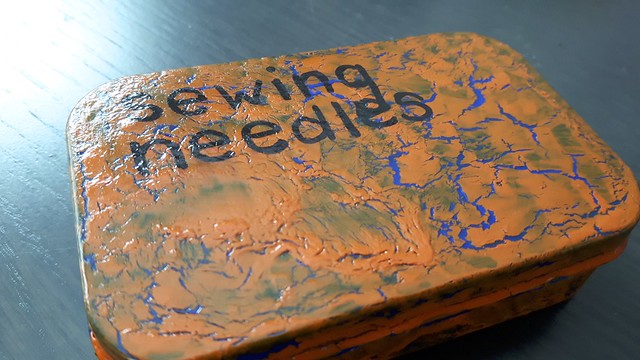
Then I needed to snazz up the outside of the tin. Something not super-cutesy, and something visible. Because my other issue with those wee plastic cases is I’m constantly losing them when they slide behind or underneath something else.

Sewing Needle Case 29

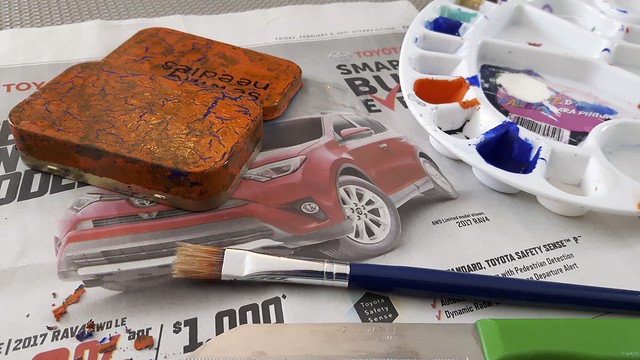
I had some fun with craft paint and crackle medium to come up with this effect. If you’ve never used crackle medium, give it a try. It’s fun.

Sewing Needle Case 30

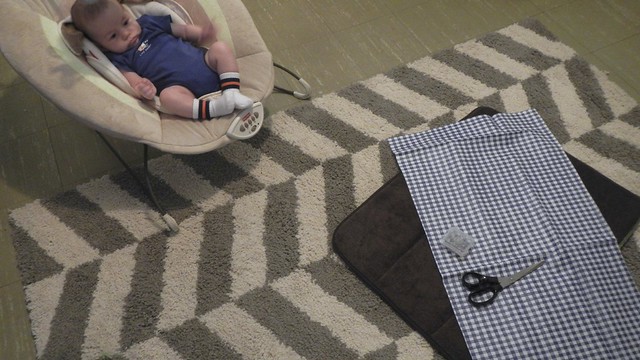
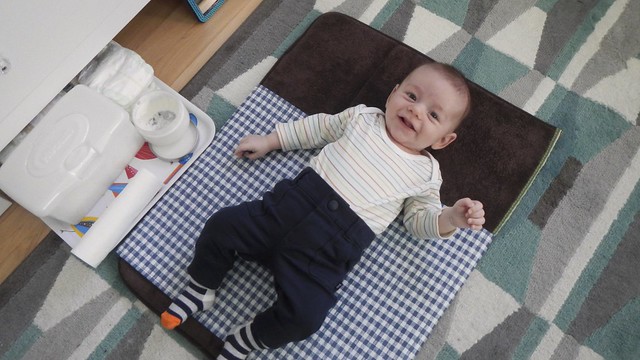
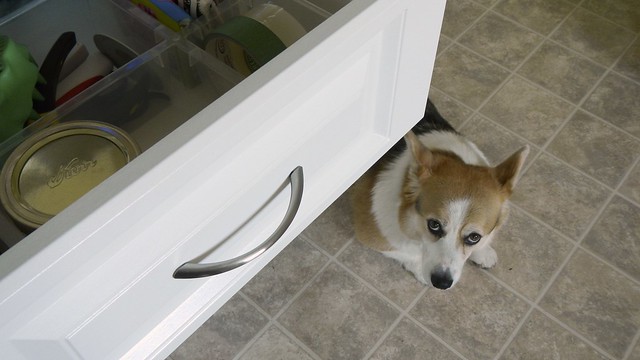
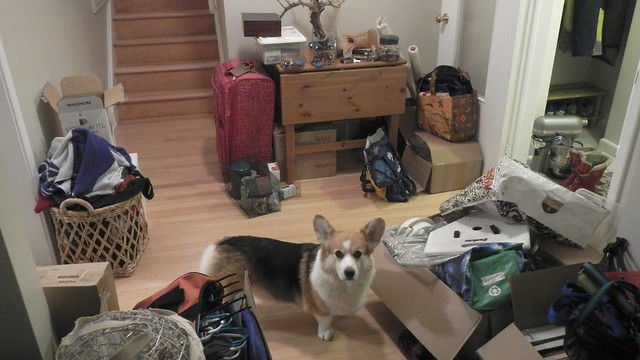
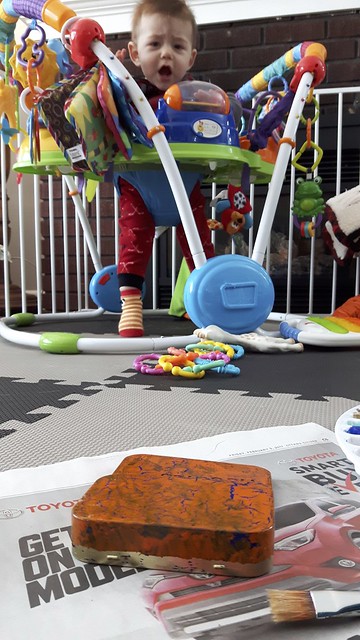
Here’s my uncooperative baby being a butt while I wait for this to dry.

Sewing Needle Case 32

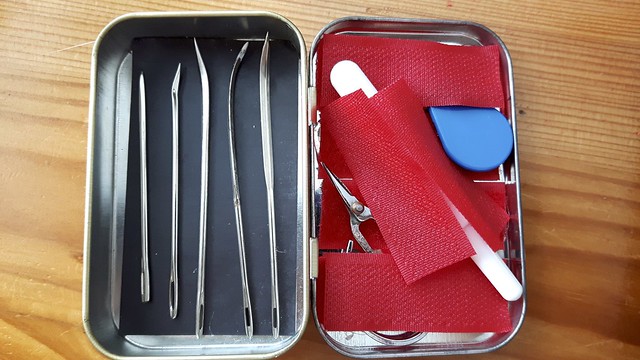
And the finished ensemble! I ended up putting the stitch ripper in the bottom where it fits perfectly. The measuring tape alas did not fit.

Sewing Needle Case 35

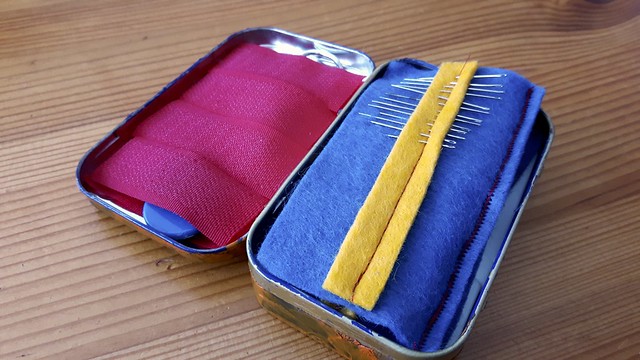
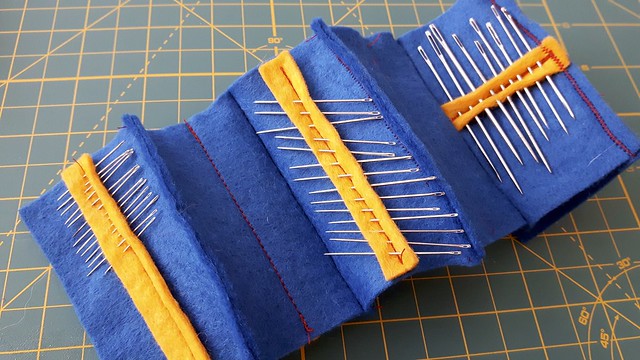
The pages pull out to reveal the needles you want.

Sewing Needle Case 36

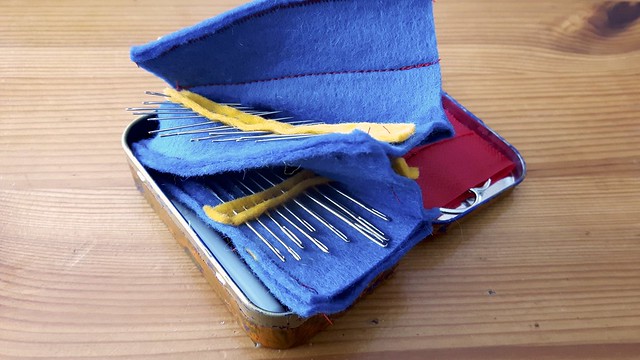
And at the bottom are all the big huge ones.

Sewing Needle Case 37

I’m trying to consolidate a lot of the crafty/sewy/knitty stuff that I have as I go through our basement (post on THAT to follow), so this is a good start. Convenient to use and definitely un-stabby.

Sewing Needle Case 40

Baby Hack

So Ali Does It has never been a parenting/mommy blog, and it’s not my intention to become one. For one thing, I know nothing about parenting. I am totally winging it. But I do have a kid now, and sometimes things come up that are useful for me because I have a kid, so you’ll see them on the blog. But I’ll try not to overload you too much with that stuff.

For various reasons, we don’t have a change table in LongJohn’s room and we change him on the floor. This was our setup for a while, with a portable change pad overtop a mattress pad, with a burp cloth added for softness. Ghetto, I know, but it worked. Except that when LongJohn peed on me (he is a boy after all), the pee would run up his back and into his hair and I didn’t like that overly much.

Change Mat Hack 9

I have this dog bed left over from back when we were doing Gren’s rehab training – it never really suited our purposes so we didn’t use it, and it was just kicking around. It has a nonskid backing and is nice and cushy without being too soft. Plus it washes well in the machine. Perfect.

Change Mat Hack 1

I cut it in half.

Change Mat Hack 2

And used some of my grosgrain ribbon to finish the raw edge on both sides.

Change Mat Hack 3

Don’t judge my stitchery. I’m not even sorry to be bad at sewing.

Change Mat Hack 5

Then I grabbed some vinyl leftover from way back when I made lunchbags (yeah, that was a long time ago). LongJohn helped me cut it out (you can see how long this project took me by how much he grows in the photos in this post).

Change Mat Hack 8

I hemmed along two sides of it, because LongJohn is really kicky and I didn’t want him to cut himself on the sharp edge.

Change Mat Hack 11

And I attached snaps to all four corners of the vinyl and then the underside of the mat.

Change Mat Hack 10

Then I snapped it on and here we go! The vinyl ends where the baby’s shoulders go, preventing pee from getting into the hair, which is key. The vinyl itself is easily wipeable, and unsnaps so you can put the mat in the washing machine. Because the snaps are on the underside of the mat, there’s no chance that tiny fingers can find them to undo them. The other mat I finished the edge and I used it as a playmat for LongJohn until he outgrew it.

Change Mat Hack 13

There’s LongJohn in situ to give you an idea of what it looks like in action. This was taken so long ago that now his legs extend far past the mat – but it still works great!

Change Mat Hack 14

Quick Hack: Your Trash, My Treasure

Platter Hack 4

I promise, I SWEAR, that I have a backlog of posts for you. The things are done, the photos are on my camera … it’s just a matter of me wrangling LongJohn into the basement and the garbage dump that is my office recently long enough for me to write them down. But I will not forsake you!

On a related note, another thing I did not forsake was this ugly platter thing that LongJohn and I picked up at a local church rummage sale for all of fifty cents. IT SPINS.

Platter Hack 1

I’ve long been looking for a better way to organize the area under my sink – which is very awkwardly situated in the corner of my kitchen. Believe me when I tell you that what you see here is actually way better than it was before when I was too pregnant to get down on my hands and knees and sort it all out.

Platter Hack 3

Emptied you can see that the space is vast but most of it is unusable because of the awkward angles and the fact that the cupboard door is quite narrow.

Platter Hack 5

That’s where a lazy susan comes in – TADA, my new platter! It can’t go in the centre here because anything on it would get knocked off on the pipes, but it WILL fit in the corner …

Platter Hack 7

… right here.

Platter Hack 6

Tada, all my stuff fits and I can just swivel the tray to grab whatever I need. BRILLIANT.

Platter Hack 8

Fast Tip Friday: The Junk Drawer

We all have one. And, despite my best efforts, when we moved into our new house, we created one almost immediately. I’m talking about a junk drawer: that mystery drawer in the kitchen or the front hall filled with everything that doesn’t have a place anywhere else in the house … and lots of other flotsam and jetsam representing peculiar elements of your household existence.

Junk Drawer 2

I’m not saying you can’t have a junk drawer, just that some of them could use a little help. Ours especially. So here are some tips for making your junk drawer into more than a repository for all those extra tiny packets of condiments you pick up when you get takeout.

Take out the trash.

I don’t even own this coffee maker anymore. Why do I need the manual? Recycle your old menus and pitch any weird pieces of garbage that end up the drawer.

Junk Drawer 5

Everything in its place.

If you look at your drawer you’ll immediately see a bunch of stuff that can actually go elsewhere in the house. I now have a reusable coffee filter so those paper ones can go into my craft supplies in the basement. The Command Strip hooks can go with our other hardware, also in the basement.

Junk Drawer 1

Same with these batteries, this Allan key, and these pieces of lamp hardware.

Junk Drawer 6

These plates need to go up on the walls in the kitchen, and they’re not going to do that just sitting in the drawer. If I put them out on the counter they will annoy me enough to put them up. Whenever I’ve been putting off dealing with something, I always place it exactly in the way so I will have to do something about it sooner rather than later.

Junk Drawer 4

Tidy spaces.

When you’re dedicating a space to all sorts of things with different purposes, it helps if you don’t just chuck them all back in the drawer willy-nilly. Then you get confusion, like when your corgi thinks you’re still keeping his pig ears in that drawer.

Junk Drawer 8

Compartmentalize! Everything in its place on a small scale means that you can find everything again very easily.

Junk Drawer 7

And you don’t have to buy specialty drawer dividers, either. This yogurt container is ideal for storing the tiny but essential components of this drawer.

Junk Drawer 9

That’s all there is to it – have a great weekend!

Ocean Room: Complete

This, along with the new fuse box and the stairs, was on my to-do list to complete in the first week of maternity leave. Since I last posted about the ocean room, we’d been adding things bit by bit: a mattress, bedding, a dresser … more onesies than any one baby really needs … you name it. But it was missing the final touches, and most of those were either hand-made by us or by one of our many talented and delightful friends and family members.

Ocean Room Complete 2

I went a bit overboard with the Silhouette Cameo to print these out in white adhesive vinyl.

Ocean Room Complete 1

This amazing crocheted jellyfish mobile was a gift from the highly talented Fussellette.

Ocean Room Complete 4

She also MADE (MADE!) this amazing ocean-themed blanket. I still can’t even deal with how amazing it is.

Ocean Room Complete 5

These jellyfish crib sheets were whipped up by Cait’s ever-talented mom.

Ocean Room Complete 6

Rusty made sure that baby wouldn’t miss out on a very first baseball glove, and it gets pride of place on an octopus hook.

Ocean Room Complete 7

Even Trav contributed a wee piece of art.

Ocean Room Complete 11

Mrs. Nice found the inspiration for this on Pinterest, and made it for us MONTHS ago. I’m so glad we could finally put it up.

Ocean Room Complete 13

Even the Pie’s favourite animal the anglerfish gets a spot in the baby’s room. Guarding the deep sea vents. Get it? VENTS.

Ocean Room Complete 14

Even this rocking chair is handmade, by either my great-great grandfather or my great-great uncle.

Ocean Room Complete 19

You like the ship? Again, I went crazy with the Silhouette. The knobs on the dresser are supposed to look like the sorts of things you pick up on the beach – most of them are from Lee Valley, actually, and others my mother has given me over the years.

Ocean Room Complete 15

Everything else was kind of stuff we already had from our oceanic travels.

Ocean Room Complete 16

So it really wasn’t hard to stick with a theme.

Ocean Room Complete 20

Now we just need a baby to come and live here (and you never know: by the time you read this, there might be one!).

Ocean Room Complete 12

Now We Can Have Nice Things?

China Cabinet 14

A couple weeks ago, we did a very old-person kind of thing: we picked up Trav and took him to Almonte for brunch at Heirloom (would highly recommend). Then we toodled across the street to the Almonte Antique Market and BOUGHT A CHINA CABINET. Because apparently this is what grown-ups do on weekends. We managed to get a remarkably fantastic deal on this puppy, no thanks in small part to the fact that Trav’s mother is one of the vendors at the market and hooked us up big time. And then we got unreasonably excited about it. Because we’ve been looking for a china cabinet for years (were we always old?).

China Cabinet 2

Seriously. Years. When we moved in together about ten years ago, at the tender age of 24, each one of us came with our own complete set of china and a silver tea set. HOW WEIRD IS THAT? In our first apartment there was a built-in display cabinet where we had it all laid out, but when we moved to Newfoundland, it all went into storage, where it has stayed for the past eight or so years.

China Cabinet 3

After giving the cabinet a thorough cleaning, I then unpacked all our boxes, starting with the silver. The definite plus of this was getting to see it all after eight years. The definite downside was that it hadn’t been polished in eight years …

China Cabinet 5

… several hours later, the tea sets were looking sparkly and badass on the bottom shelf (they’re on the bottom because I figure it’s harder for small children to break silverware – but I’m sure one of them will prove me wrong).

China Cabinet 13

China Cabinet 12

Then I started unpacking the china. And then I remembered that not only did *I* have a set and *the Pie* had a set, but that we had also inherited YET ANOTHER set from my grandmother. So we actually have three sets of china. Let that be a lesson to you folks: if you leave china alone for eight years it multiplies.

China Cabinet 10
His …
China Cabinet 9
… hers …
China Cabinet 15
… ours?

I’m still moving things around in there as the mood strikes. And once we find a sideboard I’ll probably move some of the less showy pieces into that instead. But for now we’re really happy with it!

China Cabinet 7

My Outdoor To-Do List

We were almost out from under all our snow, and then this happened.

Outdoor To-Do List 1

And we expect more in the next day or so. So very not cool, April.

But I can now actually traverse my own yard for the first time since we bought the house, which is exciting. And in doing so, I’ve realized there are so many things that need doing. You know I love my to-do lists (where I rarely complete everything on them), so here it is for the outdoors:

That ugly hedge outside my office window (yay basement office) I’m pretty sure is the reason that my office windowsill was lined with the corpses of ants when we moved in. Plus if you’re trying to get into the garage while there’s a car in that part of the driveway, it will rip your face off. And I’m not a fan of anemic evergreen hedges threatening to grow into my foundations. That sucker is coming out.

Outdoor To-Do List 2

The driveway is rather narrow, and it looks like we’re not the only residents or visitors to have to drive over parts of the lawn on occasion in order to fit a variety of cars around the curve. When we eventually re-do the driveway we’ll widen it, but for now I think I’ll put down some pavers in these bare patches so they don’t look so terrible.

Outdoor To-Do List 3

This swing hangs in the front yard, a depressing, raggedy reminder of spring and childhood safety issues. I’ve had to stare at it swinging in the blizzards all winter and I want to murder it a little. As soon as the ground is un-soggy enough to support a ladder the Pie is cutting it down and burning it.

Outdoor To-Do List 4

Also once the ground is unsoggy we will have to do some serious raking. The previous owners weren’t so fond of landscaping or lawn maintenance and so after the last open house they clearly just left the lawn to serve as a collection spot for EVERY SINGLE BRANCH IN THE NEIGHBOURHOOD.

Outdoor To-Do List 5

Our back fence. One thing of especial note: they planted a tree (and a rather expensive one at that) directly in front of the gate. Why? I have no idea.

Outdoor To-Do List 6

The fence is also rotten and wobbly and is also made up of like three different types of fencing. And an absolutely overgrown cedar hedge.

Outdoor To-Do List 7

This tree is dead. Why nobody cut it down years ago I have no idea. But I own a chainsaw. So you know what I’m planning.

Outdoor To-Do List 8

Through the blocked gate and into the backyard. Look at my air conditioner. Trust me, the cover actually improves its rusted-out appearance. It looks like it was installed before the turn of the century. We don’t even know if it works. I guess we’re going to find out soon enough.

Outdoor To-Do List 9

Oh look, it’s that hedge again. It’s like five feet wide.

Outdoor To-Do List 10

And then gets another four feet taller towards the back of the yard. It has successfully blocked all the wind from the other side into the backyard such that the parging and brickwork on this side of our house has never really dried out and is crumbling. When the hedge comes down we’ll have much better airflow and a yard that is about five feet wider than it was before.

Outdoor To-Do List 11

We’ll also replace the fence all around with something solid and standard. This other gate doesn’t even latch because the whole thing is falling down.

Outdoor To-Do List 17

There was a pergola in the backyard that we did not purchase, so it left. But it left behind these exciting steel spikes that are embedded in the ground at the perfect height to trip you up and then poke your eye out when you fall on another one.

Outdoor To-Do List 12

Especially this one that is at the bottom of the steps. I look forward to severely injuring myself on this one.

Outdoor To-Do List 14

Remnants of pergola town. I’m going to pry this random square up and re-seed the whole lawn.

Outdoor To-Do List 13

The tiny deck off the backdoor has no railings down the steps and also hovers over a retaining wall with a two-foot drop, so it’s only a matter of time before someone falls off it. Probably me. Also the wood is rotten and needs replacing.

Outdoor To-Do List 15

Oh and look, another horrid hedge. This one is being held up by that odd assortment of concrete and wood. And it’s definitely making forays into my foundation. Also coming out ASAP.

Outdoor To-Do List 16

I don’t even want to try to talk about my garage. Waiting for a day when it’s warm enough I can work in there with the door open. Which, at the rate this Canadian spring is going, might not be for some time …

Outdoor To-Do List 18

Mind Blown: Cups and Saucers

Cups & Saucers 1

Ever so slowly the Pie and I are beginning to tackle parts of the house where when we moved in we found a temporary solution and left it at that for the nonce. One of these areas is the kitchen. Every week I try to tackle one cupboard or drawer to make it make a bit more sense. This week I was browsing through one of the million or so emails that Martha Stewart sends me (because, y’know, we’re like, besties), and I saw something that totally blew my mind. This was the current configuration of my mug cupboard, with my Denby teacups stacked haphazardly on top of each other, tipping every which way, and my saucers stored in a totally different cupboard, with my dessert plates.

Cups & Saucers 2

Turns out, that’s crazy pants. If you store your cups and saucers together, in fact, if you store them alternating cup and saucer, stacked on top of each other, you get a more stable stack, and a much more streamlined tea-making process, as you can just grab however many sets of cup and saucer that you need at any given time.

Cups & Saucers 3

Plus the stack is much more stable and damage to your more delicate cups is less likely to happen. My Denby ones will sustain a nuclear blast but if I HAD tiny delicate ones I’d do it the same way.

Cups & Saucers 4

Temporary Hideaway

Temporary Hideaway 6

When we bought the house we knew that the sliding closet doors in the master bedroom were totally broken.

Home to Bel-Air First Night 22

So as soon as we took possession we ripped them out. But now we’re looking at the contents of our closet (or the quarter-unpacked contents) on a daily basis. While we have plans to eventually install a set of bifold doors or something similar, it’s not high on our list of priorities.

Temporary Hideaway 2

I’m happy to see them gone. With such a narrow door frame having half of it blocked by a giant door would have made the closet so hard to access. It’s already kind of ridiculous just in the layout as it is.

Temporary Hideaway 3

So in the interim, I’ve got our old pressure curtain rod from the bathroom at the Tower and the curtain from our old office. No need for anything go to waste. It had a bit of rust on it from the shower (because it was cheap) so I just rubbed it with some CLR and we were grand!

Temporary Hideaway 1

A quick fix to hide our messiness, and just a quick job to hem the darned things (when I get around to it). TADA!

Temporary Hideaway 4

Fast Tip Friday: One Room at a Time

I promise we’ll be returning to regularly scheduled programming soon. I’m sure that you’re getting a little tired of seeing my messy house so I’m going to try to change things up a little bit. But in order to do that I need to do things like this. My entranceway for the past week has been the place where we drop all the random bags and boxes we’re still bringing over from the Tower, and we haven’t really had much opportunity to deal with it. So when you walk into the house your first impression is one of utter chaos.

DSCN9084

Organizing your home can seem overwhelming at first, especially if like me you have just moved and you’re dealing with a whole lot of extra space and no idea what to do with it all. It’s hard to know where to start, so it’s easy to get distracted: you move something into another room, realize that something in that room needs to be organized/put away/cleaned/moved elsewhere, and then it just snowballs and after a few hours you’re exhausted and you realize you’ve accomplished NOTHING.

DSCN9086
For instance, there is no need for a large stand mixer to sit in my front hall.

So my trick is to take it one room at a time. First, you take the things that don’t belong in that room and put them elsewhere. Not just any elsewhere, mind you: put them in the room where they belong, and, if it’s something you can do quickly, put them away where they should go. If it’s not a quick job, just stash the whatever-it-is in the room where it should be and go back to the room you’re working on. You can deal with putting the whatever-it-is away properly when you finish what you’re doing and move to a new room.

Before you know it, the room will be empty of all that does not belong and you can now find space for all the things that DO belong.

DSCN9088

This is not the final form for this entrance way by any means: this is our old kitchen table and I don’t know what I’m going to do with any of these things. But now the space is clear and looks a little bit more like an entranceway should. It’s still a work in progress, but now that I’ve done this room I can move on to another, and then another, until finally the whole place is done. One down, several more to go …

DSCN9090