Fast Tip Friday: Fancy Dip, Freaking Fast!

Garlic Herb Dip 4

You want the best dip ever, and you want to make it fast? Well have I got a solution for you! Granted, its speed is based on the fact that you have a herb garden handy, as well as some frozen pucks of puréed garlic. But if you have been visiting Ali Does It for a while then I expect that you would have both of those things already.

Garlic Herb Dip 1

So go out and grab a bunch of your herbs. Like, a BUNCH. I have some basil, parsley, lemon thyme, sage, and a million chives and garlic chives. Mince those into a bowl with your thawed garlic puck, and add a little salt and pepper to taste. Tip in a 500mL container of plain Greek Yogurt. Stir. That’s it!

Garlic Herb Dip 2

Guacamole Hummus

Guacamole Hummus 9

I made this Martha Stewart dip for my parents’ 40th wedding anniversary party and it was a lovely and cool addition to the nibblies section. It’s also got all the best parts of guacamole and of hummus without the extra effort of the hummus and the non-storability of the guacamole as separate entities. I made quite a few Martha Stewart recipes for this party, as Ms. Martha sure knows how to throw a shindig. It goes well with tortilla chips or any flatbread and lasts a couple days wrapped up in the fridge.

Start by thoroughly washing a large bunch of cilantro. And by washing I mean fill your sink with a few inches of water, plop the bunch in, and swish the stalks around with more water pounding down on top.

Guacamole Hummus 2

Because cilantro is filthy. This is the sink after I pulled it out, shook it off, and towel dried it. Chop the leaves off and shove them into the bowl of your food processor.

Guacamole Hummus 3

Halve as well two to three ripe avocados (the original recipe called for only one but that didn’t seem like enough). Chuck those in the food processor as well.

Guacamole Hummus 4

Then drain a 15oz can of chick peas and rinse them well. Pour those into the food processor too. I also added in one of my pucks of roasted garlic purée.

Guacamole Hummus 5

Start the machine running and chopping all your dippy goodness up. While it’s going, drizzle in some olive oil and some water until it’s the smooth consistency that you like. A couple tablespoons of each should suffice. Tip in a tablespoon or two of fresh lemon juice too.

Guacamole Hummus 6

Season it to taste with salt and pepper and serve with lemon wedges and all sorts of scoopable tortilla chips and flatbreads.

Guacamole Hummus 7

Pureed Pucks of Roasted Garlic

Garlic Pucks 8

I was at the grocery store recently and I found a huge bag of garlic, 18 heads of it in total, for a whopping $2.49! I quickly nabbed a bag and surreptitiously shoved it through the scanner at the cash in the hopes that it wasn’t a pricing error. So now I had 18 heads of garlic to deal with. I of course roasted them all. If you’ve never done it, check out my instructions here. Now, roasting 18 heads of garlic means that your eyes are watering and you will never get the smell of roasted garlic out of the house, but it’s a worthy sacrifice.

Garlic Pucks 2

I let it cool and then carefully popped each gloriously caramelized clove of sweet roasted garlicky goodness out of the head and into my food processor. I saved one head for a soup I was making, but there are 17 heads in there.

Garlic Pucks 4

Then I gave it a whaz. Hello, gorgeous.

Garlic Pucks 5

Then I sprayed a mini muffin tin with olive oil and shoved my new garlic paste into the cups. There are only twelve cups in this tin so it’s like concentrated garlic goodness: each one contains almost one and a half heads of roasted garlic.

Garlic Pucks 6

Pop that in the freezer overnight, then store the frozen lovely pucks in an airtight bag in the freezer and use as needed in soups and sauces and whatever else you want. When it comes to roasted garlic, the sky is the limit.

Garlic Pucks 7

Purple Rice and Beef-ish Stew

Purple Stew 22

I know what you’re thinking: holy moly this woman makes a lot of beef stew. You don’t know the half of it. But each one is different, because I make them up as I go along. So I hope in posting as many of them as occur to me to photograph, you can draw some inspiration for flavour combinations!

Purple Stew 20

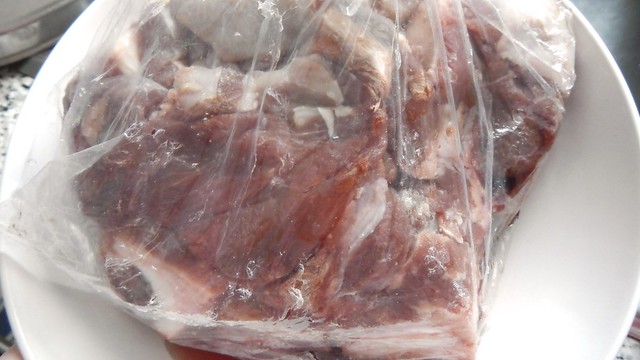
It started with this package of frozen stewing meat I inherited from Atlas’ freezer. It likely came from her parents’ organic hobby farm in BC, or from one of the people with whom her dad has a trade deal. And, given the nature of some of the other things I’ve inherited from Atlas, it could very well be goat, and not beef. In fact it’s probably goat. So I tried to adjust the spices such that it would work for goat, or beef. But what do I know.

Purple Stew 7

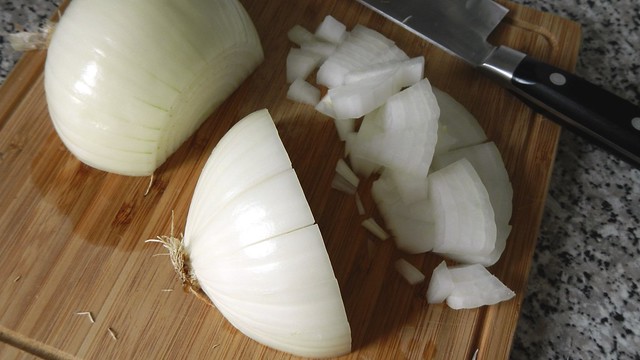
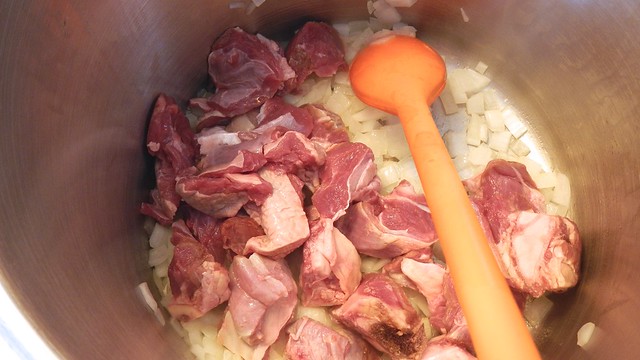
I grabbed my big stock pot and chopped up an onion, which I chucked in the pot with some butter and olive oil and sautéed until it was soft and smelled amazing.

Purple Stew 1

Then I pitched in the beef/goat/mystery meat, together with some salt and pepper, and cooked that until it was browned on all the edges.

Purple Stew 8

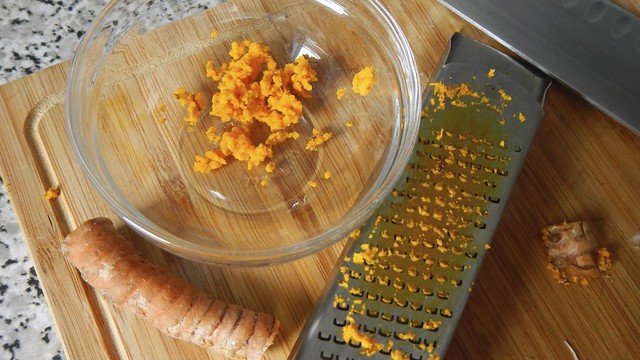
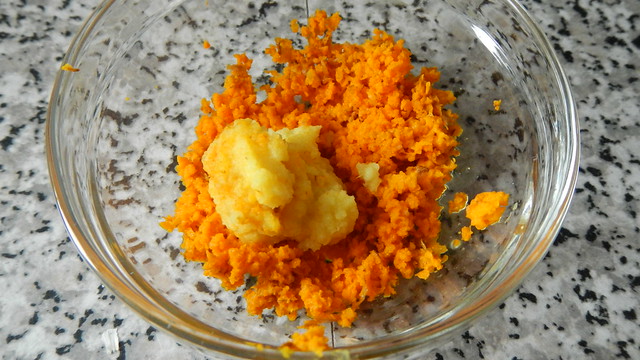
While that was going on I prepped everything else. Seeing as I had some on hand from my recent Krupnikas-fest, I decided to grate some fresh turmeric into the mix, to give the broth a nice earth-flavour. If you like the earth flavour, then you could probably add some fresh beets to the stew. They’ll definitely give the stew some colour.

Purple Stew 2

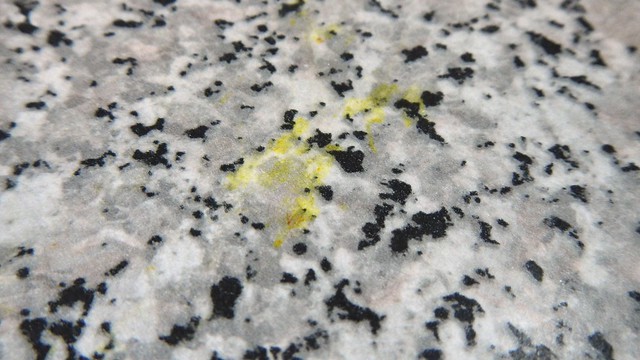
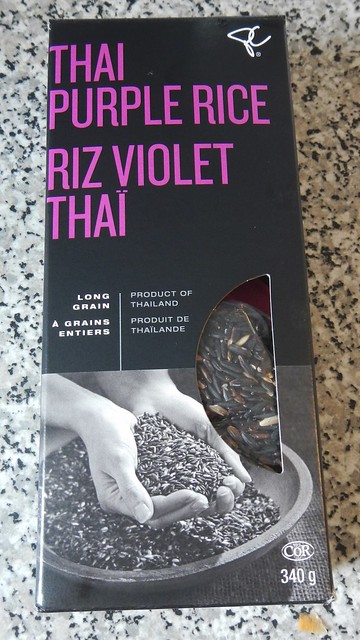
In fact, the turmeric would, under normal circumstances, have dyed my stew a lovely yellow colour, save that I’m putting purple rice in it, and purple rice dyes everything, too. The turmeric did, however, dye my fingers yellow.

Purple Stew 3

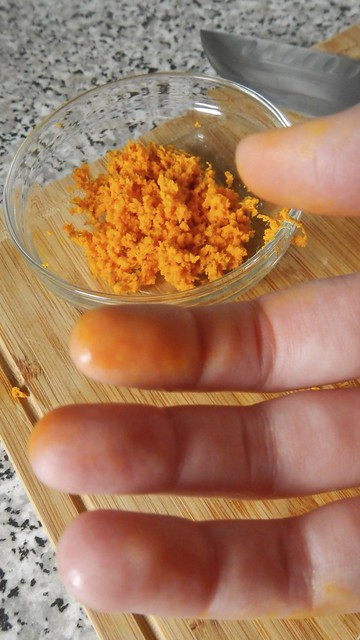
And some of the counter. I miss our all-black counter from Elizabeth.

Purple Stew 6

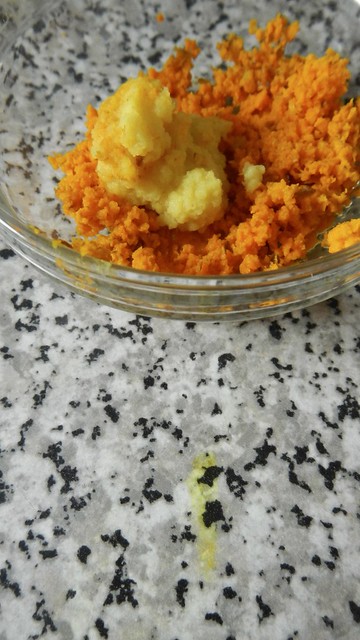
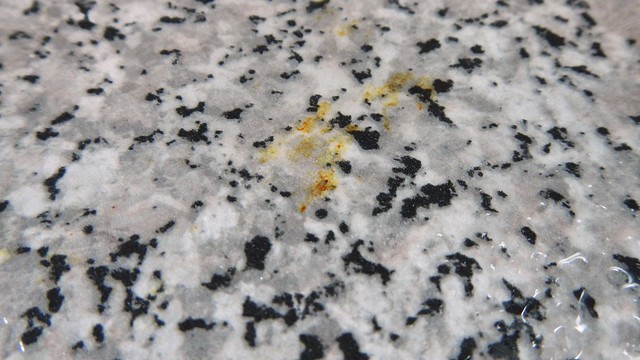
Fact, though: if you spray bleach on a turmeric stain, like this one:

Purple Stew 16

It will turn from yellow to orange, and then just wipe away.

Purple Stew 17

I added some freshly grated ginger to the pile as well, because I had a whole bunch of it in the fridge.

Purple Stew 5

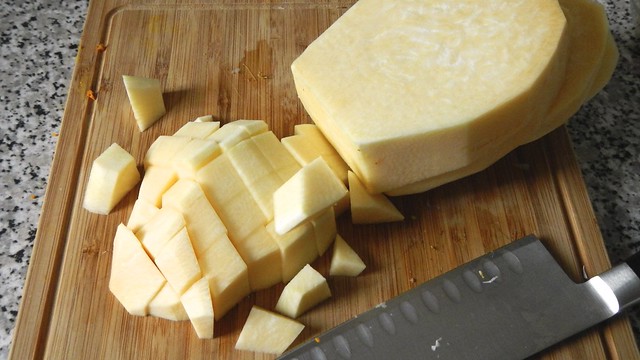
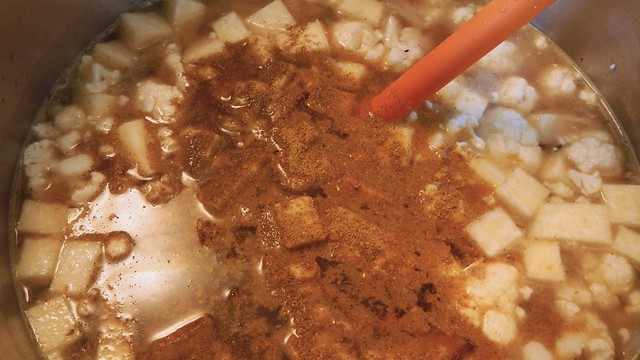
Then I chopped up a medium-sized rutabaga. While not as absorbent as potatoes in stew, rutabagas and turnips hold their shape well while also providing some of the mushiness you expect from other root vegetables and tubers.

Purple Stew 4

And a giant (GIANT) carrot.

Purple Stew 9
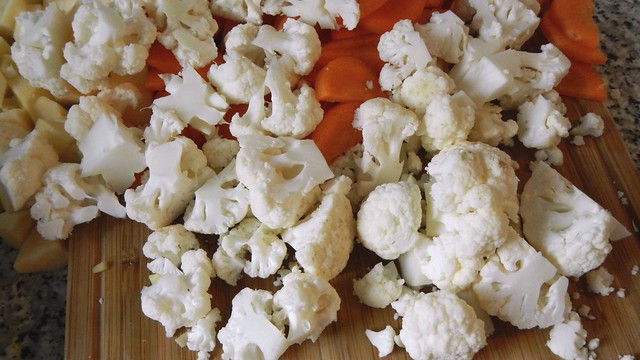
And some cauliflower.

Purple Stew 10

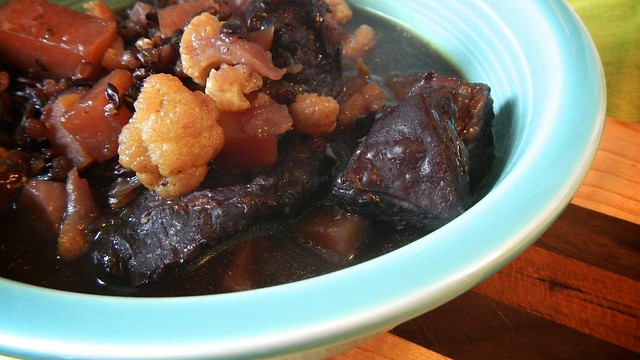
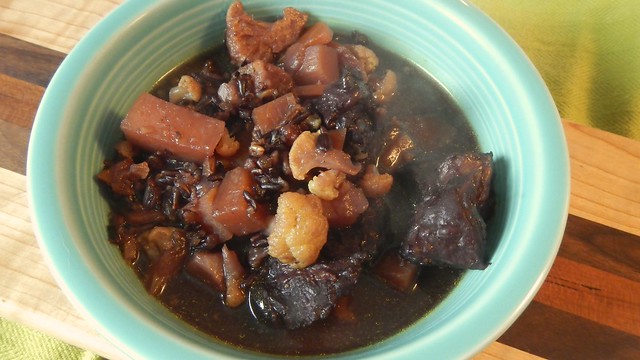
And my purple rice. It’s kind of obscene how purple it makes everything else, but I love it.

Purple Stew 11

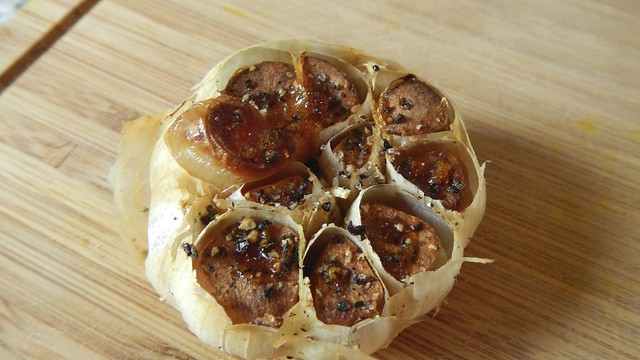
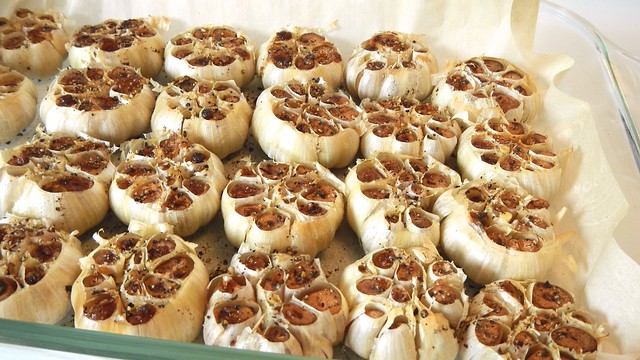
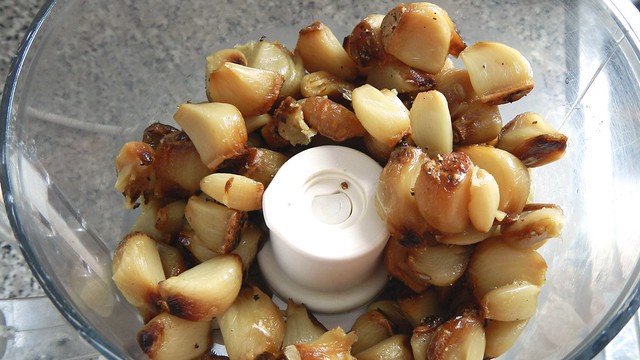
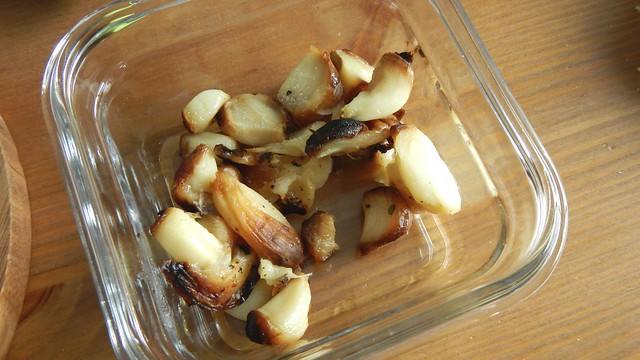
And a head of roasted garlic. Because everything is better with garlic. I popped the cloves out and roughly chopped them.

Purple Stew 18

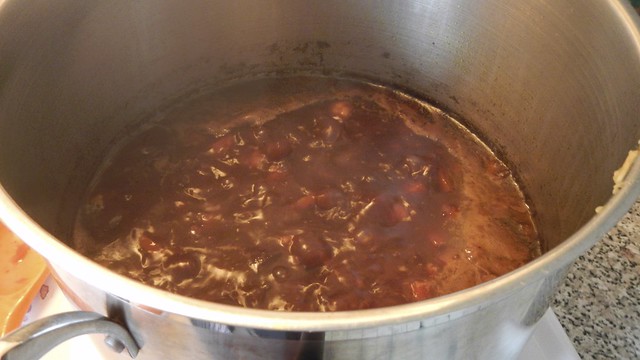
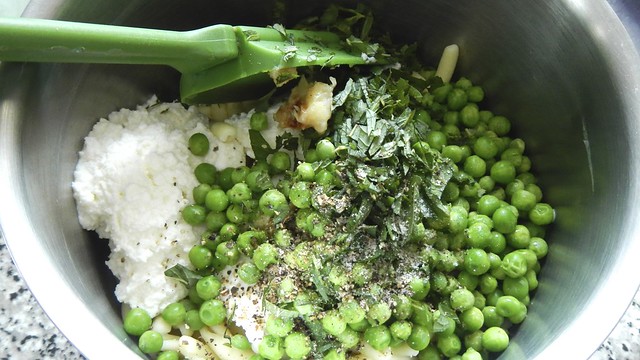
I chucked all that in the pot, together with some concentrated vegetable and beef broth and a whole lot of water. Remember when you’re putting uncooked rice or pasta into a soup or stew to add extra water as it will be absorbed.

Purple Stew 12

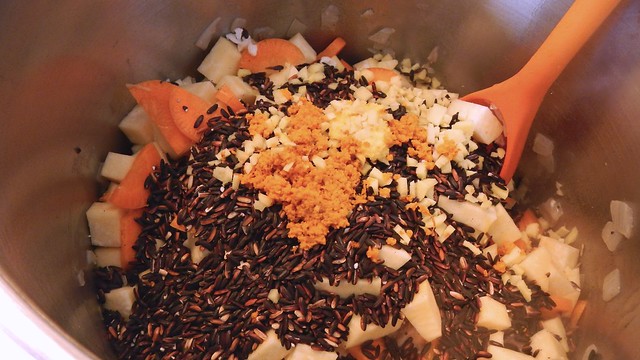
I also sprinkled in some ground cumin and yellow curry powder.

Purple Stew 13

Bring that whole thing to simmer for about an hour, until the meat is cooked through and the vegetables are squishable with a spoon.

Purple Stew 19

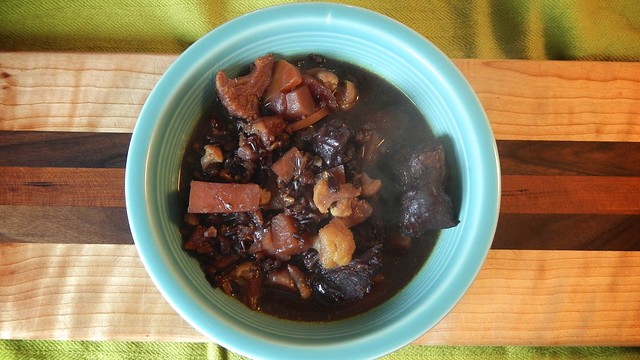
Serve hot (because it’s a stew, silly). Sooooo satisfying and purple!

Purple Stew 23

Creamy Ricotta, Mint, and Garlic Pasta with Peas: In the Woods

Ricotta Pasta and Garlic Bread in the Woods 25

This particular dish, from The Camping Cookbook, is supposed to be served hot, but I thought it would make a nice cold lunch for us to eat after setting up camp on the first day.  So I ended up making all of this ahead of time, at home (which means that technically I didn’t make it in the woods).

Ricotta Pasta and Garlic Bread in the Woods 1

Start by boiling up about 150g of your favourite short pasta. The original recipe calls for ziti, but I love fusili so that’s what I used. Cook it according to the package directions, and drain it and return it to the pot when it’s ready.

Ricotta Pasta and Garlic Bread in the Woods 9

While that’s cooking, cut yourself about 1 tablespoon fresh mint and chop that up.

Ricotta Pasta and Garlic Bread in the Woods 8

Thaw about 1/2 cup frozen peas (or fresh, if you’ve got ’em). I added this element to the recipe for the sake of vitamins. Don’t want to get scurvy while camping.

Ricotta Pasta and Garlic Bread in the Woods 4

Mash up as well some roasted garlic (I roasted a few heads of this the week before and it pretty much went into everything).

Ricotta Pasta and Garlic Bread in the Woods 3

While the cooked pasta is still hot, stir in 1/3 cup ricotta cheese and 1/3 cup heavy cream (I wimped out here and used half and half).

Ricotta Pasta and Garlic Bread in the Woods 10

Add in your mint, peas, and garlic and season with salt and pepper to taste.

Ricotta Pasta and Garlic Bread in the Woods 11

Ricotta Pasta and Garlic Bread in the Woods 15

We served this cold with a nice toasted garlic bread I prepared in advance: slice up a small baguette so that you have individual pieces but they’re still stuck together at the bottom.

Ricotta Pasta and Garlic Bread in the Woods 16

Chop up some fresh herbs: parsley, basil, and oregano (dried is also fine).

Ricotta Pasta and Garlic Bread in the Woods 17

Mush up some roasted garlic.

Ricotta Pasta and Garlic Bread in the Woods 18

Smush those all together with some pepper.

Ricotta Pasta and Garlic Bread in the Woods 19

Add softened (this is too softened) butter and mix.

Ricotta Pasta and Garlic Bread in the Woods 20

Insert the butter between the slices and wrap in tin foil until you’re ready to eat.

Ricotta Pasta and Garlic Bread in the Woods 21

You can toast the bread directly on your camp stove, or you can put it in an Outback Oven, or you can roast it directly over the campfire.

Ricotta Pasta and Garlic Bread in the Woods 23

Either way, it’s excellent.

Ricotta Pasta and Garlic Bread in the Woods 24

Creamy Pasta with Roasted Squash and Sauteed Mushrooms

Creamy Squash Pasta 20

I think this dish will make your Friday night, especially if it’s one of those nippy nights that is a portent of cold evenings to come.  This will serve a family of six happily.  Here’s how I did it, but feel free to add your own flair.

Creamy Squash Pasta 1

To begin with, roast 2 heads garlic and half an orange kabocha squash with olive oil and salt and pepper at 450°F for about 40 minutes.

Creamy Squash Pasta 2

While that’s on the go, dice up 2 small onions, and slice up a whole package of white mushrooms.

Creamy Squash Pasta 3

And grate a 150g package of asiago cheese.

Creamy Squash Pasta 4

When the squash is roasted, chop it up into little cubes after peeling off the skin.

Creamy Squash Pasta 5

I popped the roasted garlic cloves out of the head and sliced them up as best I could.

Creamy Squash Pasta 6

Here I defrosted about 2/3 cup of the frozen pesto we have on hand (if you grow a lot of basil, you make a lot of pesto).

Creamy Squash Pasta 8

Now, this is not a sauce you want to make well in advance.  I suggest making it right before you serve it and your pasta water is already on the boil.

In a skillet, melt a knob of butter with a dollop of olive oil over medium high heat.

Creamy Squash Pasta 9

Add in your mushrooms and sautée them until they’re browned.

Creamy Squash Pasta 10

Chuck those mushrooms in a bowl for now.

Creamy Squash Pasta 11

Add your diced onions to the skillet and cook until softened.  Then you can chuck the mushrooms back in, together with your garlic and roasted squash.

Creamy Squash Pasta 12

Give that a stir.  Already it smells amazing.

Creamy Squash Pasta 13

Then chuck in your pesto, as well as 4oz (half a 250g package) plain cream cheese.  Stir that until it’s all melted and lovely.

Creamy Squash Pasta 14

Pour in about 3/4 cup whipping cream, as well as 1 cup milk (or any combination of dairy you wish — that was just the amount of cream I had to get rid of).

Creamy Squash Pasta 15

Add the cheese and stir until melted and incorporated.

Creamy Squash Pasta 16

Toss with your cooked pasta and serve immediately.

Creamy Squash Pasta 18

You can garnish it with whatever you wish! Even nothing!

Creamy Squash Pasta 19

Wingin’ It Wednesday: Butternut Squash Soup

Butternut Squash Soup 17

I had a craving for a roasted vegetable soup, and my parents picked up a variety of squashes from the local farmer’s market, so I grabbed the nearest butternut and I got started.  I love any excuse to roast vegetables, so preheat your oven to 450°F and get some pans ready.

I sliced up a butternut squash and set it on a baking sheet.  Actually, it took two baking sheets (butternut squashes have a lot on them).  I also cut the tops off 4 heads garlic and chucked them on a sheet as well.

Butternut Squash Soup 1

I had about 4 or 5 parsnips that I scrubbed and cut up as well to be roasted. They’ll add sweetness to the mix. This is gonna be a sweet soup.

Butternut Squash Soup 2

Drizzle all yo’ roasty goodness with olive oil and salt and pepper and roast everything for about 45 minutes, or until they’re nice and crusty on the outside and you can jab a fork in them easily.

Butternut Squash Soup 7

The parsnips should be squishy in their innards as well.

Butternut Squash Soup 8

Told you there was a lot to a butternut squash.

Butternut Squash Soup 9

You’re going to want to wait until the garlic has cooled before you pop the sticky cloves out with your fingers.

Butternut Squash Soup 6

While that’s roasting or cooling or whatever, chop up about 2 large onions and plop them in a frying pan with some butter and some olive oil and cook them on medium low until they start to caramelize.  This will make them lovely and sweet.

Butternut Squash Soup 3

Butternut Squash Soup 4

Butternut Squash Soup 5

Peel the roasted squash (or use a big metal spoon to scoop it out of the skin, like I did) and plop it in a big mother of a pot, together with your caramelized onions, your roasted parsnips, and your roasted garlic.

Butternut Squash Soup 10

Top the pot up with some stock.  I ended up using 3 cartons (at 900mL each) of chicken stock.

Butternut Squash Soup 11

Bring that to a simmer, stirring to break up the squash a bit.  Season with salt and pepper while you’re waiting for it to bubble.

Butternut Squash Soup 13

Once it starts to bubble, leave it for a few minutes, then remove it from the heat and have a go at it with the immersion blender.  BRRRRRRRZZZZZZZZZHT! Season with a bit of nutmeg to taste.

Butternut Squash Soup 15

Serve with more sprinkled nutmeg, a dash of plain yogurt or sour cream, some chives, or just plain Jane like this!

Butternut Squash Soup 16

Roasted Garlic and Mushroom Soup

If you know me, you’ll know I don’t like soup.  Seriously.  Considering the number of soups I make I know it’s hard to believe, but it’s true. If I wanted to sip hot liquids I would rather have a cup of tea.  Blended soups, however, are a different story.  To me they’re like hot, savoury pudding.  Plus they look uber-fancy when in reality they’re not, which is a good way to easily impress your dinner guests.

I do like mushrooms, however, and I like garlic.  If you like mushrooms as well, perhaps you will enjoy this.

This one I made up, having never made soup with mushrooms before in my life.  But it turned out okay.  The Pie doesn’t like mushrooms all that much, so I don’t have any real objective feedback at the moment, but I will shunt some of this off to The Lady Downstairs (Kª) and see what she and Kº and Il Principe think.

Slice up about a pound or some other ridiculous amount of mushrooms.  Don’t worry about getting them too thin – after you sauté them you’ll be mushing them up anyway.

Visit Massive Mushroom Mountain!

Melt a bit of butter in a pan and add a drop of olive oil to keep the butter from burning.  Sauté up your mushrooms.  I did it in three batches, because if I’ve learned anything from watching Julie & Julia, it’s that butter is one of the greatest innovations known today, and that you don’t crowd the mushrooms.

Always cook butter with a bit of olive oil to prevent burning.

While you’re at it, why don’t you go ahead and sauté up a sliced onion?

In a pot, bring about 4 cups of stock to a boil.  I used chicken broth, but of course you can use vegetable stock as well.

Plop in your mushrooms, onion, and a couple heads’ worth of roasted garlic.  Splash in some red or white wine and leave to simmer for about half an hour.

Wine is optional, yet encouraged.

Remove from heat and allow to cool.  Using an immersion blender, food processor, or stand blender, blend your soup until you have a fine mushy mass.  I love my immersion blender.  My mother calls it the ‘brzzht’, because that’s the noise it makes.  She’s an artist.

Pour in whipped cream or coconut milk as desired and heat to serve.

Stir in the cream if desired.

Then you eat it!

Serve with stuff that goes with soup.

*** EDIT: Kª called it a ‘soup-tasm.’  I’m not sure I want to know. ***

White Bean Dip with Roasted Red Pepper

I got this baby from the Ontario White Bean Producers website.  And then of course I modified it.

First you take your beans.  The recipe called for 2 cups of white beans (white navy beans).  I thought this meant 2 cups of RAW beans, but no, it meant 2 cups of COOKED beans.  As a result, I have SO VERY MUCH bean dip.

Anyway, take your beans, in any form.  If they’re raw, give ’em a good cook.  Simmer them in a pot of water for about an hour.  Make sure that your water doesn’t totally evaporate, and add more water if you have to — burnt beans is a smell no one needs to have in the kitchen.

While your beans are cooking (or sitting politely in their can, waiting on your convenience), take a pan and sauté yourself a finely chopped onion with some fresh sage (or frozen sage if you’ve got it).  Once the onions are translucent, remove pan from heat and plop in 6 or 7 cloves roasted garlic (about one head) just to get them warm and toasty.

In a large bowl (with the aid of an immersion blender) or food processor, combine your cooked beans, your onion/garlic/sage mixture, one or two roasted red peppers, cut in strips (from a jar or make ’em yourself), a few dashes of balsamic vinegar, and a pinch or so of sea salt.  Blend that thing silly until it’s smooth and creamy.

Pile 'em on and blend 'em silly.

Serve as a dip with pita chips or crackers, or use as a bean base in quesadillas, wraps, and sandwiches.

Because I have so very much dip, I managed to foist some off on D and J, and I’m going to try to freeze the rest.  I will let you know how that goes.

Pita chips are yummy.