

When I saw this post on Design*Sponge last fall I absolutely itched to try it out. I love autumn, and having grown up near Gatineau Park, I have learned to appreciate the beauty of watching a large forest slowly turn from green to a million shades of yellow, orange, and red. Unfortunately, that doesn’t really happen in St. John’s. In the autumn here, we have green leaves on the trees, and then we get storms like Leslie, and all the leaves fall to the ground and go dry and crunchy and brown almost immediately.

So when I knew I was flying back to Ottawa for a weekend in September, I came determined to carry out this simple project. The problem is that even in Ontario it’s too early for most of the trees to have made the change. Cait kept me updated with leaf reports leading up to my flight, and her reports all said the same thing: the leaves are all green, dude, it’s not going to work out for you. As I flew into town, however, I could see a few orange and yellow trees dotting the Greenbelt, so I knew that with a bit of searching, this thing could happen, despite Cait’s protests.

So one afternoon, after Teedz and Tego had made it to town, Tego and I took a stroll in the nearby park to see what we could come up with. Lo and behold, there were two big old maple trees whose leaves had just started to turn and fall to the ground. They weren’t totally orange or red, but the splashes of green I think added to the character of the thing.
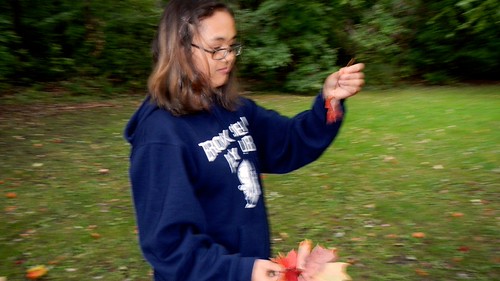
We started gathering, picking up maple leaves of different sizes and shapes. You need probably 10-12 maple leaves with stems for each flower, plus a variety of thin, relatively straight sticks to use as stems. And floral tape, which you can buy at any craft store.

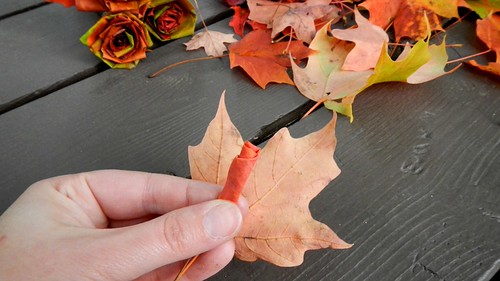
You start with smaller leaves at the centre and get bigger as you move outwards. Take a relatively small leaf and fold down the centre and two outside points towards the middle of the leaf.

This gives you the basic shape for a petal.

Roll that tightly up to form your “bud”.

Now take another leaf, fold down the points, and wrap it around your bud.
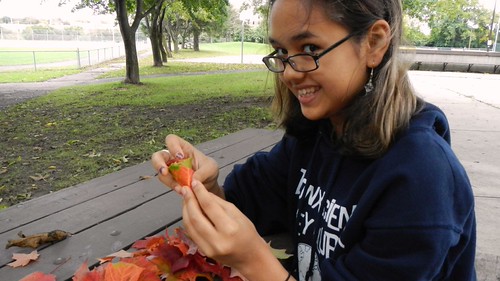
Keep repeating that, rotating the flower the whole time so it looks natural, until you get something that is a size you like.

Tego and I found that if we weren’t careful our buds started to stick out past the reaches of the other petals, so you want to make sure to keep that sucker tamped down inside.
When you get something you like, pinch the bottom of the leaf where the stems are and start wrapping it up with floral tape. Take one of your sticks and lay it at the base of the flower and keep wrapping, taping the stems to the stick.

We learned that floral tape is not actually sticky. It sort of relies on tension to stay stuck to stuff, so make sure that you pull it tight. We found that once we got to the end, if we wrapped the tape several times around itself tightly enough it wouldn’t unravel on us.

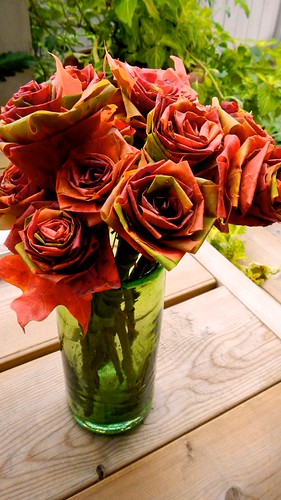
We kept on until we had a full dozen, then Tego trimmed the sticks so they were approximately the same length — you don’t want them exactly the same or the bouquet will look weird, but you don’t want them to be radically different either.

Then we tied it up with ribbon and gave it to our cousin as a hostess gift. Everyone thought we had bought them at some fancy craft fair, and were super astonished when they found out that we’d made them ourselves during a walk in the park!

As they are, I think the leaf bouquet will last about a week or two, depending on the freshness of the leaves themselves. If you want them to last longer (if, as Cait suggests, you have an autumn wedding coming up and you need time to make a large quantity of these suckers), then you can dip each flower individually in gel medium (which you can get at art or craft stores) or even spray the bejeezus out of them with hair spray or another form of lacquer and they should last you several months.
I’m also interested to try this with non-maple leaves to see if I come up with a different shape. I will let you know if anything comes of that.

***EDIT, 30 January 2013***
The florist who supplies the flowers at work did this to dress up a bouquet. Very nice, don’t you think?


This makes me wish I was getting married this Saturday instead of in June!
LikeLike
Yes, but if you get married in June you can have peonies and all manner of beautiful REAL flowers. Congratulations!
LikeLike
Thanks!
I don’t like flowers that much. Going for a butterfly one instead. Also hoping my bridesmaids will like vintage brooch bouquets!
LikeLike
That’s a genius idea — I love vintage brooch bouquets. I tend to gravitate towards the sparkly ones so I hope I have a daughter someday I can suggest it to!
LikeLike
wooowww!! that is so amazing… awesome!! 😀
LikeLike
Thanks, and so easy too!
LikeLike
I love walking around in the woods and now, if I just take along a roll of tape (I’ll give masking tape a try), and because I have an excuse to hang out just a little while longer, I can walk out carrying a bouquet! Thank you!
LikeLike
I bet masking tape would work just fine — and it comes in green, too!
LikeLike
Ali, I LOVE this idea. Beautiful!
LikeLike
Thanks!
LikeLike
This is amazing. Thank you thank you!!
LikeLike
You’re welcome — and thanks for visiting!
LikeLike
I think that is amazing… truly. I always have respect for these sorts of things, because I could never do it in a million years… at least not with such a great outcome.
LikeLike
This was easy enough that even YOU could do it, Frugal. 🙂
LikeLike
This is an amazing idea. I can’t wait to make my own bouquet. 🙂
LikeLike
The things I would do to get one now ! No maple leaves here in Singapore but I’d love to try other leaves. Oh wait, there is no autumn either. I did refer to the source blog and found another creative place to follow ! Thankee 🙂
LikeLike
I’m sure you could try it with something else …
LikeLike
Always happy to help!
LikeLike
The colors are gorgeous! What a perfect idea for a fall-tme bouquet!
LikeLike
Reblogged this on Through the looking-glass… and commented:
This is so clever, I can’t wait till the leaves fall over here too 🙂
LikeLike
Reblogged this on countingdownfromzero and commented:
Love this!!
LikeLike
These are so cool!!!! I am going to try to get around to this project this fall. The leaves here in NY are just starting to change. I will let you know if I do it.
LikeLike
Please do, and send me a picture! I’d love to see it done with leaves that have turned all the way.
LikeLike
This looks really awesome!!!!
LikeLike
Thanks, Tego and I had a good time putting them together too!
LikeLike
Do you have pictures from your wedding where you were using these?
LikeLike
Hi Karissa, these weren’t for a wedding — just for fun — but you could definitely use them in an autumn wedding.
LikeLike
Those will be getting used in my wedding bouquets. How hard were they to make?
LikeLike
Oh they were pretty easy. Tego and I did the whole bouquet in about half an hour, not counting the leaf gathering. Once you get the first one under your belt the rest just kind of happen. A good thing to do while watching TV maybe!
LikeLike
I did a bouquet (with fake maple leaves because I am incredibly impatient)
LikeLike
Hahah, yeah waiting until fall is tough. Send me a picture!
LikeLike
I really loved the idea. I’d choose them over roses actually..
LikeLike
Me too!
LikeLike
Would you be able to use fake leaves so that they would last forever? Or would they be too stiff to wrap?
LikeLike
They might work better because they have wire in them, though the overall effect won’t be the same. If you try, let me know how it goes!
LikeLike