Pfft. I can do that: Ali Does It turns three!

Papier Mache Bowls 35

Can you believe it?  I’ve been Doing It Myself for THREE FREAKING YEARS now!  Well, it’s been longer than that, but today marks the third anniversary of when I started putting my foibles and failures (and too many pictures of my dog) up on the internet for you to enjoy.  And I hope you’ve enjoyed it!

How to commemorate this, though?  I’ve been doing a lot of cooking, so I didn’t really want to do that.  And because Christmas is over and we’re moving in a couple months I don’t have any real crafty/fixy projects on the horizon.  But.  I saw this back on Etsy a year or so ago and I thought, I could TOTALLY make that myself.  It won’t be as GOOD, mind you, but I could totally do it.  So I’m gonna.  Here goes.

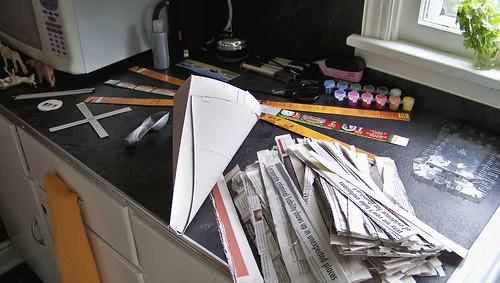
Because I can never do anything in half measures, I decided to make THREE bowls instead of just the one, and they’re gonna be nesting bowls.

Papier Mache Bowls 15

So I needed three bowls of approximately the same shape but different sizes.  Fortunately I have three stainless steel ones that will do just fine.

Papier Mache Bowls 2

You also need a barrier between the bowl and the paste.  You can use plastic wrap but I didn’t want to deal with wrinkles so I used petroleum jelly, which is the only thing I didn’t have on hand and had to buy.

DSCN6313

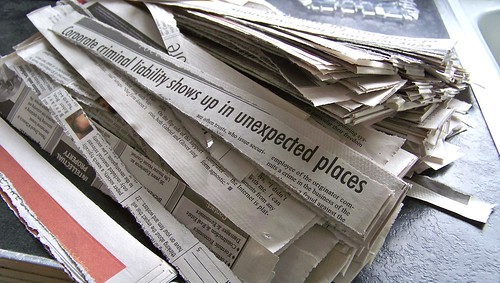
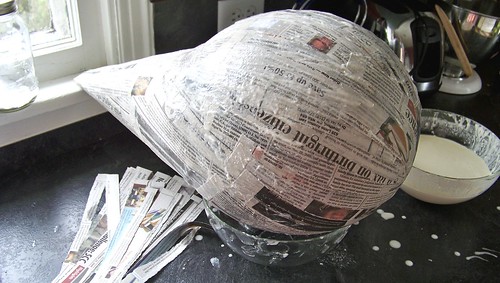
I still have stacks and stacks of newspapers to use, and so I tore a bunch of those up into thin strips, following the grain of the paper.

Papier Mache Bowls 1

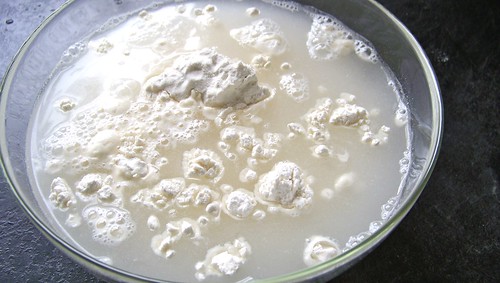
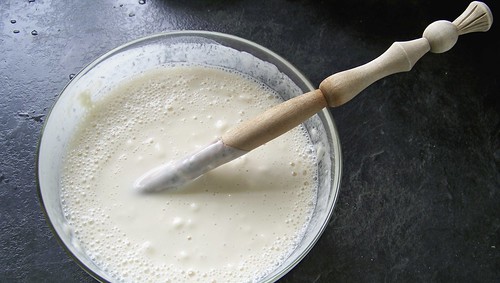
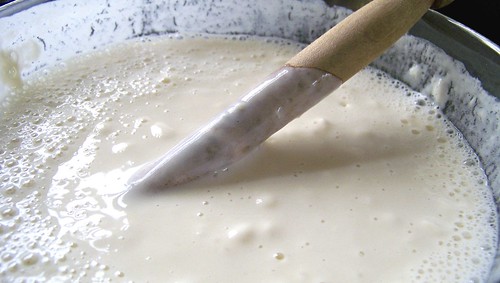
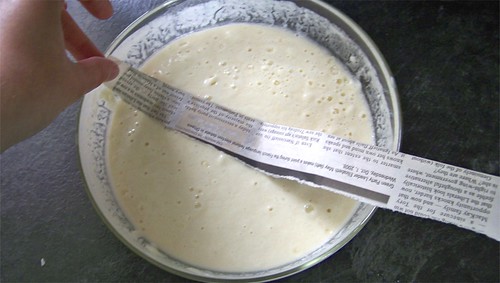
And you need paste as well, obviously.  I went with the same recipe I used for the magnificent and popular papier mâché helicopter piñata I made a few years ago, which is 2 cups flour to 3 cups water.  BAM.

Papier Mache Bowls 3

Make sure to spread newspaper or drop cloths or garbage bags on your work area so you don’t have to deal with errant splashes of dried paste later on.  This, incidentally, is a good project to do while watching movies/television on a bad-weather day.  I curled up with Supernatural, which is not a very good series, but that Jensen Ackles is pretty enough to make it worth watching, and the plot is never too heavy that I have to keep my eyes glued to the screen a hundred percent of the time.

Papier Mache Bowls 5

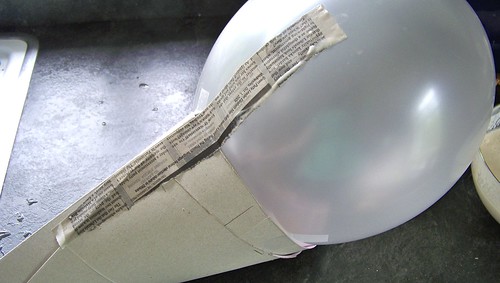
Start by smearing the outside of your bowl with petroleum jelly.  Try to put it on as smoothly as possible, but make sure it’s pretty thick at the same time.  If you’re using plastic wrap, try to avoid too many wrinkles, and wrap the plastic around the edges of the bowl as well.

Papier Mache Bowls 6

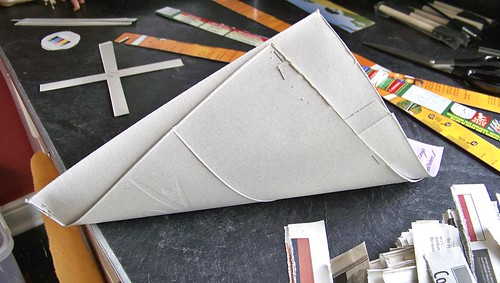
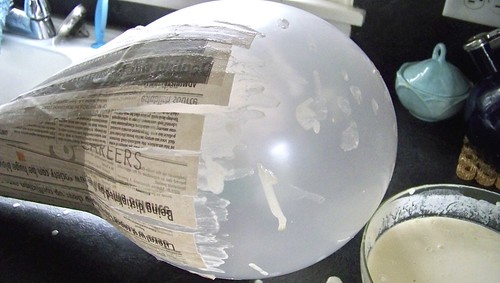
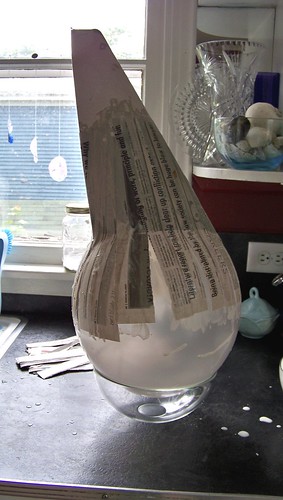
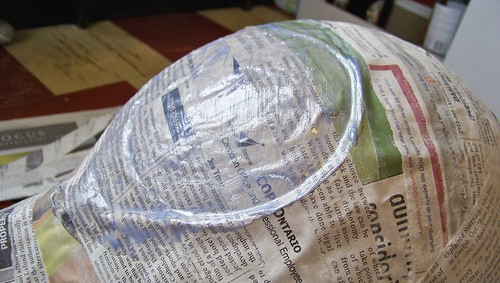
Then have at it, pasting up your strips of newsprint and sticking them to your bowl form.  Do a layer or two, allow it to dry completely, then do another one.  I did a layer, waited an hour, then did another layer and let that dry overnight, then repeated the process the next day.

Papier Mache Bowls 7

This project will definitely take you a couple of days, so make sure to keep your paste tightly sealed when you’re not using it.

Papier Mache Bowls 8

Papier Mache Bowls 9

When the bowl is as thick as you want it to be, and it has dried all the way through, use a thin knife to carefully pry the bowl from the other bowl.

Papier Mache Bowls 10

Wipe off any excess petroleum jelly or peel away the plastic wrap. I found that a cotton tea towel did the best job at getting all the petroleum jelly off.

Papier Mache Bowls 11

Trim the edges of the bowl if you like with a sharp pair of scissors.

Papier Mache Bowls 12

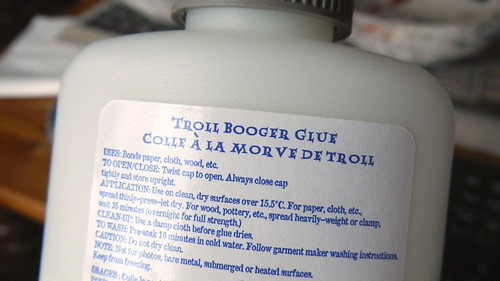
I left mine to cure another day like this, after sealing the open edges with some white glue.

Papier Mache Bowls 14

I flipped the glue over and discovered that it was actually called Troll Booger Glue.  I can’t begin to tell you how delighted I was by that.

Papier Mache Bowls 13

Now, the bowls on Etsy were lined with gold leaf, but I ain’t got the time nor the money for that.  I do, however, have some copper-coloured spray paint.  So I’m going to use that (taking all the necessary precautions, of course).

I couldn’t find my breathing mask so I went with a bandana.  The Pie took one look at me and started laughing so I thought I’d share.

Papier Mache Bowls 21

If you’re using spray paint on your bowls, make sure to do the inside of the bowl first.  That way you can avoid getting the wrong colour on the wrong side of the bowl.

Papier Mache Bowls 17

Papier Mache Bowls 18

Once the inside is done and dried, flip the bowls upside down and do the outside, being careful to direct your spray so it doesn’t get underneath the bowls.  I used blue, white, and black.

Papier Mache Bowls 23

It took a couple coats to make the lines of print disappear.  I thought I had some white spray paint but it turned out that I only had gesso.

Papier Mache Bowls 22

And the gesso only worked so well so I ended up spraying over it with blue.  After that was fully cured, I gave it a once-over with some spray varnish, for added sheen and protection.

Papier Mache Bowls 24

And that’s it.  Not bad, not bad at all.

Papier Mache Bowls 37

Papier Mache Bowls 41

Papier Mache Bowls 44

Piñata-Copter, or, How I Didn’t Eat Enough Paste As A Child

It's a Secret Part 2

The Pie and il Principe share a birthday.  Sure, the Pie is now 29 and IP is only 2, but they can still enjoy the festive atmosphere of a birthday party.

And what’s a children’s birthday party without a piñata?  It’s — well, it’s pretty much just a party without a piñata.  But that’s besides the point.

The Pie and I thought that we would combine il Principe’s love of vehicles with his destructive tendencies, and a piñata filled with toys (because this 2-year-old has enough extra energy) was the perfect gift.

First, I spent a peaceful evening with the dog when the Pie was out tearing strips of newspaper.  These are old copies of a certain legal newspaper popular in these parts.  While it’s a very good newspaper, I must admit to a certain satisfaction in tearing up all that legal verbiage.

I also prepared my helicopter rotor blades (I decided that this particular helicopter has six blades, so there), as well as the tail and all the other bits.  I pulled old cereal boxes and such out of the recycling for this.

And I cut up some clear plastic out of the recycling to use as windows.  This is going to be one classy chopper.

So now that you’ve got everything ready, you need to make your paste.  In a bowl, mix together 2 cups flour with 3 cups water.

I like to use a spurtle to stir my paste.  That’s right.  A spurtle.

Mmm, pasty.  Everyone always makes jokes about “that kid who ate paste” in kindergarten, but we didn’t have that.  We did, however, have the girl who, when asked, DRANK (like I’m talking glug-glug-glug) Elmer’s School Glue.  Bleugh.

And now we need ourselves a balloon, which forms the basis for many, many papier-mâché projects.  The last time I did papier-mâché I made an enormous head with a huge nose, cut out holes for eyes, borrowed one of my dad’s fedoras (he also has a large head), stuck a Press Pass in the brim and went around for Hallowe’en as a reporter.  It was a good costume.  I swear.

I attached the tail to the balloon with tape.

Now we paste strips!  Run one side of your strip through the bowl of paste.

Use your fingers to squeegee off the majority of the paste.

Slap that baby on your structure and smooth it down.

Continue with more strips, being careful to slightly overlap each one.

If you need help with balancing your project as you work, why not try propping it up in a bowl for stability?

Once you have finished a complete layer, use your fingers to smooth on some extra paste.

Let that set for a bit to become tacky and sticky.  While you’re waiting you can put paper on your other bits.

For the wheels, for example, I wanted a little bulk, so I dipped a few strips, crumpled them up, and stuck them to the wheel template before wrapping the whole thing in other strips.

Set those aside somewhere to dry.

Repeat the layering steps a few more times, creating three or four layers of paper on your main structure.  The focus should be on creating what will be a hard shell around your balloon.  I tried to add a bit more paper at the bottom of the chopper-balloon to help compensate, balance-wise, for the weight of the tail.

When you have enough paper on your structure, put it somewhere out of the way to dry overnight.  The top of our fridge is as good a place as any.  Plus it’s nice and warm there (our fridge is ANCIENT) and with the current humidity I’m hoping it will give the paste a boost in drying.  

I saved the extra paste, just in case.

Now to clean up!

The fortunate thing about flour paste is you just have to wet it again and it comes off anything really easily.

The Next Day …

Actually, this was two days later.  It was so gloomy and humid that the darned thing just would not dry.So now we get to get around to our painting and assembly.We bought this lovely metallic blue paint at the dollar store and thought it would look good on a helicopter.  It did, but the problem was that it was transparent paint, something the made-in-China label didn’t tell us.  Nor did it tell us that the paint fumes were highly objectionable.  But you get what you pay for of course.Onto plan B, then.  I painted the props and the wheels with the silvery-blue stuff and went off to find a more opaque solution to the plane problem.Thus I came up with India ink.  And ink is awesome because it dries really fast.It's a Secret Part 2Of course, you can still see the metallic paint through the ink, but I figured I would just paint over the quick-dry ink with more metallic paint.

It's a Secret Part 2Mercifully, just as I’d finished, the sun came out, so I left everything to dry for a bit.

It's a Secret Part 2So now we need to cut out a wee hatch through which to insert the prizes.  Using a box cutter, carefully pierce your shell and the balloon underneath.  POP!

It's a Secret Part 2

Cut a hole only just big enough for your purposes, leaving a little flap so you can close it up again later.

It's a Secret Part 2

There’s that shriveled balloon.  You can throw that out.

It's a Secret Part 2

My helicopter is going to have a window, so I measured the “glass” to the side of the chopper.

It's a Secret Part 2

Cut out a hole.

It's a Secret Part 2

I think I may use the piece I cut out to make a fascinator at some later and unrelated date.

It's a Secret Part 2

I fixed the window in place with hockey tape, that lovely universal adhesive.

It's a Secret Part 2

I used a paper punch awl to poke holes to hang the suspension wires from.

It's a Secret Part 2

You can see that balance is going to be an issue here.  I ended up taping a few rocks into the tail of the chopper to balance it out.

It's a Secret Part 2

I stuck the props on.  The wheels refused to stick and were therefore scratched.  Bye-bye b’ys.

It's a Secret Part 2

Don’t forget to put your prizes in!

It's a Secret Part 2

Then the helicopter needed some accents.  On one side of the tail I painted on il Principe‘s initials and the year he was born, to look like some kind of ID code.

It's a Secret Part 2

On the other I did his birthdate (21 July) followed by HB – happy birthday.

It's a Secret Part 2

Then I added some dots that represent flashing lights, and blacked out the frame parts of the window.  And yes, I just made up where they went.

It's a Secret Part 2

And there you have it.  Il Principe can’t wait to destroy it.

It's a Secret Part 2