

I was trying to come up with some last-minute present ideas back in December when I came across this one on the internets. Everyone likes necklaces, right? And nautically-themed things? Yes. Yes, they do.
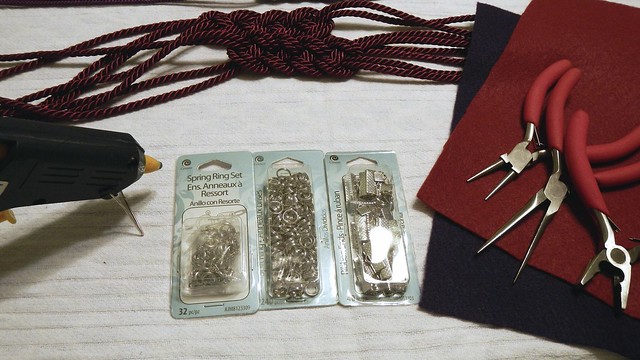
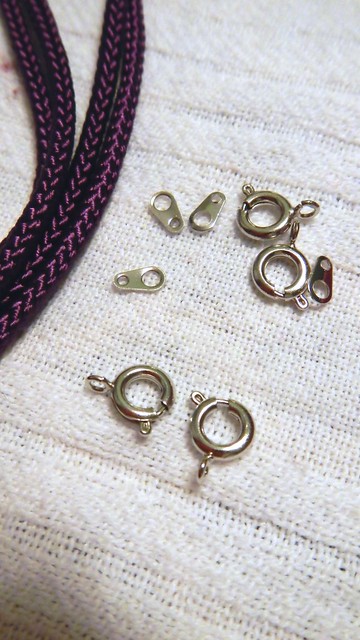
So there’s some things you’re gonna need: a couple metres braided nylon cord (you can pick this up in craft and fabric stores; small pieces of felt in colours that match the cord; some tiny pliers; hot glue gun and glue; small split rings or jump rings; ribbon ends (or pinch crimps or whatever they’re called); and spring rings or lobster clasps.
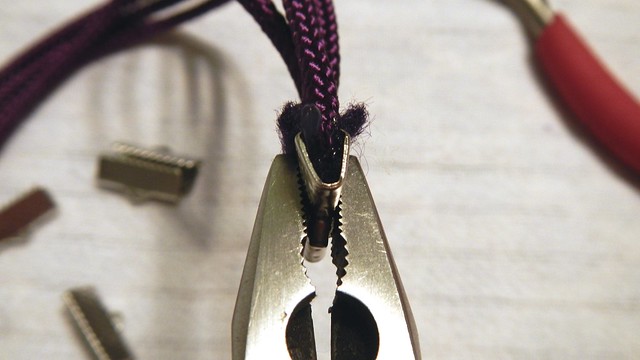
You might also need a little bit of tape if your cord comes unbraided when you cut it. The coiled stuff will come undone, whereas the braided stuff will probably stay put.
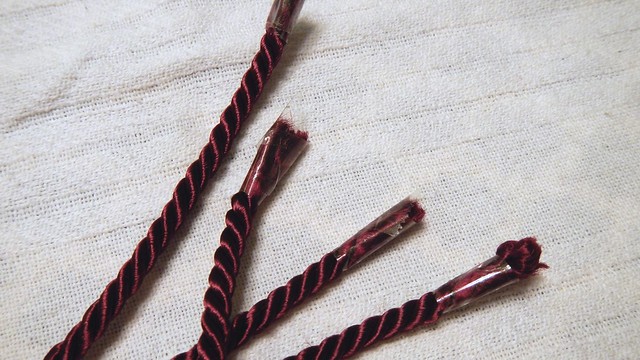
Next, decide if you want your necklace to be four or six strands wide. The version I saw on tuts+ had six strands, but with the amount of cording I bought (6 metres each), I ended up having only enough to make two necklaces of four strands each. So cut your cord into four (or six) equal pieces, and make them a little longer than you would like your finished necklace to be. Divide your strands into two groups.
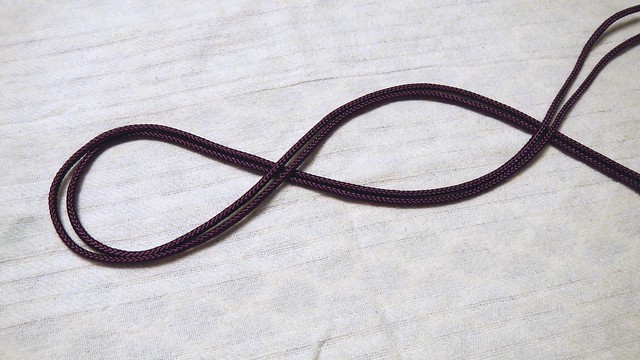
To create the basic nautical knot, start by making a wee fishie out of one set of strands: create a loop where the strands cross over themselves, as shown below.
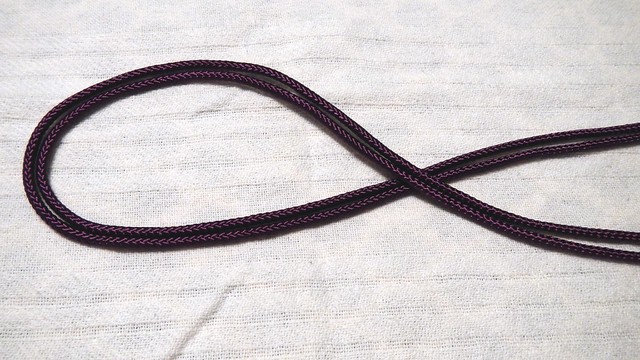
Do the same thing with the other set of strands, in the opposite direction. Lay the second loop over the first loop such that the top loop part is over the crossed strands of the loop below, and the crossed part of the top loop is over the loop part of the strands below.

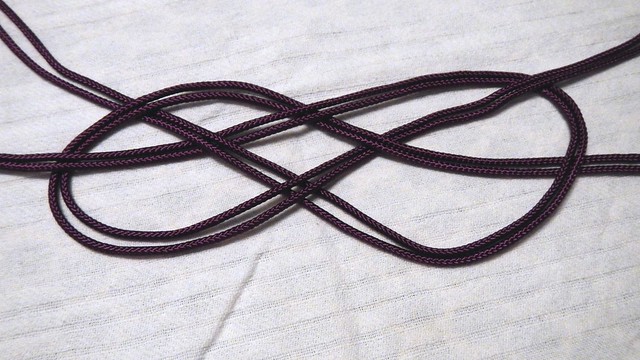
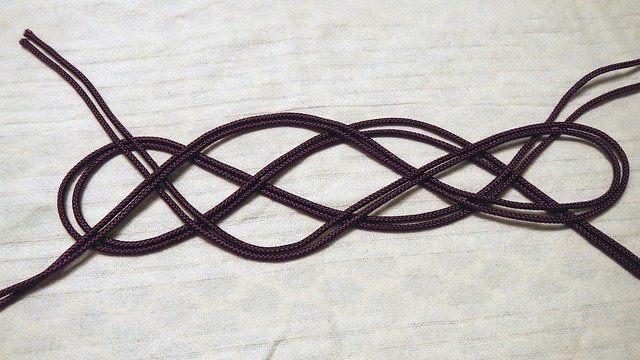
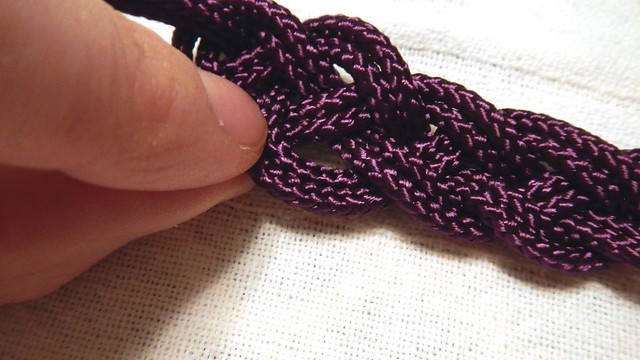
Now things get a bit complicated to explain, but once you do it you’ll totally get it. The idea behind tying these knots is that the top strands will alternate going over and under the bottom strands. So in this picture you can see that all the top strands are currently above the lower strands, and that’s not going to work.
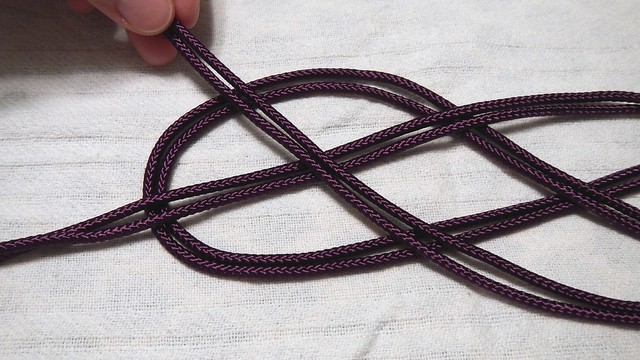
Here’s where we pull out the loops and start alternating the over/under part. So to the right you see the part where the bottom loop strand crosses under itself. That means the next one, in the bottom centre, has to go under. You can see that the far left one goes over, and the one in the middle goes over. So the one that I haven’t done yet therefore will have to go under. Yeah so that’s not easy to talk about.
Basically make sure that each time your strands cross over each other, that they alternate going under and over.

Then you do the same with the other side. Under. Over. Under. Over …
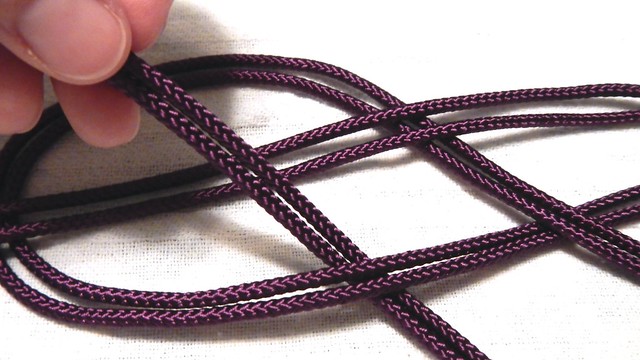
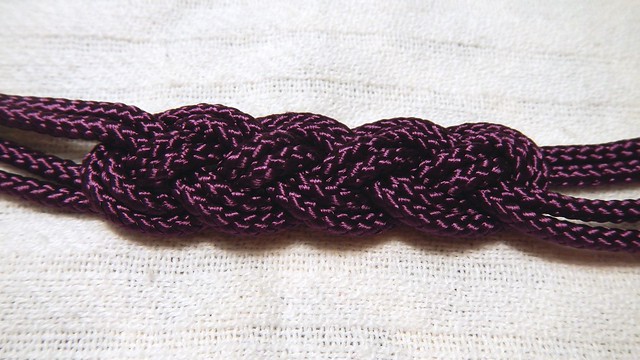
So when your cording looks like this, with all the appropriate unders and overs, then you’re ready to pull.
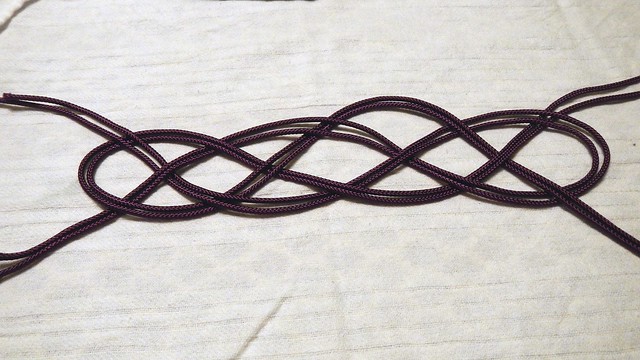
Grab the ends of your cording and gently pull them away from each other and tighten your knot.
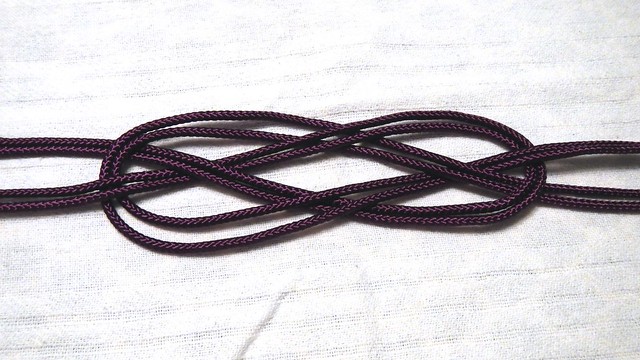
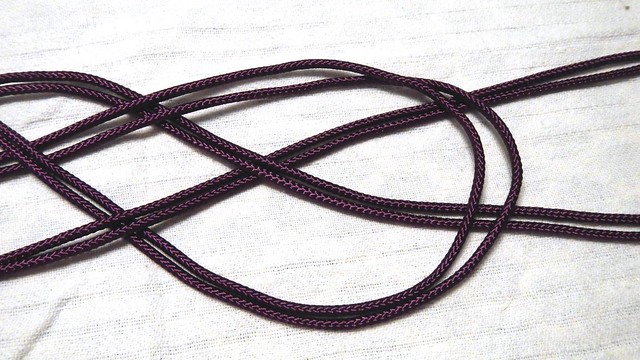
Keep pulling, and then you have an honest-to-goodness nautical knot!
You can tug on the individual cords to make the knot even.

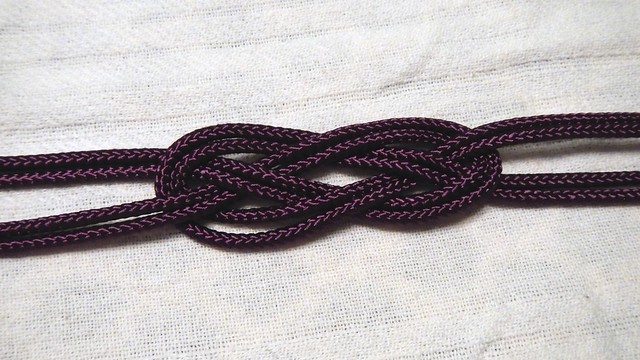
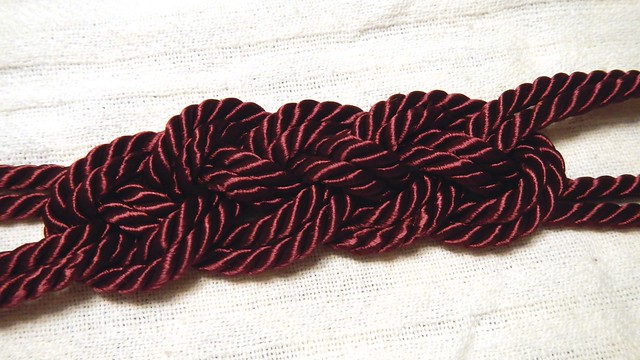
So that’s cool and all, but I figured once I had that basic knot down, I should go a little bit bigger, and better. So I doubled the number of loops!
This takes a little bit more finesse.
And certainly a longer time to weave all the under/overs.
Then you can carefully pull it tight.
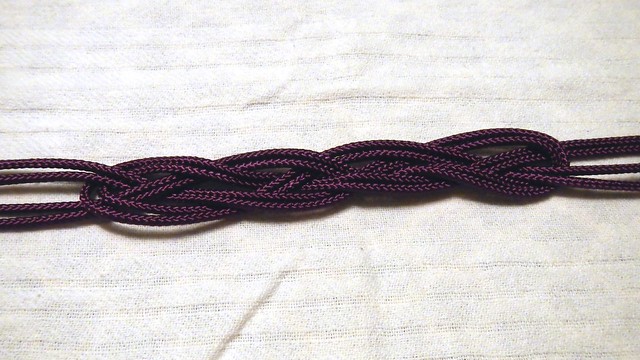
And adjust the individual cords.
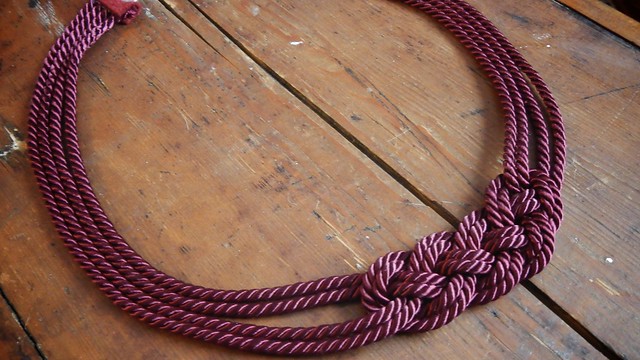
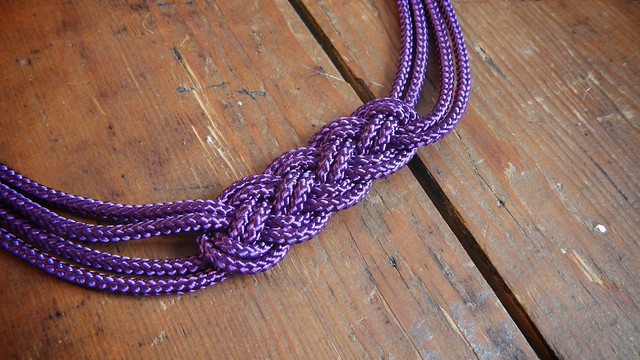
AND THEN YOU HAVE THIS AMAZING THING.
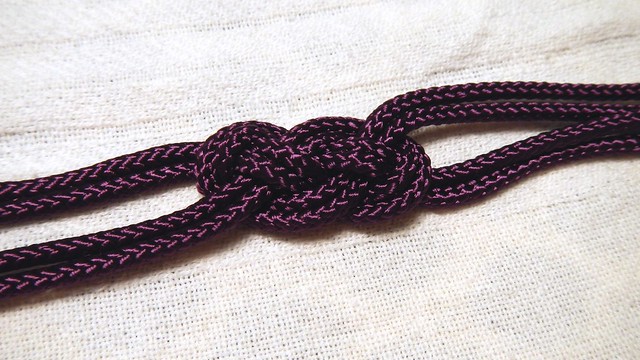
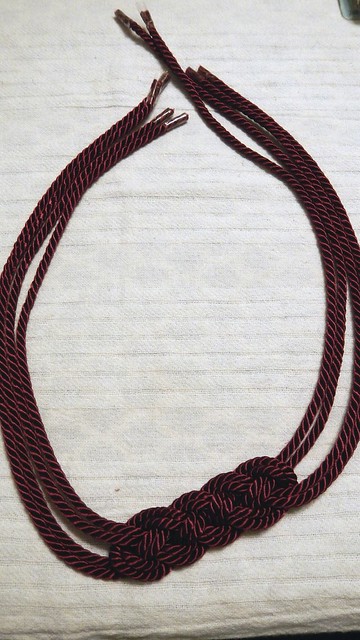
This is the version I did with the larger coiled cord.
So then you arrange your necklace how you’d like it to look.
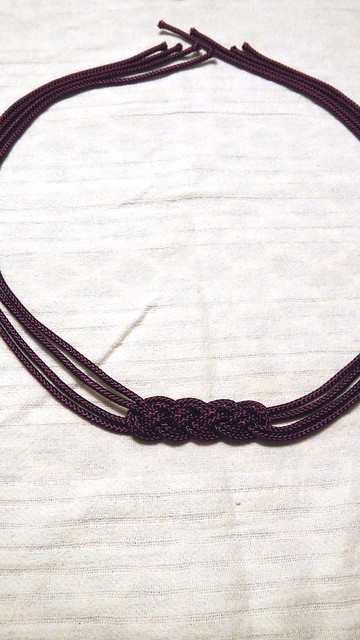
This red one is going to be off-centre. Because asymmetry is cool.
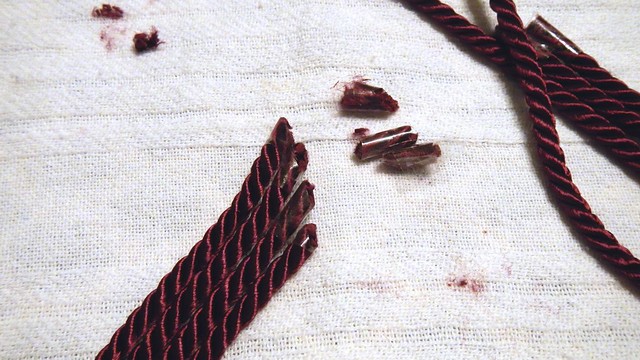
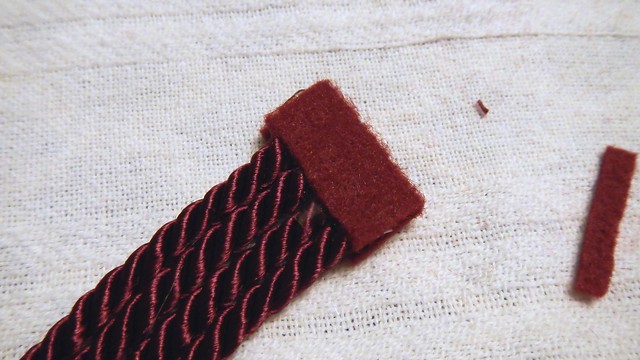
Trim the ends of the cording straight across but at a slight angle.
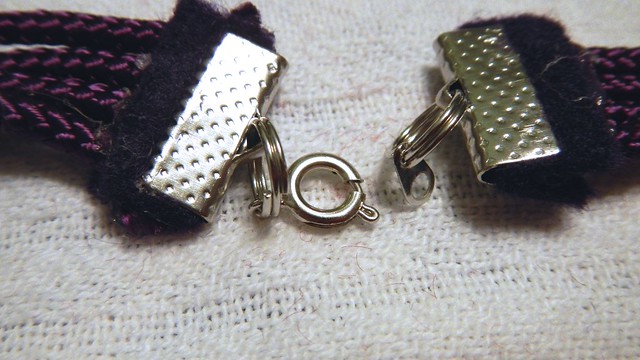
Then cut a tiny square of felt and glue your cord ends to half of it.
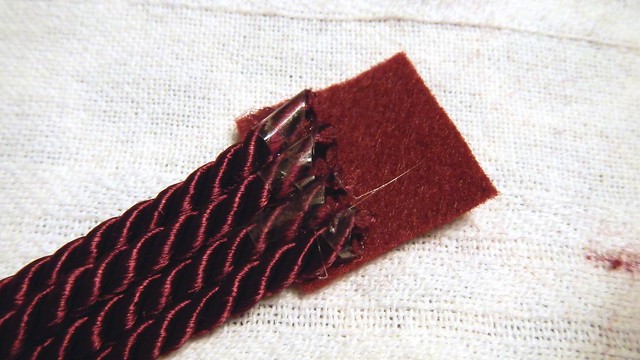
Fold it over and glue it down. Trim off excess felt.
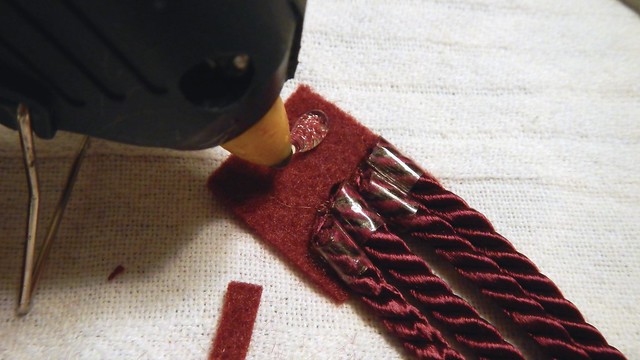
Then you take one of those ribbon end/pinch crimp things and use your pliers to crimp onto the piece of felt.
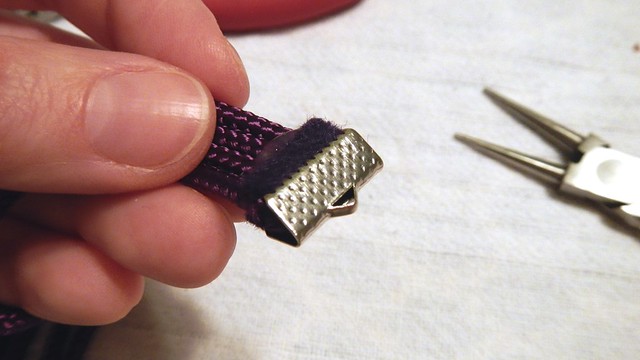
Do it to the other one as well.
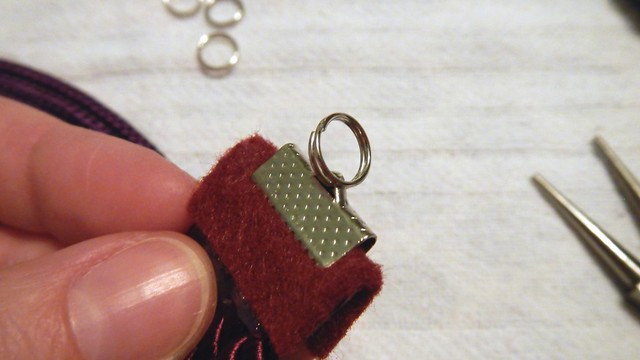
Add a jump ring to each side.
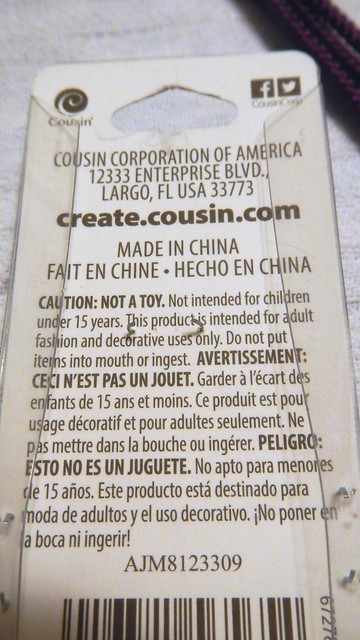
DO NOT EAT THESE THINGS. I like how in the warnings it’s only the Spanish version that uses exclamation points.
Next you’ve got the spring rings to deal with. Lobster clasps are easier, but I couldn’t find any at the time.
Add those suckers on.
NECKLACE COMPLETE.

And it didn’t take long!

Ali, thank you for posting so many clear and concise pictures of how to tie the knot. I actually think I can do this, after seeing your wonderful instructions. Off to the craft store I go.. These would be wonderful as you said for gifts, and if I make them during the long winter here in northern Canada, I will be just that much ahead of my gift lists for the next Christmas holiday.. wow did I say gifts…
Take care and happy blogging from Laura ❤
LikeLike
Aw, thanks so much Laura! I’d love to see your finished product (I wish I’d tried it with more than four strands). I’m only in Ottawa but with this cold snap we’re having even “Middle” Canada feels like “Northern” Canada today. STAY WARM!
LikeLiked by 1 person
Hello Ottawa, Ali…
I’m 5 hrs north of there… so you’re stuck in this deep freeze too… I will do a post (if mine turn out as nice as yours) for the necklace and link it back to your post for instruction of said necklace.
Thank you for your comments, and stay warm there too
Hugs from Laura ❤
LikeLike
Thanks again, Laura, I really appreciate it – and I can’t say I envy you your geography right now … 🙂
LikeLiked by 1 person
Ali, it’s beautiful here in the Gateway to the North, but minus 41 is a bit much this morning. But, I did enjoy throwing a cuppa hot water on the deck and watch it turn like snow in the air,,, now that’s cold enough to freeze water before it hits the ground.. sort of cool thing..
LikeLike
Okay fair enough that IS cool. Maybe I’ll wait until spring to visit, though!
LikeLiked by 1 person
Ali, I’m giggling here and you’re a very wise woman.. When I moved up here over 30 yrs ago from Florida, never did I imagine temps could get this cold..
LikeLike
Y’know, most people (my parents included) go FROM Canada TO Florida. I think you did it backwards!
LikeLiked by 1 person
Ali, Yes indeed I did.. and I blame it all on my being left handed.. always having to live life the hard way in a right handed world.. wink wink,,,,
LikeLike
My brother Ando always uses left-handedness as an excuse, too. Never gets him very far, though …
LikeLiked by 1 person
Ali, giggling over here, but at least it’s a grand attempt…
LikeLike
Ali, actually I married a Canadian man who was in the Air Force.. hence the move north…
LikeLike
Well see, now we can’t be friends. My dad was in the Navy and we all know that Navy and Air Force don’t get along. 😛
LikeLiked by 1 person
Ali, you have me there, but what about the wives? humm… they are always smarter than their military husbands.. wink,
LikeLike
Haha, that’s a given!
LikeLiked by 1 person
My brain hurts just looking at the knot. Oh well, the only nautical person I know used to be chief engineer on the (I better not say who)’s yacht…
LikeLike
Are you (not) name-dropping on me? Pshaw!
LikeLike
I really shouldn’t. But think of a place where it is warm and they have more money than sense!
LikeLiked by 1 person
Very nice! My summer friends and I used to make nautical bracelets right on eachother’s wrists. Your necklace reminds me of those days!
LikeLike
Thanks! I can only imagine doing it straight on someone’s wrist would be a challenge!
LikeLiked by 1 person
Hi.. nice blog. My new blog already found you and like it 😉 Thank you for the tutorial, hope i got the material and trying more 🙂
LikeLike
Looks gorgeous!
LikeLike