
This is a great gift for the artist in your family, young or old, or a neat thing to have on hand for any young visitors over the holiday season. They can be made with materials you probably have in your cupboards, which makes for a cost-conscious addition to your holiday crafting.
And because it’s all easy-peasy and non-toxic, I’m sure that kids will enjoy making their own colours – provided you don’t mind a little mess! This is a rather time consuming project, with all the stirring of tiny pots of colour, so if you do it with smaller children be prepared to finish the job once they get bored.
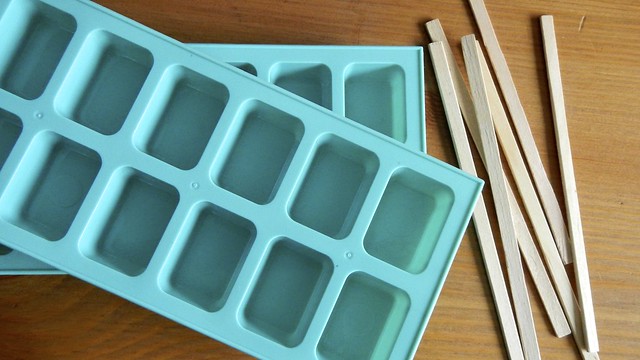
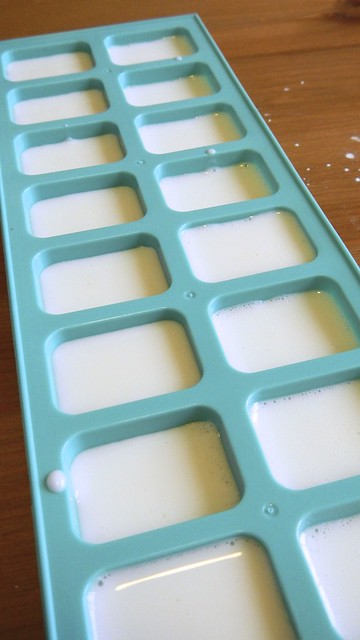
In terms of hardware, you’re going to need two plastic ice cube trays. I picked these up in the clearance section of Target. You can also use silicone trays, and then pop the solidified paint out to use somewhere else. You will also need some disposable stir sticks (one, or one side, for each colour).
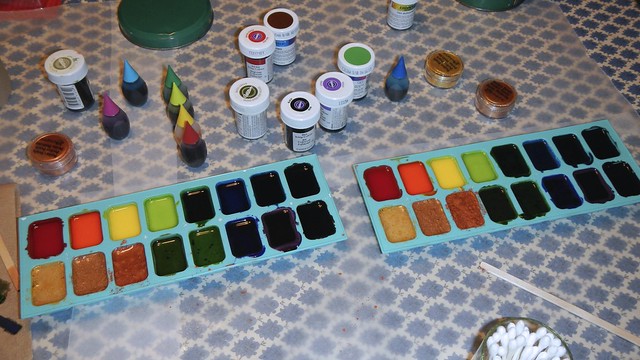
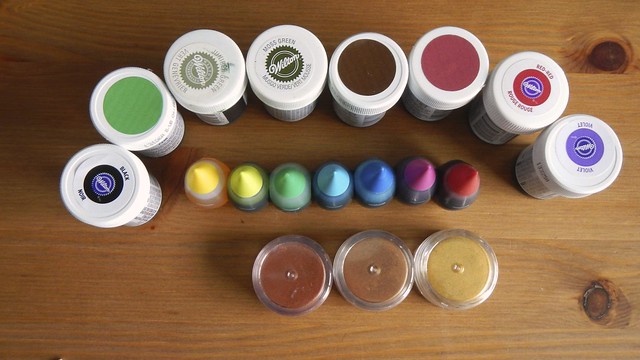
And lots of food colouring. You can use both liquid and gel paste for this. I also added some metallic powder pigment to the mix.
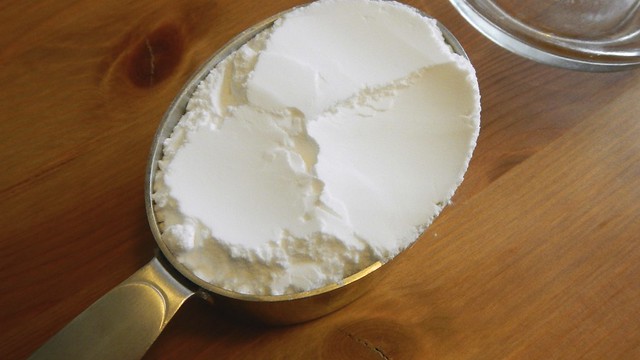
Now grab a couple measuring cups. Scoop up 1 cup baking soda, and plop it in large (~4-cup) measuring cup or bowl with a pouring spout.
Pour in 3/4 cup white vinegar.
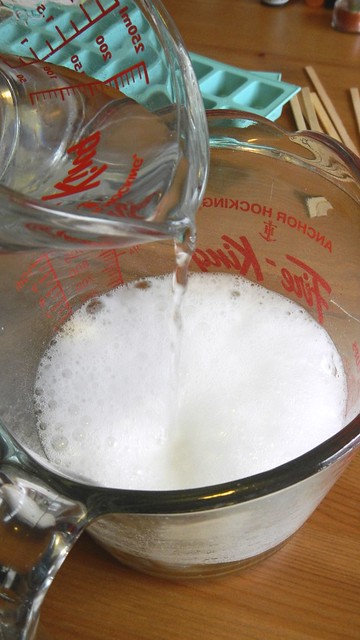
Keep stirring until all the fizzies are gone.
Next dribble in 2 tablespoons lily white corn syrup (the darker stuff will discolour the paint).
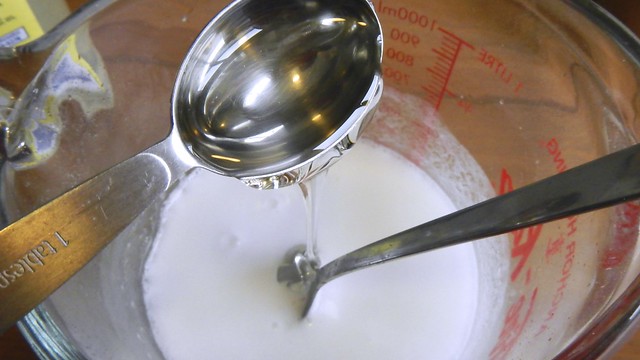
Then dump in 1 cup corn starch.

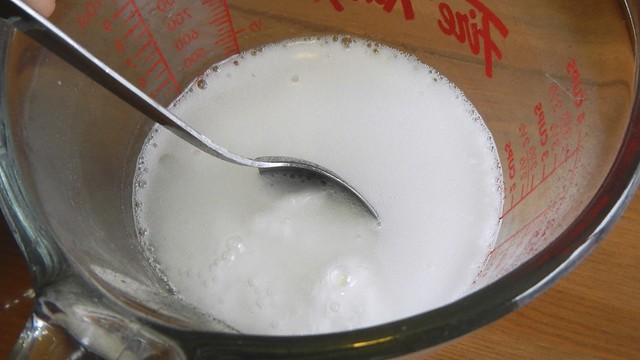
Mixy-mixy. You want this as smooth as possible, as it will settle quickly.
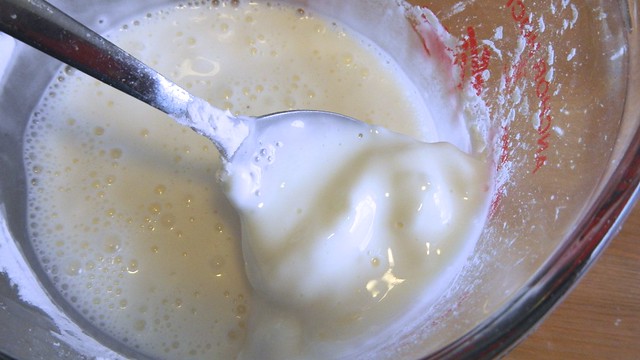
With everything mixed up, distribute the white liquid evenly amongst your trays. I found the given recipe to fill each section a little more than 3/4 full, but it depends on the size of your trays.
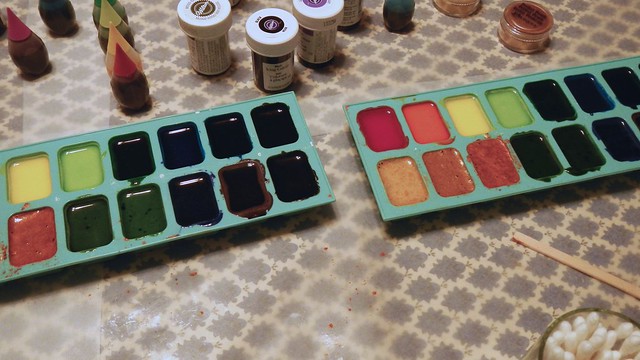
Now start colouring! Dip the end of a stir stick into your colour and drop a little bit into the tray.
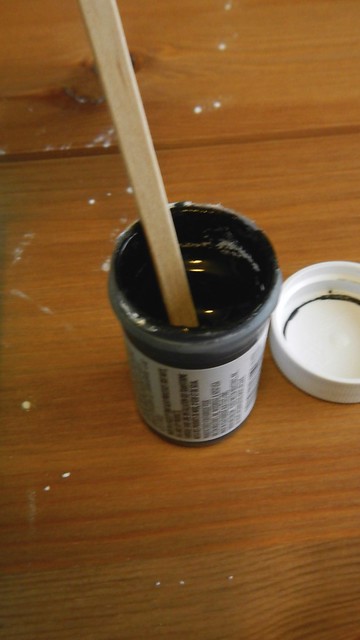
Stir, stir stir!
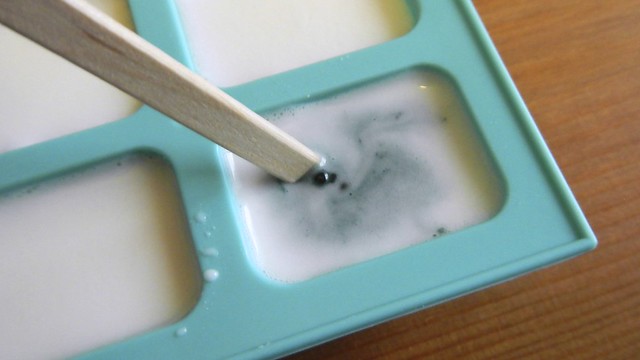
I added a bit more because this was my black one, after all, and I wanted it to be dark. Again, make sure to scrape up the bottom as you stir, because all the powders are starting to settle.
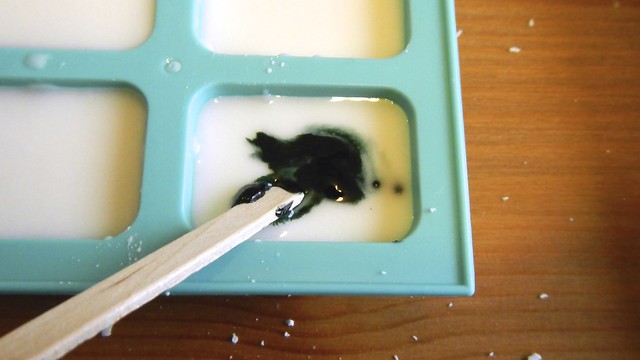
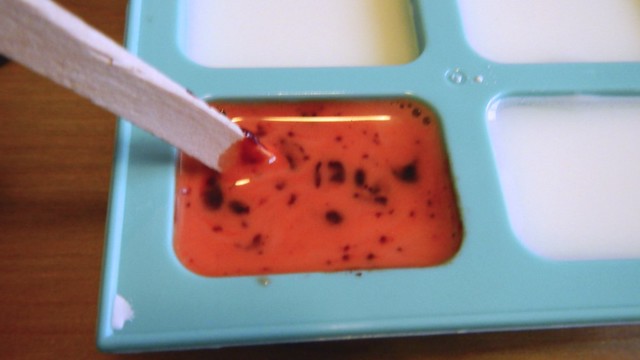
With the gel paste colour, as you can see here with my red and brown, you will get little solid pieces that float while you stir. Don’t worry about them. Stir in as much as you can, then leave them alone for a few minutes and let the liquid get into the colour. They’ll dissolve if you go and stir them again a little bit later. I promise.

The liquid food colouring was much easier to mix in. Don’t forget you can easily create your own colours!
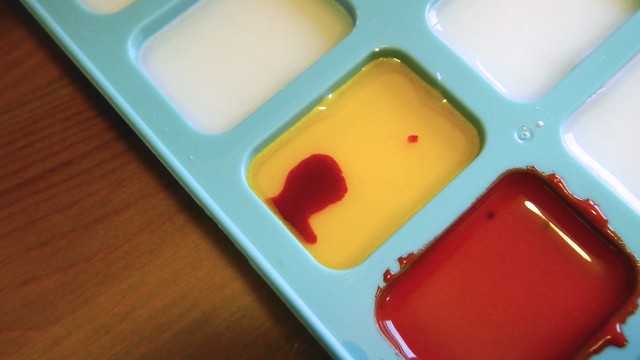
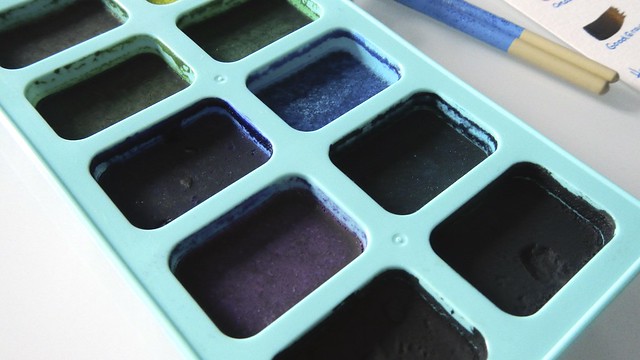
I did find that some of the colours kind of settled and separated, so I ended up re-stirring them a few times. I needn’t have worried, however: as the water in the liquid evaporates they will all come back together again.
I cleaned up the edges of the trays with a damp cloth after the mixes were starting to settle and dry. It was super quick. I ended up leaving these alone for a whole week just to ensure they were dry all the way through, but you may find you have dry paint within a couple of days.
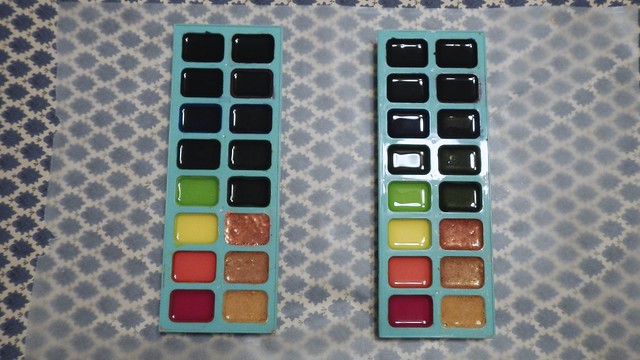
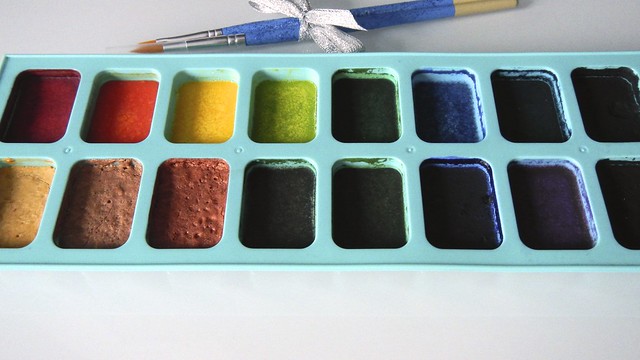
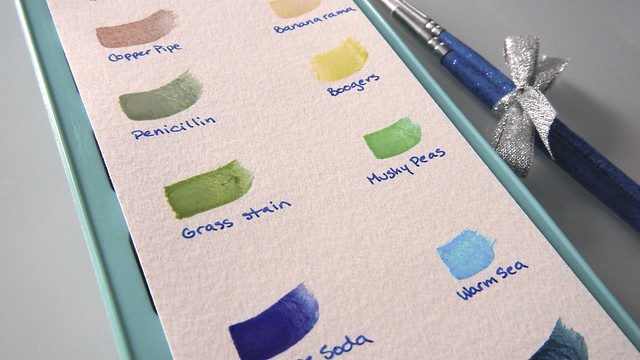
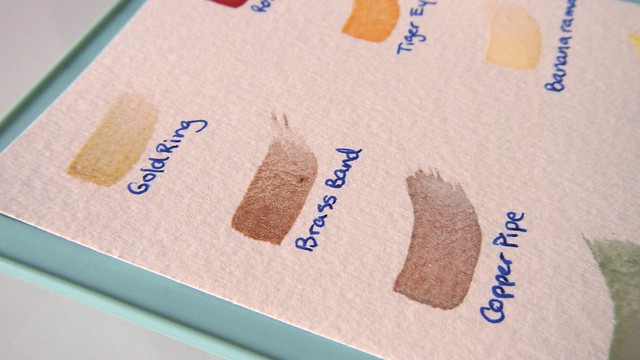
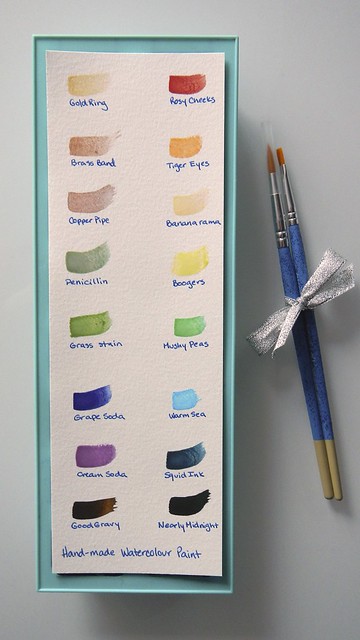
To test the paints I created a colour guide. I had fun with the names.
I’m actually really pleased with how the metallic ones turned out. All I did was add the plain metallic powder to the liquid, without any other pigment.

And added some brushes to complete the gift.

You always have the most creative posts!! Love it!
LikeLike
Thanks!
LikeLike
Awesome, really good idea. Especially when your trying to fill in time before Christmas while your going antsi.
LikeLike
Exactly!
LikeLike
What a wonderful post and I loved your re-naming the colors. This is a keeper for me as you’ve (stirred) up the artist in me, once again… 🙂
Take care and happy blogging to ya ❤
LikeLike
Hahah, nice one.
LikeLiked by 1 person
You are just so amazing. I hope people tell you that regularly. Tell yourself. Tell the world. Great post, great blog!
LikeLike
Aw, now you’re making me blush! Thank you!
LikeLike
What a fantastic idea! I cant wait to try this. Thanks for sharing.
LikeLike
beautiful
LikeLike
Reblogged this on naomineill.
LikeLike
Those names are amazing! “Boogers” baahahahaha
LikeLike
It was apt!
LikeLike
What a brilliant and unique present idea. Great names too!
LikeLike
Amazing idea! The colors are gorgeous and love that you know what the paints are made of. Simply brilliant!
LikeLike
Really really cool! I teach an art class. This would be a really fun lesson!
LikeLike
Definitely!
LikeLike
This is such a good idea!
LikeLike
I so want to give this a go. Looks like such fun.
LikeLike
Awesome idea, love this!!
LikeLike
Think in going to give this a try in a few days. Iv been wanting to try and make my own paints or something.
LikeLike
Go for it! I loved making my own colours.
LikeLike
This is great! I had heard that it was fairly easy to make these yourself, but this shows me it’s even easier than I thought! I teach art and this could be a really awesome activity to do during the after-school program and to sell at a fundraiser or send home as gifts! Thanks for the post.
LikeLike
Definitely a cool fundraiser – the materials are super cheap. It does take a bit of patience, so be prepared to wait for a week for them to dry!
LikeLiked by 1 person
Hello, a really nice recipe! I always wanted to make my own watercolors, but had no idea where to start. Thank you very much!
LikeLike
You’re welcome! I’m not sure how long-lived they are (i.e. if they’re acid-free on paper), but I do love the colours they make!
LikeLiked by 1 person