

The Pie and il Principe share a birthday. Sure, the Pie is now 29 and IP is only 2, but they can still enjoy the festive atmosphere of a birthday party.
And what’s a children’s birthday party without a piñata? It’s — well, it’s pretty much just a party without a piñata. But that’s besides the point.
The Pie and I thought that we would combine il Principe’s love of vehicles with his destructive tendencies, and a piñata filled with toys (because this 2-year-old has enough extra energy) was the perfect gift.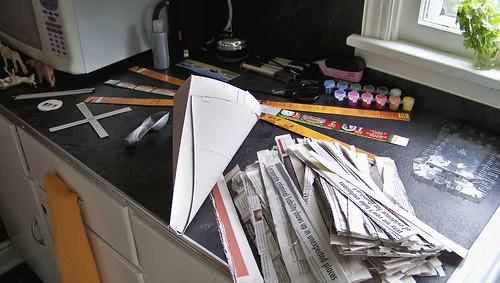
First, I spent a peaceful evening with the dog when the Pie was out tearing strips of newspaper. These are old copies of a certain legal newspaper popular in these parts. While it’s a very good newspaper, I must admit to a certain satisfaction in tearing up all that legal verbiage.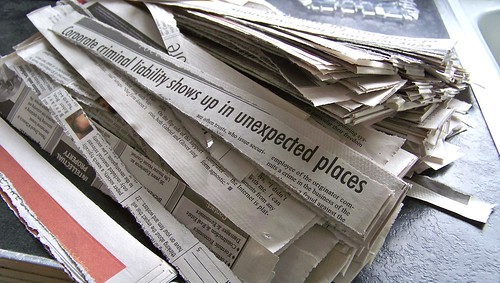
I also prepared my helicopter rotor blades (I decided that this particular helicopter has six blades, so there), as well as the tail and all the other bits. I pulled old cereal boxes and such out of the recycling for this.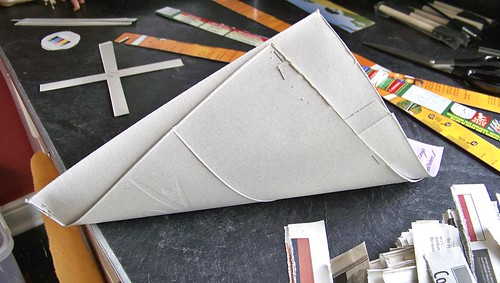
And I cut up some clear plastic out of the recycling to use as windows. This is going to be one classy chopper.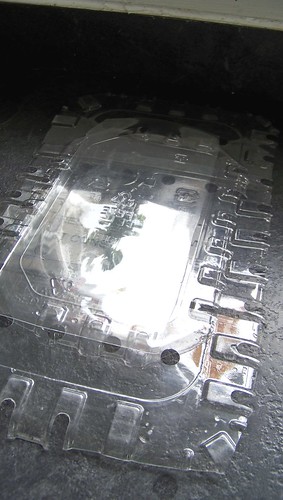
So now that you’ve got everything ready, you need to make your paste. In a bowl, mix together 2 cups flour with 3 cups water.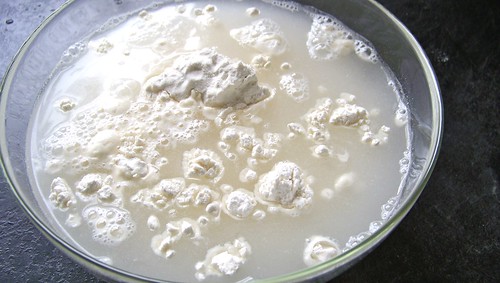
I like to use a spurtle to stir my paste. That’s right. A spurtle.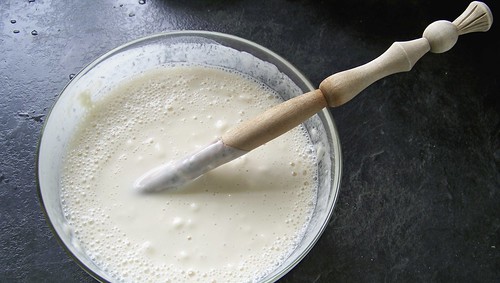
Mmm, pasty. Everyone always makes jokes about “that kid who ate paste” in kindergarten, but we didn’t have that. We did, however, have the girl who, when asked, DRANK (like I’m talking glug-glug-glug) Elmer’s School Glue. Bleugh.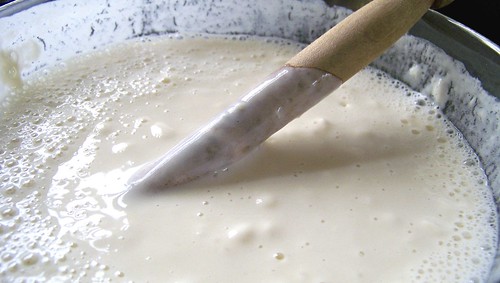
And now we need ourselves a balloon, which forms the basis for many, many papier-mâché projects. The last time I did papier-mâché I made an enormous head with a huge nose, cut out holes for eyes, borrowed one of my dad’s fedoras (he also has a large head), stuck a Press Pass in the brim and went around for Hallowe’en as a reporter. It was a good costume. I swear.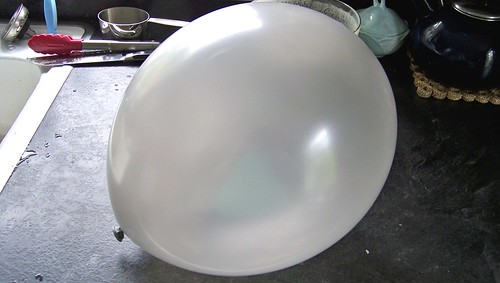
I attached the tail to the balloon with tape.
Now we paste strips! Run one side of your strip through the bowl of paste.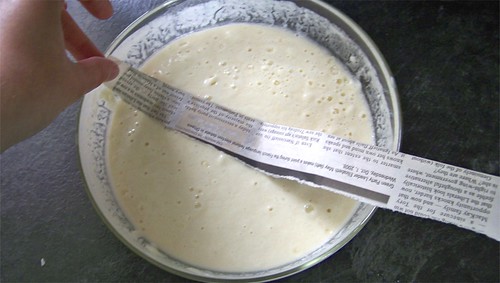
Use your fingers to squeegee off the majority of the paste.

Slap that baby on your structure and smooth it down.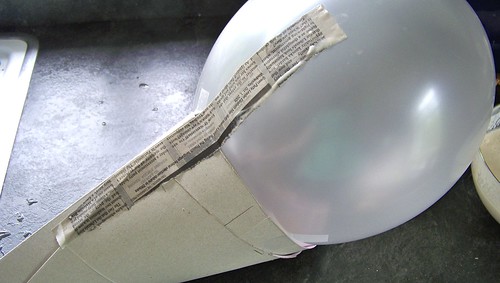
Continue with more strips, being careful to slightly overlap each one.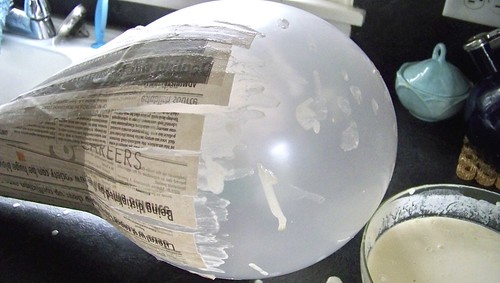
If you need help with balancing your project as you work, why not try propping it up in a bowl for stability?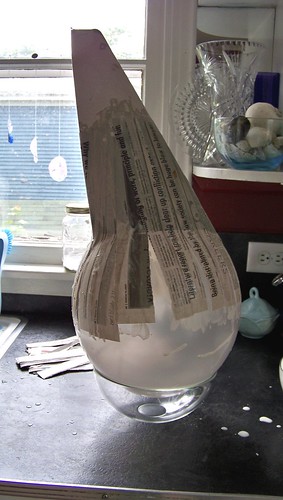
Once you have finished a complete layer, use your fingers to smooth on some extra paste.
Let that set for a bit to become tacky and sticky. While you’re waiting you can put paper on your other bits.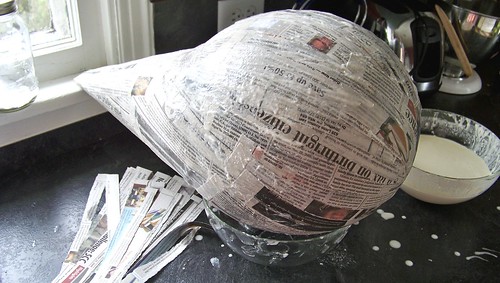
For the wheels, for example, I wanted a little bulk, so I dipped a few strips, crumpled them up, and stuck them to the wheel template before wrapping the whole thing in other strips.
Set those aside somewhere to dry.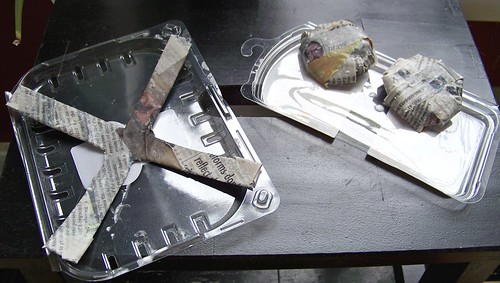
Repeat the layering steps a few more times, creating three or four layers of paper on your main structure. The focus should be on creating what will be a hard shell around your balloon. I tried to add a bit more paper at the bottom of the chopper-balloon to help compensate, balance-wise, for the weight of the tail.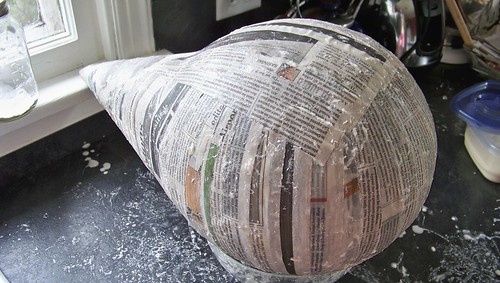
When you have enough paper on your structure, put it somewhere out of the way to dry overnight. The top of our fridge is as good a place as any. Plus it’s nice and warm there (our fridge is ANCIENT) and with the current humidity I’m hoping it will give the paste a boost in drying. 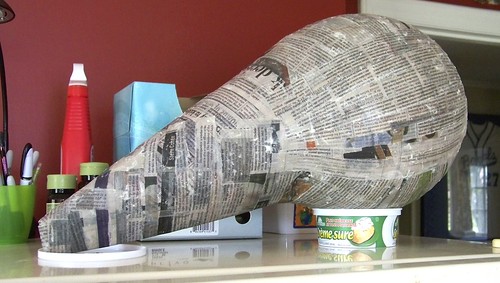
I saved the extra paste, just in case.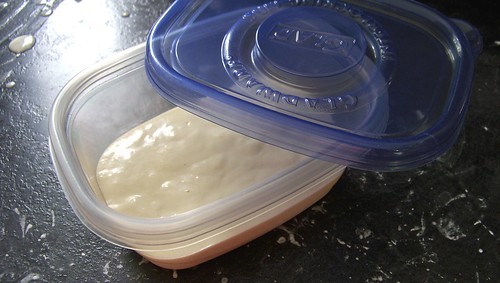
Now to clean up!

The fortunate thing about flour paste is you just have to wet it again and it comes off anything really easily.
The Next Day …
Actually, this was two days later. It was so gloomy and humid that the darned thing just would not dry. So now we get to get around to our painting and assembly.
 We bought this lovely metallic blue paint at the dollar store and thought it would look good on a helicopter. It did, but the problem was that it was transparent paint, something the made-in-China label didn’t tell us. Nor did it tell us that the paint fumes were highly objectionable. But you get what you pay for of course.
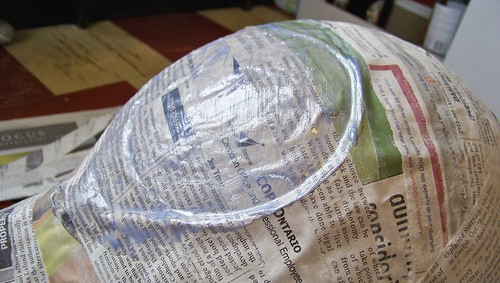 Onto plan B, then. I painted the props and the wheels with the silvery-blue stuff and went off to find a more opaque solution to the plane problem.
 Thus I came up with India ink. And ink is awesome because it dries really fast.
 Of course, you can still see the metallic paint through the ink, but I figured I would just paint over the quick-dry ink with more metallic paint.
 Mercifully, just as I’d finished, the sun came out, so I left everything to dry for a bit.
 So now we need to cut out a wee hatch through which to insert the prizes. Using a box cutter, carefully pierce your shell and the balloon underneath. POP!

Cut a hole only just big enough for your purposes, leaving a little flap so you can close it up again later.

There’s that shriveled balloon. You can throw that out.

My helicopter is going to have a window, so I measured the “glass” to the side of the chopper.

Cut out a hole.

I think I may use the piece I cut out to make a fascinator at some later and unrelated date.

I fixed the window in place with hockey tape, that lovely universal adhesive.

I used a paper punch awl to poke holes to hang the suspension wires from.

You can see that balance is going to be an issue here. I ended up taping a few rocks into the tail of the chopper to balance it out.

I stuck the props on. The wheels refused to stick and were therefore scratched. Bye-bye b’ys.

Don’t forget to put your prizes in!

Then the helicopter needed some accents. On one side of the tail I painted on il Principe‘s initials and the year he was born, to look like some kind of ID code.

On the other I did his birthdate (21 July) followed by HB – happy birthday.

Then I added some dots that represent flashing lights, and blacked out the frame parts of the window. And yes, I just made up where they went.

And there you have it. Il Principe can’t wait to destroy it.

(Possibly) Related articles
- How to make a pinata at home! (maddiefillsmom.wordpress.com)
- How to Make an Ice Cream Cone Piñata (blogher.com)
- The Most Amazing Pinatas Ever (neatorama.com)

where was this when Dave failed to make the death star pinata!
LikeLike
Oh man, the Death Star would be so EASY. And you could just set it on something while it dried so the weight of the balloon and stuff would make that little depression. Your husband just lacks my creative juices. 🙂
LikeLike
Wow, you are SO creative!!!
LikeLike
good post keep posting frnd thanks 4 sharing
LikeLike
I remember doing something like that as a kid, and it was so much fun! You are creative.
LikeLike
This is amazingly cool! Yet despite the step-by-step … I’d never be able to do what you’ve done here!
😉
LikeLike
Pah. It’s child’s play!
LikeLike
This is amazing, lol. so much better than the lame Pinatas at the party store.
LikeLike
Now that is an awful lot of work for something that is going to be beaten silly! Very impressive, though! 🙂
And congrats on being Freshly Pressed!
LikeLike
Thanks! And my procrastination techniques know no bounds at this point. Rest assured the chopper put up a fight.
LikeLike
Very creative! the “wow” factor.
LikeLike
wooww.. cool.. ill try this someday.. 🙂
LikeLike
The ‘copter turned out great. I hope you decided against letting it get beaten to a pulp. Let the jungle cats and cars race around inside it forever.
LikeLike
This is ridiculously awesome!
Great, great idea! Especially if one is looking for a piñata that is not Dora the Explorer or Sponge Bob Square Pants.
LikeLike
This is really really neat. I wished I had thought of it when I wanted to make some models back in high school.
LikeLike
That is so cool! I wish I had the time to make something like that for a party!
LikeLike
Wow what a GREAT gift! Love the idea of putting toys in there, not just candy.
LikeLike
Especially seeing as small children have enough energy at a birthday party without adding sugar to the mix.
LikeLike
I loved you taking the time to teach us how to make papier mache with photos. I’ve always had trouble making it, because I need to see it done (visual one, here). Congrats on your imagination and determination. I will try my own pinata, following your guidelines!!!
LikeLike
Fantastic! Let me know how it goes!
LikeLike
Brilliant, although far more complicated than some of the recipes I make!
LikeLike
Are you kidding me? Your recipes are always way out of my league!
LikeLike
This is really creative, I admire your creativity and how you keep things fresh.
LikeLike
This is really cool! good job! (:
LikeLike
it’s brilliant! although it appears to be a lot of work, so i’m going to leave this project to those with a little more time on their hands. thanks for sharing!
http://www.icouldntmakethisshitup.wordpress.com
LikeLike
This is really good job. COOL!
LikeLike
Cool idea!
LikeLike
Very Creative!! Thanks for sharing!
LikeLike
what on earth is a spurtle ( excuse me, I’m not american)
LikeLike
I’m not American, either, and a spurtle is a Scottish kitchen tool.
LikeLike
What fun! You did an awesome job of documenting each step. Thanks for sharing the process and the outcome.
LikeLike
Nice tutorial and project. I experimented with this sort of thing in my jr. high art class. Not much success at that point in my life.
LikeLike
No harm in trying again. I’ve discovered that doing childish things in adulthood is way cool.
LikeLike
COOL! I used to make them when my kids were little. Yours looks fantastic and I’m sure it made your child very happy!
LikeLike
Thanks! He’s not really my child, more like a delightful pet I can hand back when he’s being obstreperous (Just kidding, Lady Downstairs!).
LikeLike
Great project and that is fun to build your own pinata. Good on you.
LikeLike
Adorable! That would be perfect for my little sister’s birthday.
LikeLike
If you do it send me pictures!
LikeLike
Good for you. You have shared a very detailed, messy project! Congratulations on being Freshly Pressed!
LikeLike
Oh how I miss the smell of risograph paper and that thick glue paste. Oh – and covering my hands with Elmers glue and peeling it off after it dried.
Congrats on FP
LikeLike
cool!:)))) check out my blog to i also made a DIY to my old pumps..:))
–jena http://fashiondiy101.wordpress.com/
LikeLike
Amazing information. I will try to follow your steps to arrange my project.
LikeLike
I sooooo wanna pilot that copter! 😀
http://thecarmaniac.wordpress.com/
LikeLike
Are you extremely small? Or magic?
LikeLike
This is awesome, great way to teach. Keep it up.
LikeLike
Thanks!
LikeLike
Just for the record, the paste in kindergarten tastes way different than the kind you make with flour and water. I won’t tell you how I know that.
What a fun project!
LikeLike
Hahaha, I’ll take your word for it!
LikeLike
I made one made out of a cereal box, it was too hard. We have to rip it open after the kids and some grown-ups were not able to crack it open with a stick.
LikeLike
That makes sense. I think the balloon is key because it gives you a good shape but once you pop it it’s gone. Maybe make one out of a cereal box but cut out the majority of the cardboard so you’re just left with a frame?
LikeLike
Wow, very creative! I’ve helped a friend paint her pinata before but I never found out how she made it… Thanks for sharing!
LikeLike
Yeah man, it’s one of those gooey art projects 🙂
LikeLike
I’m pleased that I managed to keep the paste off the dog, though not for lack of his trying.
LikeLike
There is a possibility that I could have eaten more paste than you. Maybe that will help to balance it out.
LikeLike
I would like to see pictures of that. I may have TASTED paste but I don’t remember eating any. I might have blocked that out though. My mother is an artist so I’m sure I ate many worse artistic chemicals.
LikeLike
i never hit a pinata before..
this one looks so good..haha
LikeLike
I haven’t done it since I was a kid, so I was a little disappointed I didn’t get to participate in destroying this one. Maybe I’ll make another one for MY birthday.
LikeLike
This is so neat. You did a great job. I once made my son a rooster mask for a school play. I put glue in mine though to make it really hard, but if you want to break it, that would not be a good ideal.
LikeLike
Exactly. I had to find a fine balance between structural integrity and complete decrepitude.
LikeLike
Very cool copter! I’m interested to learn how it works… or rather how well it gets (or got) beaten to a pulp. Any pics on the aftermath?
LikeLike
Apparently il Principe has not ACTUALLY destroyed the copter, because his mother likes the distraction of sticking his toys in the cabin and making him fish them out. The propellers, of course, have fallen off. But if it does eventually meet its doom I will take pictures for sure.
LikeLike
Great post!
I remember when a friend of mine had a birthday party for his three-year-old (I came in a Batman outfit for him, but that’s another story). The kids loved Big Bird and they had a Pinata of the character. All of a sudden the poor kid saw his friends beating Big Bird to death with a broomstick and freaked out. He spent the rest of the party walking around sobbing, with Big Bird’s decapitated head under his arm.
LikeLike
That sounds like my kind of party!
LikeLike
This is awesome, and congrats on being FP! (I may borrow this idea for my long-planned A-Team themed party.) Too cool for words!
LikeLike
Ooh, do it! I love the A-Team! The Pie and I both have names starting with A and that’s what our friends call us. We even had my brother play the theme as the recessional at our wedding. Too far? Perhaps.
LikeLike
Really seems a shame to wreck it after all that creative work, but it sure looks nice before the wrecking crew gets to it.
LikeLike
Great! useful birthday!
LikeLike
Wow! Great work! This is a really awesome Helicopter. It looks like it took a great deal of time and effort. I hope the boys enjoyed it! Congrats on FP
LikeLike
No. I mean I did do that as a child.
LikeLike
Exactly. I want pictures of children eating paste! 🙂
LikeLike
love this & thanks for the step by step!
LikeLike
I remember the feel of P. Mache paste. Yech. My favorite part was always cutting the strips of paper.
LikeLike
You have me inspired. Next party I’m making one. I love the photographed step by step guide. I am compiling a list of ‘inexpensive’ and creative activities to do with kids as a bit of a school holiday theme and pinata was on it, and now i have a how-to-do-it. Kia ora, Emily from Aotearoa’s ‘wild & grace’.
LikeLike
That is great. I decided years ago to make a pinata for the family Thanksgiving get together. I made a turkey. it sounded like a great plan until my sister thought it would be a good idea to put construction papers feathers all over it. So we tried glue, they kept falling off, so then we tried regular tape, it didn’t work. So then we thought being the brilliant women that we are that we would duct tape the feathers on. We did rows and rows of feathers. And it was so full. It looked great! The kids were so excited…they all beat the heck out of it. My Dad beat, it my brothers beat it., my sisters beat it …we beat it and beat it and beat it…. Let me tell you, duct tape is some tough stuff..
I’m very jealous of your helicopter. 🙂
LikeLike
Hahah, I wish I could have seen that!
LikeLike
This is an extremely creative project! Thank you for sharing your tips with us! I had never thought that it was possible to make your own pinata (but then again anything is possible!). Great job!!! I hope it was a success at the party!
If its okay with you, I just started my own blog recently and I would really like to post my link along with my comment, it’s http://www.logicmeetsreason.wordpress.com I invite you and your readers to take a look at it, comment, and subscribe!
LikeLike
‘While you’re waiting you can put paper on your other bits’
Giggidy
Fun post!
ravolution.wordpress.com
LikeLike
I’ve only ever seen them on american tv sshows but I ddid wonder what they were made of.
LikeLike
And now you know!
LikeLike
Haha, so cool 🙂
LikeLike
That was amazingly crafty. I love the flour paste. Glue is always so hard to clean up.
LikeLike
Yeah cleanup was pretty easy. All the paste that dried came off after I got it wet.
LikeLike
Wow, you are so creative! Such a great little helicopter and it probably took so long to make but it’ll take so little time to destroy.
LikeLike
I remember my best friend’s mom transmitting directions for making papier mache through me. She emphasized that you needed no more than 2-3 layers of paper, tops. But when I told my mom this, she didn’t believe me. A pair of papier mache ballet slippers resulted that were so strong, not only was my dad unable to crack them with a broom, but my sister and I wore them around the house as play shoes for years!
LikeLike
That’s awesome. It’s amazing how strong this stuff can be!
LikeLike
great project!
LikeLike
This is awesome!! I’m thinking about throwing a for the heck of it fun with my daughter and this is going to be great! thank you for sharing 🙂
LikeLike
How funny, just today I was thinking about what else I could make out of old newspapers instead of just making the paper recycling bin heavier!
LikeLike
Pretty sure you are the mother that makes the rest of us look bad. That is pretty amazing!
LikeLike
Thanks, but I’m only mother to a dog at the moment. I doubt I would have this much time if I had kids!
LikeLike
I liked the way you have posted every stage of your pinata production…very nice…rally want to beat the hell out of it 😛
LikeLike
THIS IS REALLY NICE!
LikeLike
GREAT..!!!
LikeLike
This great is a good idea
LikeLike
Great documentation and end result! I wish I was as creative with my hands.
LikeLike
So cool! My 10 year-old grandson loves to make all kinds of contraptions. I’m going to show this to him and challenge him to make his own. Thanks for the fun inspiration!
LikeLike
Great job. Thanks for teaching step by step.
LikeLike
great instructions. I will use this up on my kid’s party!
LikeLike
Ha…I love it!!! Thanks:)
LikeLike
Yours look pretty good. As I child I remember my best friend’s dad making one, it was horrendous! It ended up looking like a nude colored egg and it was so thick no one could break it!
LikeLike